the mirror modifier has an option to mirror the UV map either on U or V (textures: U, V).
you can paint simmetrically in texture paint mode if you activate the simmetry from the tool palette.
About you rigging problems I’m not sure to be able to help you, I’m used to rig up way more realistic figures, where the problems are different; in your case there could even be more effective ways for deforming the mesh, such as a cage sorrounding the mesh and a Mesh Deform modifier, I don’t know actually.
I don’t really know much about animation or rigging, but I know a lot about art. I read through this thread and the one thing that sticks out to me is your steadfast refusal to do anything besides this one project. I absolutely get the drive and I get the love of having a pet project, but you’re making this so absolutely painful for both yourself and everyone who is trying to help you. You’ve said multiple times things along the lines of “this would be so easy if I had a more common model”. Okay, so why don’t you do that? No one is saying you have to build a game with a model you hate, but there’s so many pre-rigged models and tutorials based around things like humans, dogs, and dinosaurs that there’s no reason that in four months you couldn’t have taken one evening to open up one of these files and play around with it. No matter what you do in life, it is always helpful to turn towards completed professional projects and reverse engineer them to figure out what they did. With Blender it’s even easier because practically everything is available somewhere for free. Just download it, play with it, animate it, break it.
I can’t believe how pig headed you have continued to be with this model. So many users have gently tried to suggest that you’re trying something way beyond your ability level or even something that may be impossible for the model you’re trying, and your response has been basically to throw the middle finger up in everyone’s face and keep slogging away without stepping back to consider they may be right. Instead of learning something properly and doing it right the first time, you keep piling more problems on top of what you already have. You don’t even have your UV map sorted out, let alone the head, and now you’re trying to figure out the spine/legs/tail too? Stop it. Step away from the project and take time to really learn and think about what’s happening.
First of all, the needlessly hostile tone of your post isn’t going to dissuade me from working on this model. If anything, it will only strengthen my resolve not weaken it, since I always found spite to be both a powerful motivator and a inspiration for my work. After all, you catch flies with honey , not calling them pig-headed because they won’t fly into your flytrap.
Secondly, I’m not sure how I’ve been “giving the middle finger” to the people who’ve been helping me out on this forum . I dunno if I haven’t been coming off well in my posts, which is quite possible since I’m not exactly what you’d call a “social” person and so I tend to have problems with properly expressing myself. Regardless, I’m eternally grateful for all the help I’ve gotten so far, even if it hasn’t directly contributed to my current work, everything that has been contributed has at least expanded my overall knowledge in some manner. For example, this post:
While I opted not to use Bendy Bones for the spine, I added the tutorial to my folder of online tutorials for future reference since you never know when the information might come in handy.
This is ultimately the reason I’m here, to expand my knowledge not to find some magic solution that will instantaneously fix all my problems and make everything will be hunky-dory. I’m here to make mistakes, get feedback on potential fixes, and then keep on making more mistakes, each new mistake giving me more insight into how I can improve.
Yes, choosing to work with particular model has been a lot more problematic than I had expected (except for rigging the legs, I knew that was going to be a hassle even before I started working with Blender) and yes, working on this model at times has been an absolute headache-inducing nightmare, but in spite of it all, I feel that during my time of working on this model that I have grown as a 3D artist and have a much greater understanding of 3D modelling than I did before. Heck, over the course of this thread alone I’ve learned about numerous functions of Blender I didn’t know before such as this:
Knowing this now will be a huge boon for when I finally get around to redoing the UV map, and I wouldn’t have learned about this if I hadn’t screwed up my original UV map, which in turn was a response to another screw-up.
I’ve also learned about Corrective Shape Keys:
Which has been quite useful for going from this…
…to this:
Not mention that sourvinos suggested this for the setting up the leg bones:
The thing is that I have no idea if this suggestion is going to work or not, but even if it doesn’t it, I will still have added the knowledge of Mesh Deform modifiers to my overall knowledge of Blender, which can then later be called upon if I come across a situation where it would be useful, which I can almost guarantee is going to happen eventually. So even if it doesn’t work, I gain new knowledge and then I try, try, try again, with each new failure providing some new insight to help propel me forward, even if its only by a little bit at a time.
Also, the problem I have with your suggestion of quitting and working on something else easier & looking up references and studying other models is that I already do all of that stuff. I have hundreds and hundreds of references for 3D models and drawing saved into a dedicated folder on my computer and my daily routine includes checking Pinterest for references for 3D models reference images. I also download video game models, as well as texture sheets from the VG Resource to use as references as well. On top of all that, I have also worked on other models inbetween working on this particular model, I just never felt the need to ever mention them. Also I just feel that simply copying what someone else has done can only get you so far, and that to truly become your own artist you must be willing to reach into unfamiliar territory and not be afraid of failure. This is a problem that I have with a lot tutorials I’ve encountered, they don’t teach you what to do if you screw-up, and you will inevitably screw-up. Screwing up and then learning from those screw-ups is a fundamental part of life and you shouldn’t allow it to deter you.
To revisit the pig-headed comment, the reason that I’m so inflexible when a lot of the design elements of this model is because I very strong sentimental connection to this character. This character was originally created by my brother when we were kids and we used make all sorts of stories & adventures involving the character. He was a huge part of our childhood, even going into my teenage years and adulthood I kept expanding upon the world that me and my brother created as kids. This character simply isn’t just something that we created and then threw away like so many other characters I created as a child, this particular character was a huge part of my life and I simply would not be the person I am today without him. If it were a character that I didn’t have such strong emotional connections to, then I wouldn’t have a problem with making major modifications to make the design easier to rig & animate.
To cap off this story of growing up, there’s a anecdote I would also like to share: when Retro Studios was working on Metroid Prime, they were having massive problems with implementing the Morph Ball ability due to the first person perspective of the game, and just simply couldn’t get it to work. So the developers then recommended to Shigeru Miyamoto, who was supervising the development of the game, to scrap the Morph Ball entirely as it simply couldn’t be implemented. In response, Shigeru Miyamoto told the developers that if there was no Morph Ball, there would be no Metroid Prime all together, and so the development team went back to work and re-doubled their efforts. Ultimately, they were able to a find a way to include the Morph Ball into the game in a way that worked that wasn’t disruptive to the gameplay. And so we finally reach the point of my rambling story is that just as Shigeru Miyamoto felt strongly that the Morph Ball was integral to the identity of the Metroid series as a whole, I feel a similar connection with this character and how it relates to my own life, if I were to make radical redesigns to the character’s appearance, it simply wouldn’t be the same character that me and my brother grew up with. In the end, I feel that sometimes an artist has to willing to stand up for their artistic vision, even if it means taking a much, more difficult route to reach that vision.
So call me pig-headed if you want, you can also call me bullheaded, mulish, hardheaded, rigid, inflexible, ornery, and recalcitrant, but I am fully committed to seeing this entire endeavor to the end, just as I was committed to writing this entire post despite the fact ended up taking several hours to write up when I should be sleeping. That’s time of my life I’m not getting back , but I feel it was necessary to help show just how committed I am to this particular project.
So all in all, I want to say thank you to everyone who have made contributions and have been willing put up with me up to this point .
Not that you need any support to your arguments, nevertheless I want to say that I totally agree with your thought.
For myself, I’ve always finished what I started, not only in profession of course, but also on my personal projects, although sometimes I realized I was not as interested in the subject as when I started it, and this just for a simple fact: you can learn the most every time you face an obstacle and you perseverate without never give up.
I don’t speak about a ‘principle’, If you give up with a project because you sincerely think it dosn’t worth, then it’s ok, but too often it is just an excuse to avoid a stumbling block, and so missing a chance to learn.
I didn’t set out to hurt your feelings, let me make that clear. But reading through this thread, your responses to most people so far have been “this is better but it’s not exactly what I want, next?”. Whether you mean to or not it comes across as very dismissive and rude to everyone who has taken the time to build your blend file for you.
No where did I say “give up” or “create a different character”. I basically advocated for taking a break and studying for a while with different projects. I find it hard to believe that you’ve created a character so unique that no one in the history of rigging or animation has ever seen these problems before. You’re basically asking how to fly a jet plane when you haven’t even learned to drive a car yet. I’m not saying to give up on your dreams of being a pilot, I’m saying learn the smaller less complicated things first before you jump into this giant dream project you have.
Lastly, no offence but you are not Miyamoto. He had been making games for 20 years at about five games a year before producing Metroid Prime. You’ve been at this for less than a year. Again, I’m not saying give up. I’m saying stop bashing your head against the wall and try something different for a while. Sometimes things just click after you’ve taken a break from them.
I didn’t read the whole thread, because it seemed to be a lot of personal thoughts about things and feelings which I (and probably most of the people around) don’t care about: We’re on the Internet, in a mutual aid forum, it’s no place for that.
Still, I think I have a good picture of some issues.
I think the thing missing here is the understanding of the very basic effects of skinning vertices onto a bone. And body mechanics maybe.
First things first: when a vertex is assigned to a bone, even by 0.01, it is assigned and it will move with the bone. The only way to make it stand where you want is either with another bone, either with a shape key. Simply, with anything to make counterpart the resulting movement.
Second: The bone shape is kind of a lie because when you assign some vertices to it, they are not assigned to a stick. They are assigned to a point, which is the origin of the bone.
The big difference is that all the vertices are rotating from and around the bone’s origin, not from the stick.
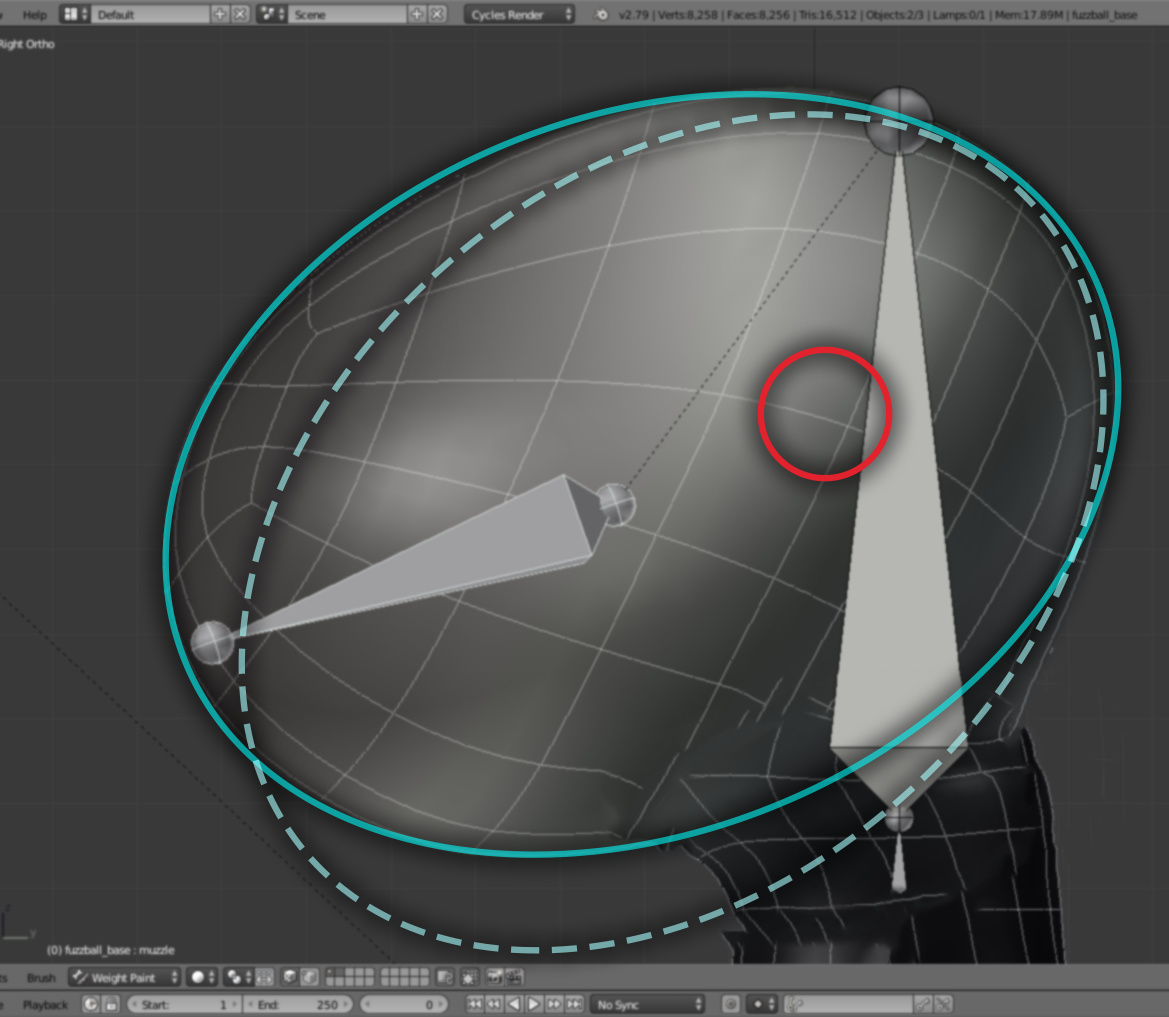
Once you understood that, you also understand what’s happening with, let’s say, your head rig.
You will have bad deformations. Because your bone is not placed in the correct place for what you aimed, and because the wrong vertices are assigned.
Basically, because of the bone’s position, the head is rotating inside the neck. If your goal is to rotate the head around the top ellipsoid origin, this is where you should place your bone’s origin :
Then, for the nape, if you want the points to stay still, don’t assign them. Only assign the vertices at full weight when they must move with the bone, and ease out the weights where the vertices must deform.
Then, even with that, you will have incorrect deformations, because articulations are more complex than just a bunch of points rotating around because there is skin stretching, flesh flowing, etc.
And this is where you use shape keys.
For your feets, I bet it’s about the same story, but a bit more complicated, maybe.
So I decided to shift my focus back to rigging the feet/legs since that was suppose to be the original focus of this forum topic, and so far the results have turned out a lot better than I was initially expecting!
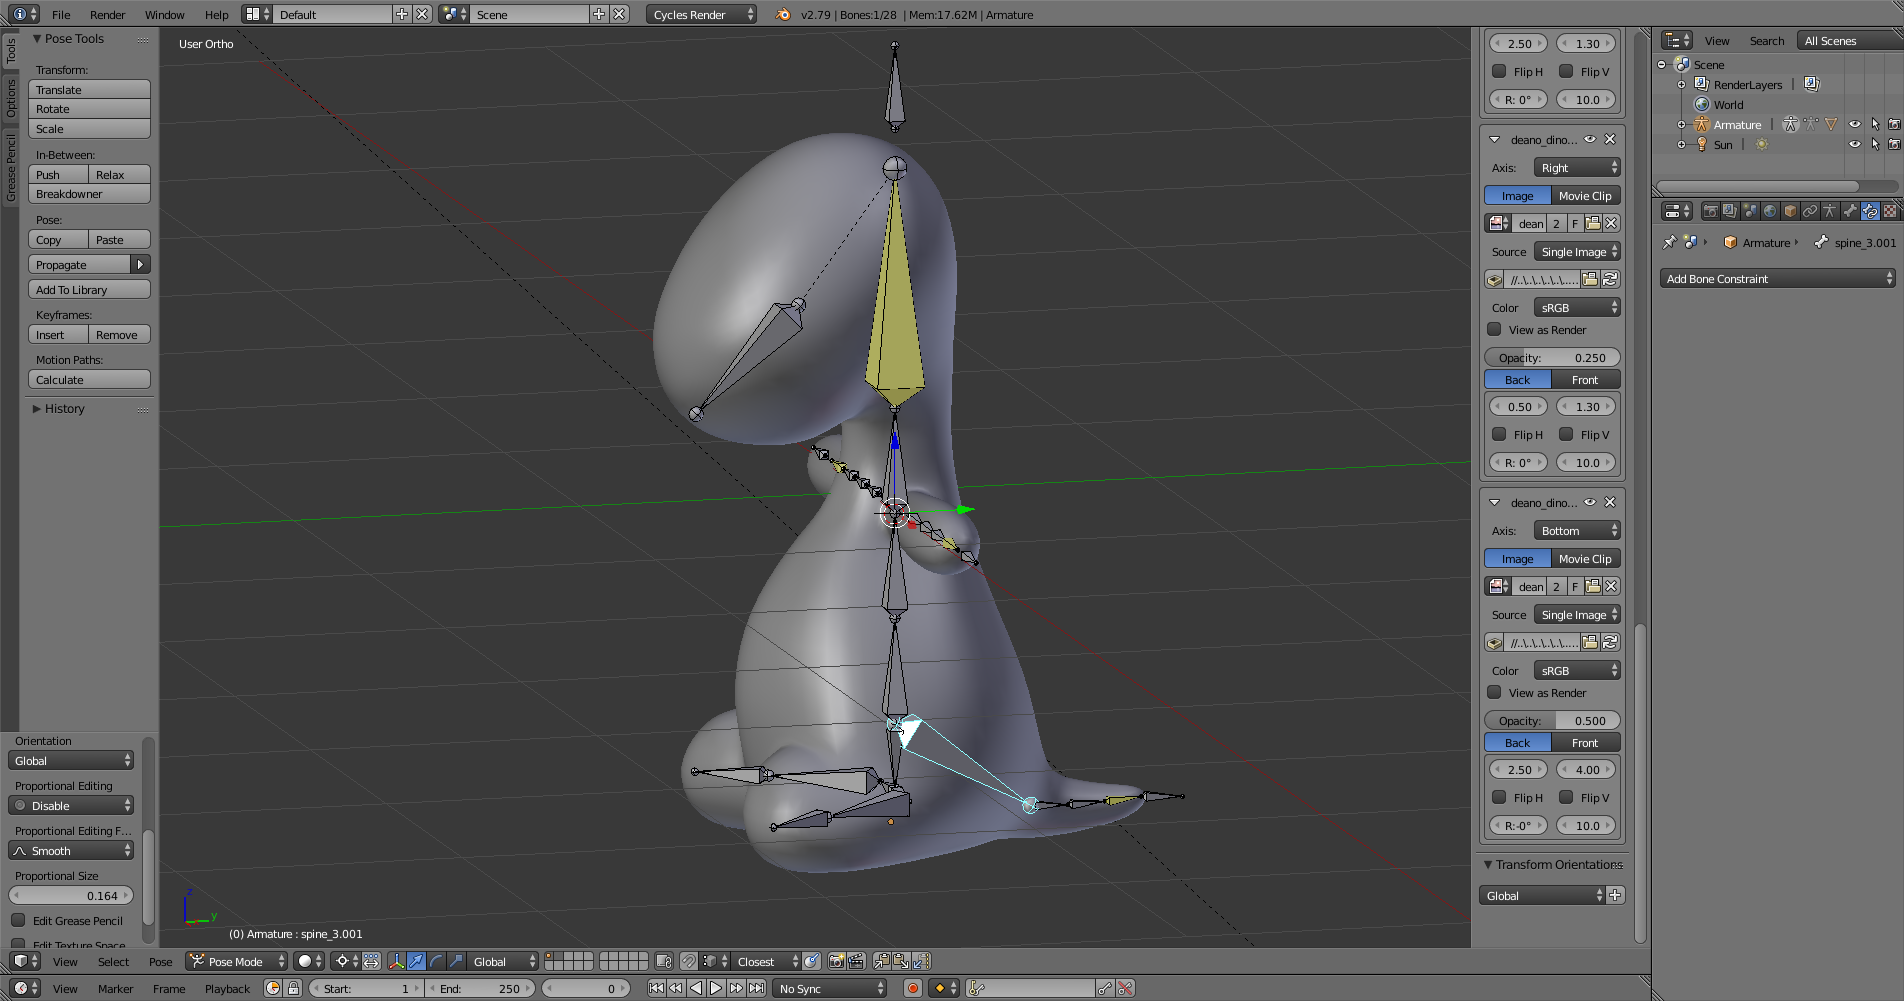
This setup I’m not entirely sure that is what Toka had intended when they originally made this post:
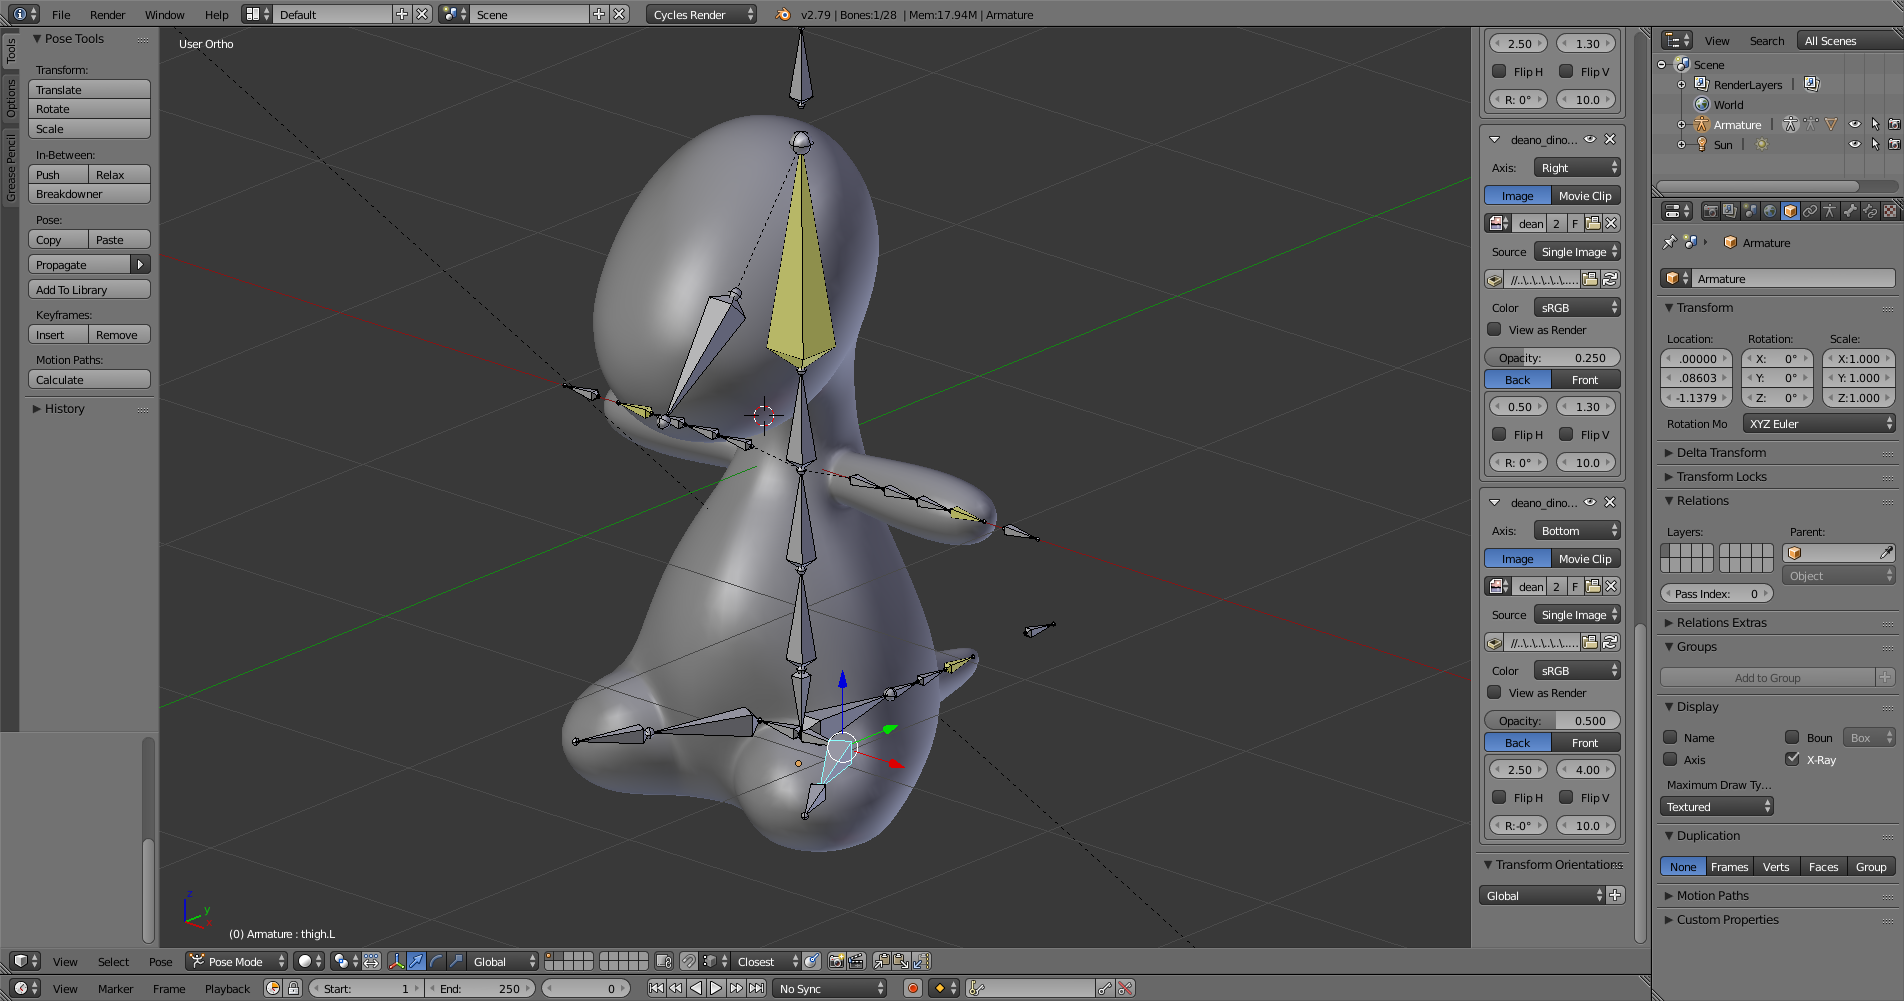
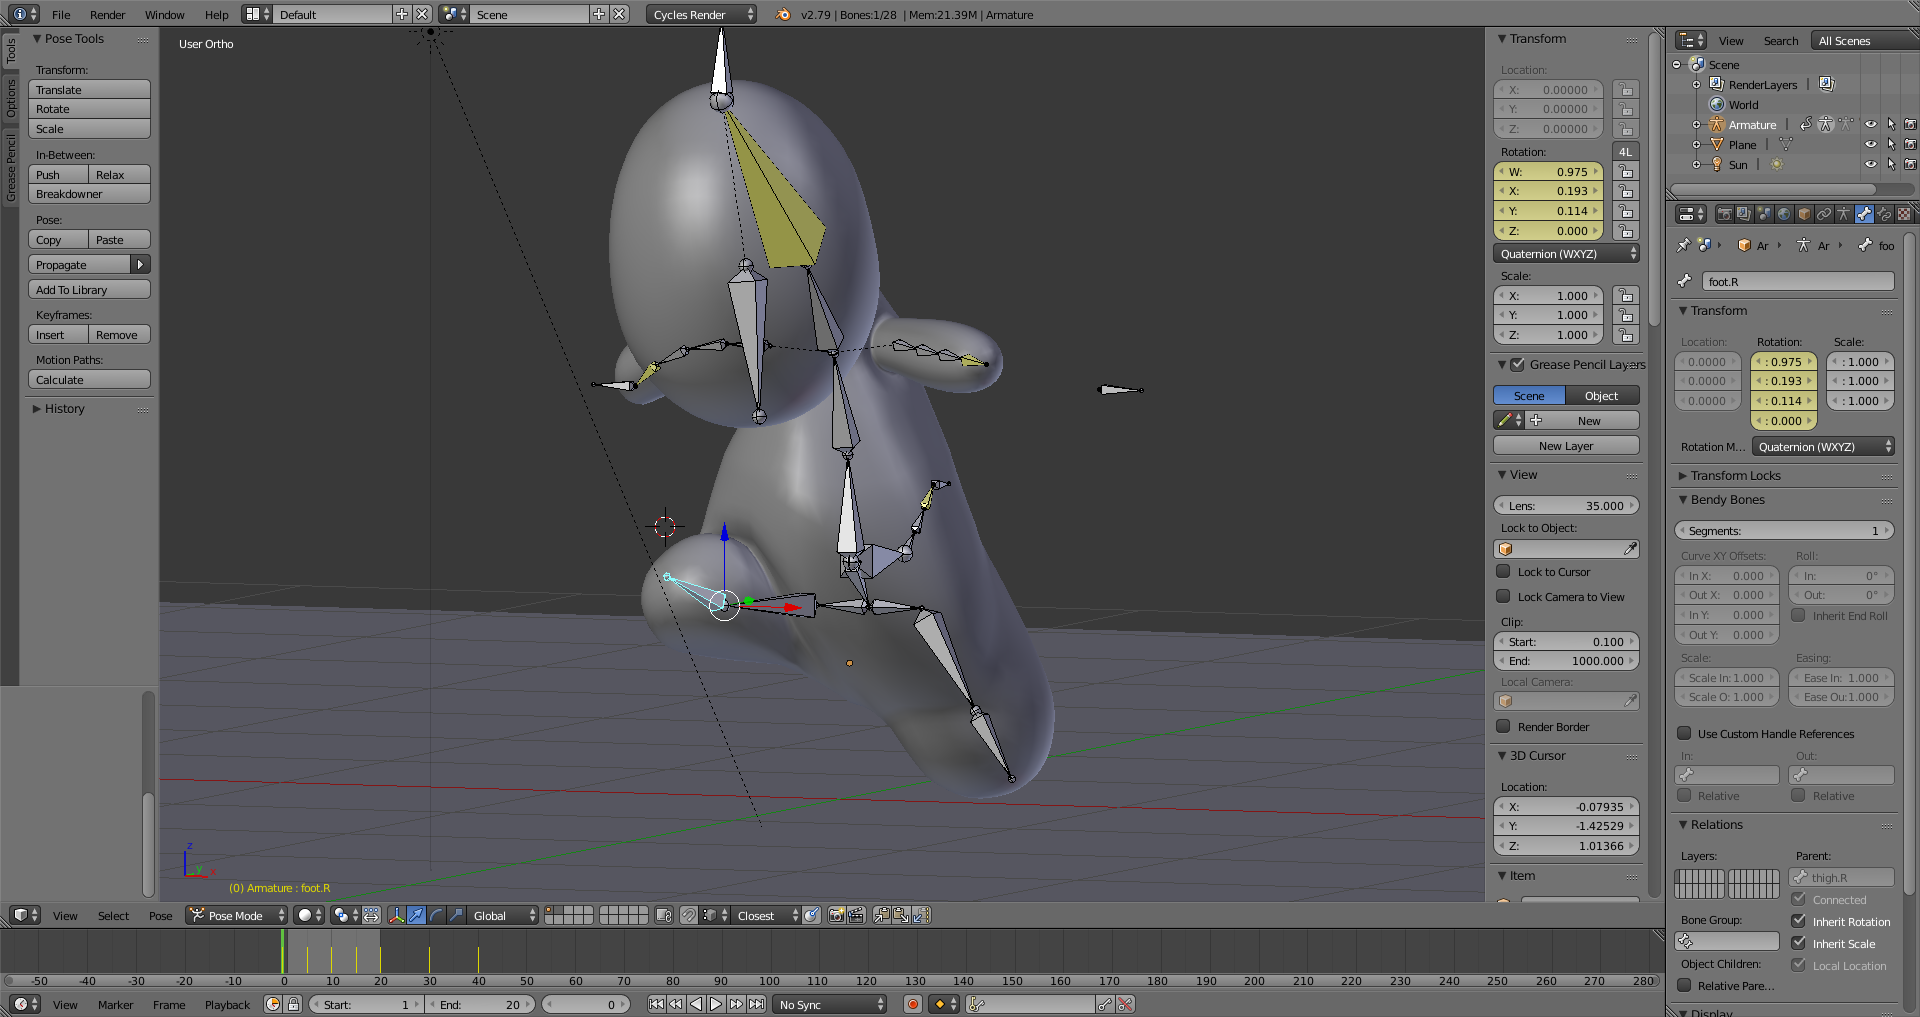
However, much of the results so far have been promising, as the root hip bone can bend the model’s legs downward without the lower torso turning into a distended mess:
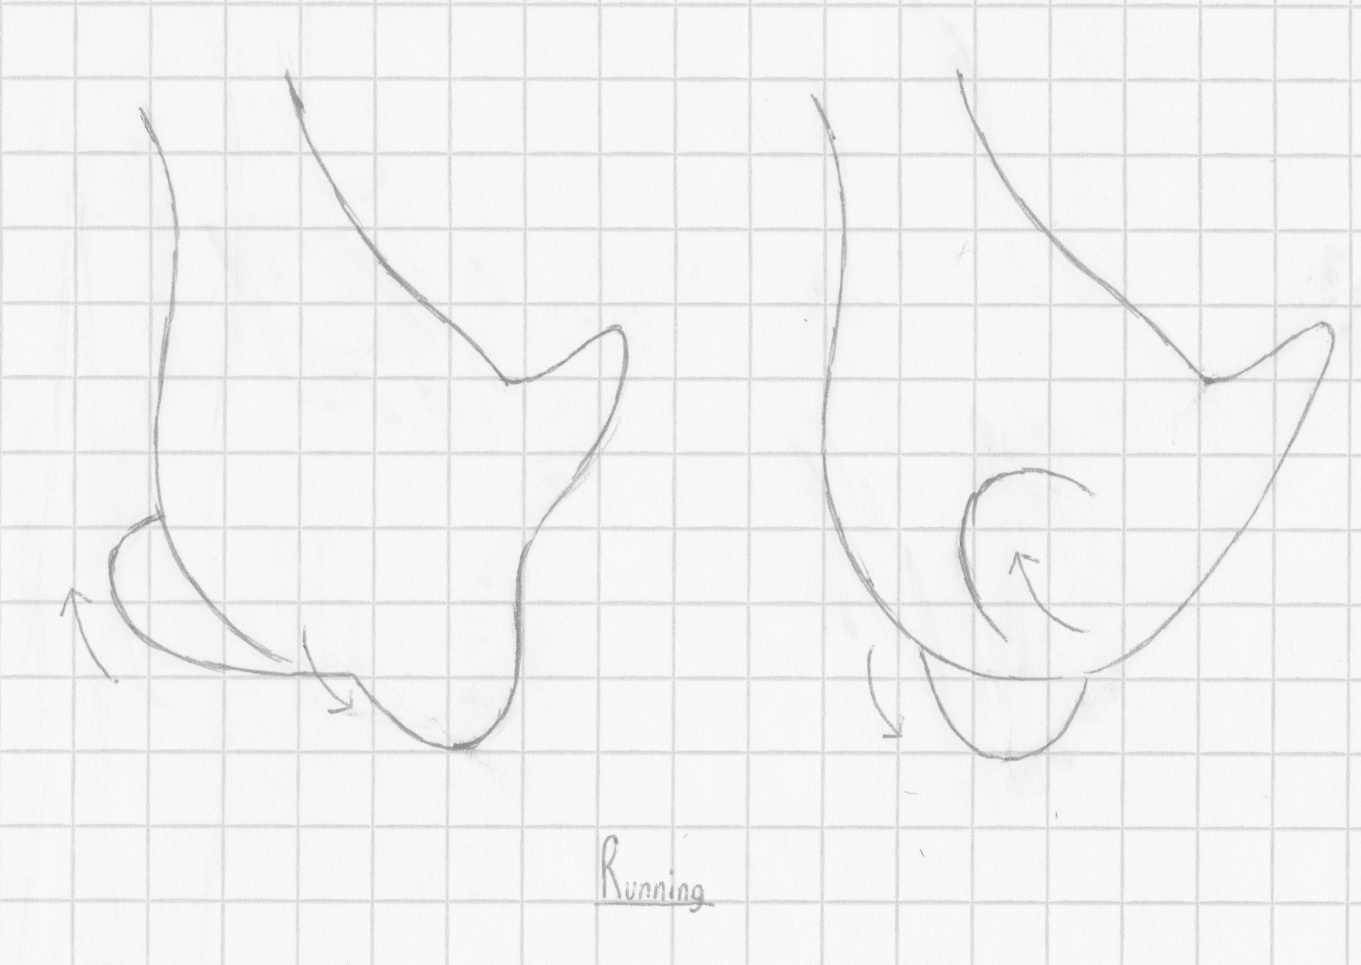
Which theoretically would mean the model could now be set up for animating a walking cycle. The best option for creating a convincing walking cycle for this particular I believe would probably be go with a waddling style of movement, as illustrated below:
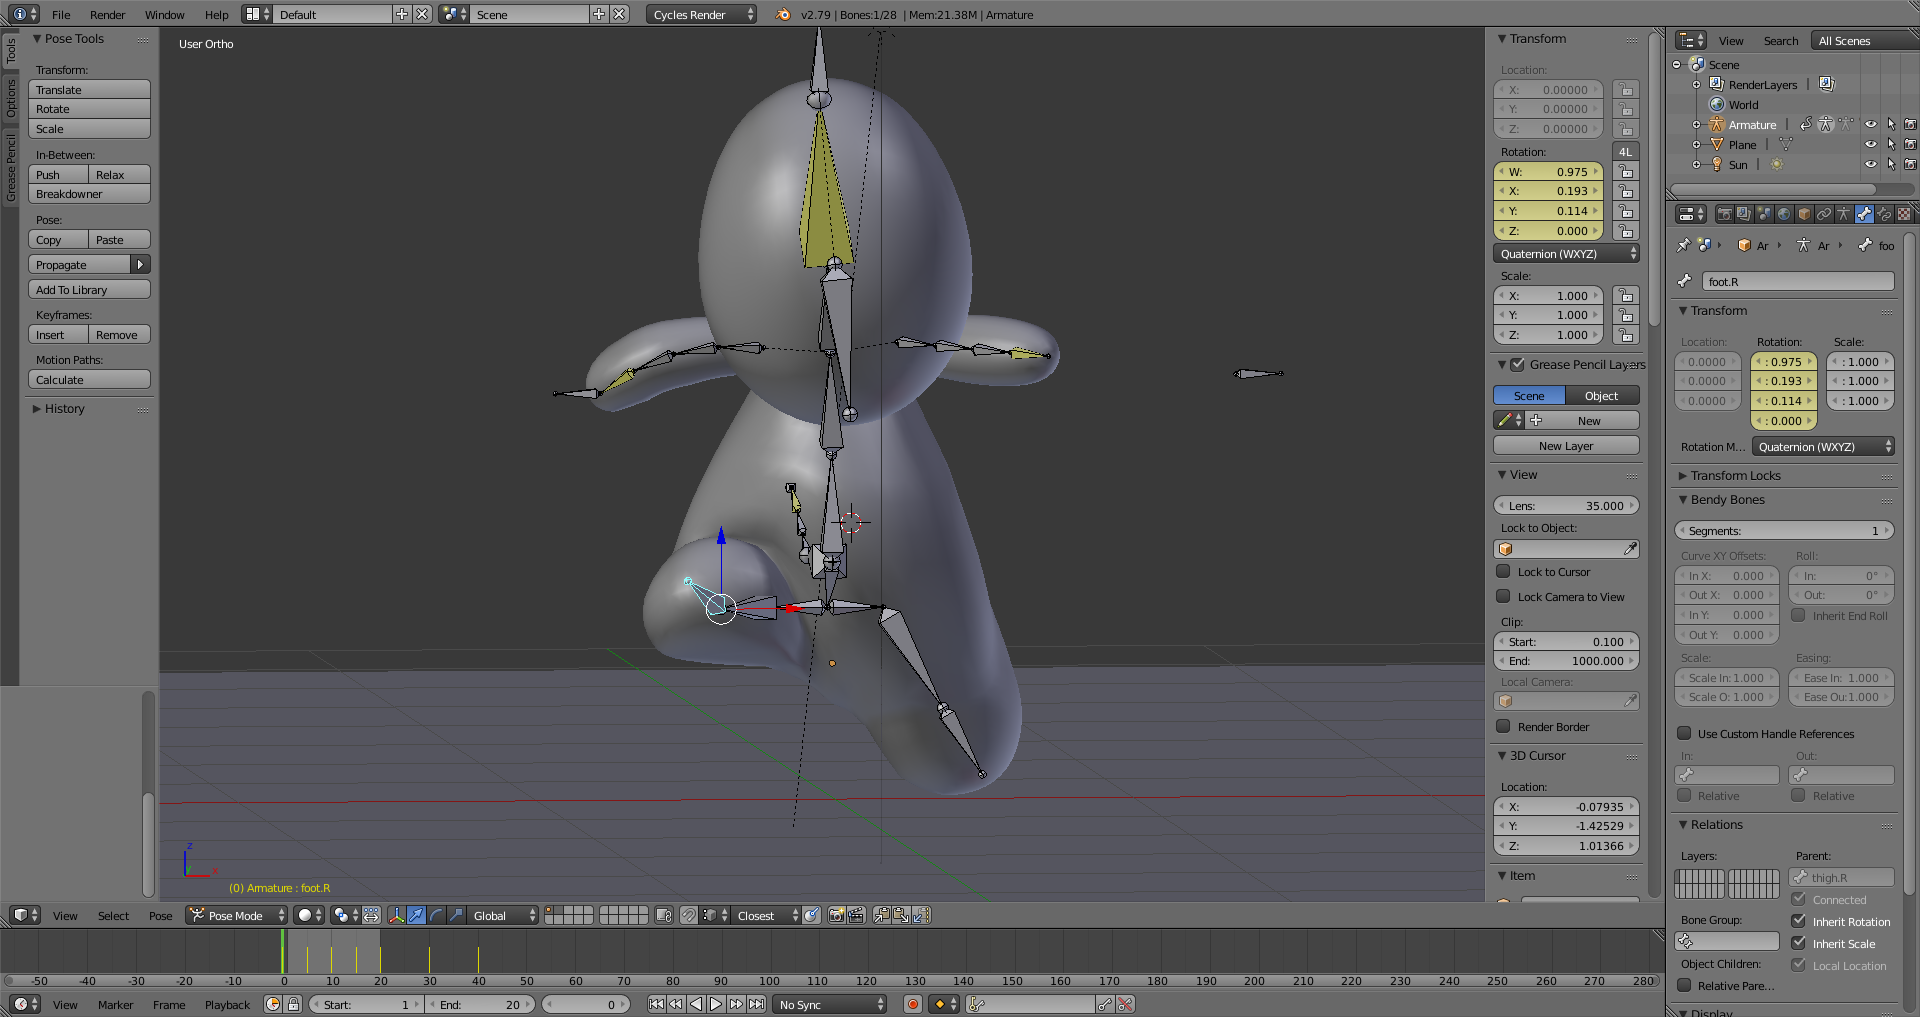
While I should be able to now animated a proper walking cycle, running on the other hand, still remains a problem:
Both legs can bend backwards without the aforementioned badly stretched lower torso via manipulation of the hip bone, but trying to move one leg forward and other leg backwards to make a running pose, unfortunately, instead ends up with the above disjointed mess, rather than how it should look, more or less, in this reference image:
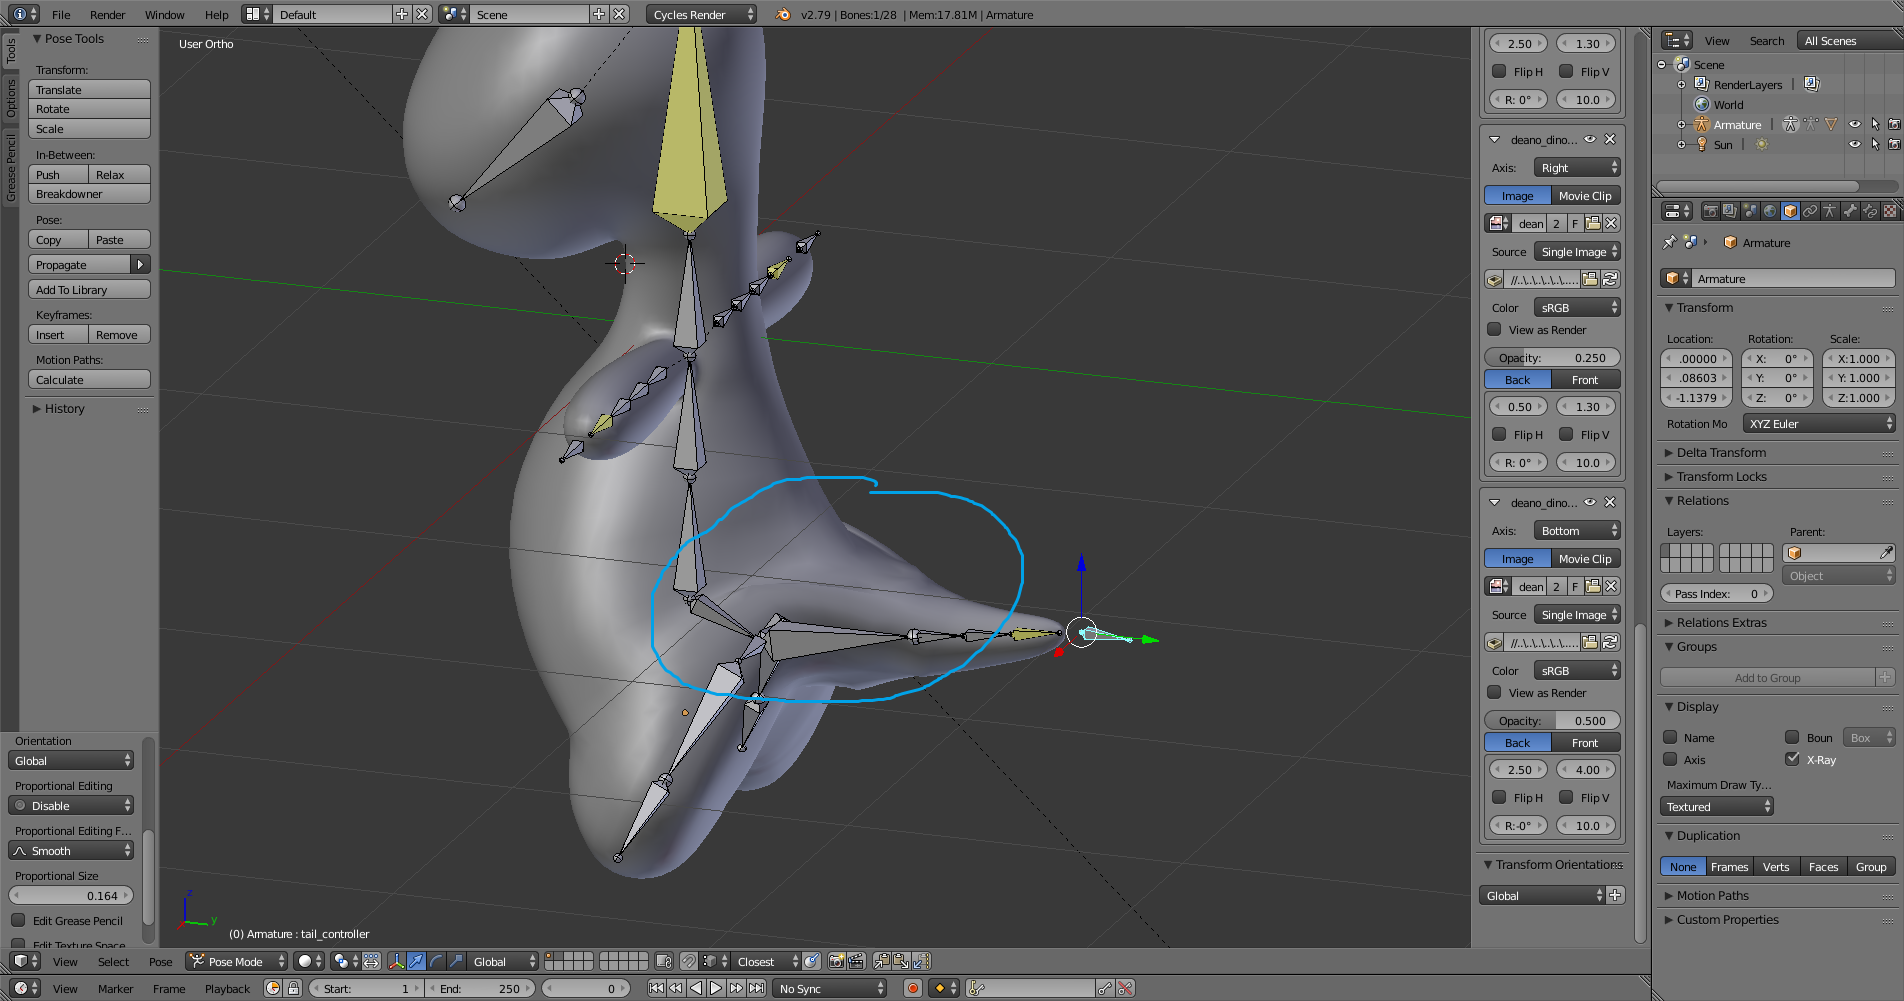
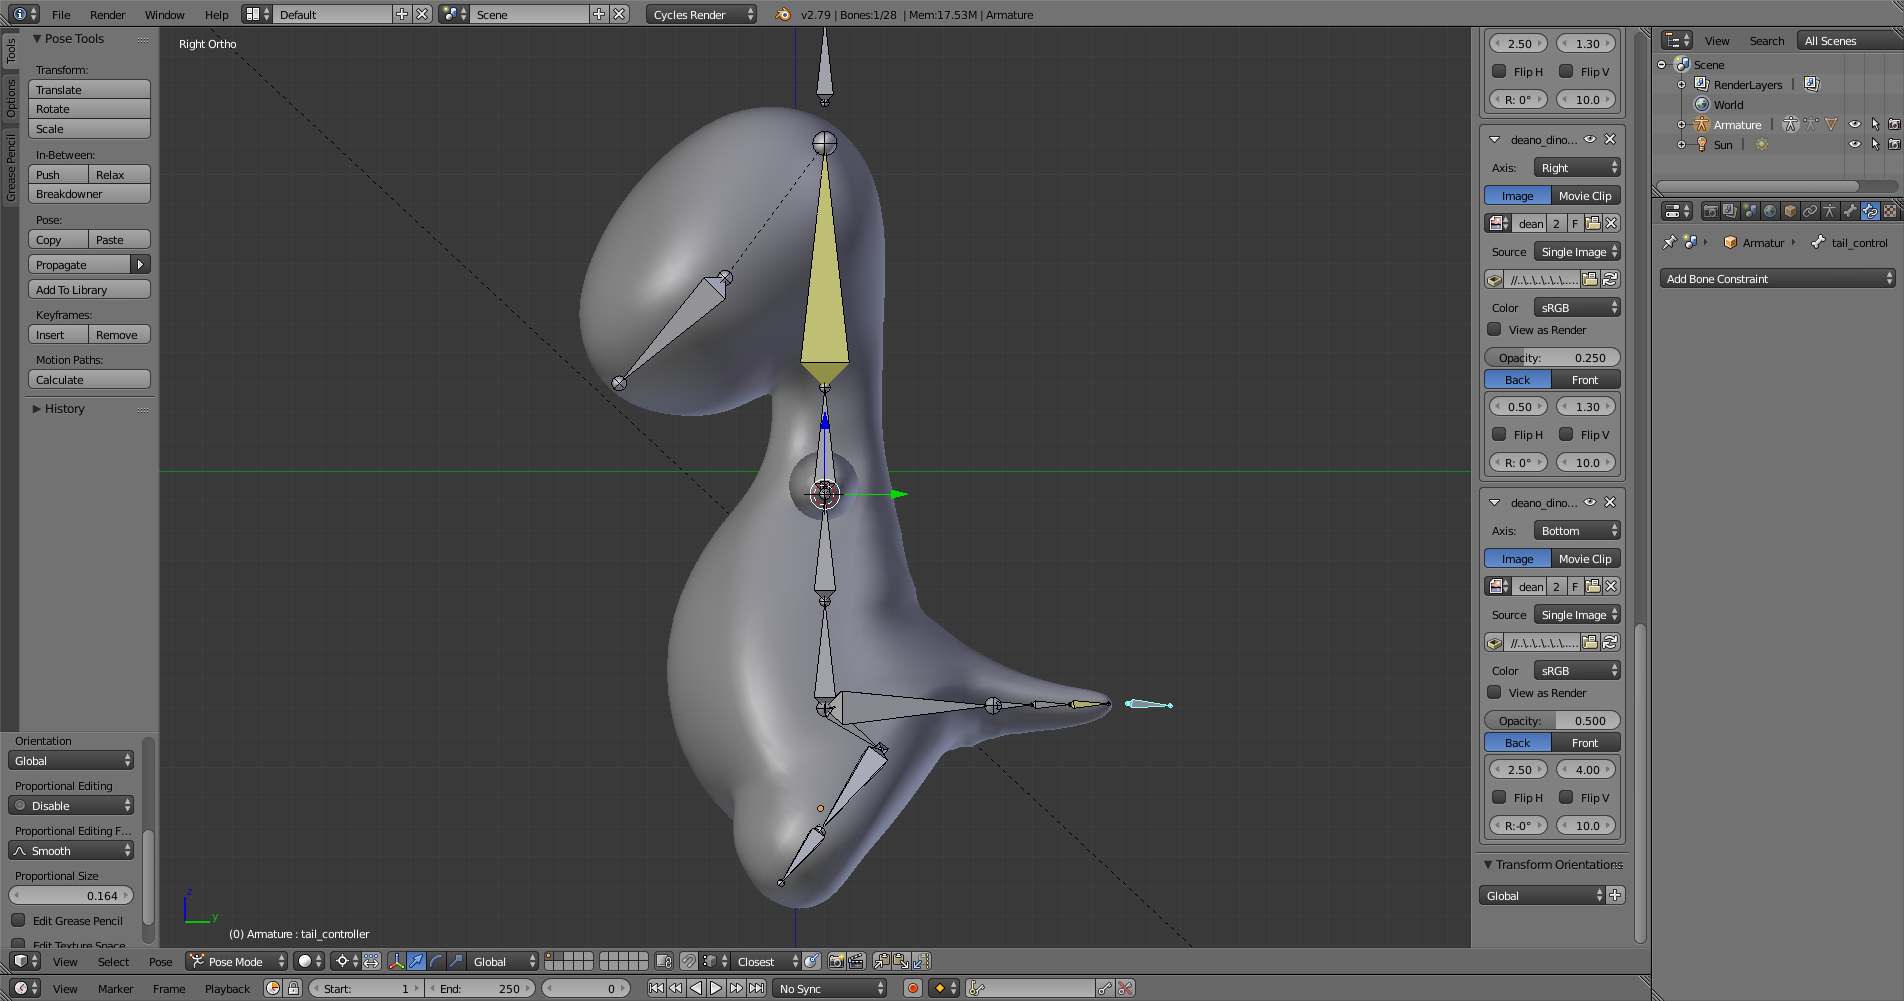
There’s other problems as well, such as the distorted geometry of the tail area, which I’m uncertain about whether or not that can be fixed with Blend Weighting or Corrective Shape Keys.
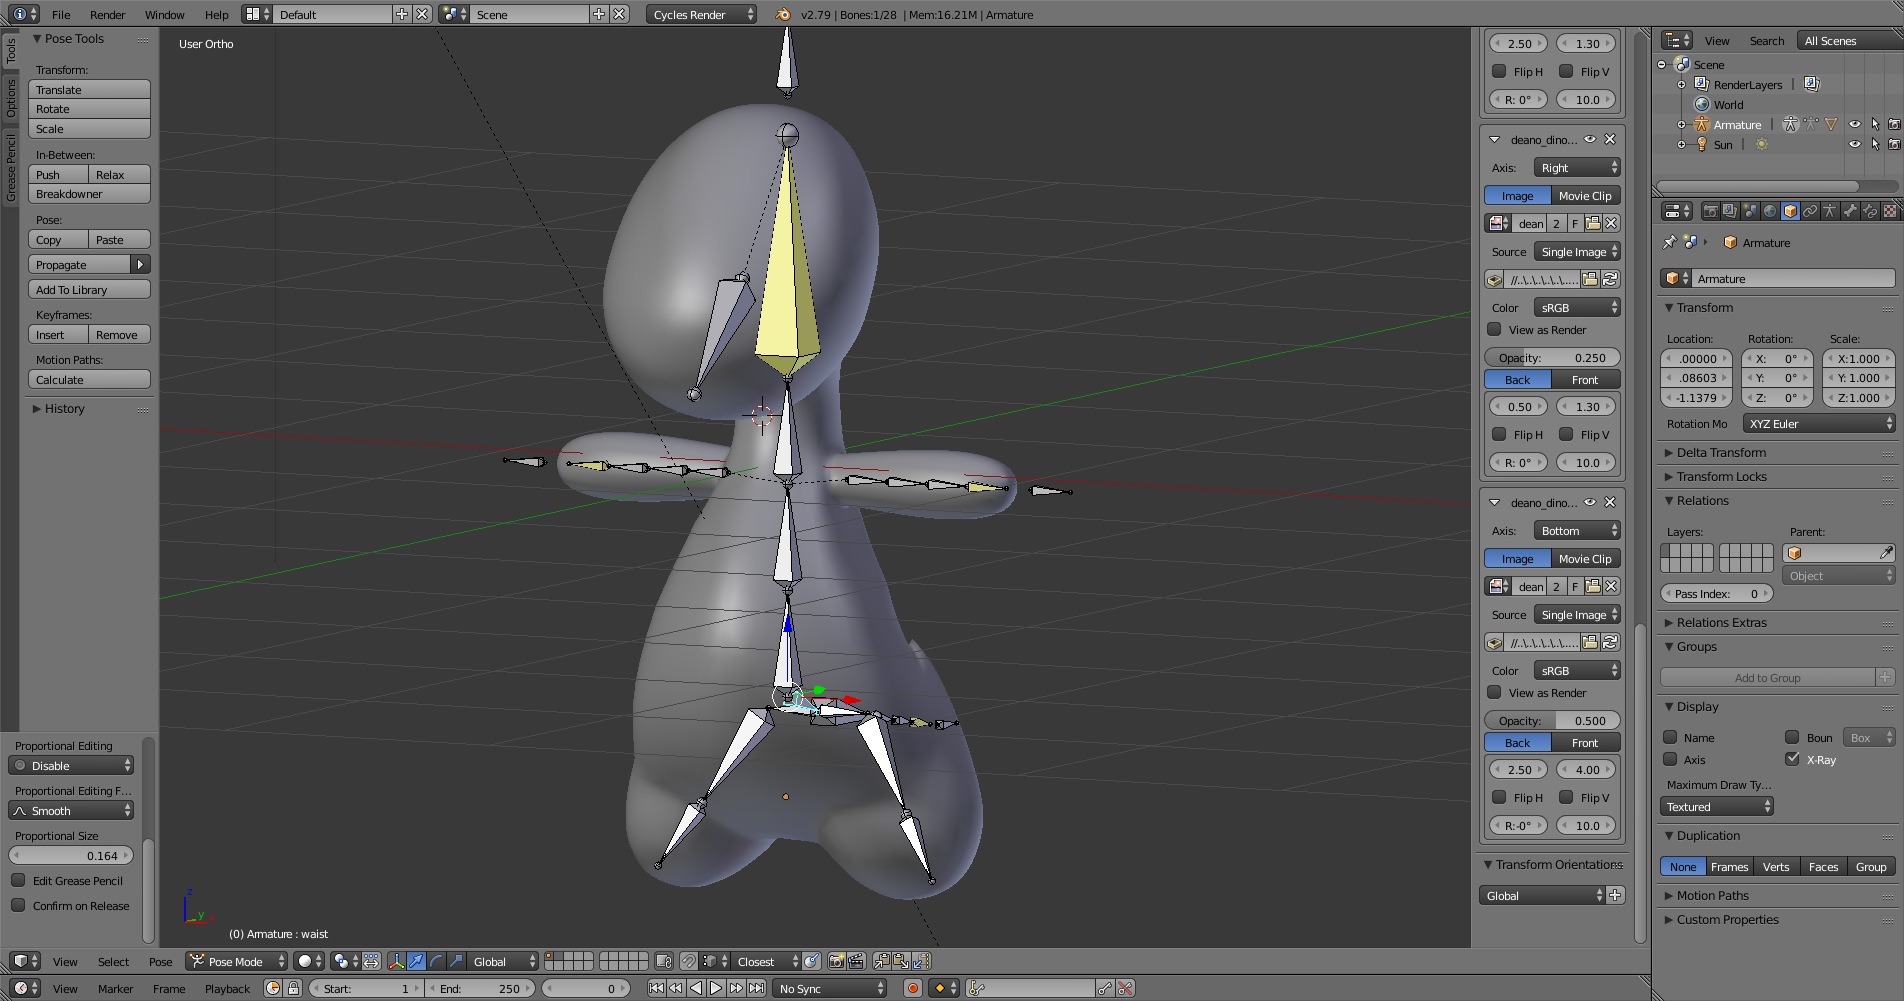
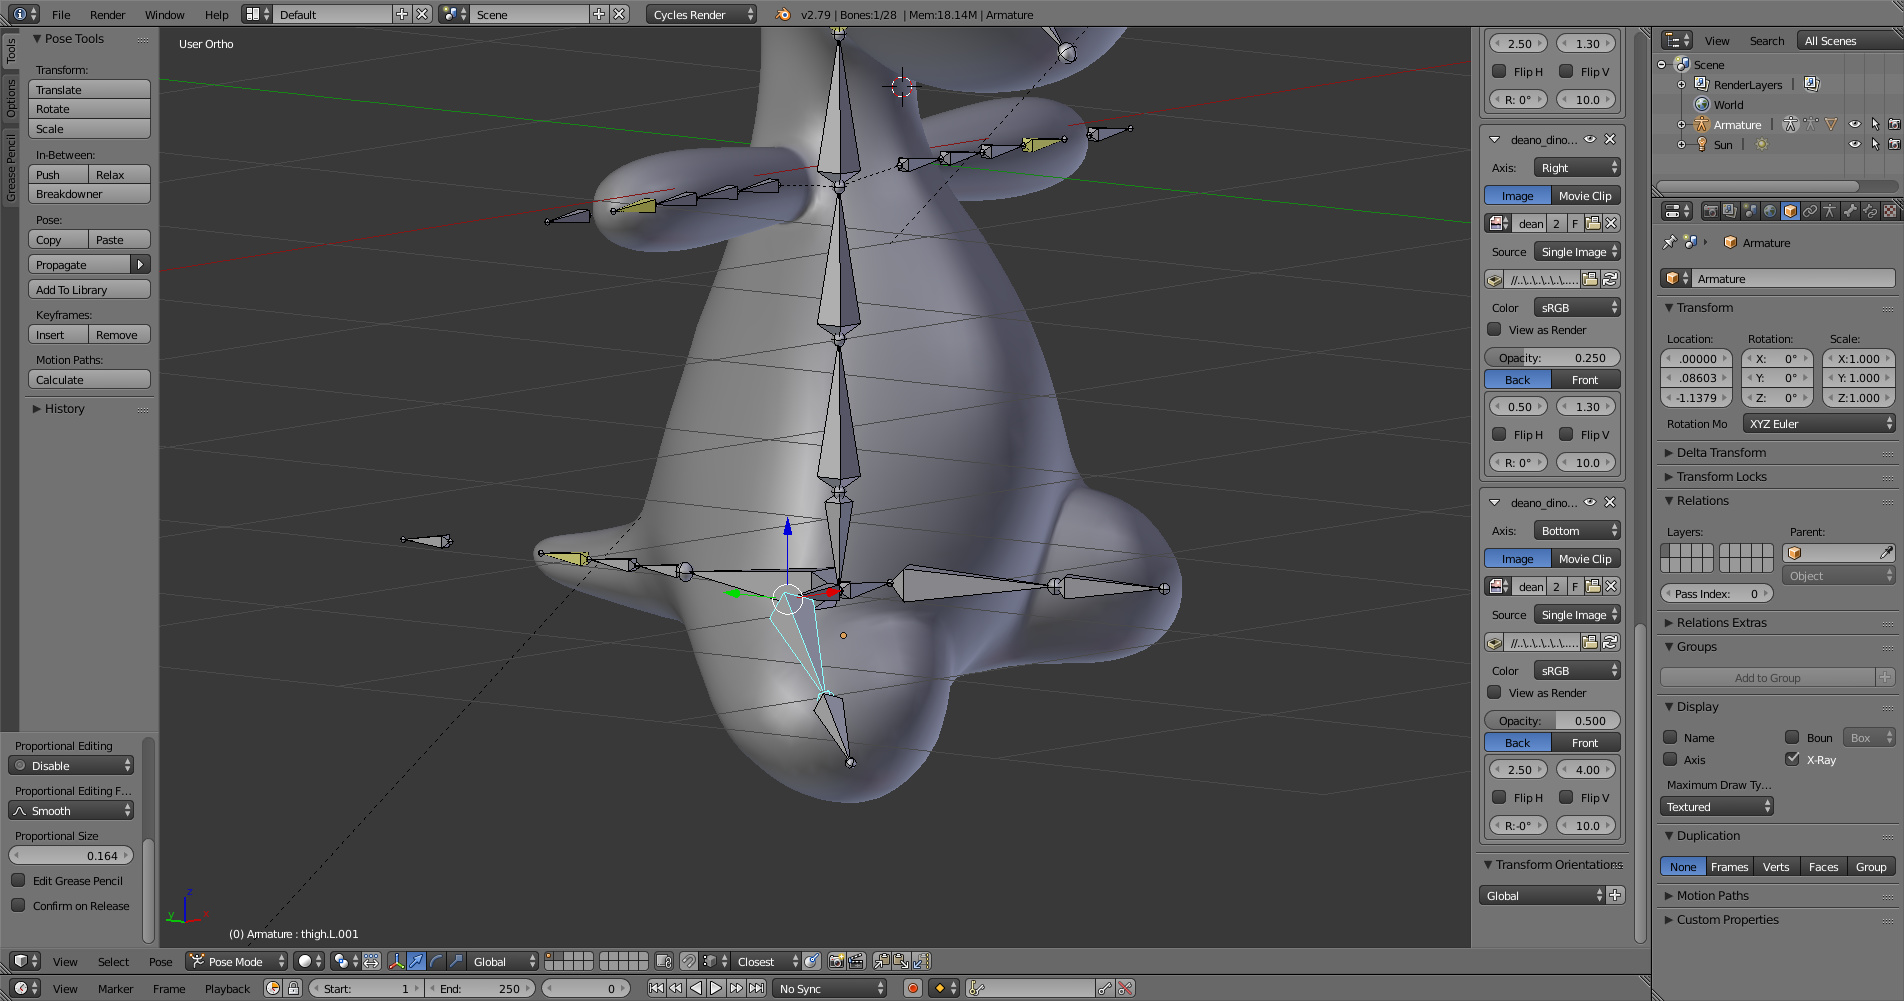
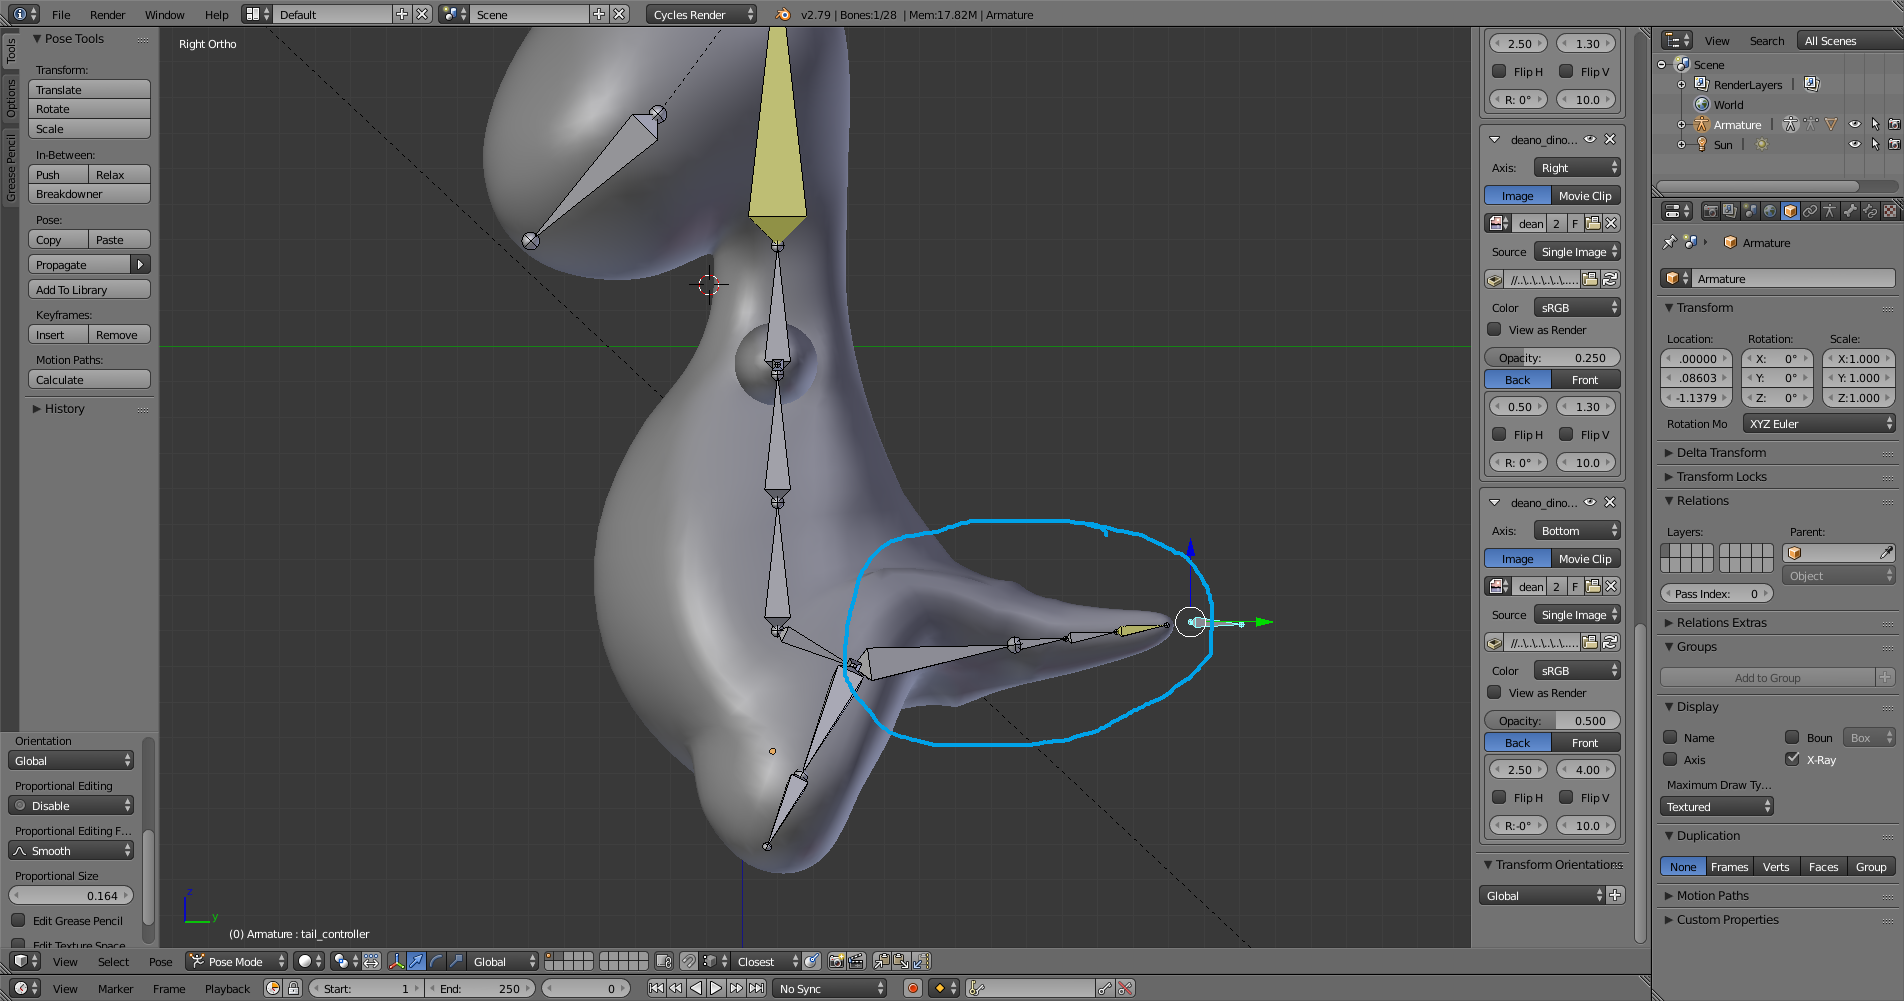
As a alternative, I tried attaching the tail area of the model to the same root as the hip bone rather than trying to attach it to the area below with the feet/legs:
Which actually improved things quite a bit, aside from the small amount of distorted geometry on the model’s back, which I imagine can probably fixed fairly easily.
There’s other subjects that I should probably address besides the current progress on the feet/leg area of the armature so far, but its late & I only got about four hours of sleep last night, so I’ll have to address those topics another day.
I hope that I can get some feedback on how I can potentially improve this armature & address some of the issues I brought up. Any help, as always, would be greatly appreciated !
From the very top of this thread I had the thought to use a standard rig. This is a common trick. You have a mesh that looks like it is supposed to be unique, but under it, is just a standard off-the-shelf kind of rig.
Like Rigify or Blendrig5.
This automatically sorts out all of the common rig issues. All you have to do is adapt the bones to the shape of this character. And maybe there are joints and movements underneath that you never see. But they result in the final motions just the same. You don’t have to paint weights for every bone that would normally deform a character.
We did this recently at the studio with such a character and it worked well.
From there, you can improve performance and deformation by using mesh deform. A much simpler cadge mesh over the whole character will be easier to get deformations on the problem areas you have been experiencing.
Beyond that, weight painting is an art. Takes a lot of practice to get right. Mesh deform helps this a lot though.
I was going to respond to the various responses from the last couple days but since they each cover very different topics and most of them aren’t differently related to the main topic, responding to each one would only serve to bloat this already extremely long forum topic, as L0Lock put it:
Sorry for not giving proper responses, but it would probably be best to focus on the business at end and not get sidetracked by anything not directly related to animation and rigging, and so that brings me to my current situation.
When I last posted several days ago about the status of my model’s armature I mentioned this:
However, yesterday I was playing around with the armature in Pose mode when I noticed that when I posed the model into more of a proper running pose that the model wasn’t as distended as I initially thought.
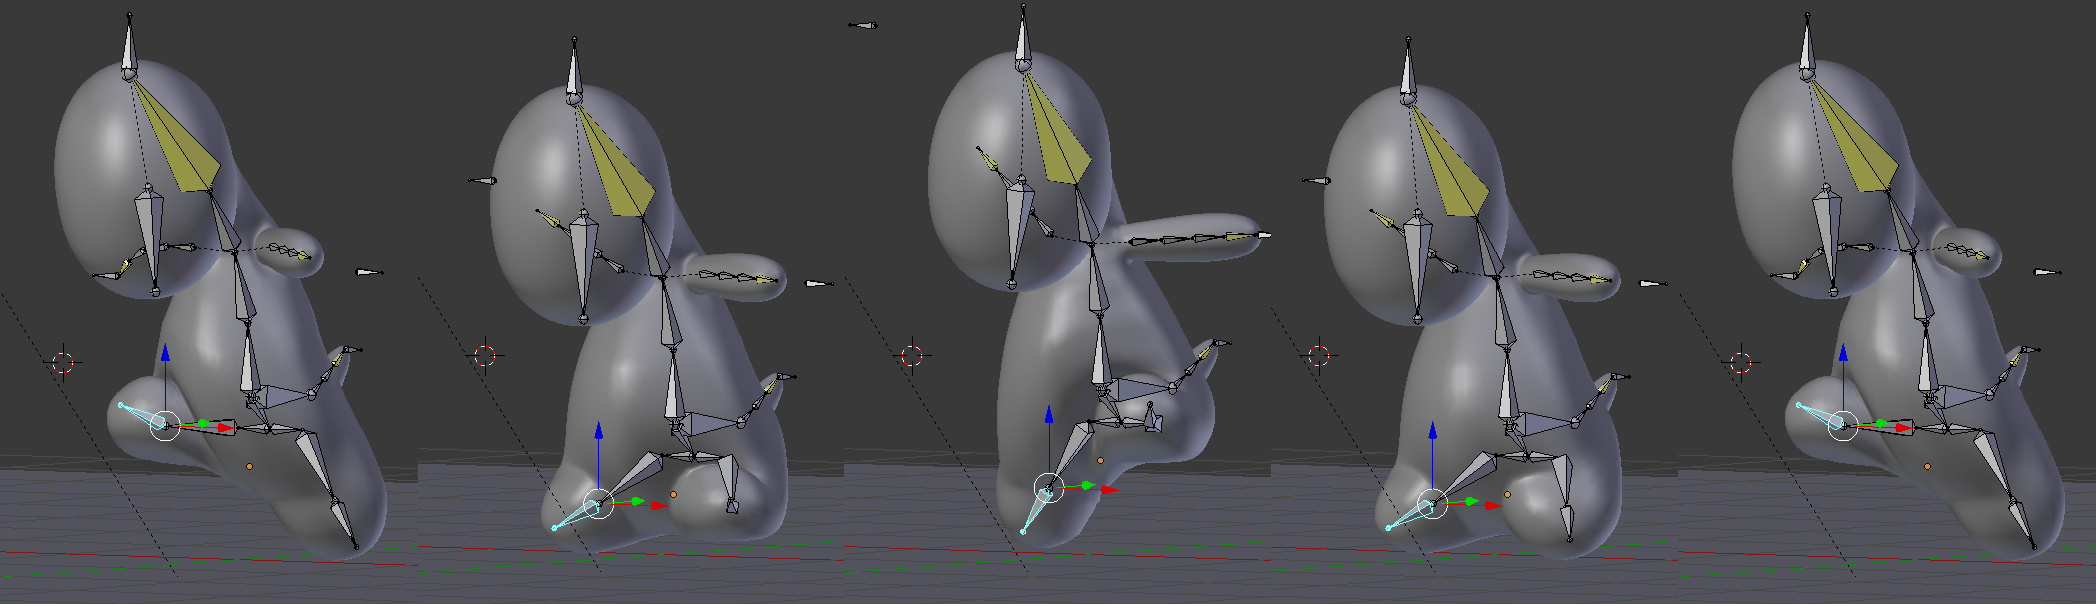
To get a better sense of how the model would look running with the current armature setup, I decided to try and setup a short animation clip in the animation timeline. The resulting running animation was rather crude since I used automatic weighting without any additional weight painting, the armature also missing necessary IK controllers, and the head hadn’t been modified in this version hence why the head is in same downward position in each picture shown. All-in-all though I think it turned out fairly well for something that was both incomplete and quickly thrown together.
I would’ve preferred to post a video clip of the running animation but I don’t know how to go about recording footage and just decided to post screenshots of the animation’s key frames instead. Its not as good as a video clip, but I think that it should give the gist of the animation across.
It might be just me but it doesn’t seem look as bad as in the initial screenshot I posted, but to be on the safe side I thought get someone’s else opinion before I go on further.
But since this a bare-bone rigging, I was wondering that if I were to properly weight paint the model, as well use other features such as the Mesh Deform modifier (both sourvinos and Richard_Culver have recommended using it, but I haven’t gotten around to checking out yet, which I guess I really, really should), that I could smooth out that those ugly deformations, that this current armature setup could actually be used to properly animate this model, provided that I also properly fix the head and add in the necessary IK controllers.
If you’re going to try Mesh Deform, which is probably not supported by FBX (so no sending it to a game engine with that), you might as well try the Corrective Smooth modifier to get a feel of what kind of corrective shape keys you should plan on making to fix the self-intersections and loss of volume that come up.
Oh, well that’s quite disappointing to hear, I guess if the Mesh Deform modifier is indeed incompatible with game engines such as Unreal or Unity then its no good for my purposes. If that indeed is the case, I will still say thanks anyway to everyone who went out of their way to help me by suggesting it, regardless of whether or not it ended up being a dead end.
I wonder what other options are available then? I’m not sure it is at all possible to fix all those deformations with weight painting alone, especially given the problems I’ve previously had with the working on the head. There’s also Shape Keys, but I sincerely doubt that you can use Shape Keys on the entirety of the model without it turning into a overly-complicated mess. I mean, it was one thing to use Shape Key on my model’s head since it was limited to only a particular section of the model, its quite another to try cover every permutation of model’s movement with Shape Keys, but who knows, I could be over-complicating things in my head as I do have a habit of doing that quite a bit.
I guess I’ll try looking at tutorials for specifically making game characters to see if any of them can offer some help rather than relying on general Blender modelling tutorials. I’ll also try checking out videos on achieving good topology, since I came up with a few of those while searching YouTube, so hopefully those can help as well.
On the brighter side of things though, I now should be able to put together a crude character model out of everything I worked to date so that I can resume my work with Unreal Engine. The model doesn’t to be a perfect 1:1 representation in order for me to continue working, it just simply needs to function as a stop-gap while I work to get a better grasp of how to use Unreal and work out the basic gameplay elements before moving on to the more complex stuff.
Trying to finish this model still remains a top priority, regardless of whether or not I use a cruder version as a temporary fill-in, as I’d much rather to get this whole thing out of the way so that I can free up some time to work on other assets and continue to expand my knowledge of Blender into other areas.
(You don’t need to reply to me on this one since you’ve made it clear of what you’re after in your posts.)
If in the future you just want to use Unreal or Unity as real-time renderers (not for making actual games), then you can export your scene in the Alembic format, and then you can use any complexity you want, such as mesh deform, soft body physics, shape keys, procedural meshes etc., since the engine will never know about these things and will only receive the final meshes (it works like a mesh stream, a snapshot of your scene geometry on each frame).
Blender has a built-in exporter for it, and you can read more on the Alembic homepage.
I’m not to sure if I needed to provide closure or not for this topic since its been a while since I originally started it, but after a long while I finally managed work out the issue with the head here, and so it would appear that I’ve finally work out most of the issues that I originally outlined in this topic. There’s still lots of work to be done, but I consider this particular part of the saga to be resolved.
Thanks to everyone to provided help on this matter!