OK got a little further. Is there a way to make particles mirrored? When I lengthen it, it only does the one side (and crashes when I render it to often.) And how NOT to make it look cartoonish?
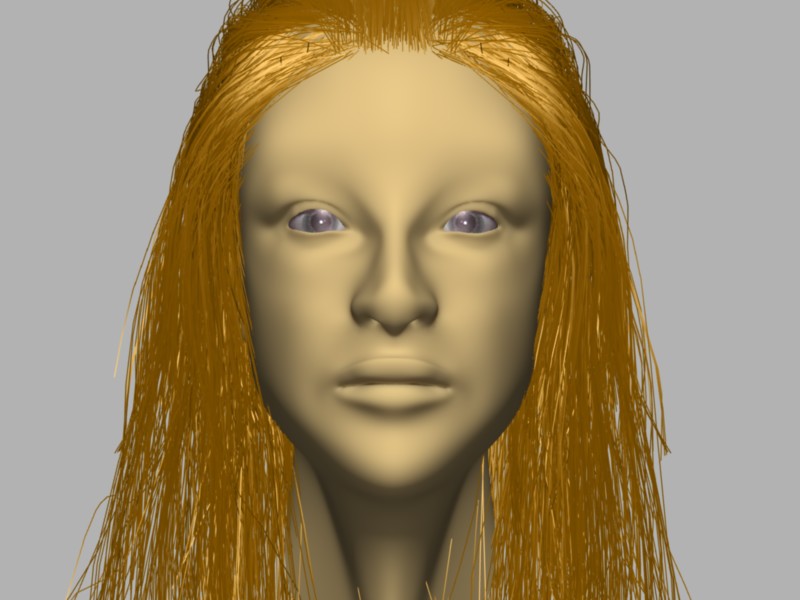
Really? I’ve stumped you all??  Ive tried just about every tutorial I could find. The above pic is the best I managed to get so far.
Ok, after sitting here thinking about this a while, I’ve realized that when I do the particles, they show up on the mirrored side only, NOT on the side that I made originally. If I DO manage to get anything decent, and click where it says mirror on x-axis, it does nothing. And like I said earlier, when I try to lengthen it, it only does one side. And I’ll be darned if I remember how I got the latest pic to show her with the short hair. I’m so lost, and trying to be patient, but when nothing I do does what its supposed to, it gets a bit discouraging.
Well, actually until I got bored this morning, I’ve been completely avoiding this thread. Why? Because although you said “please”, you still lacked the manners to come up with a half decent title of around three words to actually describe the content of your initial problem. It’s annoying me that I would go to the trouble of making specific titles for my own help requests, only to find really unspecific thread topics like this one get the most immediate attention. Maybe I should call my next thread “please help please”?
But yes - I could have told you that the particles won’t work on mirror modifier and that you need to unmirror the mesh first. If you want to stay mirrored for now, then you should have made a wig for your hair by selecting the faces hair will grow out of, then use [SHIFT][D] to duplicate them (then [ENTER]), then [P] to separate (while they are still selected) as a different mesh object. Simply have the particle settings for hair set to not show the emitter mesh (the wig) and the hairs will appear to grow from the head.
Another problem I foresee you having (and which I think may be what you were worrying about on the previous page) is that subdiv modifier plays havoc with the direction of particle hair. Either don’t have subdivision on the wig, apply it, or make sure the subdiv modifier is underneath the particle instance modifier, not before.
P.S. Your screenshots seem to show you are using Blender 2.49. Where are you going into Mirror x-axis?
Thank you, Lancer. Point well taken.
As for the mirror x-axis when you’re in particle mode, then press the word particle to the immediately left, the option is there.
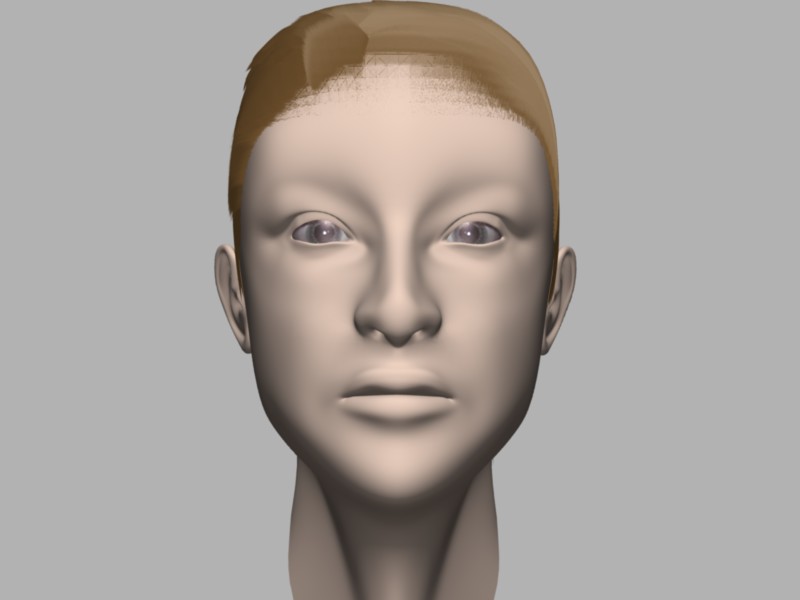
2.5 and I dont get along very well yet.
Okay, first you need a mesh that is actually symmetrical along the X-axis.
Then in particle editing, select the particles you want to mirror (use [A] to select them all)
Then hit [CTRL][M] to activate mirror mode. They should increase in number.
Hit [W] to remove any doubles (two strands in the same place)
Now you are ready for the part you were after. Activate X-axis mirror (as you were doing) for symmetrical editing.
Ready-to-go file attached.
.
Attachments
xmirror.blend (250 KB)
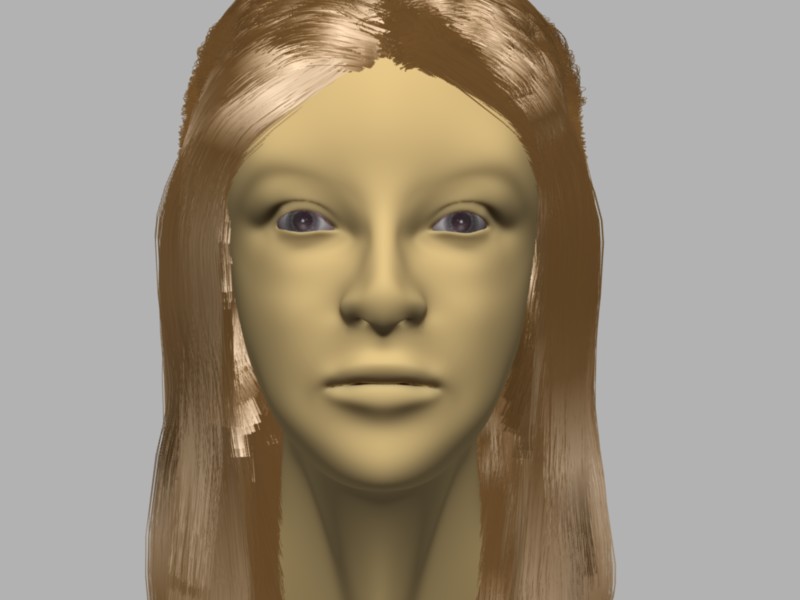
Finally! Its getting there! Now if only I could make her her a little thicker and not as “wispy.” And not have blender crash when I do a slight change. Argh!
Now the only other issue I have (not that its too much of an issue, is the kink/branch under children does nothing. Could that be from me applying the Particle Instance modifier?
Attachments
Are you actually using children hairs? There should only be a few hairs on her head, and children changing them to many during the render. It’s these children the kink / branch affect and quite dramatically.
I thought I was…but when I went in and checked, it wasnt pressed. So I changed it, and tried again, and nada. If you want to take a look at the blend file, Ill attach it, and tell me where I went wrong? If I have to start over again, so be it. Only way Im gonna learn.
blend file was too big. 
http://www.pasteall.org/blend/3098 Hope that worked.
Okay, firstly, your Subsurf modifier in the wig has to be AFTER the particle modifier, otherwise it screws up the default direction of the hair strands. This may only be visible when it renders (try losing the Free Edit and rendering - you may find your hair is not straight like it is in 3D mode.
The reason you’re not seeing any children effects is because you aren’t seeing any children(!!!). You clicked the
“Abs Length” button with Max Length set to zero, effectively limiting children to nonexistence.
There is something else going on here as well which I haven’t nailed (and I’ve got a bit much on this morning) because when I correct the errors and take the children down to zero, it seems to lose all hairs from 3D view… strange, but it looks like you’ve been pressing a lot of buttons. I’m thinking it would be better for you to delete the current particle modifier and create the hair afresh. This time, have only 100 hairs (not 1000) and make the difference up with children.
Thank you for taking a look at it. I have been moving the subsurf after particle, but I guess when it crashed it went back to that.
I think your right about pressing too many buttons. After looking at so many tutorials, everything gets jumbled in my head.
Will work on it later. Thank you SO much for your help! Very much appreciated!
Yeah, those subdivision modifiers are pretty cool, but they can bite you when they slip into the wrong order of other modifiers. In this example, I was using a Lattice deformer (or something like it) to stretch the expressions around stretchy eyes. I couldn’t work out why in 3D view it was working, but on the render, the head mesh wasn’t stretching at all… check it out:

The reason was that the lattice deformers require a “bake” to their mesh, which is where they weight deformation on a vertex-by-vertex basis. Because the subdiv modifier was effectively doubling the amount of vertices in the mesh, the lattice deformer reacted badly (in the render where the subdiv was working) by saying “hey, where did all these extra vertices come from? This isn’t the same mesh I was asked to deform!” and ker-pow… no more lattice deformation.
The whole thing was fixed by activating the lattice to the not-subdivided mesh, and then making sure subdivision happened only after the lattice modifier had done its thing.
If I had time right now, I’d show you some step by step on your own model for setting up the hair afresh. Busy though, but it’s not hard if you restart from the particles. Keep us posted on how you go.
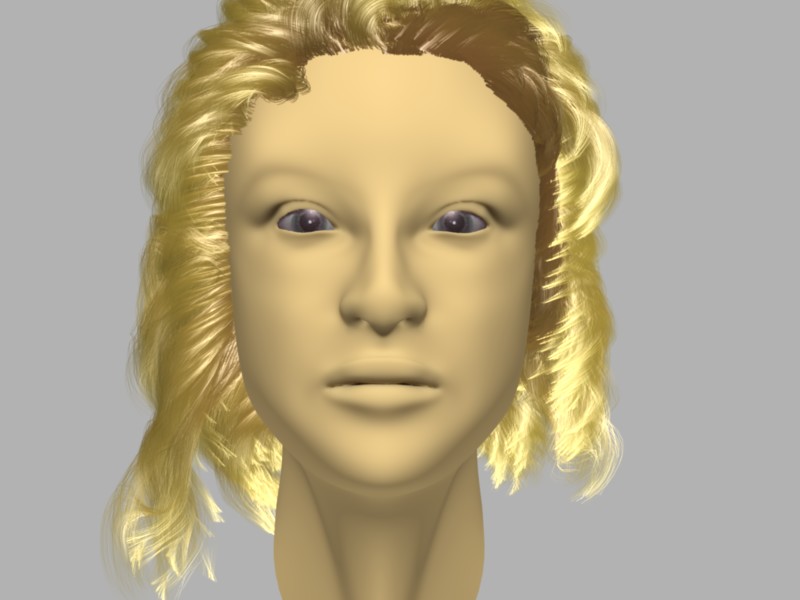
YAY!!! Slight update. I didnt do the mirrored part, but thats ok. I like having more control over it that way, even tho it may take longer. I didnt know any other way of lengthening it other than using the lengthen in the Particles Edit Properties. And found its easier to lengthen it with the children OFF (in the properties) then turning it on when I want to see what it looks like. But it sure as heck looks better than before!
Now I just need to figure out how to make the hair darker, as this was a material I previously had. But one thing at a time.
Attachments
Good. How about you fix where the iris pokes through the eyelid? Creeping me out.
Blonde hair normally has a dark colour, but a high level of coloured specular highlight.
Yeah, I need to fix the eyes. I know. Its UV’d of her actual eye. I needed something to make it look real.
She isn’t blonde. Shes brunette. I think the fix just popped in my head. We shall see.
I think I finally got the hang of it. The reason I had so much trouble getting the hair straight, was due to the deflect emitter being set to 1. I lowered it it to .02 and voila! I like the hair for the most part. I’m hoping the lighting is causing the slight issues. Now, it just doesnt “match” the rest of her. And the lack of shadow.
I fixed the eyes…kinda. And where it looked like she had a double chin. Didnt realize that one, til I put the hair on.
I know the face is a little dark. I have AO on and set to .5