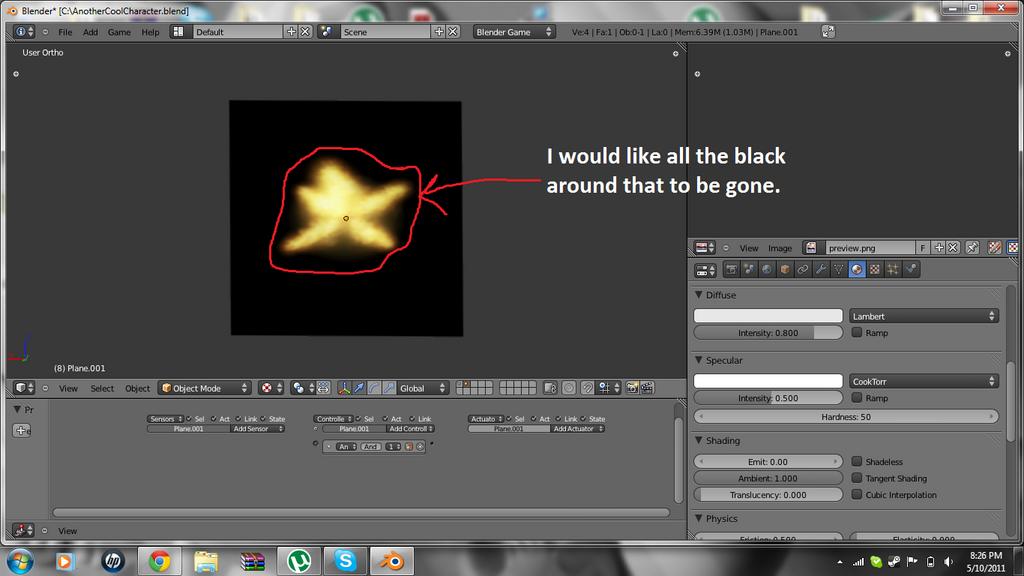
So I have seen a few tutorials on muzzle flashes but they are for blender 2.4 I would like to know how to get rid of the black around the flash for blender 2.5
Select the face of the flash, and select either Add or Alpha - one of those will work for your texture (which one will work can be explained, but you have to tell us if the flash has an alpha channel or not). Also, to make an object have two different materials (and therefore two different colors), select a blank slot on the material window, and click the + button. Then, click the Assign button and change the color of the material. That should work.
Lol that sounds very helpful and you solved my second problem but can u explain the first in an easier way. I am kinda new.
Are you talking about applying different materials? On the material tab, on the right of your screenshot, scroll upward. Then, click the + button (there should only be one). This will create a new material slot. Select the new slot, and then click the next + New button. This will create a new material - you can also browse for one using the large, dark gray button (that I don’t remember what it says - probably Browse). Then, in edit-mode, select the faces you want to assign the material to, and then press the Assign button (which will appear when you go into Edit-mode). This will assign the selected faces to the selected material.
But there is only one face? How do I add the alpha to the plane?
Select Alpha blending mode on the Edit tab. If your image has an alpha channel, it should show through (unless you’ve got a material set - if you have a material with a texture, then you could uncheck the Tex box on the edit tab when editing the mesh, or use a blank texture in the first slot instead).
If I was a noob, that sounds confusing to me too solarlune. I can post some screens of where that stuff is.
Yeah, I guess so, sorry. Screenshots would be useful. Here are a couple.
Select your object. Press Tab to enter Edit-mode for the mesh.
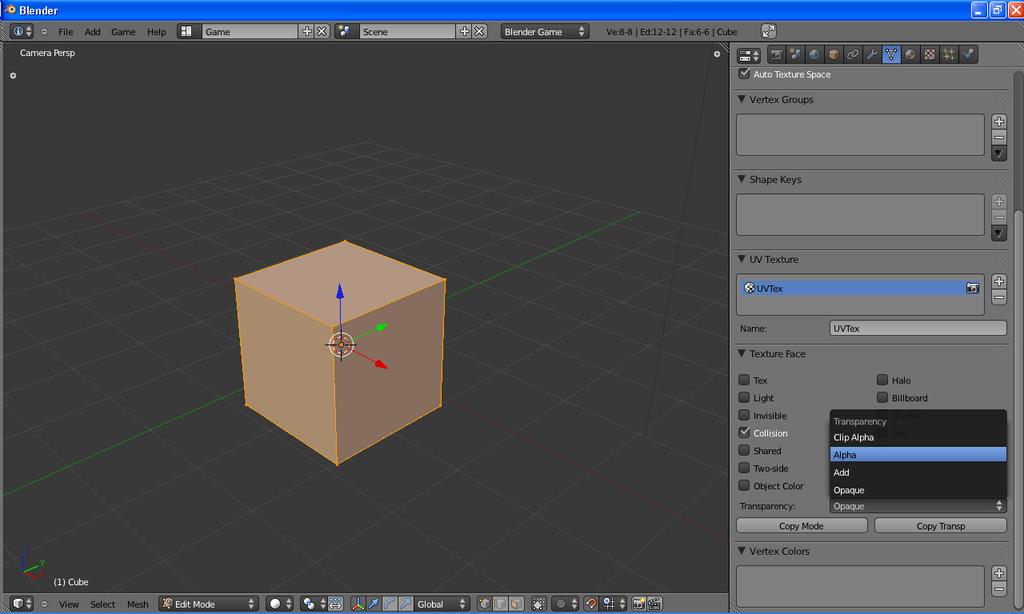
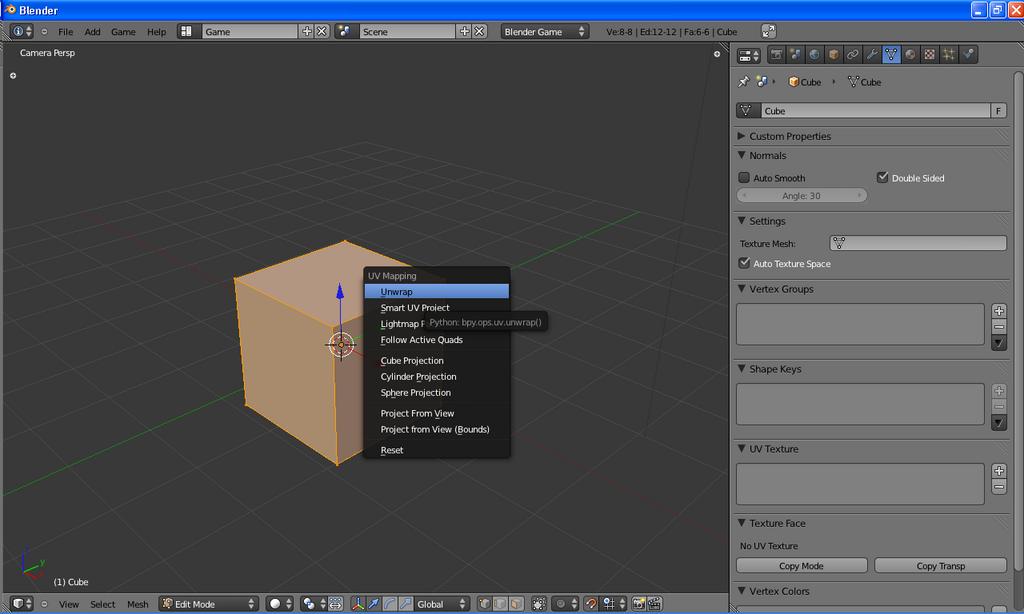
Press U to bring up a menu to add a UV-map if there isn’t one, and unwrap the mesh (first screenshot). A UV-map is a map of coordinates for recording what part of the texture appears where on the mesh. Then, on the right side, in the Edit tab (the triangle), there should be the face texture blending menu - the open menu in the second screenshot - click the ‘Opaque’ menu.
This is where the face’s texture blending mode shows up, and where the ‘Alpha’ entry shows up. After this, if you want, you can select all the faces you want to apply a setting to, select the first face, and use the Copy Mode / Copy Transp buttons to copy the settings across all faces.
Note that this will work only for Multitexture mode - GLSL mode texturing is a different beast, and I’ll let someone else pick up that part. In short, you go into the material tab (the tab with the circle on it), click the texture tab (to the right of the material tab), add a texture, and select the ‘Alpha’ checkbox. Then, on the material tab, set transparency (with the Z-Transparency button) to 0.
Wow thanks SolarLunar that helped a lot. Lol srry for all the trouble.
No problem.