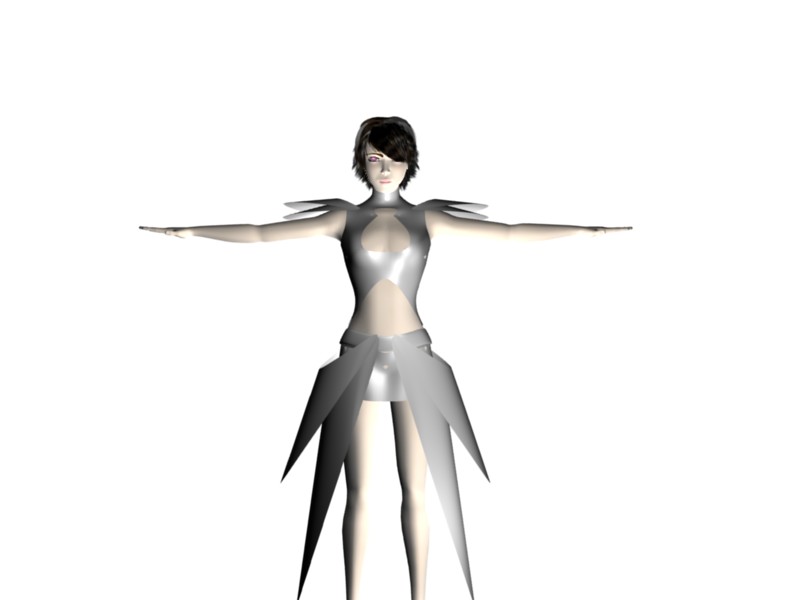
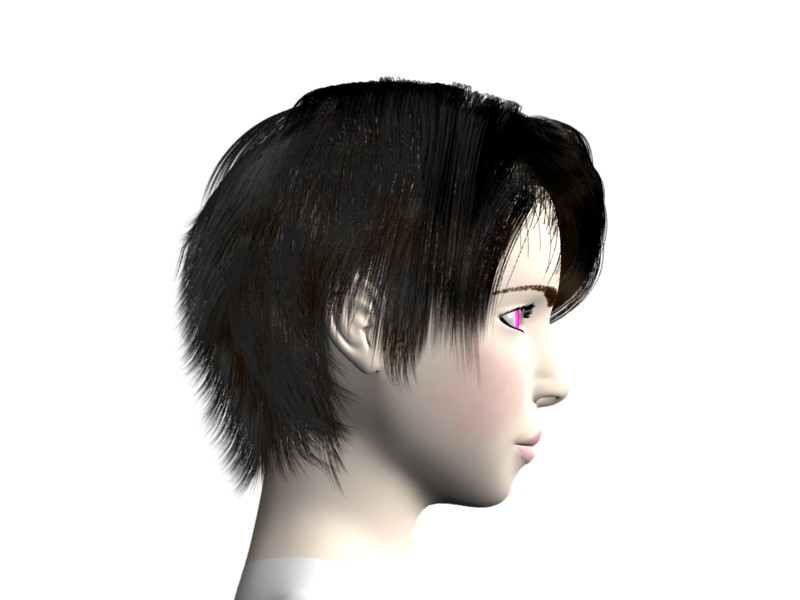
Ive been in the dark for a few days so the going is slow i’ve started adding and playing around with textures “still learning” :yes: the hair is mostly done its just some fine tuning now… “I finally got this static hair down”
Just a question when texturing and posing or making animations should one apply sub-surf ?
Crits and Comments Please.
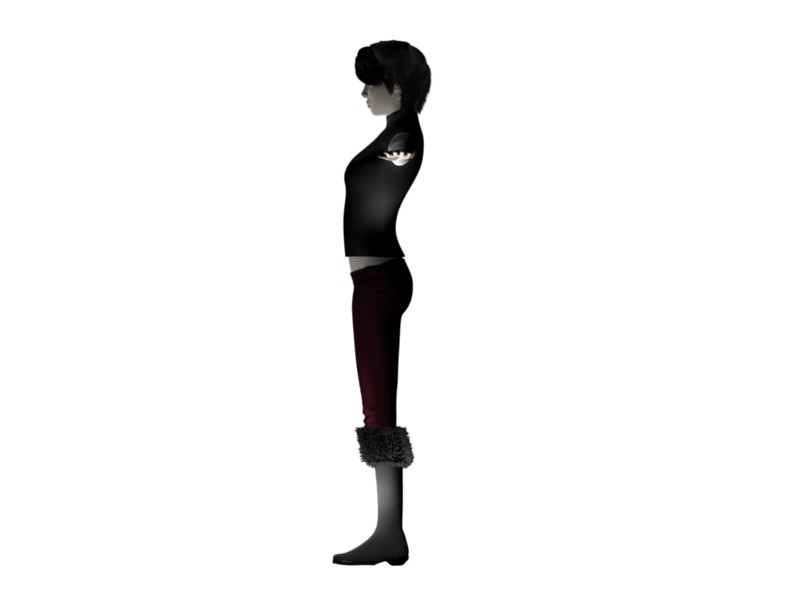
P.S sorry about the boring front and side renders:( still getting armatures down…:eyebrowlift2:
That’s really pretty. I think a bit more hairs, so that you can see through, but you could also paint the hair are of the skin darker. Also, try the new sss for the material. She is really pretty =)
I haven’t done any remarkable animations myself, but I think that the general feeling is to use a lvl 1 or 2 subsurf, and then press “setsmooth”. Basically, you want a smooth result with a low poly character for animations. Even just a subsurf lvl 1 can be highly effective when combined with “setsmooth”
one day i got sic and tired of the particle hairs, because well i was getting nowhere with it it looked unnatural and i always had huge bald spots so i decided to go with alpha mapped plains instead, and i stumbled accros a tutorial A Guide to Hair creation by Alvin Sebastian Hoo
heres the linkhttp://www.ordix.com/pfolio/tutorial/hair/Ver3Dcafe/index.htm
hey uses this overlay/layer method with hair guides as explained …
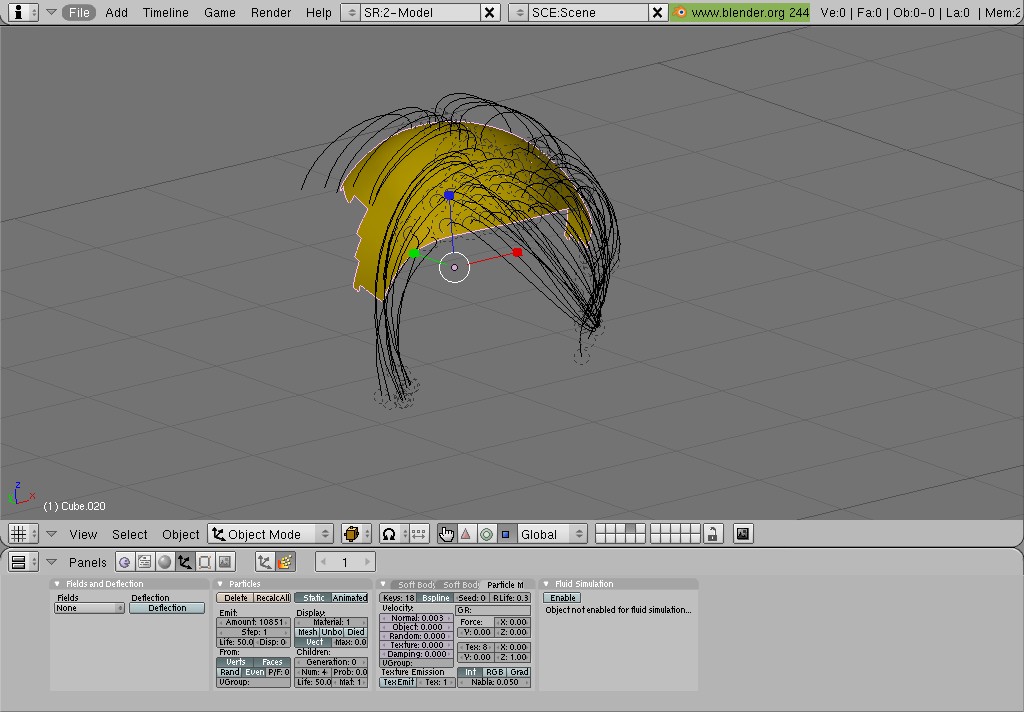
so i wondered how the hell could i do it in blender then it hit me use three layers of ± 10000 strands each as aposed to one layer of 30000.
Step1 : first start of with a “Cap” or “Emitter” with about 10000 strands do not add a normal starting speed…"the guides will act as shape and length " now add your guides and set them to the shape you want NB dont add volume make the hair as close to the head as possible! once you have a desired shape go to step two.
ok once step two is done Duplicate and move the Cap and guides to another layer
heres the fun part :Dyou must now tweak the guides on the second layer, move them around in a semi random fashion now this is where you add Volume and General shape
as for starting speed amp that up to .002 "NB i think the size of your overall model counts so test and play.
move the bottom of all your guids out a little too and adjust the curves :evilgrin:
tedious i know but “i dont know a better way to get results this good…and i say I”
step three is easy duplicate the “Cap” again along with the fringe guides " oh there is little or no fringe in step 1 only two and three.
in this step we will be concentrating on the top of the head and the fringe so delete the faces that aren’t in use . and agian crank up the normal starting speed just a bit…
for the top use guids with a smaller “Max Dist” so you can move them together"
as for material check the above tutorial by Alvin :spin:
and there it is if you could point out a better way to do this please let me know>
yes greate hairs.
Can you explain how will you work with there haires…
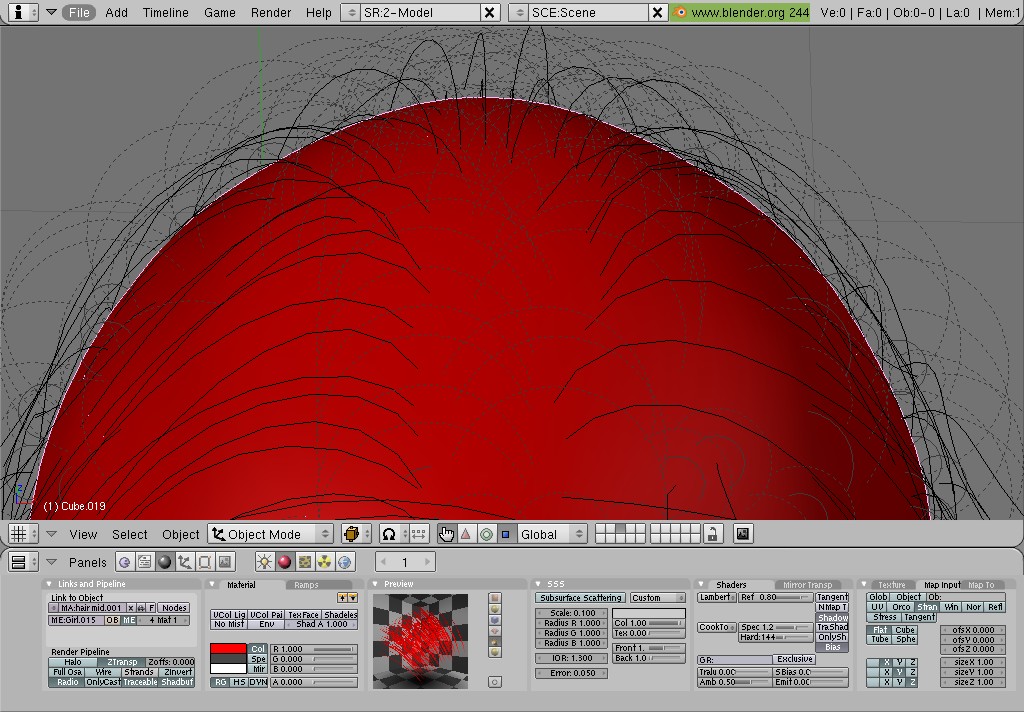
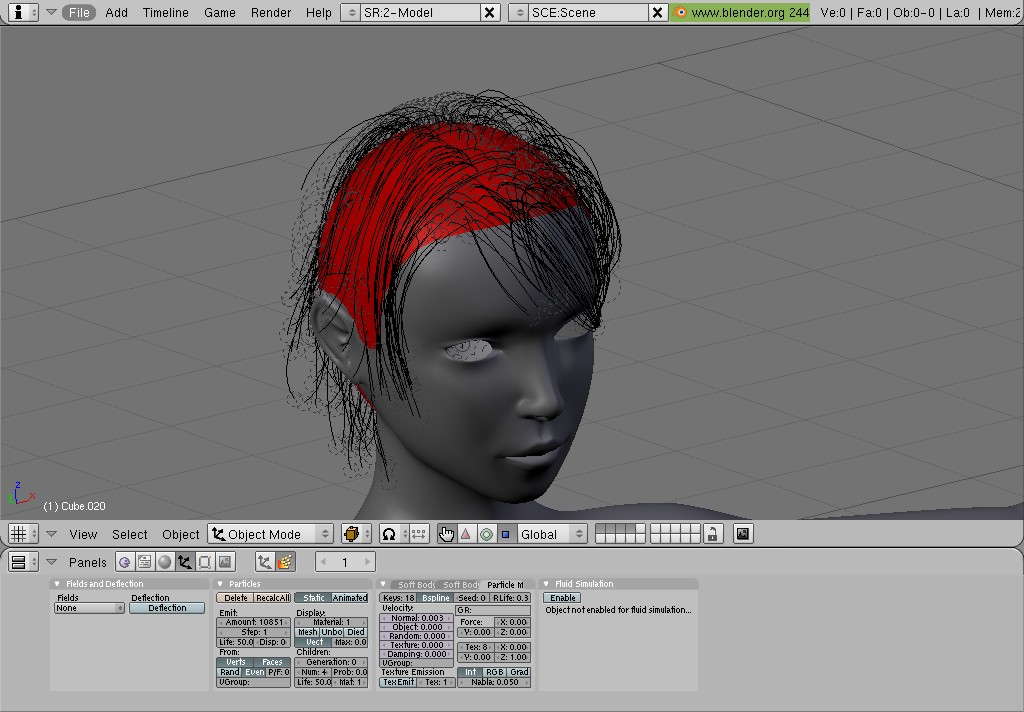
It looks like the hair splines have some control on the bottom ??? :o :o never see it on blender 2.44 :o :o
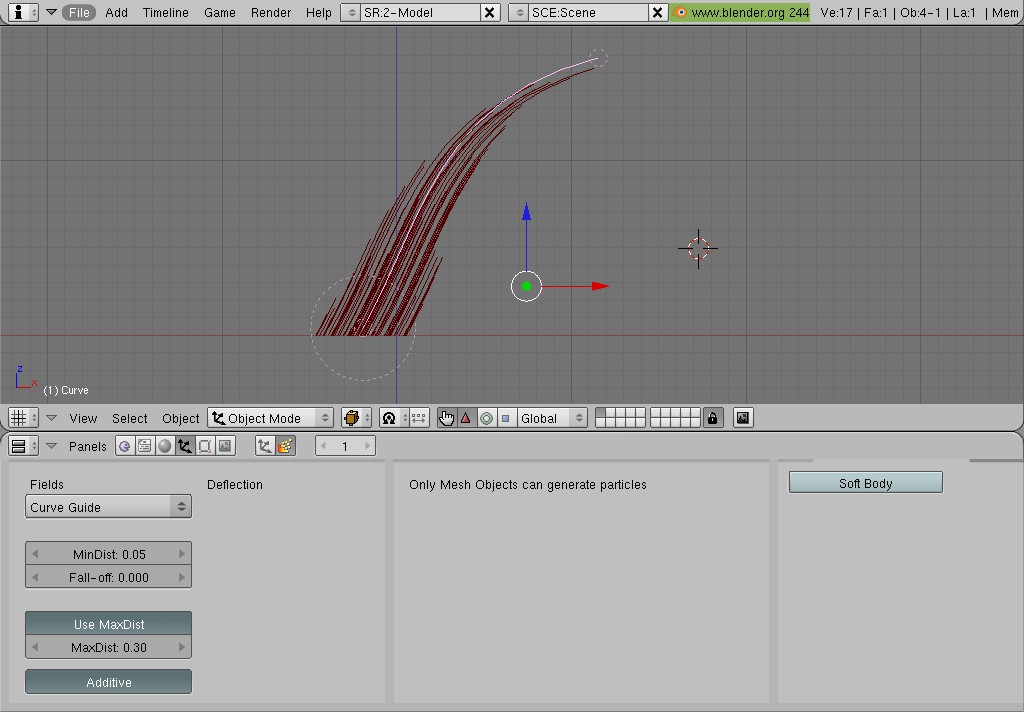
K most of my hair guides have a max dist of between 0.10 - 0.30 depending on the area
i use the finer guides on the outlying edge of the emitter
the hair guides settings on the 1st screen use a small max dist for detail and additive for the fall off with a min dist of about 0.05 “the rest have no (additive)”
…
ive also adjusted the rlife to 0.3 to get the length variation…
CyaNn as for the root control…well thats why i tried this method have a look at the 2nd and 3rd screens…in the 3rd screen my “roots” are closer and they have a smaller "Max Dist then the “roots in the 2nd screen” thats how i countered the baldness or wide path.
also the size of your “max dist” will be different to what mine are depending on the size of your mesh so its by trial and error to get the right one… and then its all to the textures a darker under mesh to a lighter one etc… and a alpha texture mapped to the strands to add fluffyness and alpha out loose strands
its work i tell you but i like the results have fun
JO9 :the skin under the hair or the actual skin? its my first skin texture i still need to do bump and spec maps and finish the diffuse…:eek:
About those eyes: they are a bit wide spread, normal eyes are about one eye width apart. Sasha’s appear to be a bit more apart than that. The pupils are tiny and her upper eyelid is raised to show iris above the pupil. That generally indicates fear or shock. A more relaxed eye pose has the upper eyelid just clearing the pupil
Yo! Yet again a looong time “:mad: i had issues with my service provider :mad:”
Progress has been slow of late due to lack of experience and the fact that i haven’t done any planning so i could never make up my mind sigh:no: the first rend was one of the ideas"of many" but i scrapped it and decided to go all out simple and get her finished…
simple and furry :yes:
Orinoco > thanks for the tip ill adjust the pupils but the eyes look alright to me i think its the hair over the one eye that obscures things a little.
Kaos86> thanks for the support i need it.
Everyone> “im being lazy” if you get this method down post the link or pm me id love to see the results id like to know how far this could go
and now on with the show.
>Im done clay modeling so im not going to change anything body wise.
>im messing around with armatures and rigs ind ive got a pose… but ive got to deal with strange deformations a creases that arnt in the right placessigh lol and theres still the matter of bump maps to do…
>and a nice little scene and hopefully im done…and then ill do some thing small very small like a hair ball or something
Yes very strange…At the moment the rig im using was one I built from tutorials so its very simple im gonna try and give bouza’s rig a shot and see if i can get better results.


 i dont have time to read it now but ill get to that.