What have you tried so far?
You are looking at two basic meshes here and one armature. The lego man can be built as a rigged mesh and animated in the usual fashion. The “croc” can then be built as a separate mesh within the lego man mesh, the armature needs a separate set of bones for the croc, and you will may need some shapekeys as well to make it “grow” out of the lego man, either by using shapekeys or scaling bones.
You can then animate the croc, keeping the lego mesh inside it. You should also scale down the mesh that is inside the other, almost to 0 if you like, while you animate the “outer” mesh. This is where “root” bones are useful as you can scale the entire mesh down by simply scaling the appropriate root bone for that mesh. Have an overall root bone for the whole thing to move it around or rotate it.
So in short, one armature, one overall “root” bone. One mesh specific “root” bone and set of bones per mesh, scale down the inside mesh while you animate the outer mesh.
Have a go with a simple mesh to get the technique, like growing a sphere out of a cube for example, then move to more complex meshes. Please report your efforts here, with pictures preferably, and we will help further.
Cheers, Clock.
OK, so two pictures, first the man:

Changes into the croc:

They are simple meshes and simple animations just to show what I was rambling on about earlier… 
Blend file:
morph.blend (689 KB)
Just press Play to see it all working, armature is on separate layer (turned off just now), bones for the two meshes are also on separate bone layers for clarity and ease of animation. 
Let me know what you think, you must, of course, put much more effort and time (I spent 30 minutes on this) into your meshes and rigging/animation, but you should get the idea. :yes:
Cheers, Clock.
Thanks so much! The only problem is the color change. As you can see in the video, the skin color slowly turns green, but the head turns green after the hand does. Is there any way to do that without two seperate materials?
Colour change can be done by having a material with two colour node sets feeding into a Mix Shader node. To change the colour you keyframe changes in the Fac from 0 (first colour) to 1 (second colour) over the required number of frames. I would assign different materials like this to each set of vertices, like the head, that change at different times.
To keyframe the Fac just RMB Click the Fac box and choose “Insert Keyframe” in the node editor, using Cycles render engine of course.
Cheers, Clock.
Here’s two pictures of a very simple node setup to change colour:
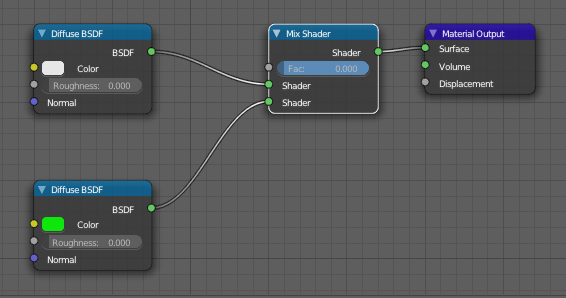
This would render as white
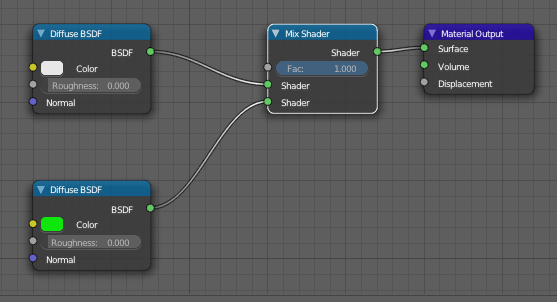
This would render as green
You can put as much as you like to the left of the Mix Shader to get the exact material you want, like an Image Texture node for example. Note the keyframed Fac variable.
Cheers, Clock. 
EDIT:
I have also done this using a Driver for the Fac in the past - Create an Empty at Z = 0 and limit to only move to Z = 1, lock the other axes, then make this the target of the driver with Z location as the variable and use transform space, then when you move the Empty - the colour changes.