Thank you! That’s extremely helpful. I searched YouTube for an answer and couldn’t find one. This is such a necessary and often done thing, I expected to find at least one tutorial on it.
I’m coming from a background using Lightwave 3D for many years. So much is different in Blender. In Lightwave, if I remember correctly, If I parented an object to another, it would move to the origin point of the parent object (provided it was at 0,0,0), unless I chose “parent in place”. But, it’s been awhile, I may be wrong.
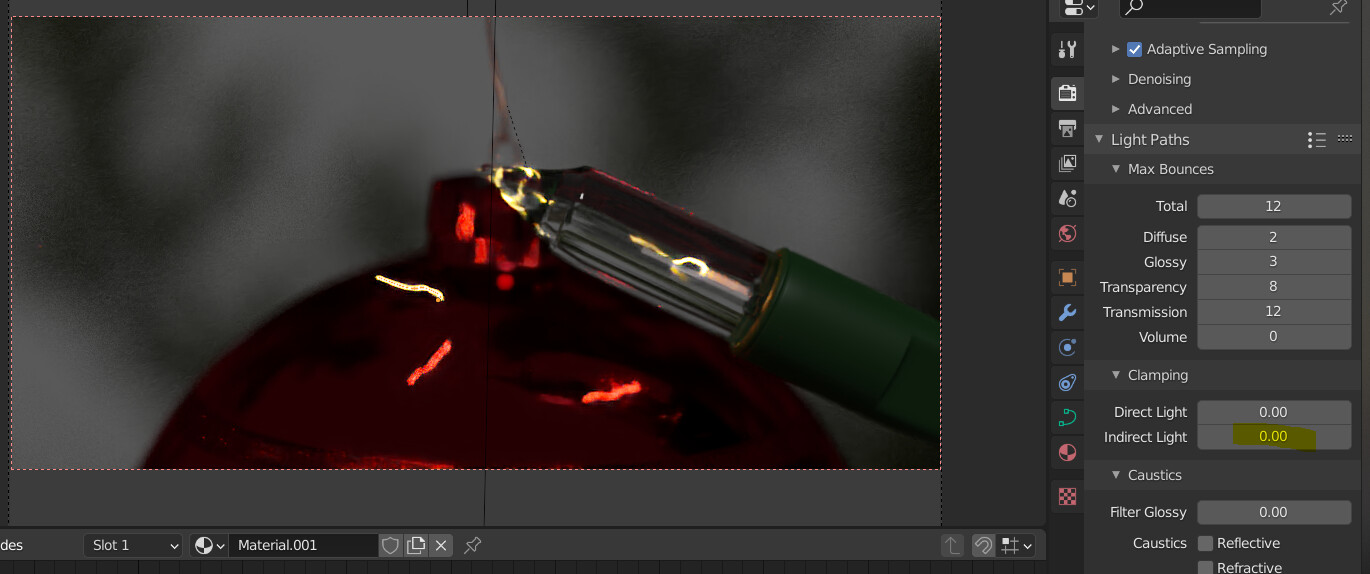
Ah, that was something I changed in an attempt to cut my render time down, as suggested by a YouTube video. My renders were taking an extraordinarily long time.
One of the biggest impacts appears to be the adaptive subdivision on the sphere itself. A sphere subdivided 4 times is probably fine enough, it doesn’t really need to be subdivided to the pixel level.
As others have mentioned, that filament is super fine, and it will be pretty easy for the path tracer to miss, especially on secondary bounces, which could cause a lot of noise.
When I open up your scene and convert from Imperial to Metric I’m seeing bulbs that measure about 0.008mm across and 0.04mm high. The ornament is 0.778mm high. I’m guessing the unit scale of 0.001 instead of 1.0 might be having an impact.
(EDIT: Just noticed someone had already pointed this bit out) For your issue with NumPad Period on the ornament. You have a single stray vertex from it hidden in the tree somewhere. Go into edit mode, hover over a vertex on the ornament, hit L, invert the selection with Ctrl+I and delete the single vertex.
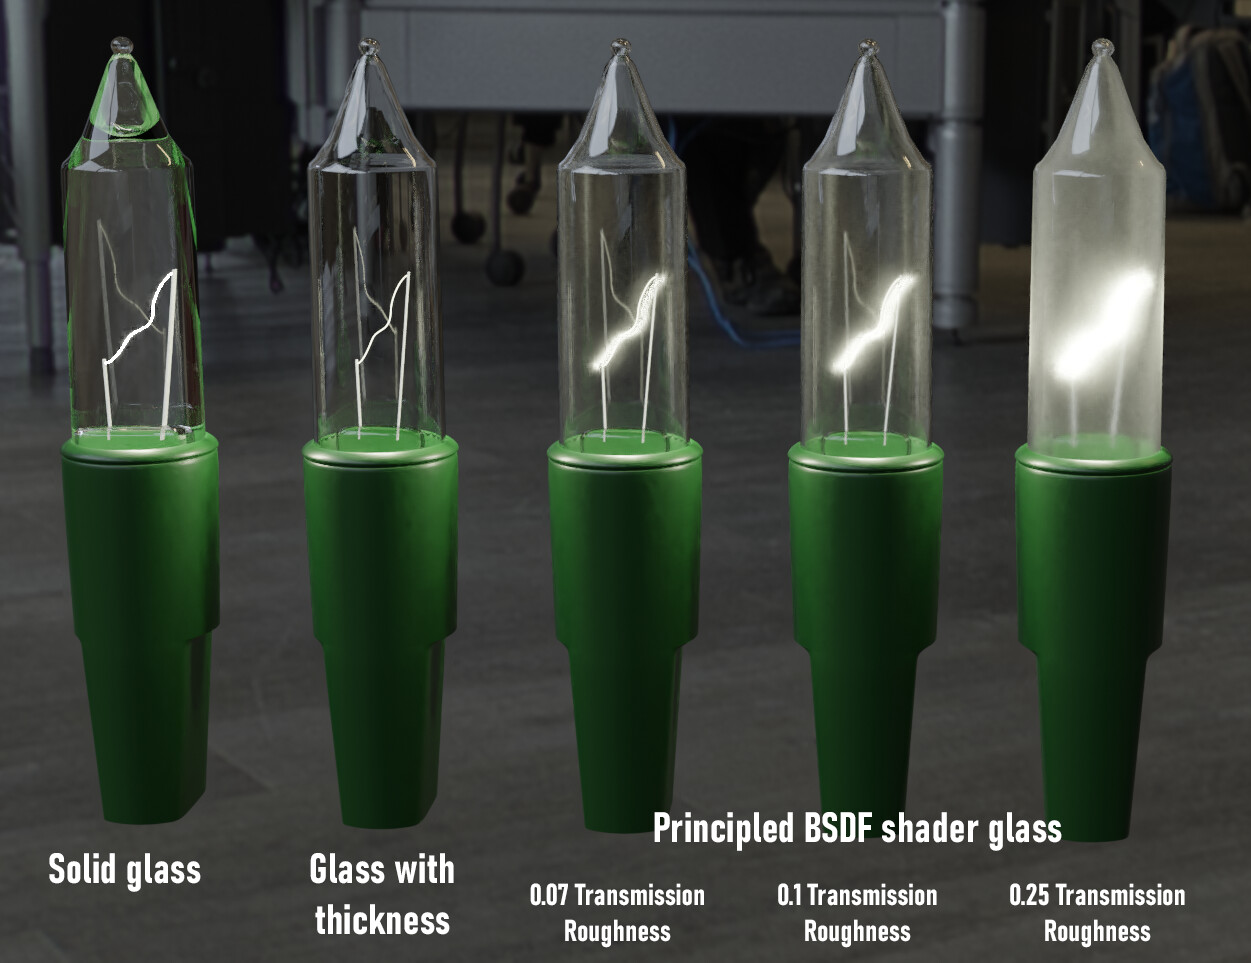
Your glass light bulbs have no thickness making them render as though they were solid pieces of glass. I think you are expecting a bit much from Blender if you want to make them look like real lit bulbs this way. Real incandescent light bulbs tend to have some sort of coating on the inside of the glass to help diffuse the light.
Adding some appropriate thickness to your glass and then giving it a tiny amount of transmission roughness will help make the bulbs glow a little more like you’d expect from the real thing
One of the biggest impacts appears to be the adaptive subdivision on the sphere itself.
Yeah, I was experimenting with that. I wanted to make an actual raised texture on it. The bump map didn’t seem to be working very well. I probably don’t need it. I was trying to get that texture of crystals on it. Maybe I should do a particle system?
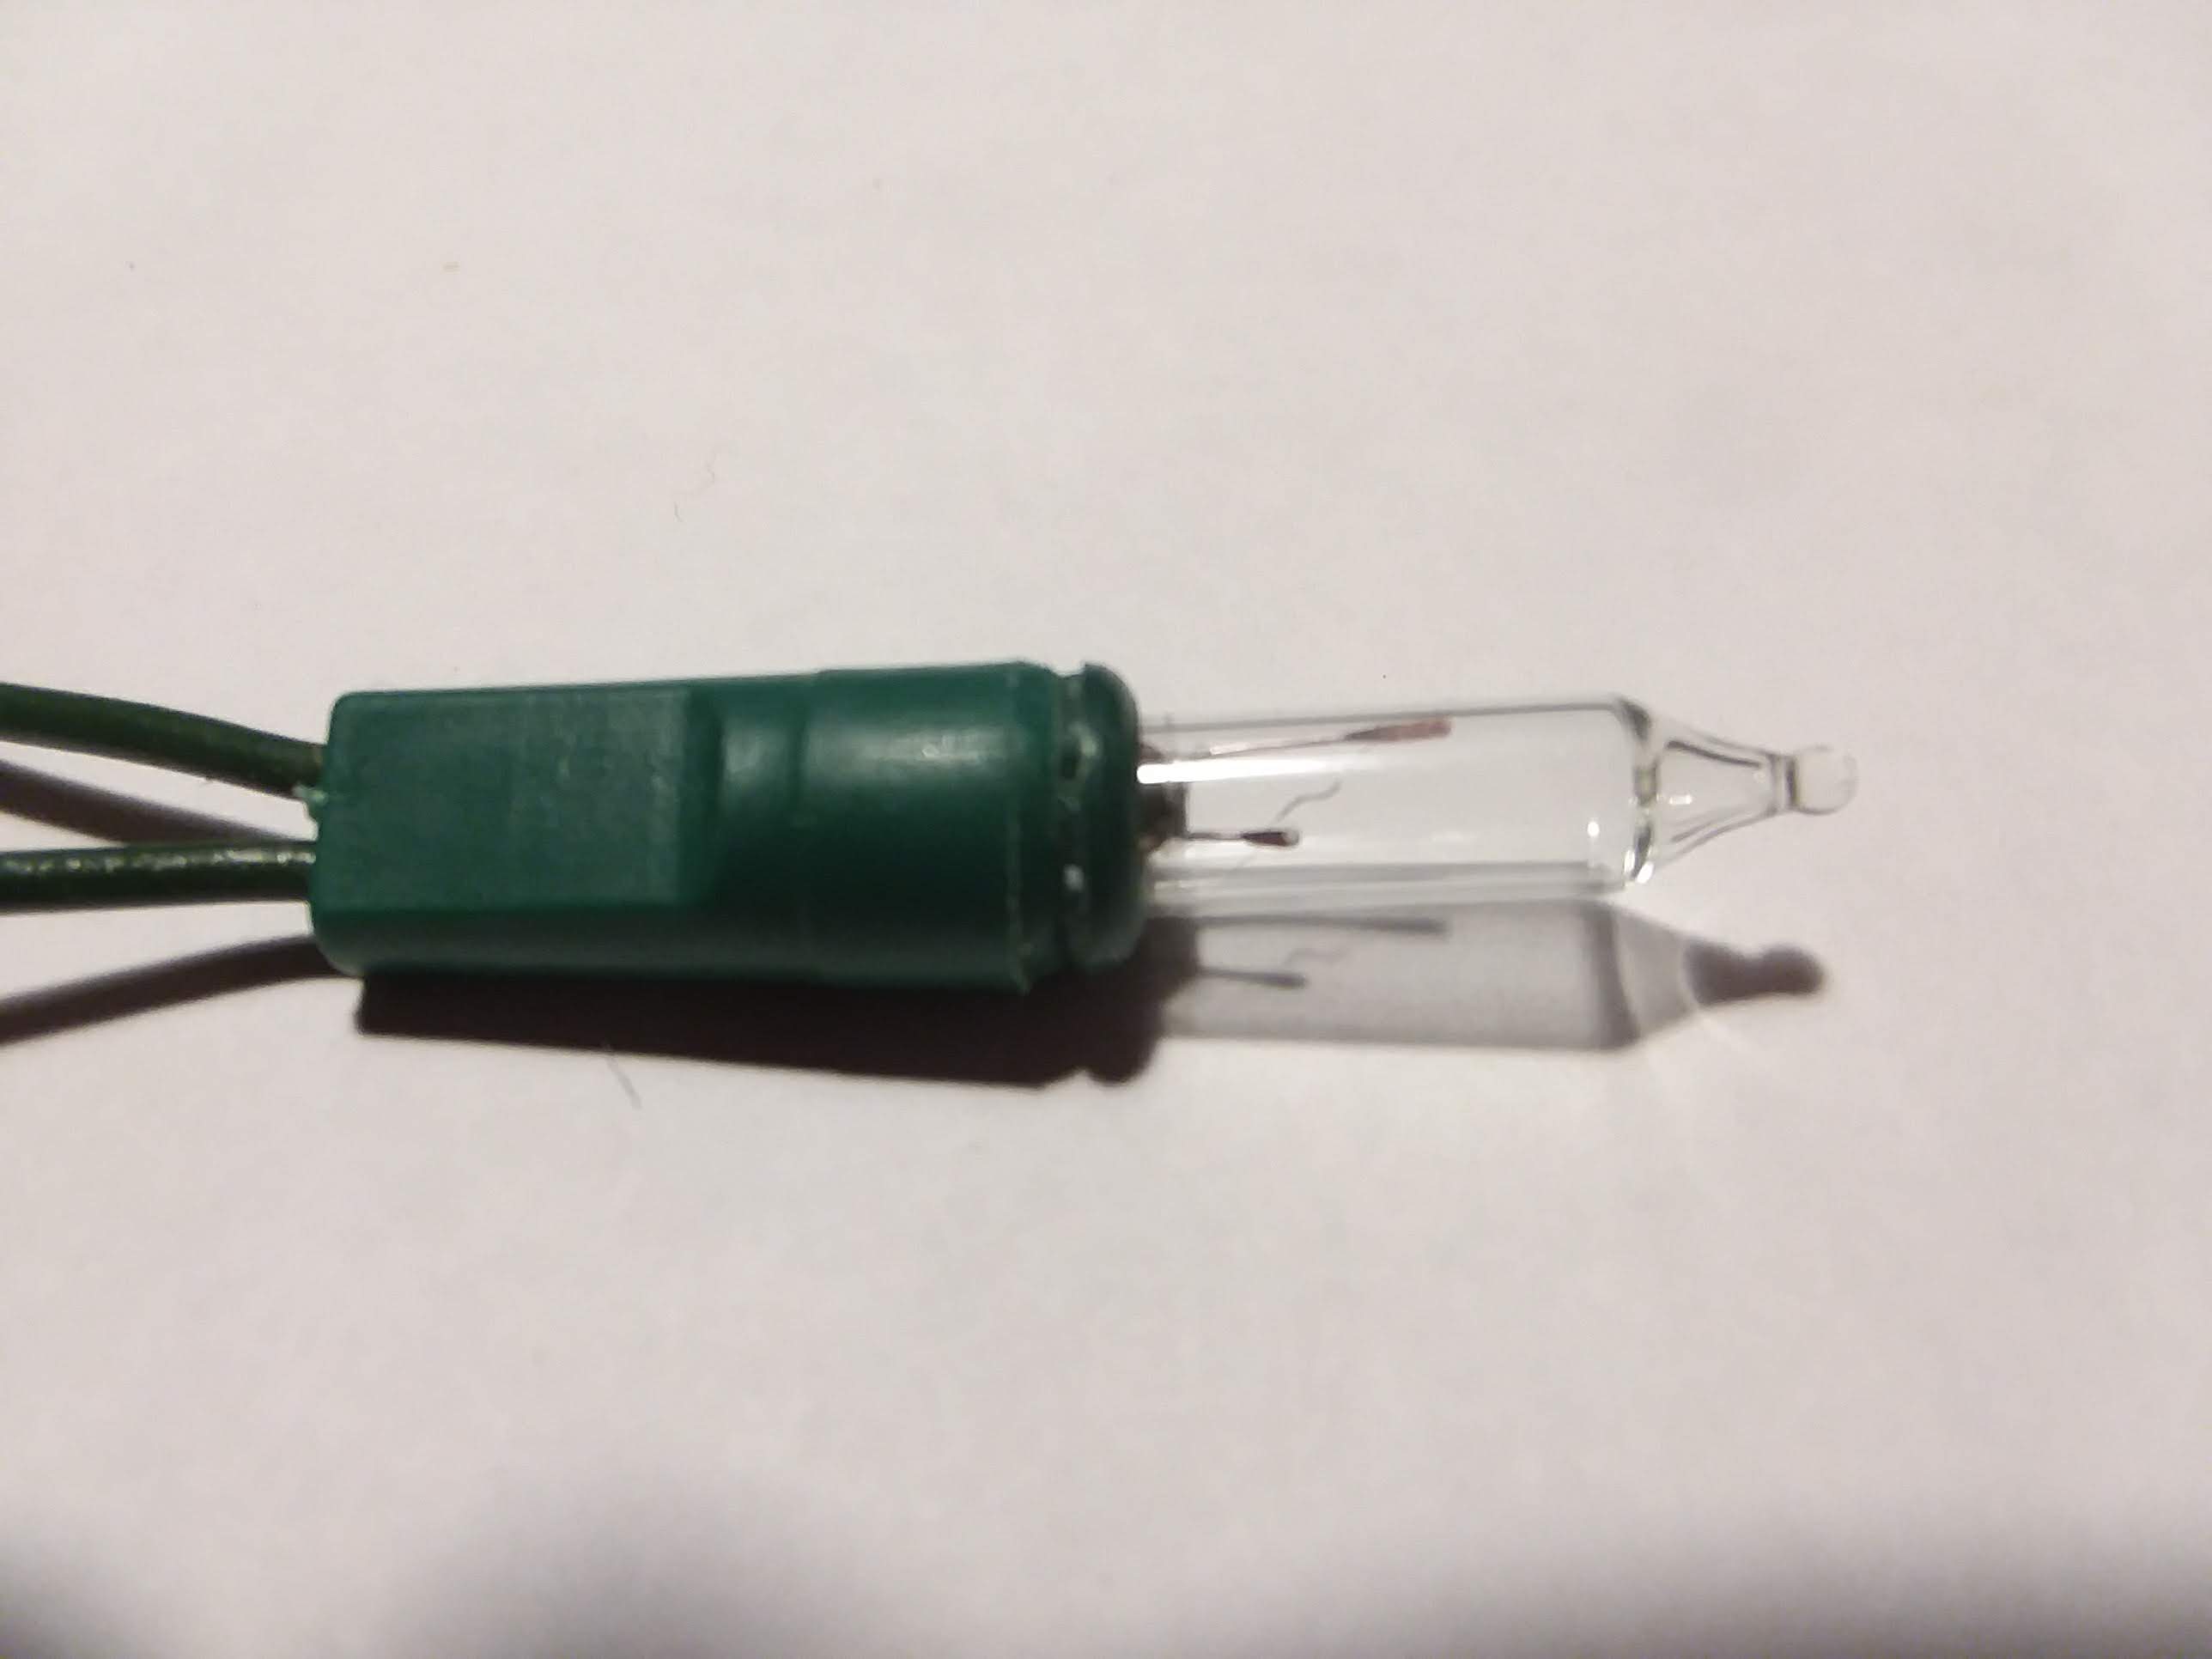
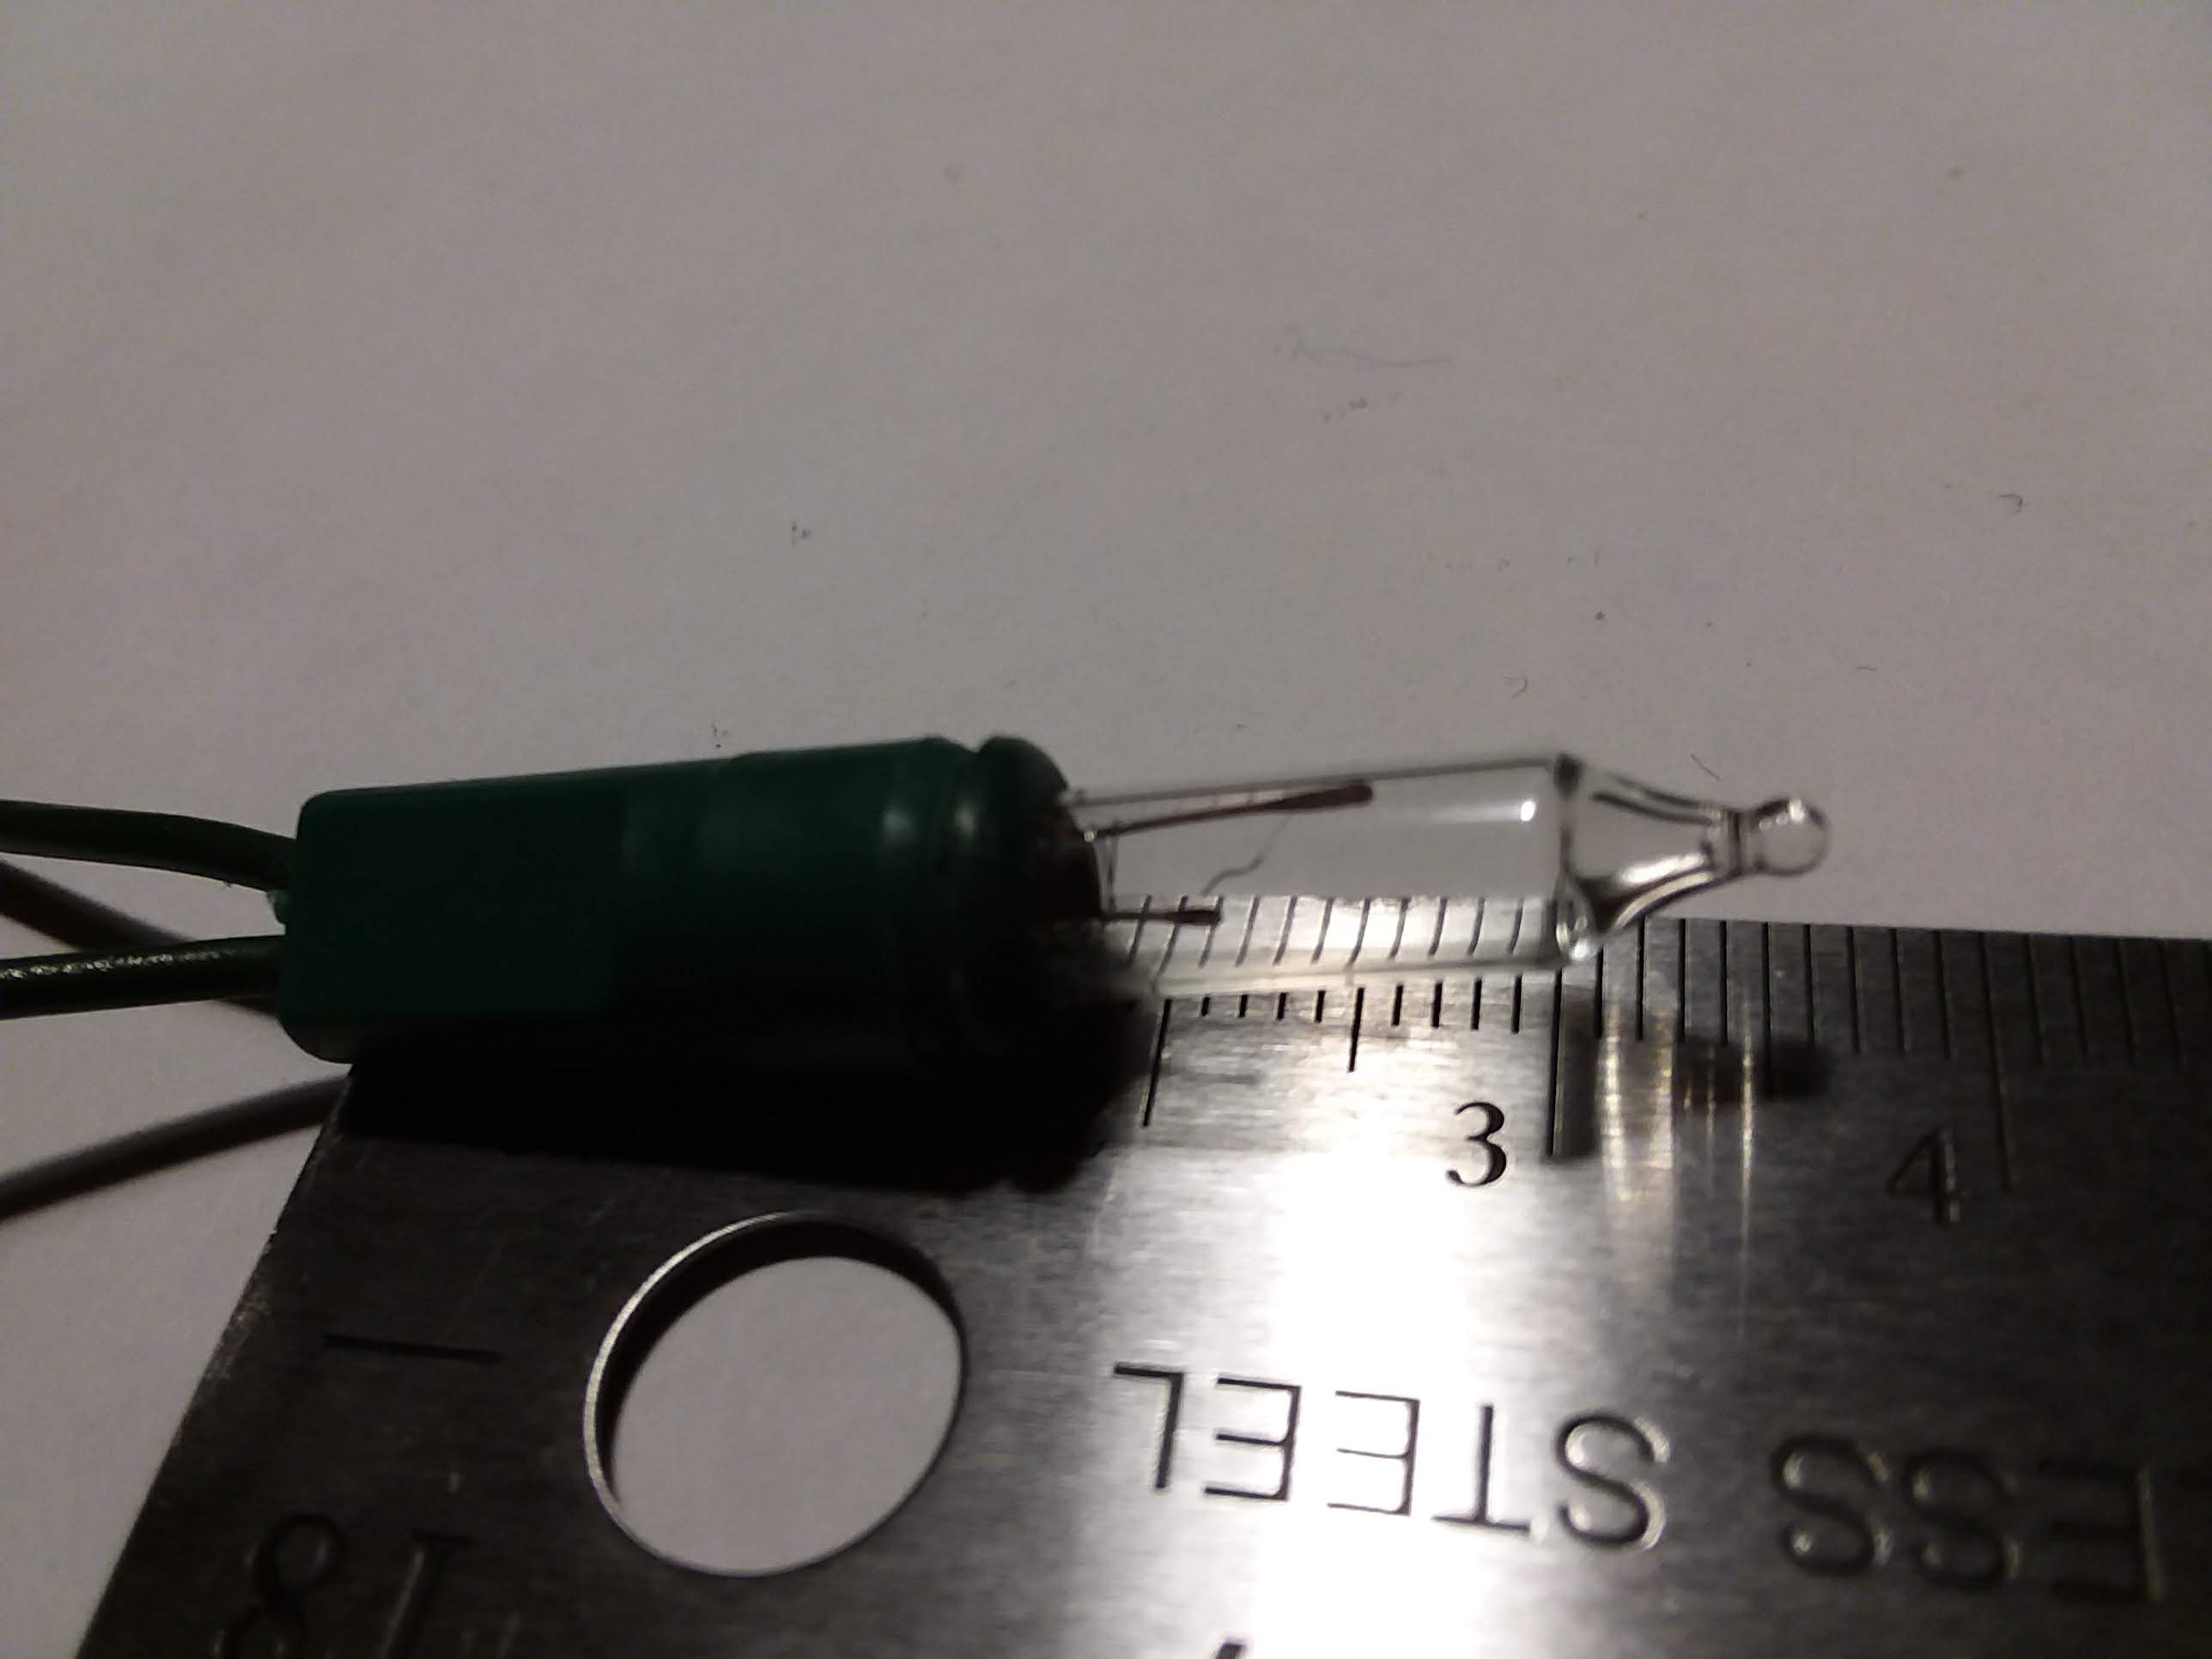
Thanks for all the help! Very useful information. I’ll have to check the scale again. The whole light should be about 4 centimeters tall. I must have the settings wrong. I think I set the unit scale to .001 just so I could move the camera in smaller increments. One click rotation of the mouse wheel was moving the camera way too much. That ornament should be about 8 or 9 centimeters wide. I’ll check, and make the changes you’re recommending.
Here’s an actual bulb that was my reference. I’ll have to refine it a bit.
I never have Lock Camera to View turned on and never position the camera using the mousewheel. It’s a recipe for frustration. Forget you have it ticked and you can mess up your camera position in an instant. I use Shift+` (above Tab key to left of 1 key) to enter Fly mode and position my camera using WASD keys plus Q and E to move up and down and the mouse to aim. Scroll wheel controls the speed of the movement so you can get it as fine grained as you like.
I haven’t gotten used to it yet. I had my camera shot set up.
I think I actually meant view. I use the scroll wheel to zoom in and out, but the scale of that movement was too big. Everything is set up for one meter increments by default.
For zooming while just editing I tend to mix scroll wheel zooming for large view zooms with holding Ctrl + middle mouse (scroll wheel used as a button) and pushing up or down with the mouse to zoom in and out smoothly. Try that method. You might find it preferable.
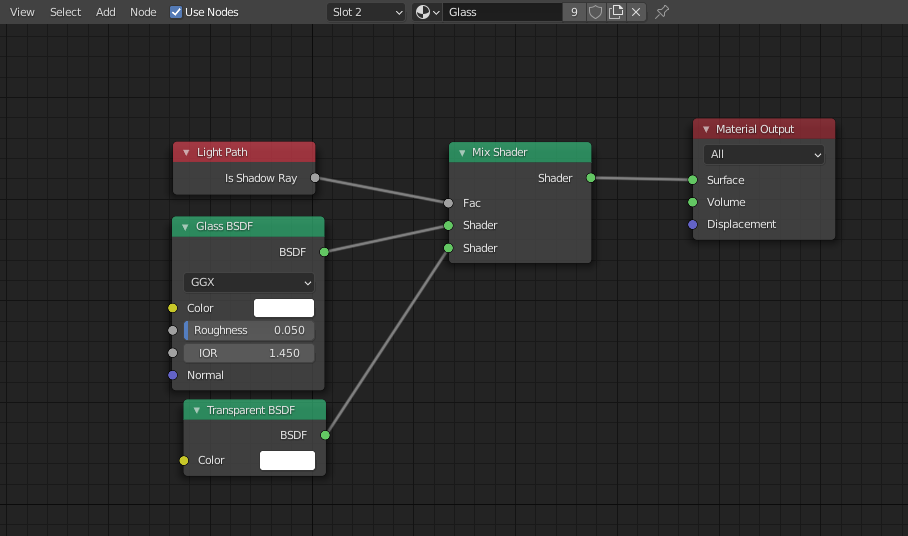
I downloaded your file, and on top of the suggestions made by everyone I’d also suggest mixing the glass shader with transparency to reduce noise a bit.
Overall the scene scale is way too small, I changed it to have the sphere around 7cm and it made the lighting behave better, on the tests I did the filament has a strength of 50 and it works pretty well.
The other change I did, as suggested by John Malcolm, was to add a bit of thickness and roughness to the lightbulb glass.
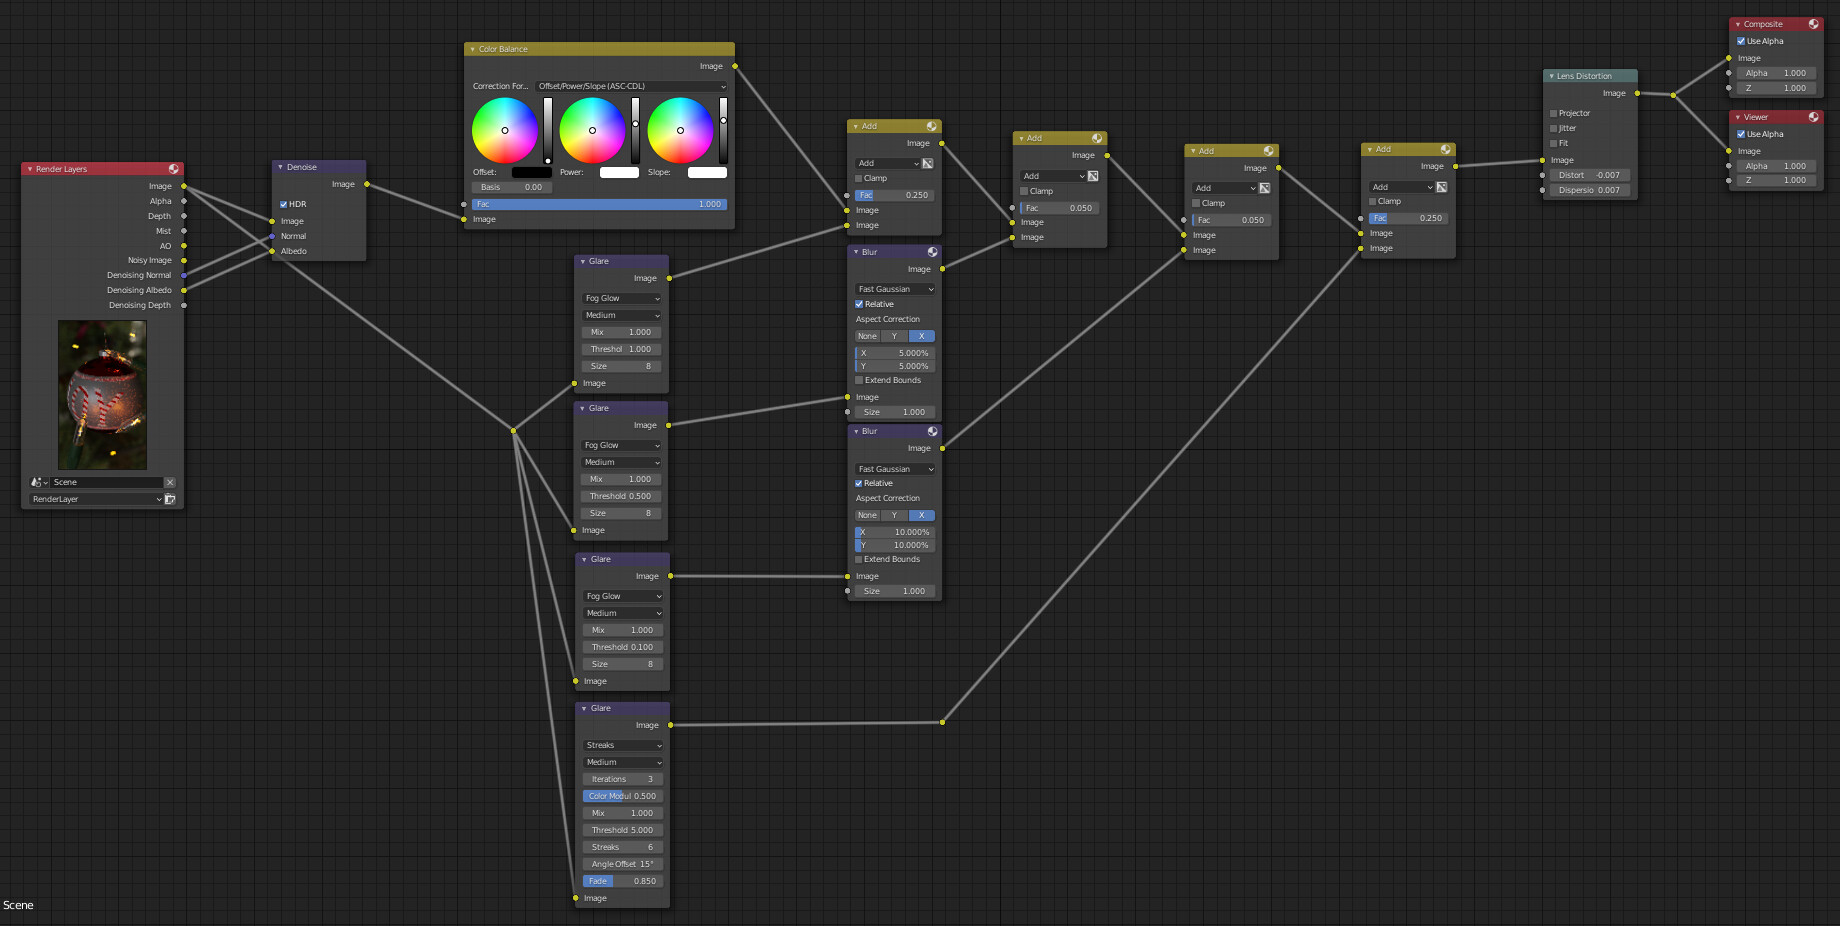
Apart from that, most of the look you want is achieved in compositing, since the glow and bloom effects are not possible with cycles by default afaik.
Here’s a comparison of the render before and after compositing, and the node setup for the comp (I also unchecked denoising to do it in comp instead):
Notice that I layered several glare nodes on top of each other and mixed them with the render instead of applying just one directly to it, it allows for more control this way.
My apologies for the slightly off-topic chat, but I just wanted to say how amazing it is to be a part of this community where so many knowledgeable members have reached out to assist with so many great suggestions. It warms my heart to see so many who are willing to help.
Yes, thank you! That is exactly what I was going for. Thanks so much for the help!
I don’t know how I managed to make everything so small. Wrong settings I guess. Last Feb. through March I thought I was starting to really get the hang of this, but I got sidetracked and didn’t touch Blender for a few months, and in that amount of time, I seem to have forgotten everything I learned.
I will take a look at your scene file and study it. That’s definitely what I was trying to do.
Thanks again!
-Don
Here’s my latest render, using Julperado’s additions/fixes.
I did a bunch of things, mostly experimenting, but I worked on the X-mas light model a bit more, and did some organizing and piece naming. I wish that objects that are parented together could be grouped and function as a single object. Collections just doesn’t do it for me.
Anyway, I also set the color temperature to 2700 K and lightened it up a bit.
I want to model an actual 3D branch with dimensional needles. The flat, alpha clipped branches work fine at a distance, but for close ups, it just doesn’t cut it. If anyone knows of a tutorial on this, please let me know. The tutorials I’ve found are for a whole tree using the Sapling add-on. I’m thinking I’m needing the array modifier. I started, but haven’t gotten very far.
Thanks again for all the help! I’m learning a lot.
About the grouping/parenting issue, collections are not groups, and parenting has its own quirks; but if you create a collection for the light for example, you can just add instances of that collection via Shift+A/Collection Instance instead of duplicating it, and the instances are handled as a single object, with the advantage of receiving any change you make to the original collection. So if you change the light intensity or the glass thickness, every other copy will have the same change too.
About the branches, don’t know any tutorials that go into detail about this specific thing, but since you need just a section of the tree you could just model a single branch and use a hair particle system to create the little pine needles, those could be just textured planes.
Thanks! That compositor setup really helps. I was studying it last night. I’m an After Effects user, so the node based compositor is foreign to me, but I’m learning.
I found a YouTube video that I think will help me. They use the particle system to place needles on the branch. The needles are dimensional, which I think is needed for a shot this close.
The thing I was running into with this is having to select everything that makes up the light bulb, instead of just selecting the light bulb as one object. At first, I thought I could just select the parent object and instance that, and everything parented to it would also be duplicated, but that’s obviously not how it works. I’ll take a look at the add-ons you mentioned.
The other problem I was having is: when I model things, I start at 0,0,0. If I then parent this to another object that’s been moved to another place, the child object stays at 0,0,0. Why does it not move into position relative to the parent object? Is it possible to do this? I see that I can un-parent and keep transformation. In Lightwave, that’s how it would work by default. There was a second command to “Parent in Place” if you wanted the child object to stay where it was at the time of parenting.
A couple of times, I accidentally moved the glass away from the base of the bulb. I thought that I could reset the transformations on the glass and it would go back to where it was, but that’s not the case.