Is there an easy and elegant way to get the joint folow the bubble glass in the upper and under part?
I wanted to use bolean modifier, but it ended up ugly and full of N-Gones. I guess there is another way that I’m missing?
do you mean you want the strip in the middle to go up and over the bubble and the bubble joined to the base mesh ? do you want it as all one mesh or separate top joint and bottom ?
edit so something like this ish ? does the bubble have to be that exact shape ?

No, I mean a joint around the glass ( I see that upper and under part wasent the right way to put it.)
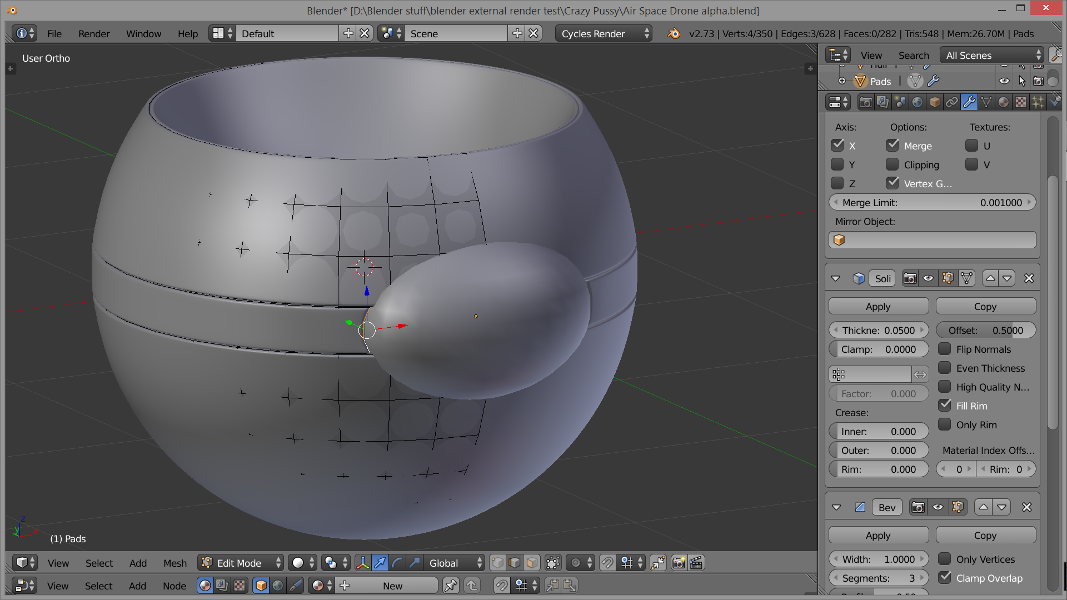
The glass is a separate object at the moment, not sure it was a very good idea to make it another object but is was easyer.
The bubble dont have to be exacly like this but I will prefere if it ist. I m trying to make a 3d version of a little drawing I made some month ago. Was thinking it will be easy to turn in 3d version.
I probably have to use the knife tool, but I m not realy sure how to do it and keep quad who will be smooth friendly. I guess it’s a classic probleme that already have an elegant solution and I better ask than try to invent somthing not as good.
It’s horible to see how unclear I am. Especialy when I cant blame it on the reader as I totaly get you can anderstand it this way. lol
No, I mean all around the bubble glass but I already have the part with the midle plate done so I’m missiong the above and under part.
I probably better had put the .blend from the start ( as somone else asking for the blend on another question make me realise)
http://www.pasteall.org/blend/34792
So I reformularte my question.
How do I cut in the upper and lower part of the Pads object with maintaining a good looking round render to continue the joint around the glass that I started in the midlle of the pads thing. Its mainly a topology question I guess but the way of cuting it cleanly interess me too.
i think showing your concept drawing would be more helpful for our understanding in this case 
It’s not realy a concept drawing as I had stoped 3d for years when I drawed it. It’s just a tiny sketch so it’s laking details like joint are just lines. But a real scale model will have joint betwine the plating and the glass.
I think I understand now 
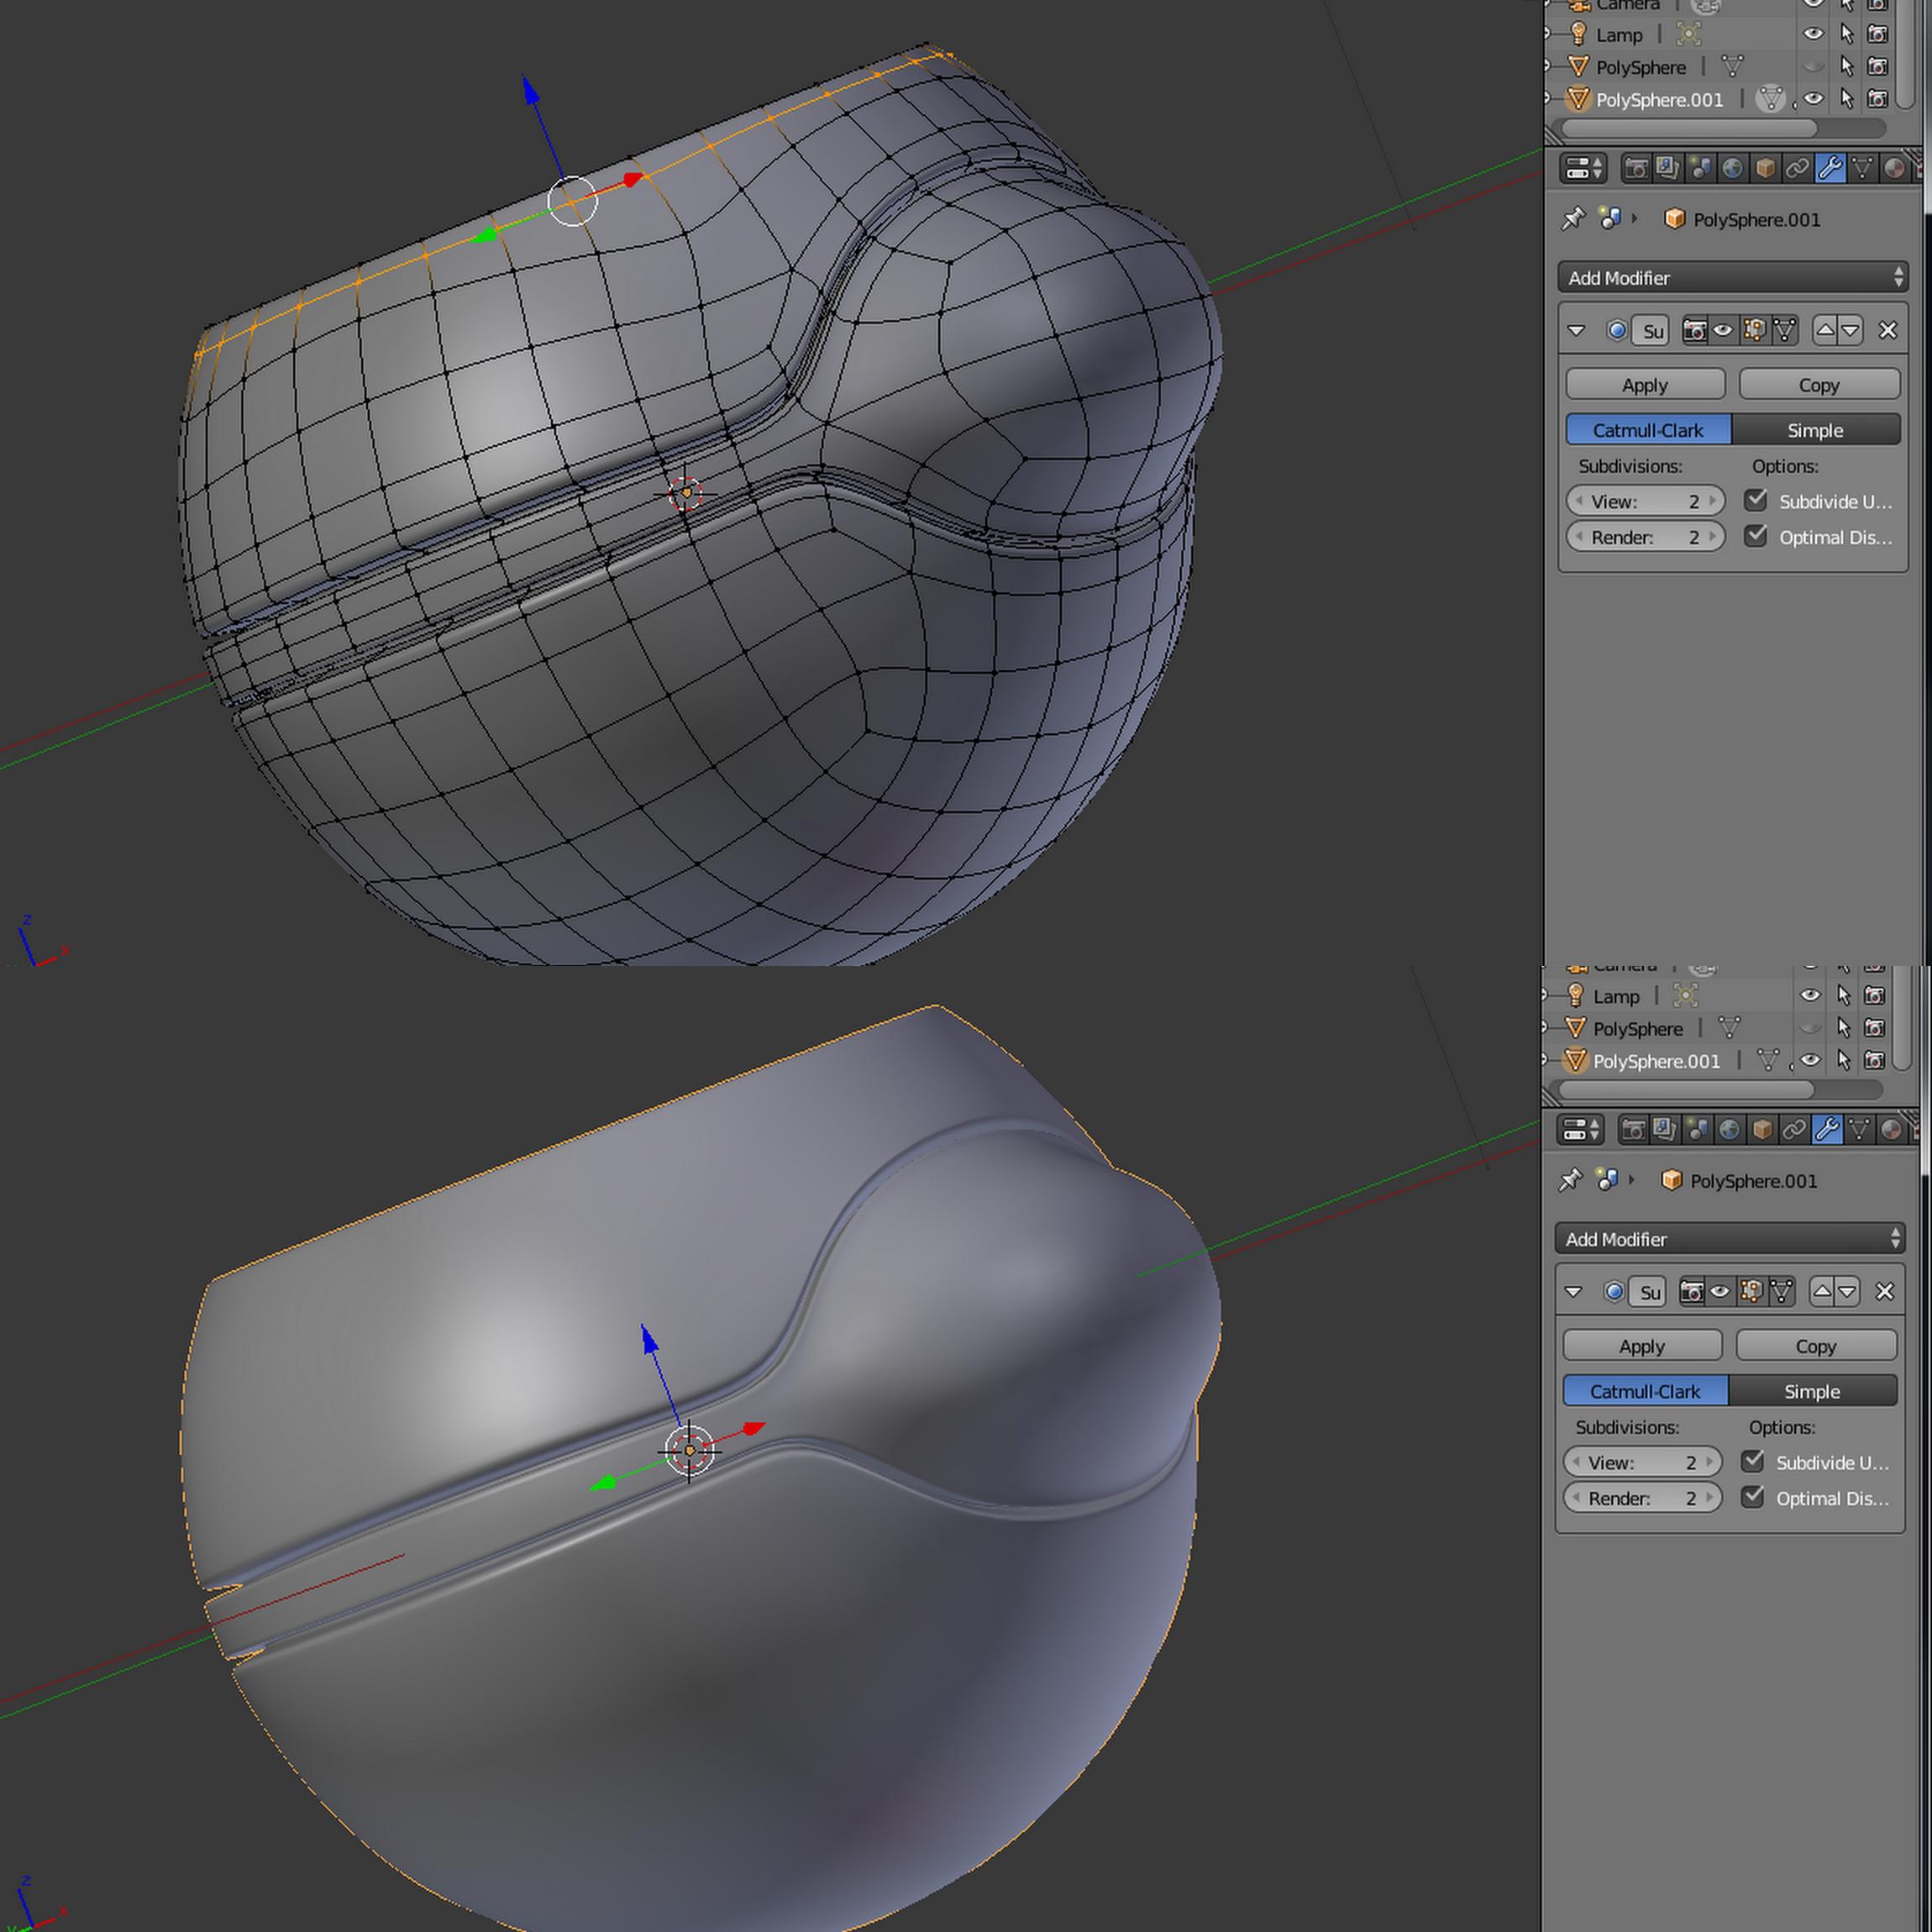
Like this ?
if it is because you have nice clean topology it’s easy,
just add a shrink wrap modifier on your pads object to the hull make sure it’s at the top of the stack (and turn on clipping on your mirror modifier) turn off sub surf, solidify, bevel etc. so you can see what you are doing.
add a little extra geometry just ctl r and add an extra loop cuts as above so you have enough point to make the curve keep them spaced in the middle the shrink wrap will stop you getting lines pulling it to the hull shape.
then turn on face snapping and simply drag the verts roughly into place around the cutout try and keep everything roughly evenly spaced.
install loop tools if you haven’t already in user preferences
select the rough curve you have made and use relax to smooth it out nicely, tweak and repeat a few times
Apply the shrink wrap, job done turn modifiers back on.
You could probably do a second fancy shrink wrap to the sphere using a vertex group to restrict it to the edge verts as well if you want to be precise but the best advice I got was this is not a CAD program, eyeballing is fine if it looks nice that’s good enough in most cases
If that doesn’t make sense I’ll do some screen shots later tonight. Hopefully have it correct shape now
Thx, I will try this.
Your screen shot show the result I was after.
Your second explaination had an interesting result, more good looking than what I am after. But I have other round thing to add, like screw for exemple, where I will probably face the same exact problem. So I wanted to know how to do it right.
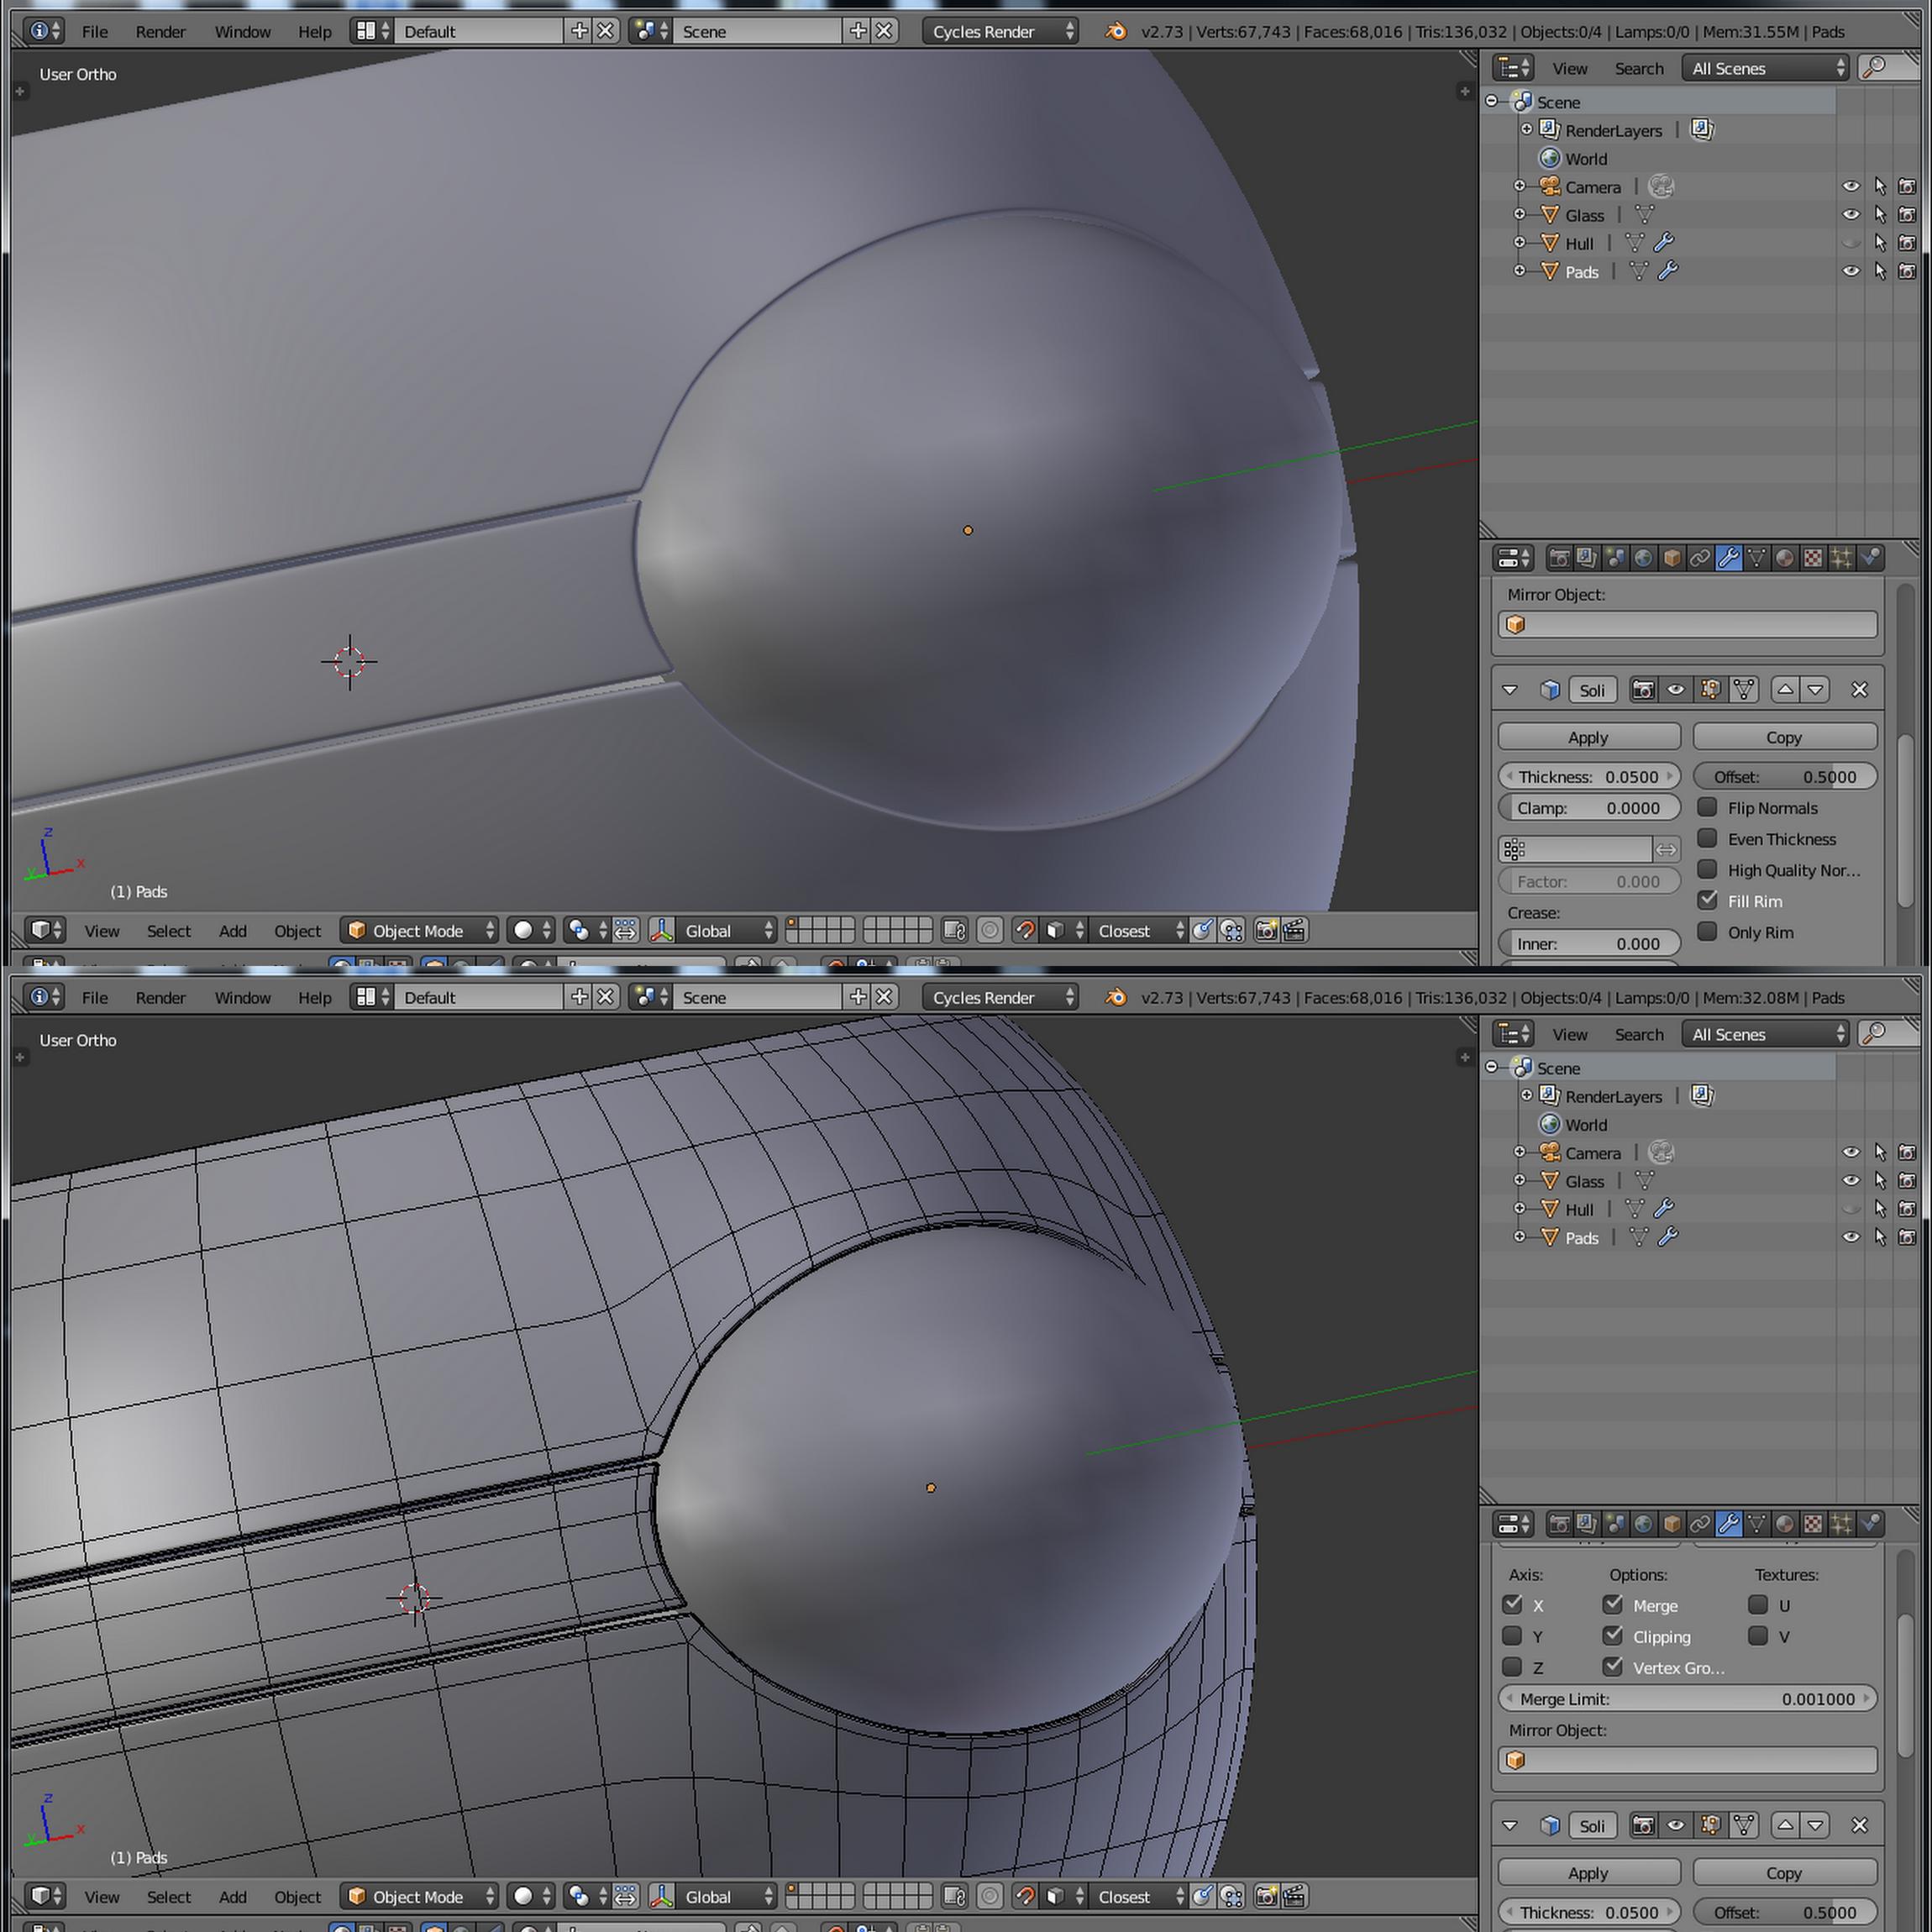
For putting round holes in it’s easier, I’ve done a few of those as well happy to have a look when you get to that point if it’s not obvious you can also use boolean and knife project as well but you have to plan it well and make sure you have the same amount of verts in the cutting object to the target to do it nicely and they you have to do a little tidy up as well but you can do it. Good luck!
edit just remembered I had this uploaded if it’s just a circle and you don’t want any cut in at an odd angle etc. you can do something like below with the shrink wrap trick from above, you might need to switch to using edge loops with the subsurf rather than bevelling if you get artefacts. If you want to cut in at a funny angle etc. then boolean / knife project can do it but I haven’t done pictures of that yet as no one asked the below is just inset then use loop tools to do the circle. you need to try and keep it quite tight to the circle to avoid getting glitches in the mesh depending how tight the curve is you are cutting into and if it matter.

Ok just finished to aply your advice it was tourougly explained. I had to strugle a little to find the relax buton, but not that much.
There is one thing you didnt say, it’s how and why you did the outlined edge loop close the the glass ( not sure if I m clear here again).
For the how I assume one additional edge loop slided to be close to the border and adding the 4 missing vertex to form the quad at the corner will do it, so I anderstand you didnt explain this.
But the why intrigue me. Right now, without it, the modell looks fine. I guess there is a reason behind this little extra work?
You probably don’t need it as you have used the bevel modifier, I tend to use edge loops to tighten the edges on curved surfaces as I find that bevel creates issues on more complex curved shapes so most likely added one without thinking by habit.
The bevel modifier will be effectively adding at least 2 tight edges anyway if you test and apply it and then look in edit mode you will see so it’s sort of doing the same thing except you can end up with triangles and funny geometry in the corners that can cause issues especially on curved shapes like this.
It’s just picking the correct solution for the geometry, I think in this case there is not much in it. Also I had simplify display turned on and show sub surf in edit mode so it will have been stretched visually because of the sub surf and look tighter than I had it.
Essentially if you have kept it all quads and done it with less vert’s than I did and it looks how you want it all good ![]() if you start noticing glitches etc. and you don’t think they will be hidden when you add materials then perhaps think about reworking it to use edge loops. Try turning on a shiny matt cap and see how it looks on the corners but I try not to get overly obsessed unless it’s going to be a really close shot.
if you start noticing glitches etc. and you don’t think they will be hidden when you add materials then perhaps think about reworking it to use edge loops. Try turning on a shiny matt cap and see how it looks on the corners but I try not to get overly obsessed unless it’s going to be a really close shot.