How would I go about creating a karaoke text effect in Blender? What I mean is white text that changes color as the lyrics are sung. I’m sure it can be done with materials & transparency but I can’t figure it out.
Thanks!
There’s a lot of ways, probably the best way to do it is with compositing.
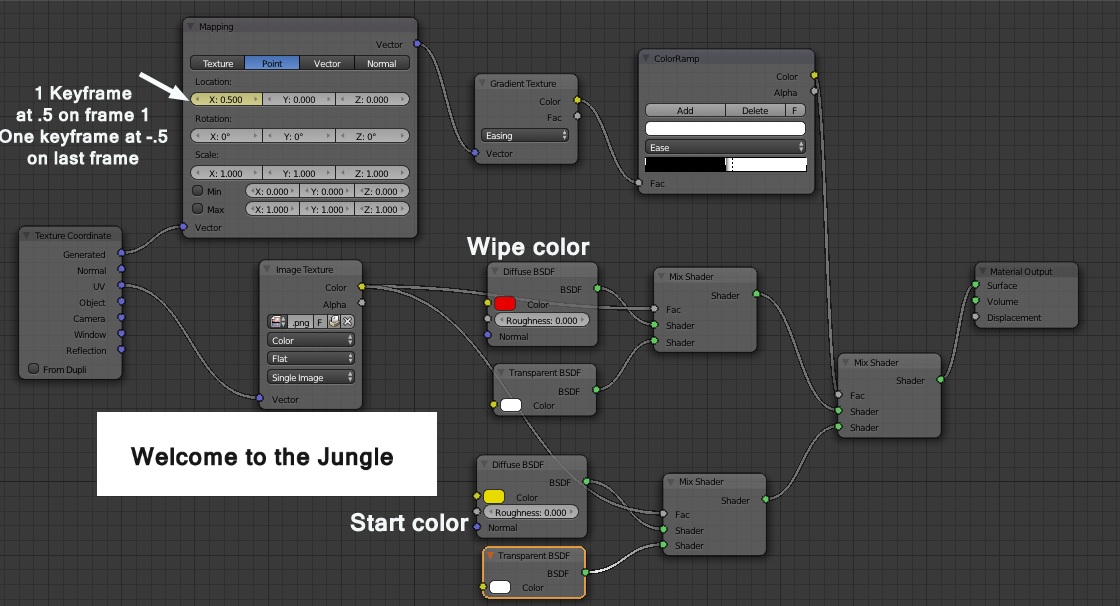
This is a quick way to do it with cycles without compositing, with one plane, one material and one image. It uses a greyscale image of the text, which is used as a mask to create two materials (before and after the wipe, in this case yellow and red) In the example it is just a diffuse shader but the node setups can be as fancy as you like. There is a procedural mask created half black/half white which is keyframed on x, moving left to right. You keyframe the mapping node by right clicking on the x location. That mask then mixes your two setups. Node screenshot explained below video.
This is a test animation of the effect, I’ll post the blend if you want to look at it.
Doh! One image for each line of the lyrics… As if the animation of the rest wasn’t tedious enough!
BlenderAllDay’s post led me to look closely at those Generated Coordinates which I never use. Quite handy for a text object… :eyebrowlift: Yep! That’s what I did: One single text object for all the lyrics… and the whole karaoke display. The result of my first attempt on a black background:
(Watch in 720p!)
You’re supposed to render transparent images to overlay the original video. And it’s really quick because I use Emission shaders which allow to use very low settings for a perfect noiseless result.
I synchronized the lines with the “lyrics” but I didn’t do the fine “lipsync” to synchronize the “Karaoke cursor” with the words. (I’m usually really lazy at 4 AM with a massive headache…)
Everything is customizable, from the various materials to the style of the scrolling. You can have a simple stepped scrolling to give the impression that the lines appear one by one, for example.
The blend file is here: Forum Karaoke.blend (1.2 MB) (including the “lyrics” in OGG)
That is really nice kaluura, for real karaoke text it’s definitely a lot better. Just out of spite I hope the OP comes back and says, “well what I really want to do is change my wolverine from gold to blue…”
Well, it doesn’t matter what the OP does with my blend file, it was fun to do. It might be useful for other people so, once documented, I’ll put the whole thing on BlendSwap.
Well what I really want to do is change my wolverine from blue to gold…
Thanks blenderallday for going the extra mile and posting the .blend file and the detailed post. By the time I saw your response I was already neck deep in a ridiculous workaround involving transparent planes, text converted to meshes, and boolean difference modifiers, so I finished the project that way to meet a deadline rather than start over.
And thanks Kaluura for taking it to the next level. Next time I will definitely use Cycles. So much easier and straightforward. I’m not familiar with it at all, but it’s obviously time to learn.
I’m digging out an old subject, sorry.
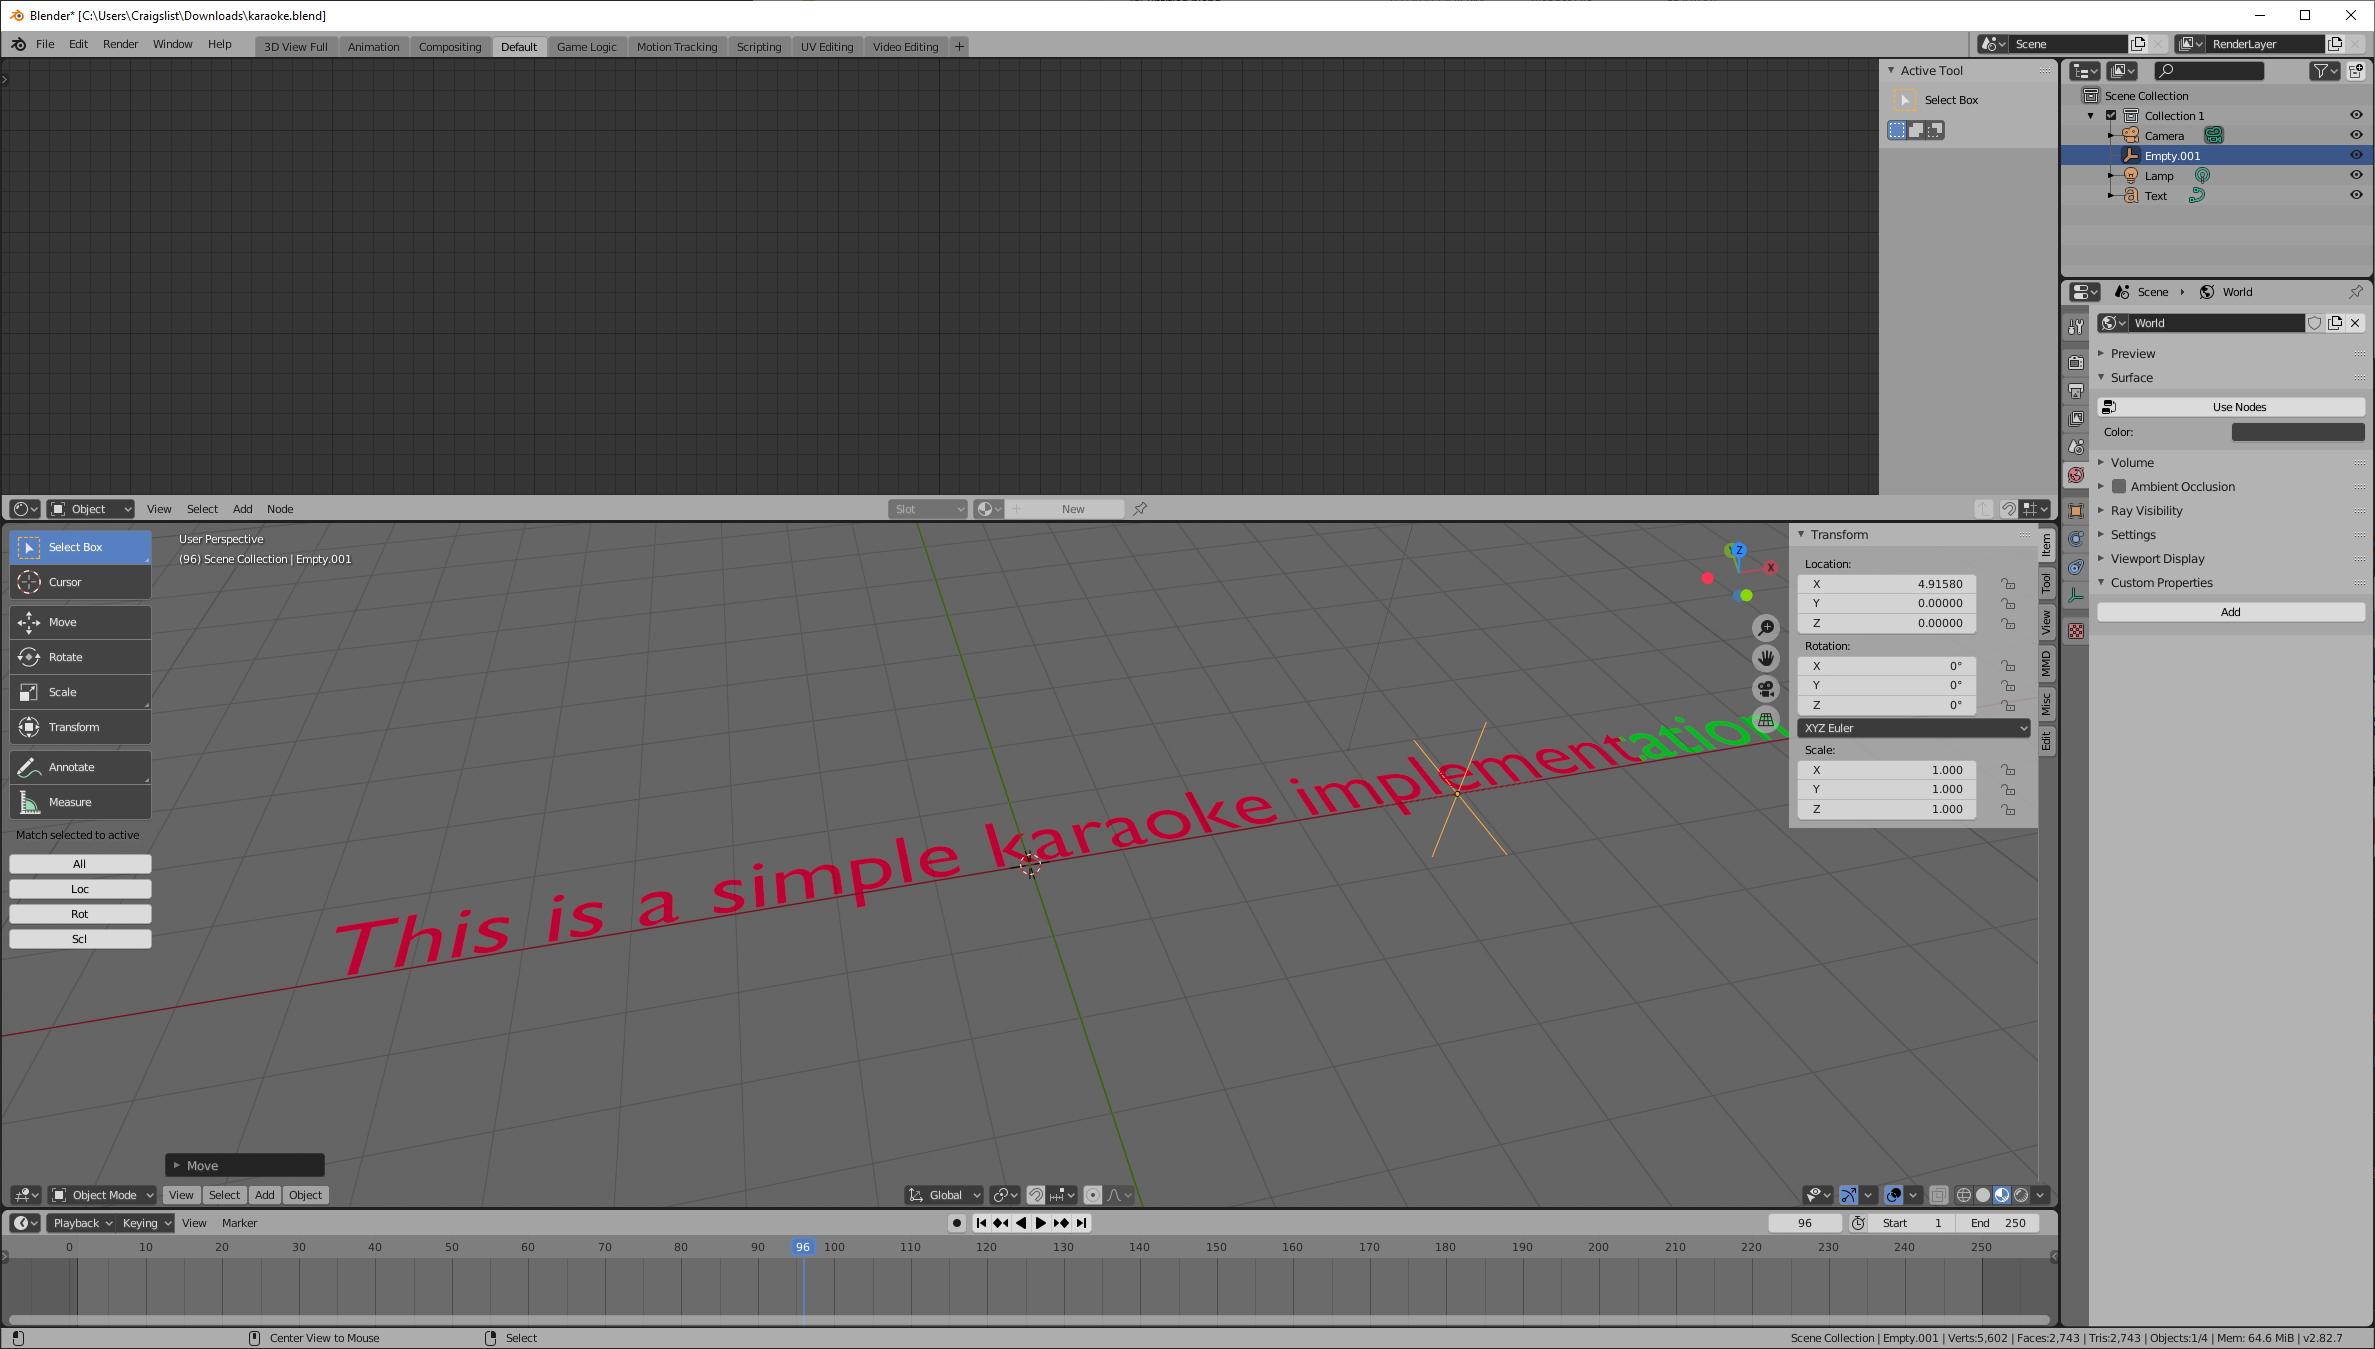
Your solution seems perfect for my needs but I can’t seem to get the end result to look right. I have Blender 2.79b and your file won’t work.
The coloured line is not the current one but the line at the very top of the screen. If I change the number of lines from 10 to 2, it looks a bit better (I have no clue why…).
The XOffset needs to go from -1 to 2 for the end result to look right.
I would appreciate some pointers on how to fix this.
Thanks.
I wouldn’t do this with compositing, not if you’re planning on rendering anyways, because compositing is slow, doesn’t show up in the preview, is unnecessary, and is less intuitive than doing it in the 3D viewport.
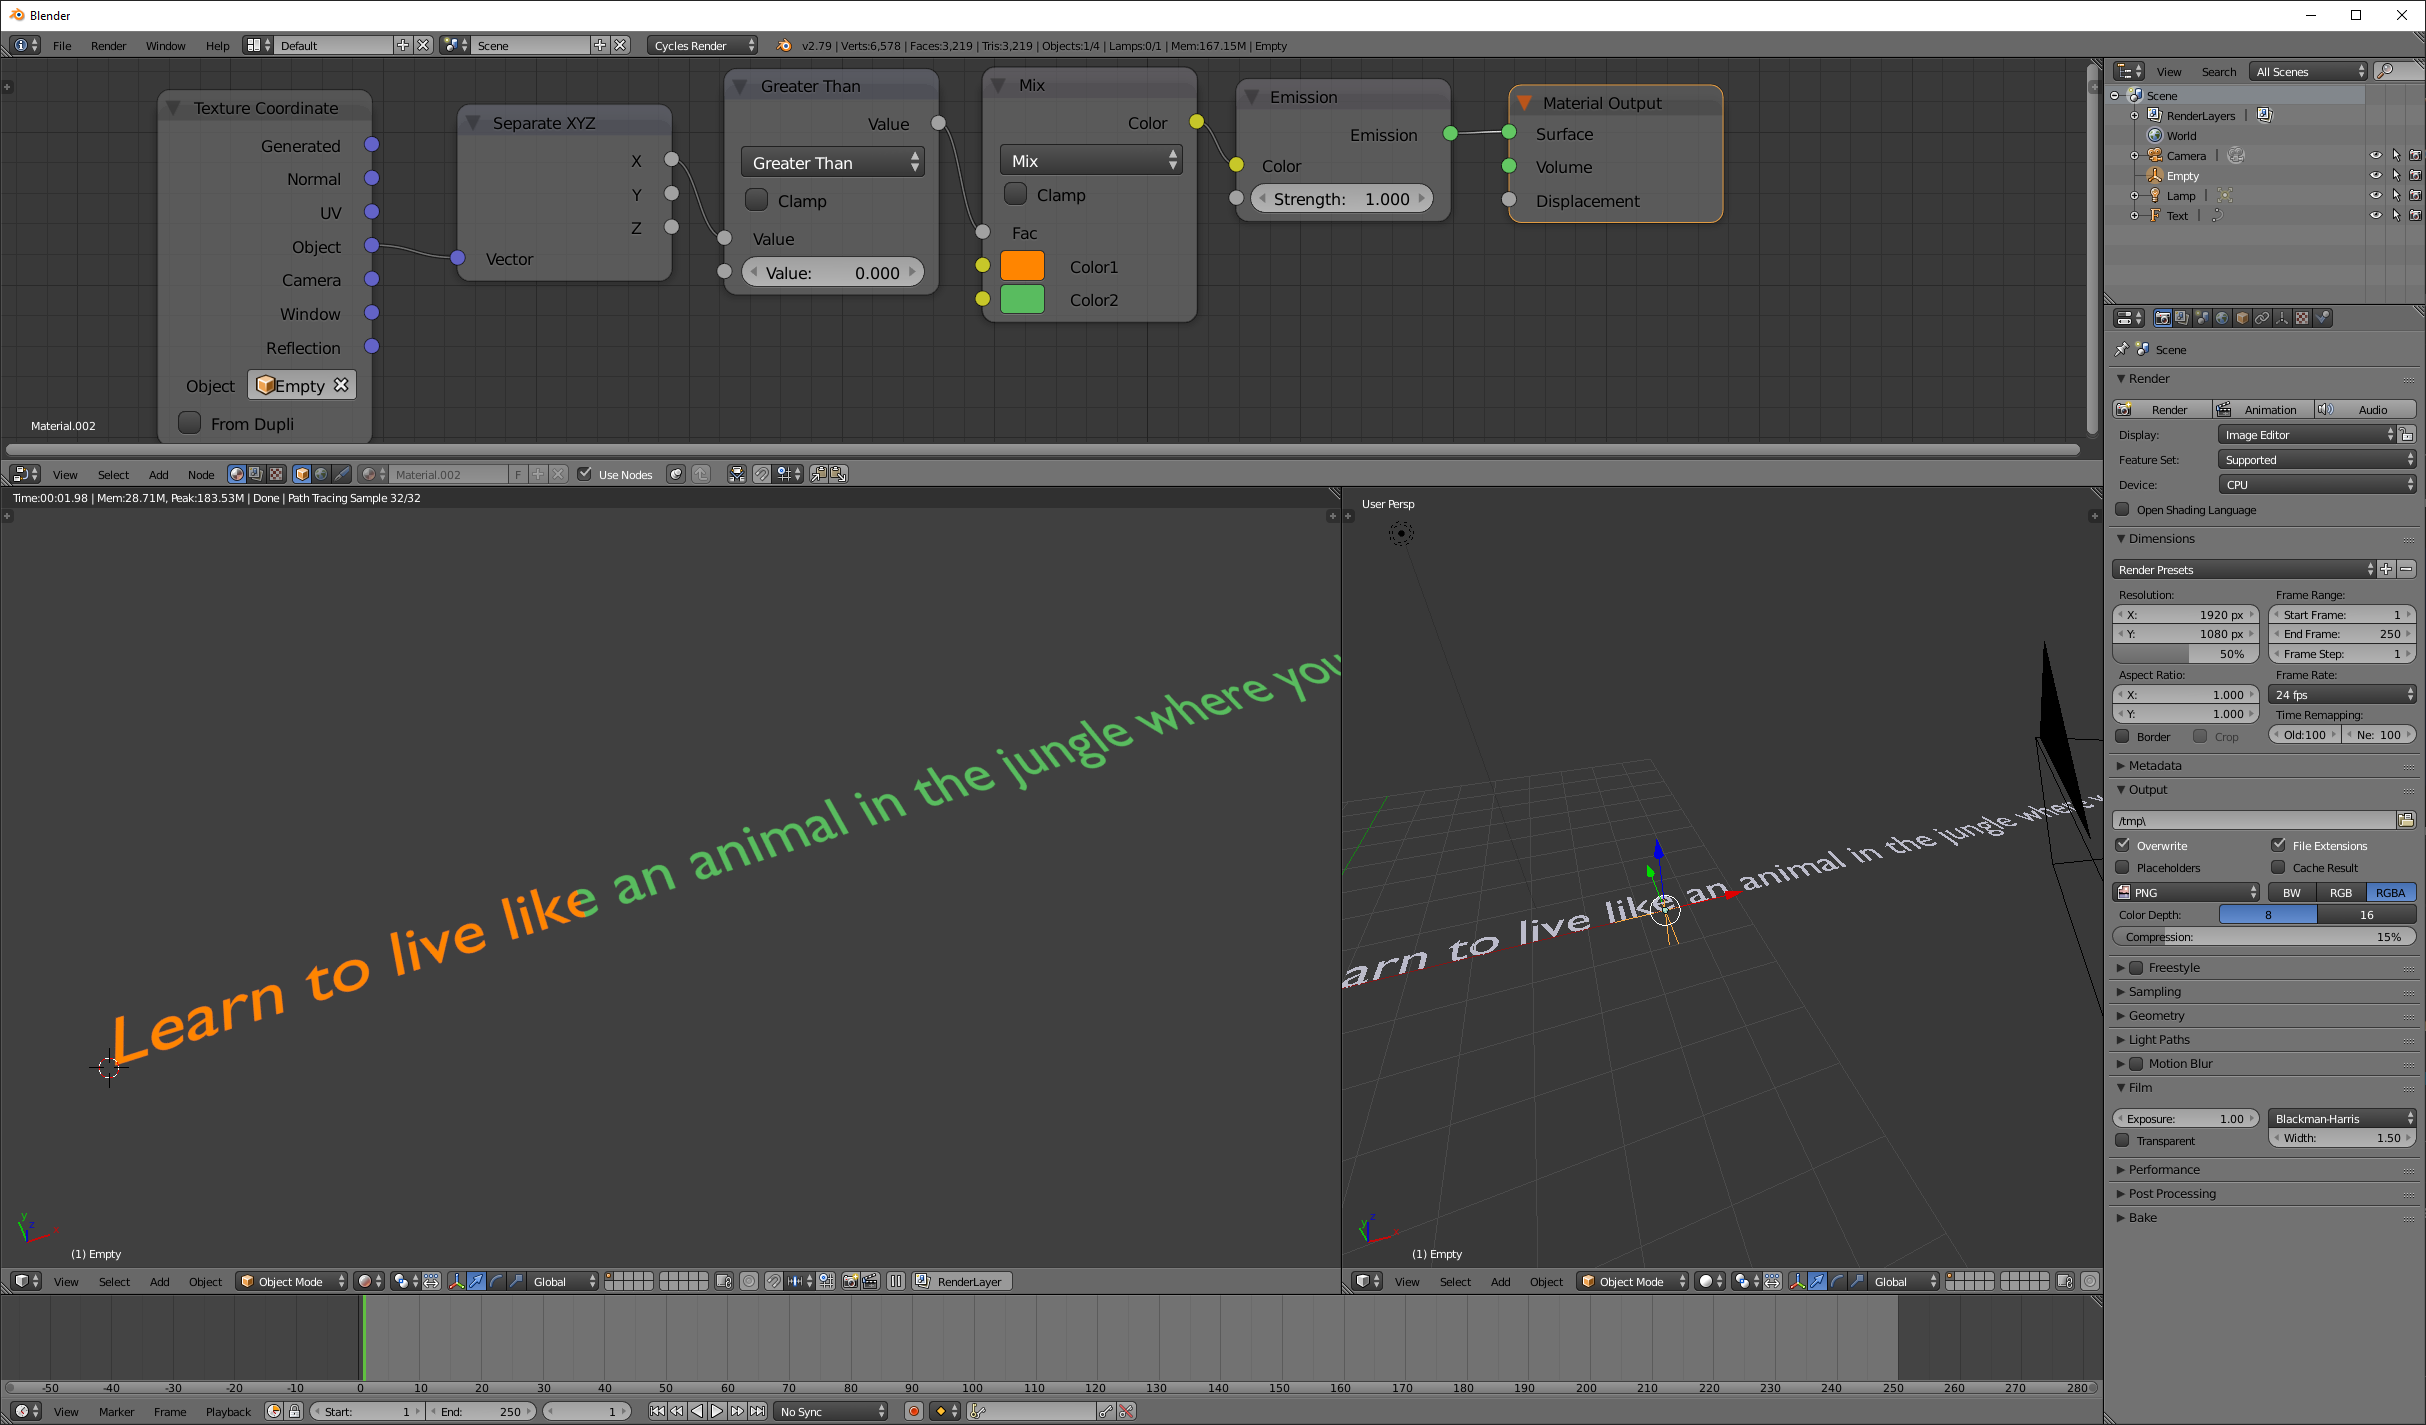
Instead, I would use texture coordinates from an empty to control the color position. In 2.79b:
Thanks for the help. I have managed to get the color effect of the lyrics, but I need to change the “Greater than” value in order to move the color along the text.
In other words, I have created an Empty, and used it in the “Texture Coordinate”, but when I move it along the x axis, the color will not change. What am I missing?


 That’s mean… I like it!