Was trying to adapt my previous workflow in 3ds max to Blender but i run into a little problem with the scale of image in displace modifier.
The goal is to use various displacement map i created of various rock surface and to quickly apply them on a rock shape to get realistic detail, with procedural there is a size option but with image i don’t see any tiling option like in 3ds max.
What i was doing in max was to put my image as a map in a material and link this map as an instance that i drop in the displace modifier field and then i only had to change the tiling size of the image in the mapping section to see the effect in the viewport as i tweak them.
In Blender i am still trying to figure out to emulate this workflow without success so far, i have tried going in edit mode and scaling the whole uv set but it doesn’t seem to do anything and it is not convenient since i don’t see it in the viewport while i scale it.
You need a Mapping node between the Texture Coordinates or UV Map node, which has your standard controls for moving, rotating, and scaling texture space.
(Shameless plug) Alternatively, you could use my UberMapping node, which has some additional settings for randomizing the tiles. It’s quite useful in spite of the fact that not many people seemed interested in it. haha
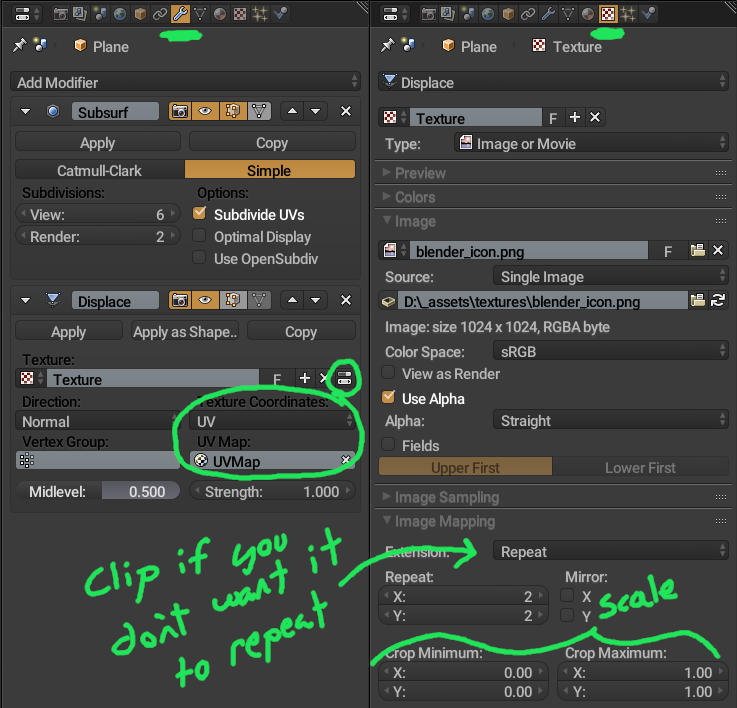
I know that it can be done with node but i am certain it can also be done without node since i saw many tutorials that show the mapping section in texture but in my case i don’t have any mapping section showing even with all tab expanded!
Are you using Blender Render? That image is the Mapping panel for Blender Render.
If you are using Cycles, then you can set it all up from within the material panel without ever looking at a node graph… but blender is still going to place the mapping node for you.
OOOH! My bad. I completely missed the word modifier in your title! haha
For some reason I had it in my head that you were talking about material displacment. My apologies friend. I’m over here thinking, “Why is this guy so adamant at not using nodes?!”
No problem and i have nothing against nodes since i use them in many other software.
I already saw this image mapping and i was not able to size it bigger only smaller but with the option clip that you mention everything is fine now thank a bunch my friend!
OK i can now adjust the texture tiling coordinates but it doesn’t work for the displace modifier, so i think it is because there is no instance dependency so is there any ways i could make the texture an instance so it could work in the displace modifier?