I am modeling a chair now. the box is the seat area. I want to make the center of the seat sink down a bit. I am not sure what is the easiest way to do this so I use my long method as below:
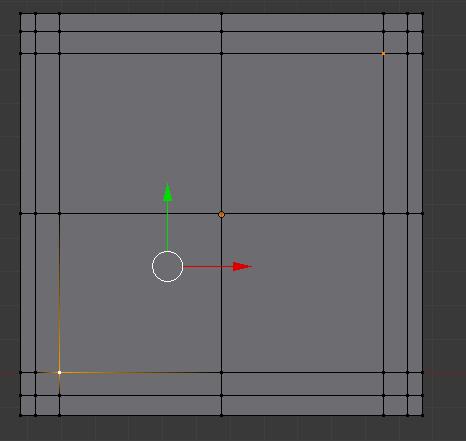
a) Cut a few vertices not straight line but slanted 45 degree.
b) Use PEF and G to move the center vertice lower.
My problem :
a) I only know how to use loop cut to create straight edge. I am not sure how to create a slanted edge (refer to the 1st image) - I wish to cut an edge through the 3 selected vertices but how?
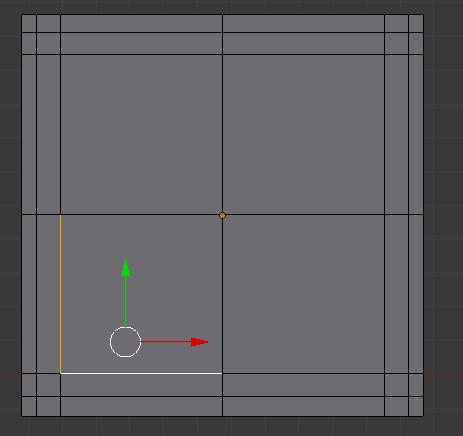
b) How can I create an edge that links 2 edges (refer to the 2nd image) - I want to cut at a vertice at the center of both edges but how ?
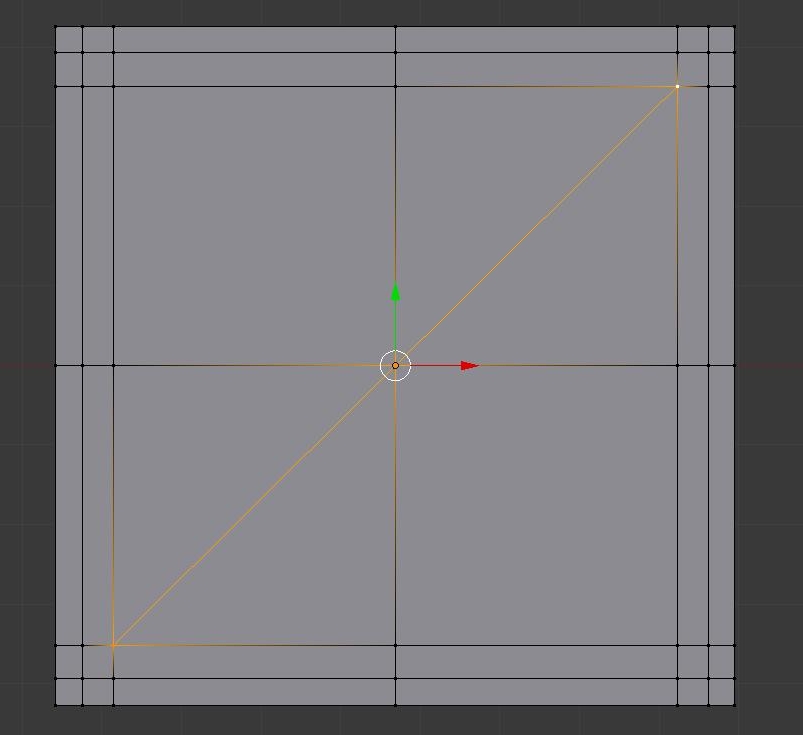
Ok, for the first one, select first two vetices, press F, than other two and press F again.
But when i try to select all three, it actually creates a face, so i did it separately.
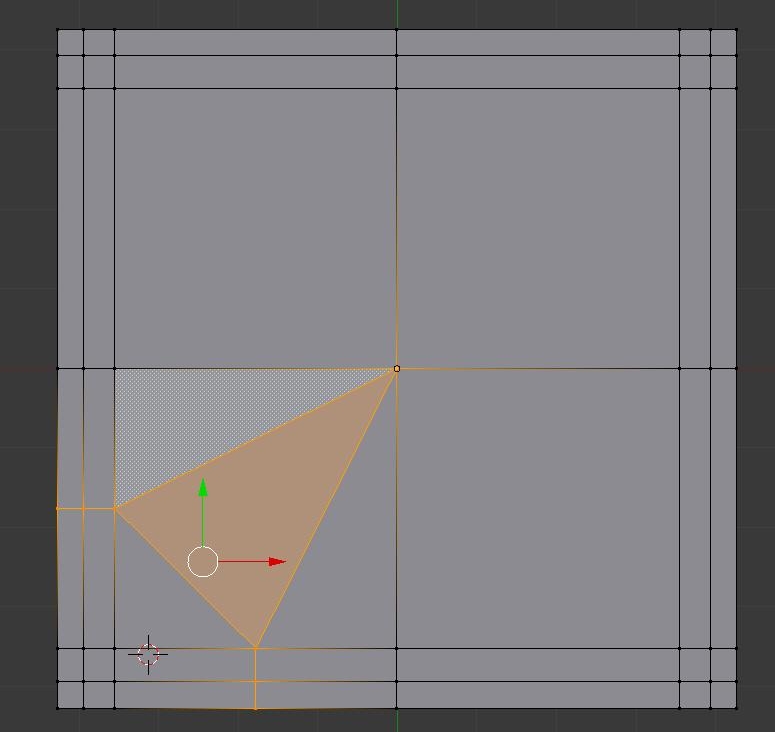
And for the second problem all i get is this, i removed bigger face, with loop (ctrl-r)
make two additional loops, and connect all that with faces like in an image below.
Blender support ploygons with four and three vertices, so i had to go this way…
I hope that this helps.
I’m a beginner myself, however if you do not know what Subdivide and Extrude do, do check them out.
Extrude automatically duplicates vertices, used to expand a part of the model.
Subdivide makes the same model consist of more faces (useful when you want more detail in specific areas)
A great and quick way to learn those is the Noob-To-Pro tutorials:
To practice Subdivide, go down to “Quickie model”
To practice Extrude, go down to “Extruding a simple person”.
But it’s best to leave the chair alone, do as many tutorials as you can, and then come back to it. This tutorial is fantastic.
In the simple tutorials above there is also a mention in the Subsurf modifier, in case you want the chair to move in smoothly.
Thanks Andarion. It works. But just another question. Why is the 45degree edge doesn’t split the square face into half ? Do you know how can this be done?
HI dtrip. I have been trying to use sub-divide but face some difficulty. It seems only can apply to to whole object but not certain face. Or else it will split very weirdly. Can anyone help to split on particular face only?
Thanks for sharing the webside. I will surely dig the webside and hopefully can master this blender soon.
The short answer is: Currently you can’t. Splitting a face that is surrounded by other faces will create triangles/edges cutting through surrounding faces. This is one of many things the VERY long overdue BMesh upgrade to Blender will fix (if it ever gets done).
The reason this doesn’t work is that you are adding faces by pressing F. In the future, when the knife tool fully comes back to Blender, you will be able to make cuts into the mesh where you want, thus splitting the square.
Select the Face, Ctrl T to make the Quad a Tri. Select new Edge. Ctrl E and choose Rotate Edge if you need to.
But to make the curve of the seat of the chair I would not use triangles. I would subdivide the seat evenly and use Proportional Edit to drag down the points with a fall off so the edge of the seat is flat and there is a smooth transition to the curve in the center.
Thanks Richard. I like Ctrl T. Initially my plan is to cut quad so that the seat looks abit rounded instead of square. but later find another way (bevel and smooth) as I have no idea how to cut quad. However this bevel and smooth is affecting my whole chair including the legs and handles. Will give your method a try.
I have one problem using the proportional editing. I want to strength to be as big as the top view. However I want the strength to be very minimum at the front view. This is so that me seat only lower down at the top view but maintain flat at the bottom view. My problem is how can I adjust the strength in this way?
Try this: Use proportional editing as you have shown which will modify both the top and bottom of the seat. Modify until the top of the seat is where you want it. Next turn off proportional editing, select only the vertices of the bottom of the seat and hit S > Z > 0 (zero). This will flatten all of the bottom verts to each other. Then G > Z and move those verts up to be level with the rest of the bottom of the seat.
Yeah Mike J has the right idea. Remember also that you can hide portions of an object to exclude them from the edit. Enter wireframe mode, vertex selection and then select and hide the bottom verts.
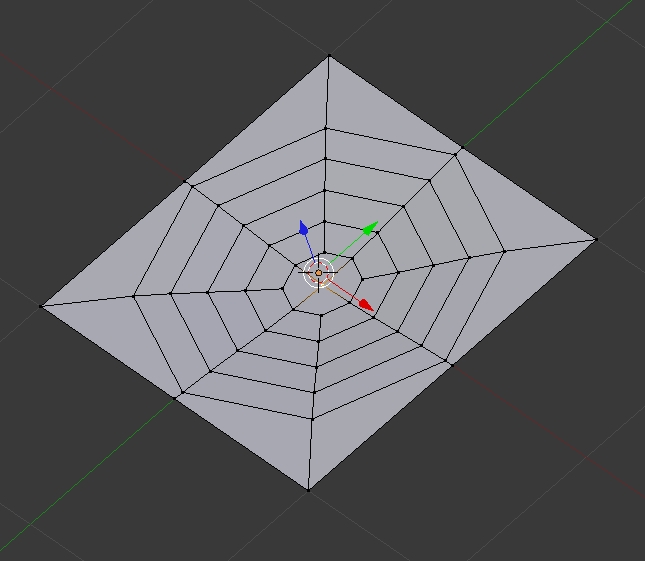
I was also thinking that an even better solution would be to create a series of concentric edge loops by creating a circle and extruding towards the center. Then connecting the center with a cross hatch pattern and merging he circle to a square on the outside. This might make a better pattern.
Yeah I forget about that too sometimes. But your other ideas were extremely valid and very crucial tools for modeling in Blender so that should not be overlooked in places where hiding may not be an option or even a part of the process.
 :
: