I was trained in 3DSMax3 and I’m now happily cruising along in Blender, but now I’ve got to a point where I’d be scratching my head even back in Max:
I’d like to create an effect of many strands of light and stylised glass (a bit more hard edged than fibre optics, but nowhere near as jagged as glass shards)
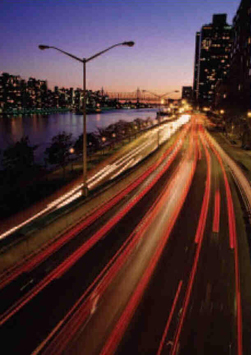
nb. I’m not actually trying to make time lapse headlights, they’re just very similar in structure to the look I’m going for.
I’d really prefer not to use any motion blur, unless I can make it very hard edegd (more like multiple overlayed frames) edged. (but I haven’t looked at any of Blenders options for motion blur effects, so feel free to push me in that direction if you think it’s the best way to go).
I’m also rendering in orthographic for this project, so I’d prefer a way to do this that worked with that, as I want to avoid having to composite in post production, but I guess I can’t have my cake and eat it too
circle emitters with Particles with very long lives and deflectors to bend the path of the particles
A path, with a circle that extrudes along it (to make the wire). Then make the material a glass, and place lights inside the tube. Search this forum for a neon effect post. Add a banding type of texture to make the gaps.
An animation where you move an emitter along a path, spewing out particles that stay in place (no motion) and decay in place over time.
Motion blur will only help in an animation from frame to frame. There is no such thing as phosphorescence in materials, and no exposure time in the camera settings (altho there is an Orthographic button which you’re looking for). Exposure time is how your reference pics got the light trails.
Hope these ideas help!
I have played with particles a bit, but I have no idea how to use deflectors. I’ll mess around with them today and see what I can accomplish. I did manage to get the vortex deflector working a bit, using a particle system made with Dupliverts, but I couldn’t get the particles to rotate at all - ie. they were all facing the same way.
This would be more uniform than I want - and they edges wouldn’t be hard enough, but I’ll definitely look up that glow effect.
(small rant on the joys of Blender)
One think I really like about Blender compared to Max is how the glow effect (when applied as a Halo), is actually sized relative to the blender world, not the viewport resolution. Using Max all the effect sizes were based on the resolution and scale of the render, so if you had an object that moved around, then you would need to animate the glow to make it a consistent size (relative to the object), and if the a large expanse of the object could be seen in the one frame, then you would need separate glow effects on different material channels.
Also, since the glow was applied as a lens effect in Max based on object or material channel, if the object became obscured, then it wouldn’t glow at all ie.if you did an animation of a moving object with a large glow, then it would almost appear to be blinking when it was obscured- very irritating, and no easy fix.
I’ve been playing around with this idea, and while I was modelling some of the particles, I found some buttons that I hadn’t clicked on before - spin, screw and spin dup. I think I might start by making a few strands by hand, then spin dup them a few times, then spin (extrude) them all . I can then try a NU (non-uniform) scale with fall off (in Max speak) to give the widening effect without using perspective.
yep, sorry I didn’t make it clear that the project is in Ortho mode already, - (some if it’s already done, I just need to add this effect). I’m making a still image, but I thought I might be able to use some animation to apply motion blur to an object (in 3DSMax, I could set motion blur to be on or off for each object and then specify how many frames to blur and what level of blur to use, so it stell makes an effective looking still image)
How about a path, convert to mesh then make it emit particles? This should give you a finer line since you only have a series of connected verts.
You don’t even have to use particles. Just apply a halo material to your single edgeloop mesh.
yes, if you turn blur on and render out like three frames, the second one should be very blurrrrrry, assuming things are really cooking along. And you could set your frame rate low, like 5 fps (Scene buttons) so that blender will move things alot between frames. I just did a lighted ball streaking along; blender jiggled the ball and rendered the ball like 8 times along the path. So, doing that, and then running the image through a soften composite node should give you what you want!
In Blender, motion blur is on or off for the whole scene, and has a blur factor. Check the wiki manual for info.
Also, halo’s are really cool. I think you have a good idea on the halo.
Seems to me that you could get what you’re looking for with a particle-emitting frame that’s dragged along a track toward the camera… the frame itself, of course, being invisible. The particles don’t need to move at all, just fade. Render a handful of frames (just of the effect you seek), and keep the last one. Or, you could keep several of them and composite them with one another, maybe slightly offset.
The frame need only include the effect; it can be composited into/onto the background.
