I was wondering, if there is a way to unwrap 3D model the way that it is actually possible to create real plush toy from the unwrapped islands. Well, I browsed here and there and there were lots of tips, however I don’t think they actually work well. People mostly recommended pepakura software, which is meant to create 3D paper models, but this is suitable only for very low poly models.
Well, Plushie doesn’t work on my comp and to create islands in Easy toy, one needs a Pattern image program, which seems to be impossible to get (I wrote email to developer - no response)
Hi, I’ve been unwrapping 3D objects in Blender for a couple of years now, making models for my mascot costume company (BAM! Mascots, fyi). I’ve made hundreds of objects.
First I model to scale, making sure that the separate panels are made from distinct strips of faces.
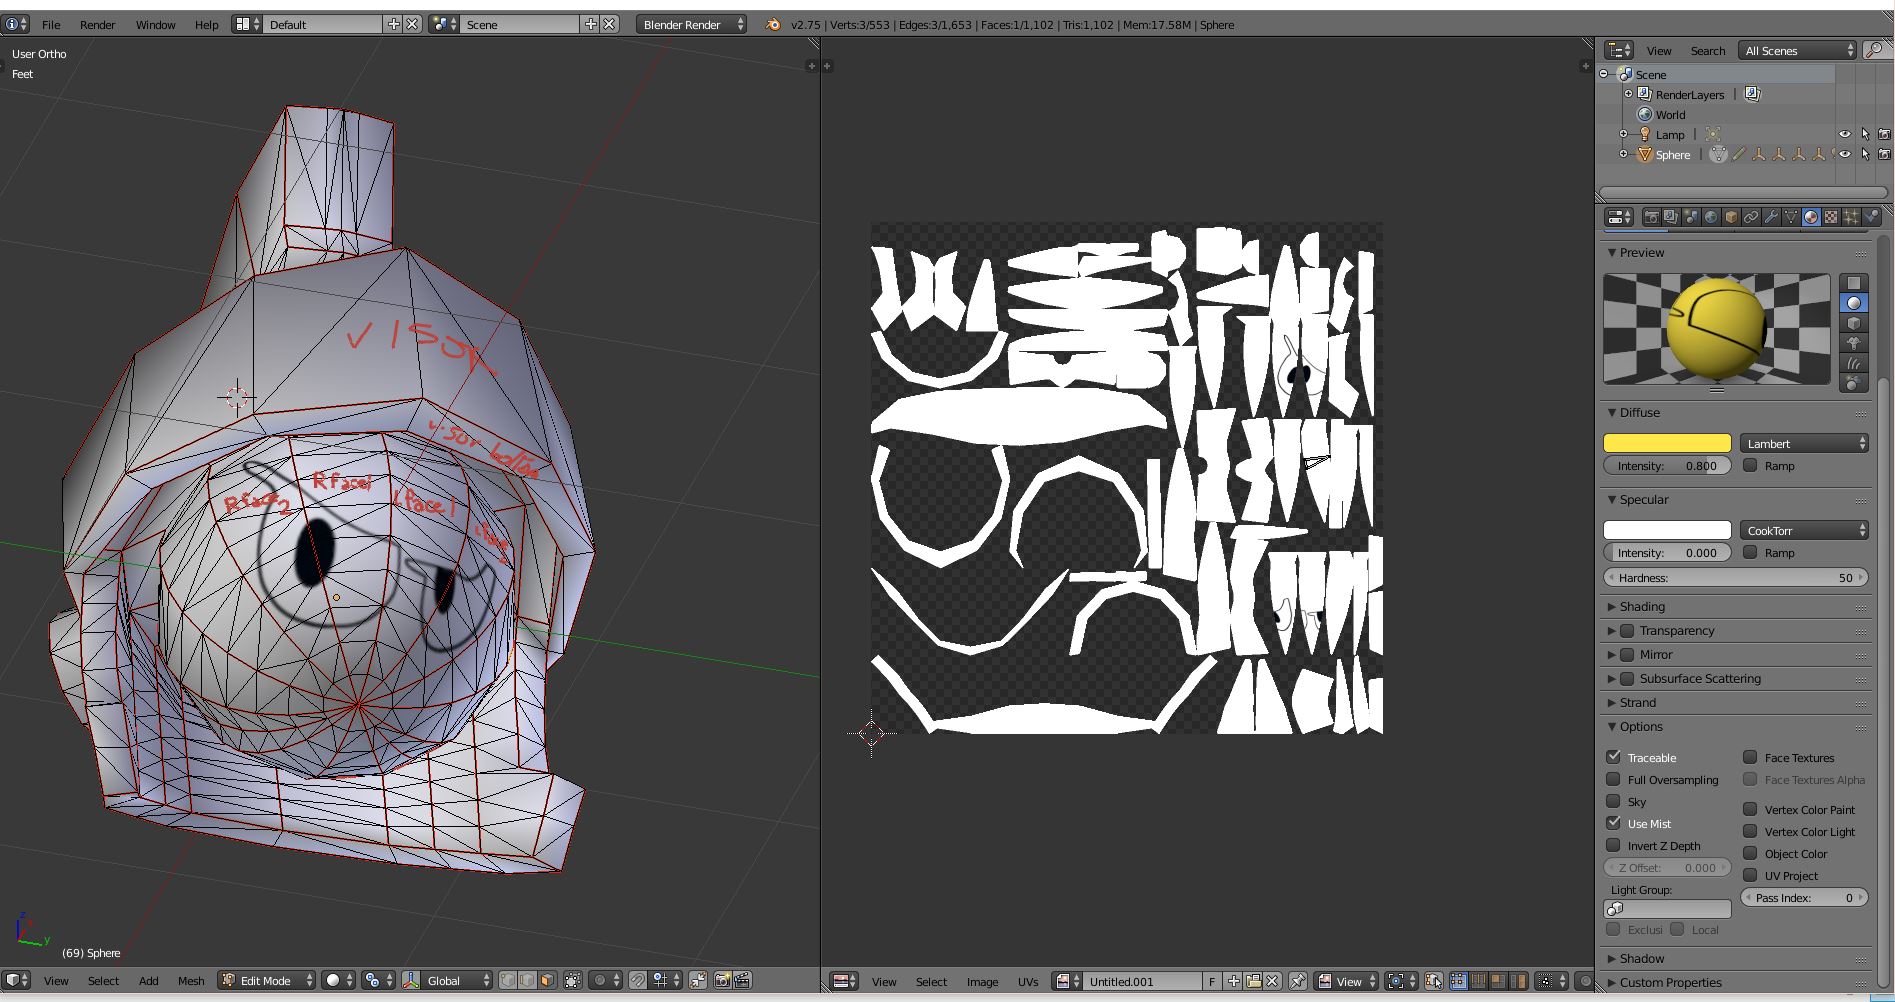
As long as each panel is made up of strips of SINGLE faces there will be no distortion when you unwrap. Mark your seams properly, unwrap and double check visually with the show Stretch box checked in the properties window (N key) of the UV/Image editor.
The next part is tricky. Pick one of the longest edges on your model and determine its length (show Edge Length in the properties window (N key again) of the 3D view). Export your UV layout as .eps and open in Illustrator (or Inkscape I guess). Scale everything up until the edge in question is the right length, and print. You can bake textures into the UV layout also. Works great. The Marvin head above was done in card stock. Don’t forget to add seam allowances for sewing.
I checked the BAM Mascot FB page and mascots really do look good. So what is actually the process to get it from unwrapped model to final stage? It seems like you make the paper model (at least it is what the model on picture you posted looks like) at first. And another question is - How do you recognize so many unwrapped islands when connecting them together in real world? They seem quite messy to me.
OK, well first in real life if we’re making an object out of foam (let’s say it’s 1" thick) then I put a 1" solidify modifier on the model (thickness 1" , offset 0") with a subsurf of 2 to simulate the thermal curvature of foam (we heat and bend our foam pieces). This best simulates the conditions under which our objects are usually made. Don’t worry about this business of foam objects though - making fabric objects is way easier in that you don’t have to worry about thicknesses or foam behaviours.
The Marvin cardboard model I showcased in my reply to you was just a prototype I had made to demonstrrate to myself that the Blender unfolding process was workable.
As far as matching edge to edge is concerned, I’m afraid that’s where the drudgery work comes in. If it’s a complex model, you have to highlight an edge in Blender, switch over to Illustrator (or Inkscape), find the same edge, and label it. That’s the downside of Blender in this application.
Sorry for lots of questions, but few other come to my mind, as you seem to have lots of experiences with this.
So, I see that your unwrapped model is actually quite low poly, but real mascot models don’t seem to by “edgy” at all. How this is achieved?
One more problem that comes to my mind is that while mascots are usually quite big, plush toys might be as small as let’s say 10 cm. Lots of islands would make it very hard to sew. I think that working with fabric allows little bit of distortion of unwrapped model. I am not sure how much would be acceptable, just in order to make little larger and fewer islands. Any idea how much distortion would be acceptable if any at all?
If you think of a giant sized plushy (say 4 feet tall) that’s made from foam that’s at least 1" thick rather than very thin fabric, you get an idea of how I use it.
Here’s a typical shape. It’s very low poly (only 8 segments) but the 1" foam panels from which it is made are heated and bent into their curved shape. Then the panels are glued together edge to edge. If you made this object with fabric, sewed it together and stuffed it, it would curve into the teardrop shape.
The distortion question is a very good one. Unless using fabrics like vinyl, all fabrics will stretch and therefore not only will they allow for some ‘cheating’ on the patterns as you suggest, but they will distort in bad ways also once the project is sewn and stuffed. It’s going to become a matter of judgement on your part how much is acceptable. For my part, I want zero error so I model very low poly so that the UV layout will have zero distortion and I know exactly what I’m getting.
Software like Plushie or Easy Toy look like they get better results because the models are very high poly and so very well detailed, but when the UV islands are separated there is inevitable stretching. Many softwares (like Rhino) flatten the mesh and then indicate visually how much stretching is going on. If you model a high poly object in Blender and then flatten it into UV islands you will get the same effect (using Show Stretch checkbox in the properties panel of the UV editor). That might be a very good way to go for you, after you get good at estimating how much stretch is acceptable. I would just rather go with zero stretch even though the model is low poly and looks ugly, I know how the foam will behave.
Also I use a subsurf modifier on my low poly model to approximate how the object will look once it’s made - that might be your best option. Model the object in low poly actual size panels that will be easy to cut out and sew, and use the subsurf to better visualize the final product.
Ok, thanks a lot for advices. I will try some options and see how far I can go with stretching. My biggest problem now is, that I can’t sew. Iwanted to find someone skillful who can do it for me, but as it will be only trial-error at first, I will have to learn some tailoring
Hi, I’ve noticed this thread is quite old but I was wondering if you guys found out some way to do this. I tried to DL the software you mention here, I could DL a trial version of Easy toy and I think it’s a GREAT piece of software, but again, as you say, PatternImage is nowhere to be found, the guys at Livesforce are not answering my mails. I am an advanced maya user and I guess I could model the plush in maya and get its UVs and try to stitch them together but I m not sure how all this would turn out. Thanks for your help!
do you know where I could find the plushie software? the link gets me some info on it but not the software itself. Seems like it’s similar to Easy toy, and it seems worth trying. Thanks!
thanks for your reply RSEhlers but I tried to run that file yesterday (the .bat file) into it and nothing happened, just a flash of a ms-dos window and then nothing, not sure if I did something wrong but could not run the program.
Hmmm has to have Java 2.0 / which can be done but a pain…
The online version is just about the same as Plushie
I just found this one Opensource Seamly
I have not tried it yet!
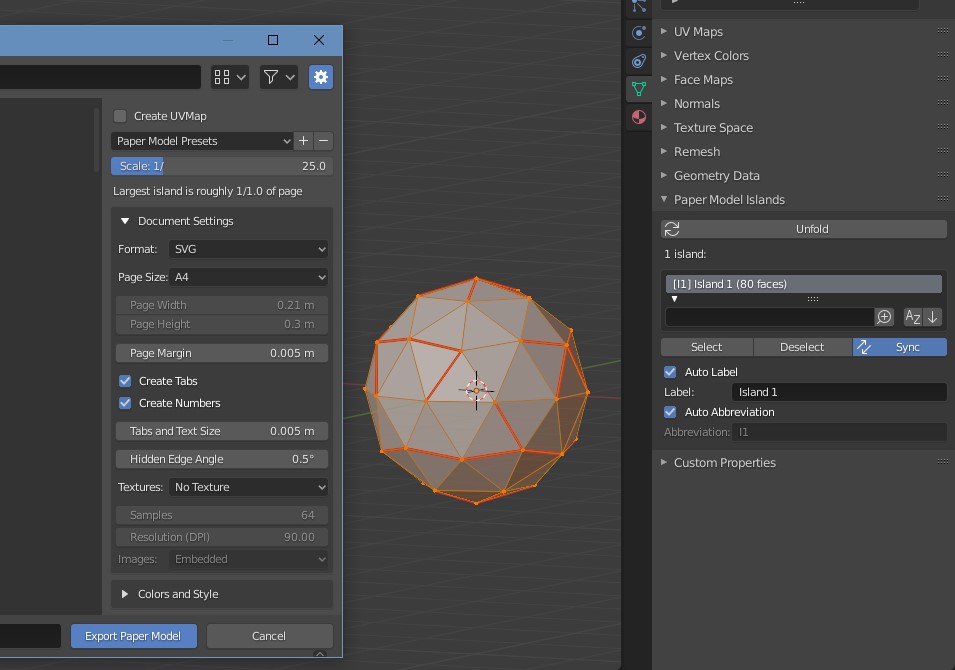
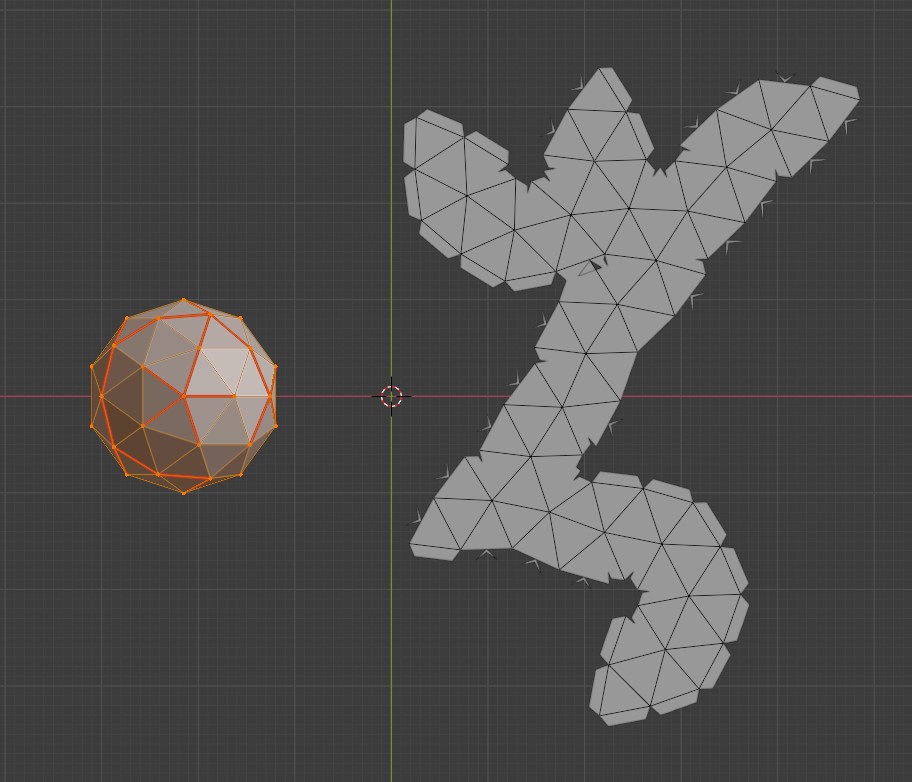
If these things fail then…I would advise you to install the Papermodel addon ( Free in addons) you really need to know how to unwrap and mark seams for it to work well but it will export to an SVG file that you can use as a pattern…
I can help you with learning how to get your first one on paper!
You can not imagine how grateful I am for all this info!
I will look into all this stuff and come back when I come up with something. Seamly looks like a very promising piece of software.
As for the papermodel addon, I may not be able to use it as I am using Maya as my modeling program, I know Blender is said to be intuitive and may be easy to get used to but it may also be investing some time I don’t reallly have.
Export out of Maya as FBX and you are good to go in Blender with the Paper-model addon! and the addon…is just a few items as you are making a pattern, and exporting…