Okay, first you need to add a material before you can add a texture, so go into the Properties editor > Materials context panel and select a color in the Diffuse sub-panel. That’s your material.
Now go into the Properties editor > Textures conext panel and select the New button to add a texture. When the next panel opens up, click on the Open button and select your texture file.
At this point, set the 3D viewer to Edit mode and select the faces on your object you want to texture. Once they’re selected, go into the Mesh menu and select UVunwrap > Unwrap.
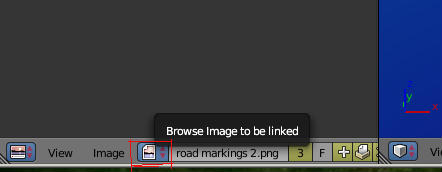
Now you can create a new window and change it to the UV editor. In the UV editor menu header, click on the little button to the left of the field box to select your texture file from the popup menu. Your texture should come up in teh UV editor with the mapping lines laid out over it.
If you can’t see your texture on your object at this point make sure you’re in Texture mode. You might have to switch it between Material mode and Texture mode (and possibly even Solid mode) before you’ll see it in the 3D viewer.
I am stuck in your first sentence… you say “Properties editor > Materials context panel”… where is the Materials context panel as I don’t see it in a new project after deleting the cube?
And how do I select a color in the Diffuse sub-panel? Where is the Diffuse sub-panel?
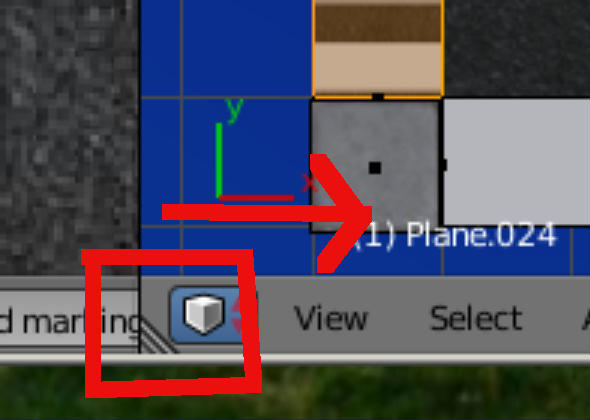
okay, at the corner edge of the menu bar for each window there’s three little diagonal lines. If you put the mouse over it you get a + cursor. When you do you can click and drag the window aside to create a new one. I’ll post an image…
I don’t understand when you say “In the UV editor menu header, click on the little button to the left of the field box to select your texture file from the popup menu. Your texture should come up in teh UV editor with the mapping lines laid out over it.”