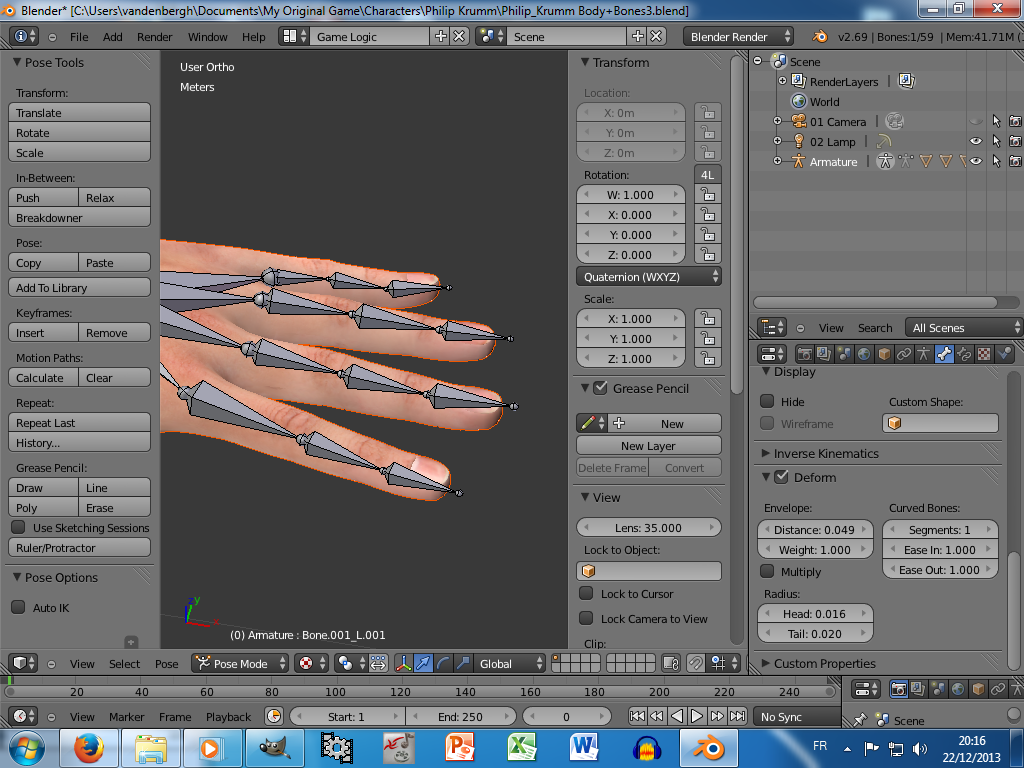
How could I solve this prob? I tried on my own, changing some figures but nothing changed…
Thanks a lot, this community already helps me for many things (with the good topics). (For example I thought I had to use bones for facial expression, but it’s better to use shape keys, I found this somewhere on the forum…)
PS : What I’m trying to do is an human (my dad) in 3D, wich is already done, but I never animated any 3D object, so it’ll be my first 3D animation, but it seems very intuitive with Blender, so I guess it won’t be too hard.
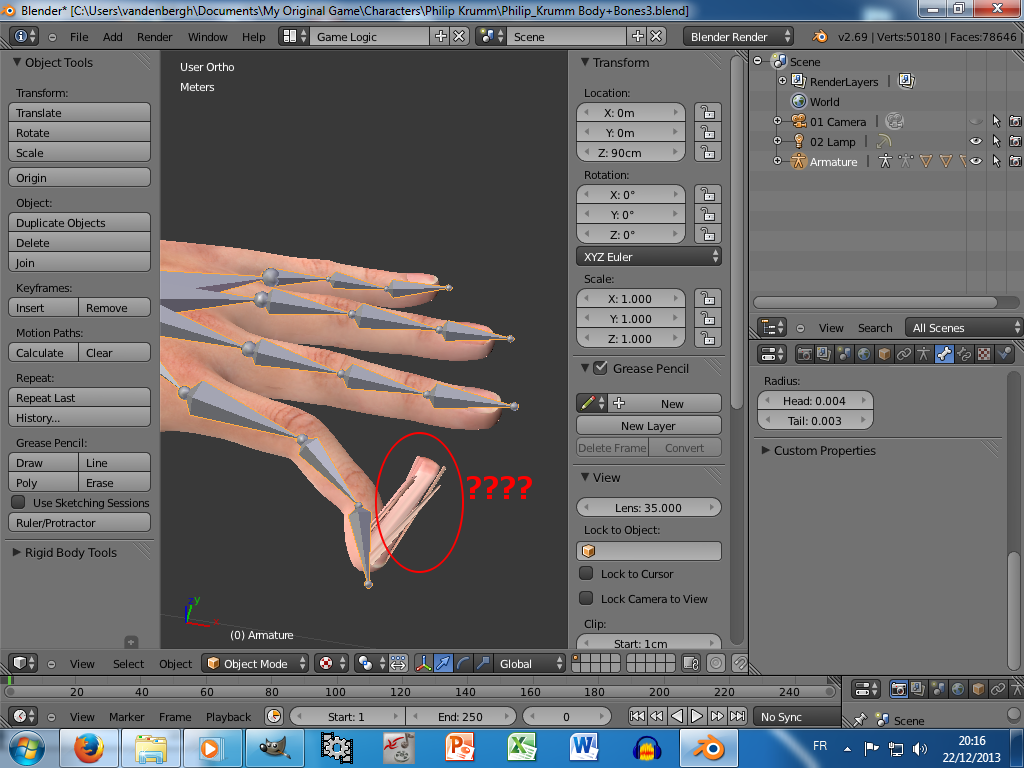
The vertices which are not moving with the bone, It looks like the vertices are not assigned to the finger bone vertex group.
You can check by selecting the finger bone in pose mode, then selecting the human mesh object, and switching the weight paint mode.
The vertices weighted to the bone will be displayed in red, the vertices not weighted to the bone will be displayed in blue.
To fix this, one way, select the human mesh vertices you want to assign to the bone, then go to Propertied Editor > Object Data > Vertex Groups, and assign the selected vertices to the correct vertex group, which should have the same name as the bone.
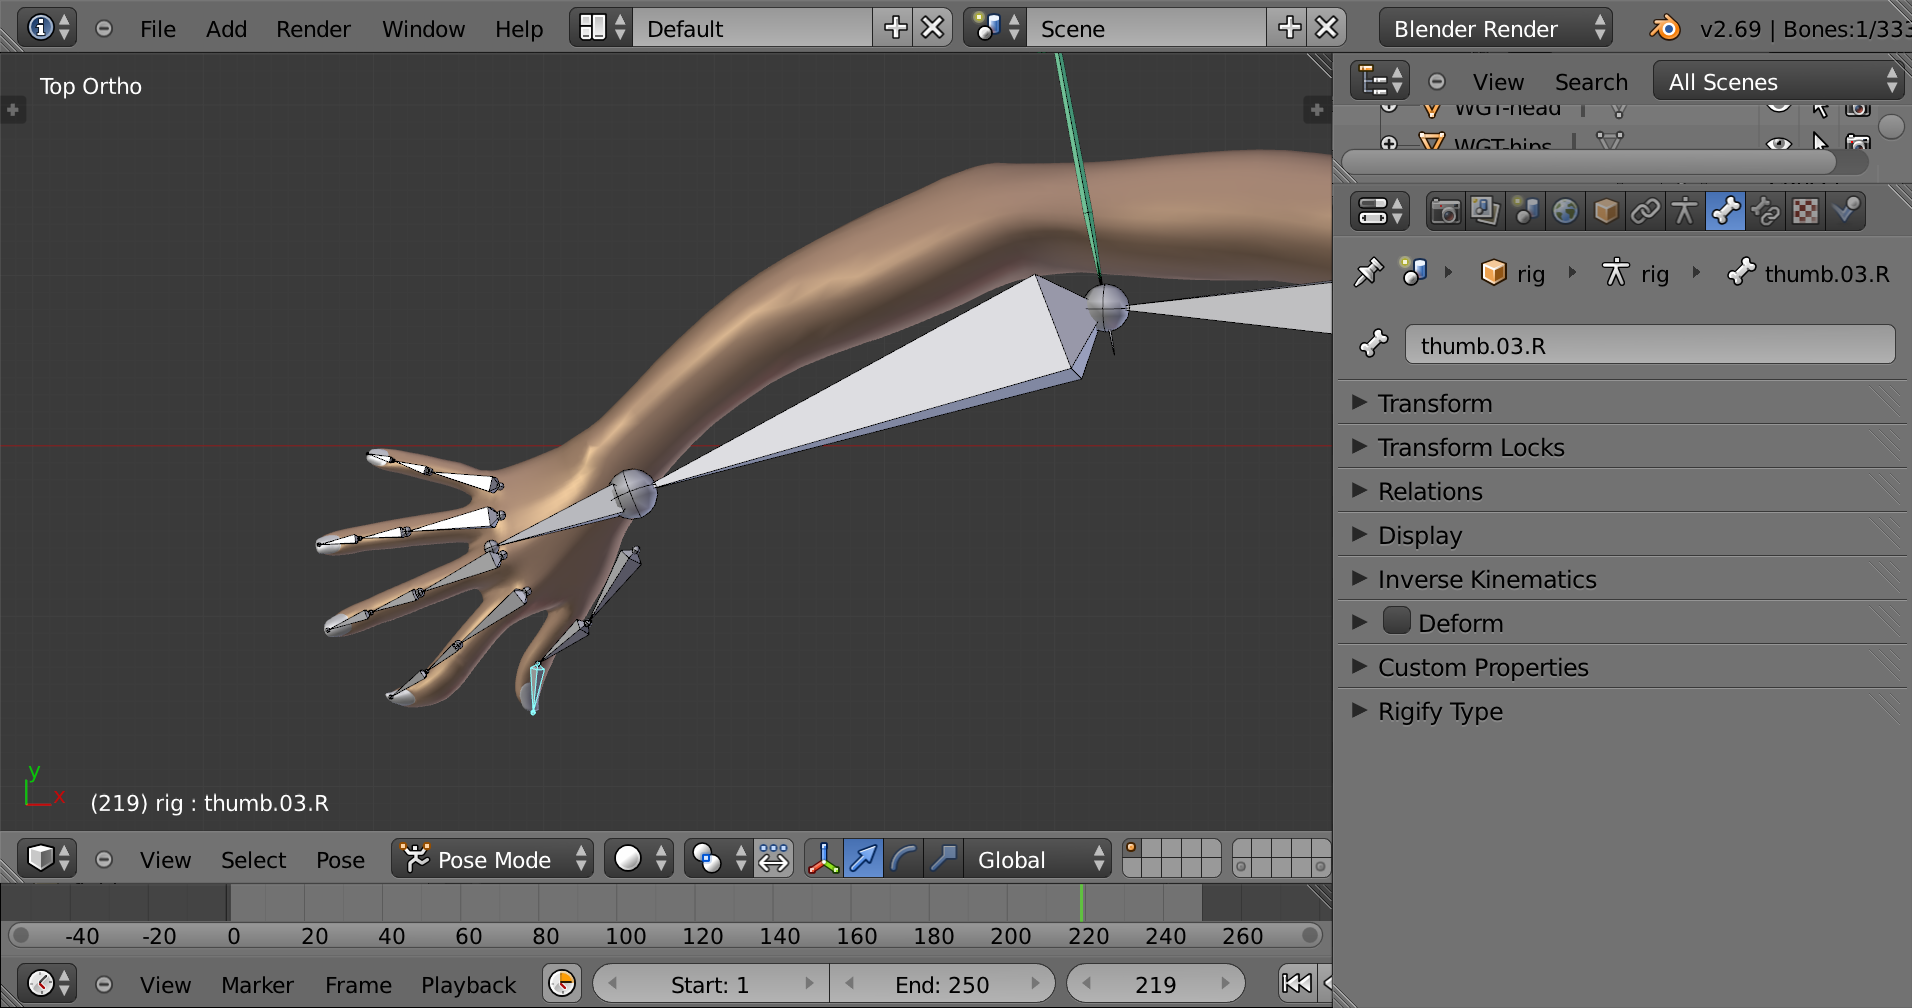
Here is a model with an armature, like yours (well, not really, the weights on this are seriously messed up.) You’ll notice the display panel is set to octahedral bones. You can change this to stick or wire to better see your mesh later in the process.
I select the armature, go into pose mode and rotate the last thumb bone. What a mess. The forearm, the back of the hand, the first finger, all of those things are deformed by this bone, and none of them should be.
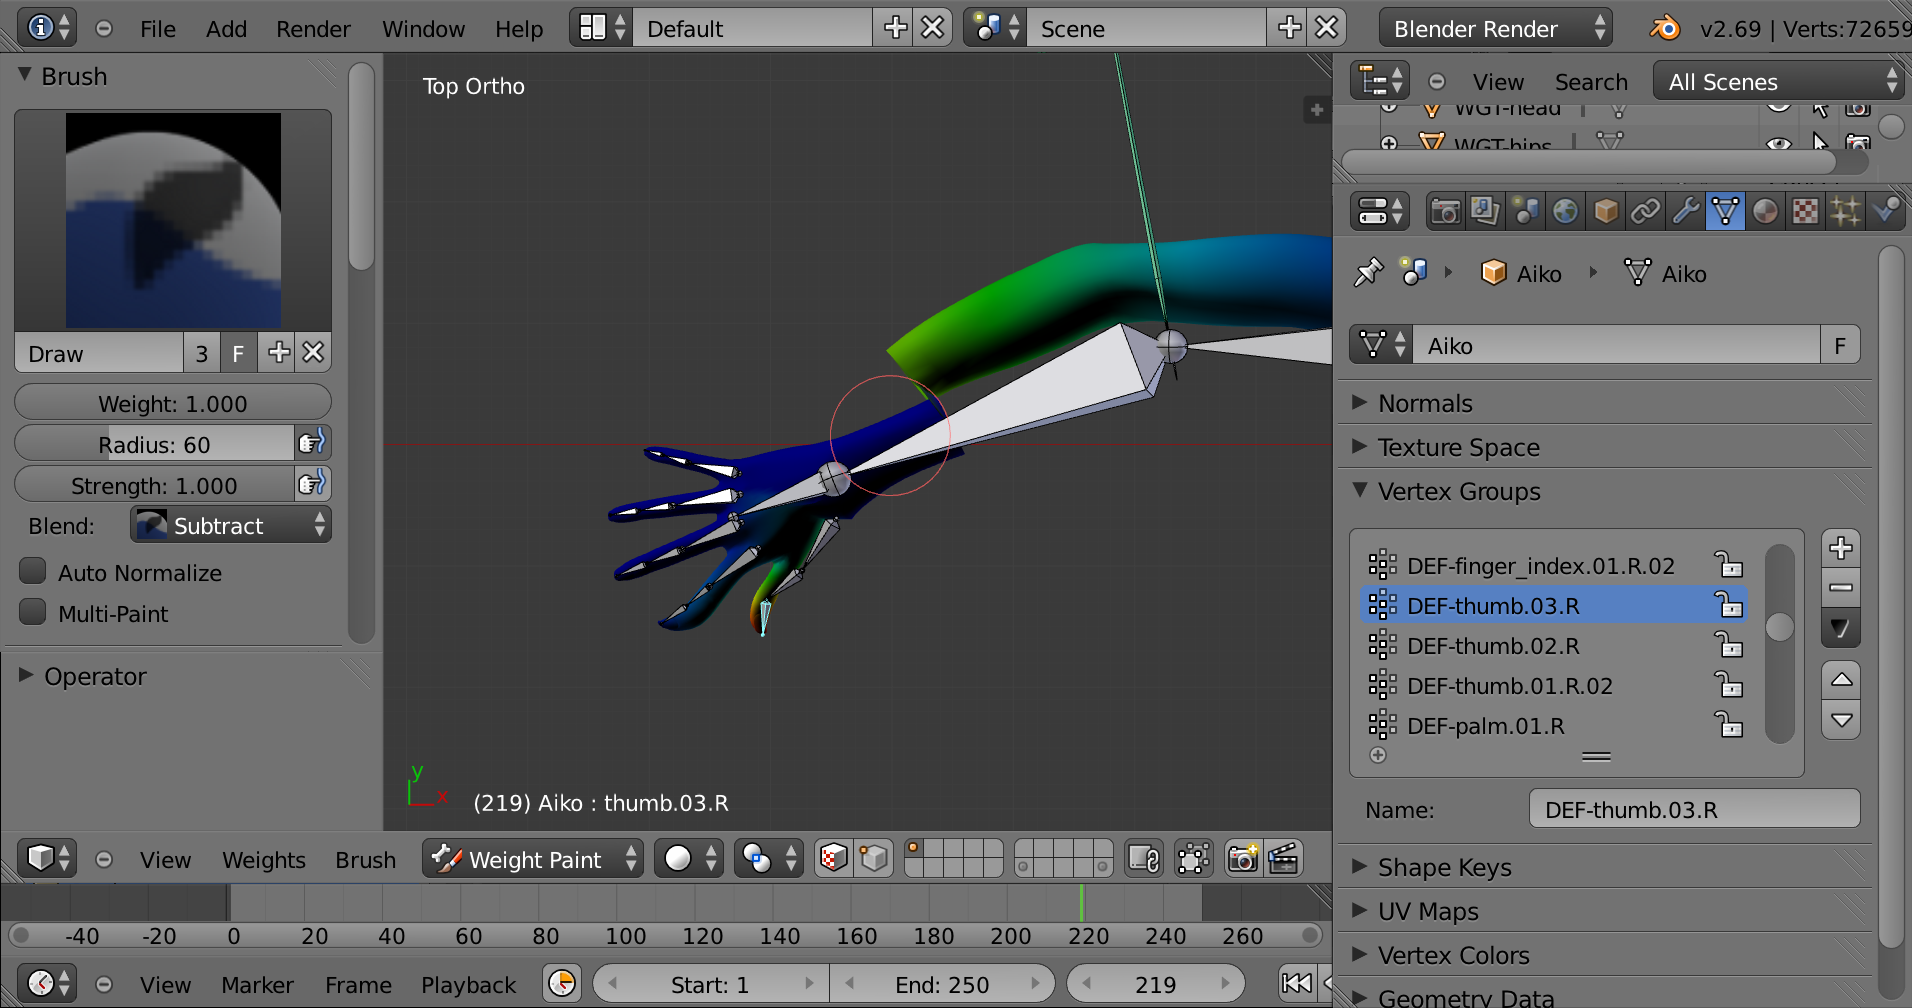
Leaving the armature posed, I select the character mesh and go to weight paint mode. The greens and light blues show where this bone is affecting things it shouldn’t. And the end of the thumb should be solid red, and it doesn’t look like it’s quite there.
I toggle on the weight paint tools panel (Hotkey “T”), and set the brush radius up to 60, the brush strength up to 1.000 and the Blend mode to Subtract, then I start painting out those nasty green and blue areas. Notice that the character mesh snaps to its unweighted position as I remove the weight from this bone.
I turn the hand over (Ctrl+Numpad 7 for bottom view) to make sure I paint out anything on the palm side of the hand as well. I sweep over the parts that are already dark blue, just in case.
You can zoom in to fix the weights around small bones like the fingers. Adjust the strength and radius as needed, as well as the Blend mode. In the case of your mesh, where the verts stay put when the bone moves, you need to ADD weight to make those verts red.
Once you have fixed the weights in this pose, it is always a good idea to go back into pose mode and rotate the same bone to the opposite extreme, just to make sure you don’t have any hidden problems that show up with different poses. Also, make sure you check the whole character for mis-weighted vertices. In the Vertex Groups panel, select the vertex group with the bone’s name, and, in weight paint mode, take a look at the whole character. Everything should be dark blue except the area around the bone.
Thank you very much! It works, the only annoying thing is there’s a lot of vertices and even if I select the vertices with CTRL+Left click, Blender doesn’t select every vertices of the area…
Anyway, I’ll try to select them all, and it will work ^^
Box Select is usually a good way to select vertices, in edit mode press B, then draw a box over the vertices you want to select.
Orinoco demonstrates Weight Painting, which is also useful, you can weight vertices to the selected pose bone by painting on them.