How would i best achieve engraved/inset text with quite a few vertex in a perfect sphere?
one way i think would work would be to make a sphere with many many polygons, how could i make it a denser mesh where the text is only without messing up the spherical nature of the area?
i got a fair bit of success with a very dense mesh. but i know its not the best way. i dont know much about retopo. could you point me in a direction for study?
Thanks guys for all your help, i new about retopo, and i had used the shrinkwrap, but after a bit more research im confident that between snapping to faces, shrinkwrap and some patience i can get this to work. before i was converting text into mesh and using shrinkwrap but the results could not work unless i had a stupidly dense mesh.
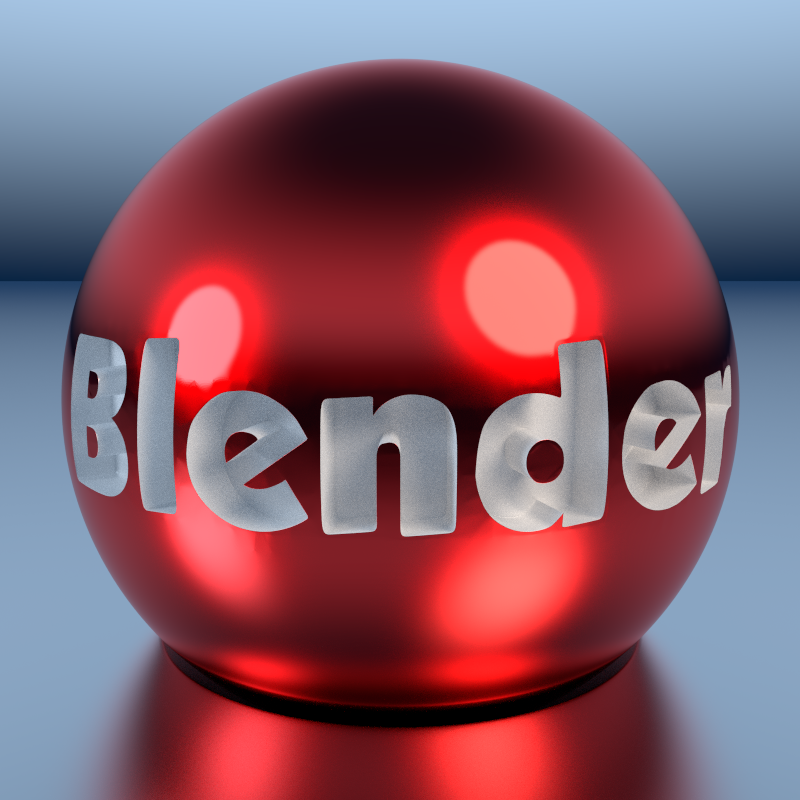
here is what i am modelling. very simple but i want to learn how to create dense areas without adding more geometry all around the mesh.
Edit: Also, i believe textures could be used, however im not sure how convincing they would be for a high res close up still…any thoughts would be appreciated on this.
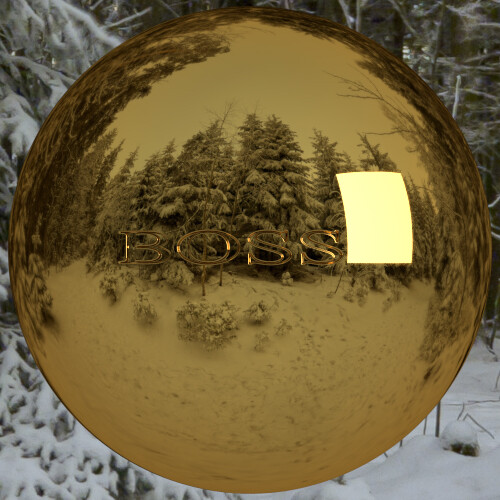
It is a deceivingly difficult effect. It seems like it ought to be a piece of cake. I messed around with shrinkwrap and boolean and that was not working well. The best results I got was using a black and white texture of the text and the displace modifier. Essentially I put a suburf modifier on the sphere – 4 for viewport, 7 for render. These renders are with 7 (maybe they were 6??). This is definitely the brute force approach. The blend is tiny, the renders are quite quick (< 2 minutes each) but it uses every last bit of memory I had (5 MB for blender) Perhaps GPU would breeze through it. There is also a ultra low res environment lighting image. Have a look at the renders and if you want to play with it, I’ll post the packed blend too.
@brinemobee: Blenderallday’s method is the easiest way to engrave on any surface. Just blur your image (A lot!) to have smoother edges. The engraving won’t have vertical walls any more but you won’t need to set the Subsurf modifier so high.
If you really insist on having some real geometry, there is however a way. I found an interesting way to engrave text on a flat surface on YouTube. I wanted to see if it would work on a curved surface. Here is what I made:
I didn’t work much on the geometry so there are places where the result isn’t perfect. But the other places where it’s so perfect show that it’s possible… with a bit of work.
As you can see, the geometry is a real mess full of triangles. To have only quads is impossible but, at least, it’s possible to do more than just [ALT J] (Triangles to Quads) like I did.
If somebody is really interested (and has a big stock of tuna cans in their basement), I’ll explain. That’s a lot of work!
@Edk: This is a bit the opposite of what the OP wants.
…And, altho this tutorial is fine for newbies, this guy drives me nuts. :spin: Too slow! He uses the menus. :eek: Instead of clicking the button to center the text, he moves everything sideways. And the cherry on top, he uses the Boolean modifier. :no: (I hate that thing!)
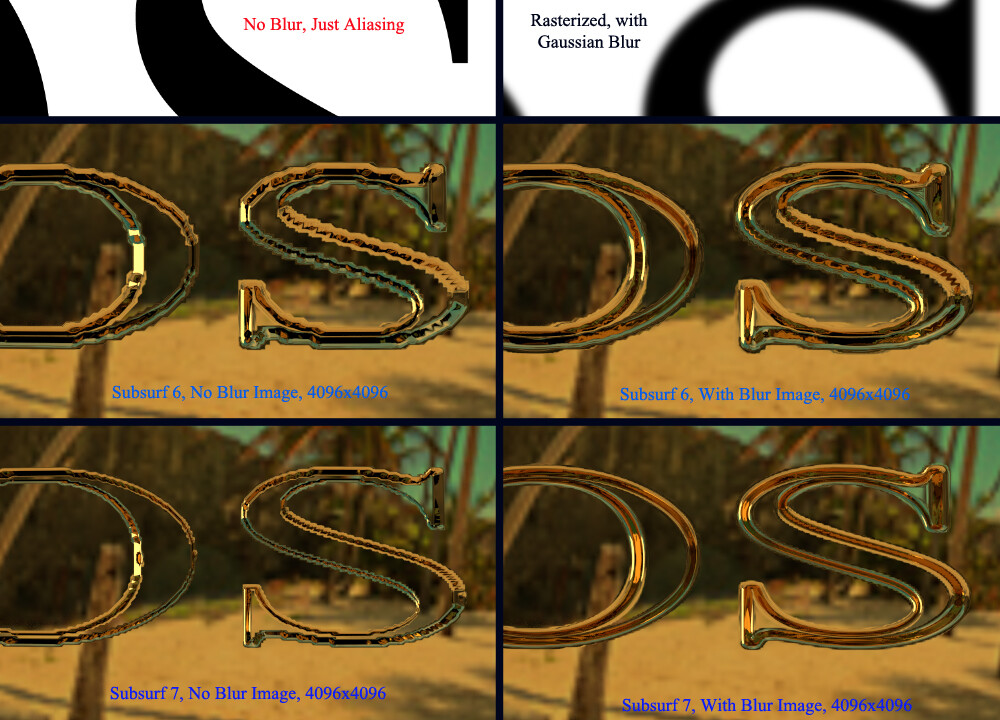
I decided to do some tests with blur vs. straight aliasing, and the results (which we already knew) are in: Blur is much better. I would note that my original image in the blend above does use a small amount of blur, but not as much as this one. For my money this is the best I can get using displace. I tried subsurf 8, and my laptop croaked. It’s funny though, because subsurf 7 comes out in under 3 minutes, like it’s nothing. As you can see, subsurf 7 with blur is the winner, The blend below is set for those. Also I decided, since you seem to need close ups, to up the resolution of the image to 4096. See for yourself.
If there is anyone with GPU willing to test subsurf 8, my gut feeling is that it would essentially be perfect? Maybe the OP has it.
@blender all day: Your method is great for a product shot, thanks, quick and easy. however it seems counter productive to add so much geometry for something so simple. Ideally one would be able to create a dense mesh for an area and then retopo edges to keep it as low poly as possible? without disturbing the spheres shape.
@Kaluura, Your way seems to have a great effect. however if the text is much smaller you would need a lot more edge loops to connect them correct? as the text for this product needs to be high res but only cover a small area you would need as many loops as you have in a smaller area the required mesh would be very large…i will enjoy cracking this one.
@YAFU , I can’t seem to find a video where displace is used with text or image, although I’m sure there is one somewhere. Have a look at the second blend (engraven-2.blend), it’s pretty simple. I may be able to put together a quick tutorial or if someone has a link to one post it. I came up with this by experimenting and participating in a couple of earlier threads months back, I haven’t seen a tutorial that explores this directly.
brinemobee, so what technique are you using in the image you posted?
As for the making the mesh dense in that area only, in theory yes it is possible to use the wedge technique to reduce the density outside of the area of interest. In reality, it might take longer than you think.
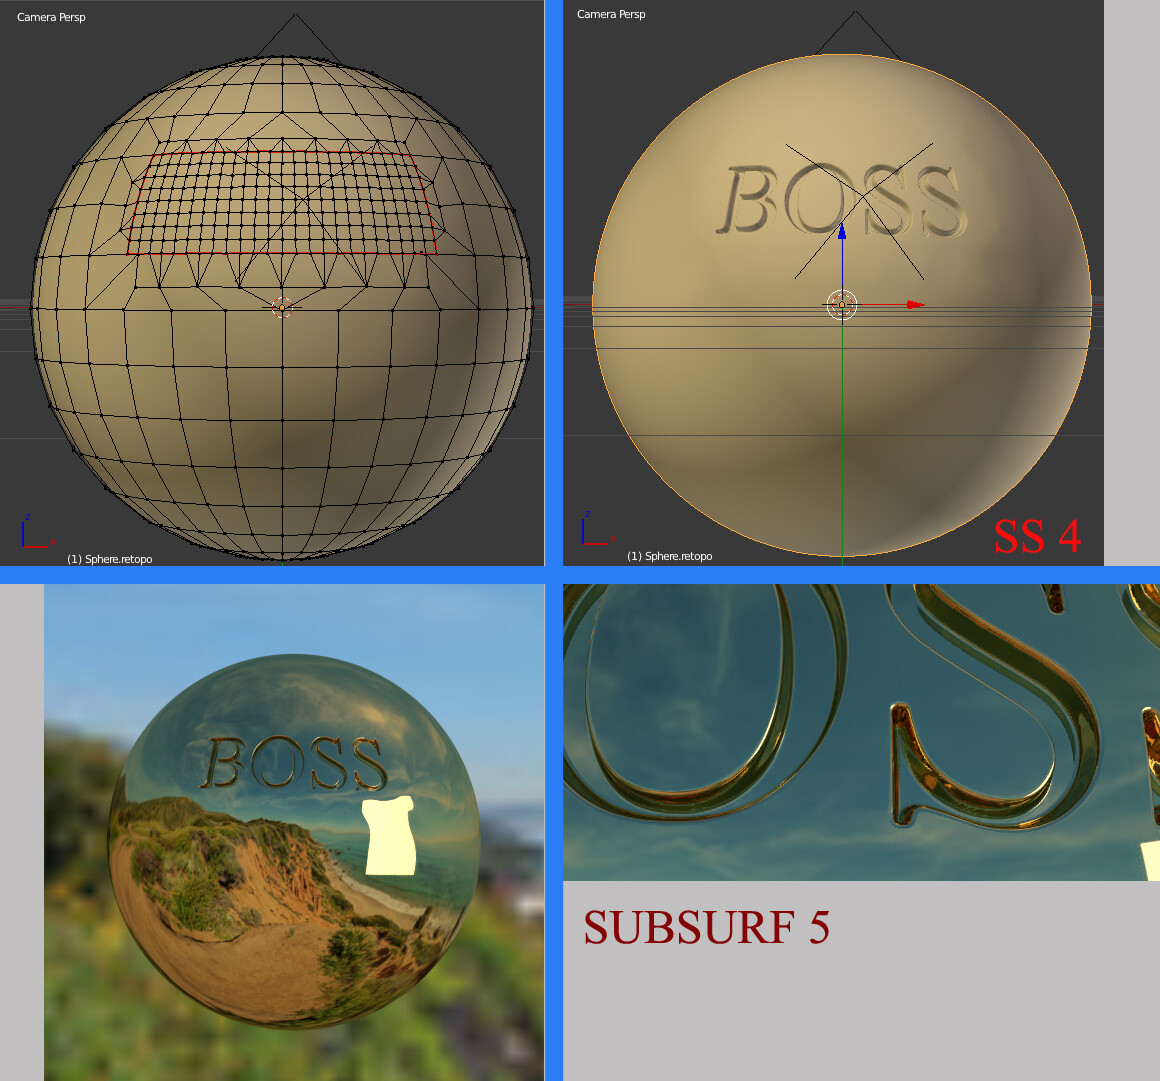
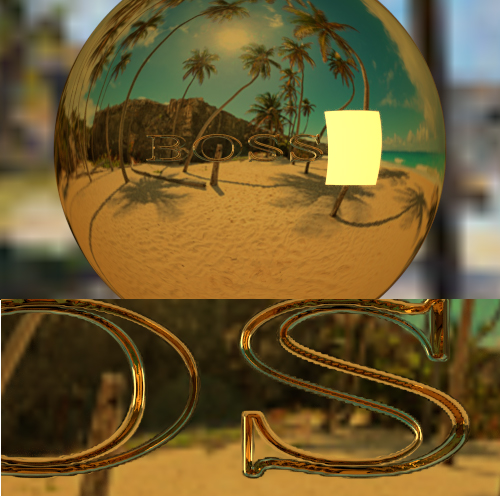
Well brinemobee really is right and that we are wasting a ton of memory subsurfing at crazy levels, areas not even visible to the camera, so I had a go at wedging out a high poly area. You can see my topology in the wire shot, and of course you can just open the blend up if you want. This approach allows us to reach indistinguishable levels of resolution at a subsurf level of 5. In my opinion this solution wins most awards as it is incredible flexible in that (besides retopo-ing the sphere) there is no modeling needed, and the image can be changed easily and quickly.
I basically cut a “rectangle” of verts out of the low poly sphere. selected the inner rectangle and subdivided smooth twice. I then extruded the high poly inner part outwards and used the wedge technique to reduce poly count. Filled the gaps, and then shrinkwrapped the whole shebang around another high poly perfect sphere. Applied it, added the displace and that’s where it’s at. For my money it’s a usable workflow for close product shots where engraving/embossing is the desired effect.
edit: oops I forgot the convert the wedge tris to quads.
Wow, Blender thats perfect. thats exactly what i wanted to achieve.
could you breakdown the steps you did in a bit more detail?
This is what i did.
created a high density mesh, lots of loops and rings
created text, scaled it to fit inside a group of faces,
i shrinkwrapped the text and converted it to mesh, though cant remember what order (im on work comp, blender is at home)
separated the faces, and began merging the text inside those faces, cleaning up the edgeloops as best i could, the only good thing with a high dense mesh to start with is that adding in a loop or 2 made no difference to the curvature, vs a low dense mesh where adding an extra loop tightens up part of it.
subsurfed 1/2 times for a pretty smooth finish. i ended up with a super high dense mesh though, so your way is definitely better.
What exactly is the wedge operation? never heard of it… please enlighten me.


 And the cherry on top, he uses the Boolean modifier. :no: (I hate that thing!)