Hi everybody, I can’t understand how to use the snap tool in Blender. I’d like to use the snap tool to constraint some vertices to a background mesh. I thought it was possible to use it like the background constraint tool in Modo.
You can watch this video (Link) to understand what I’m talking about. The author use the constraint to background tool to make a hole in a mesh.
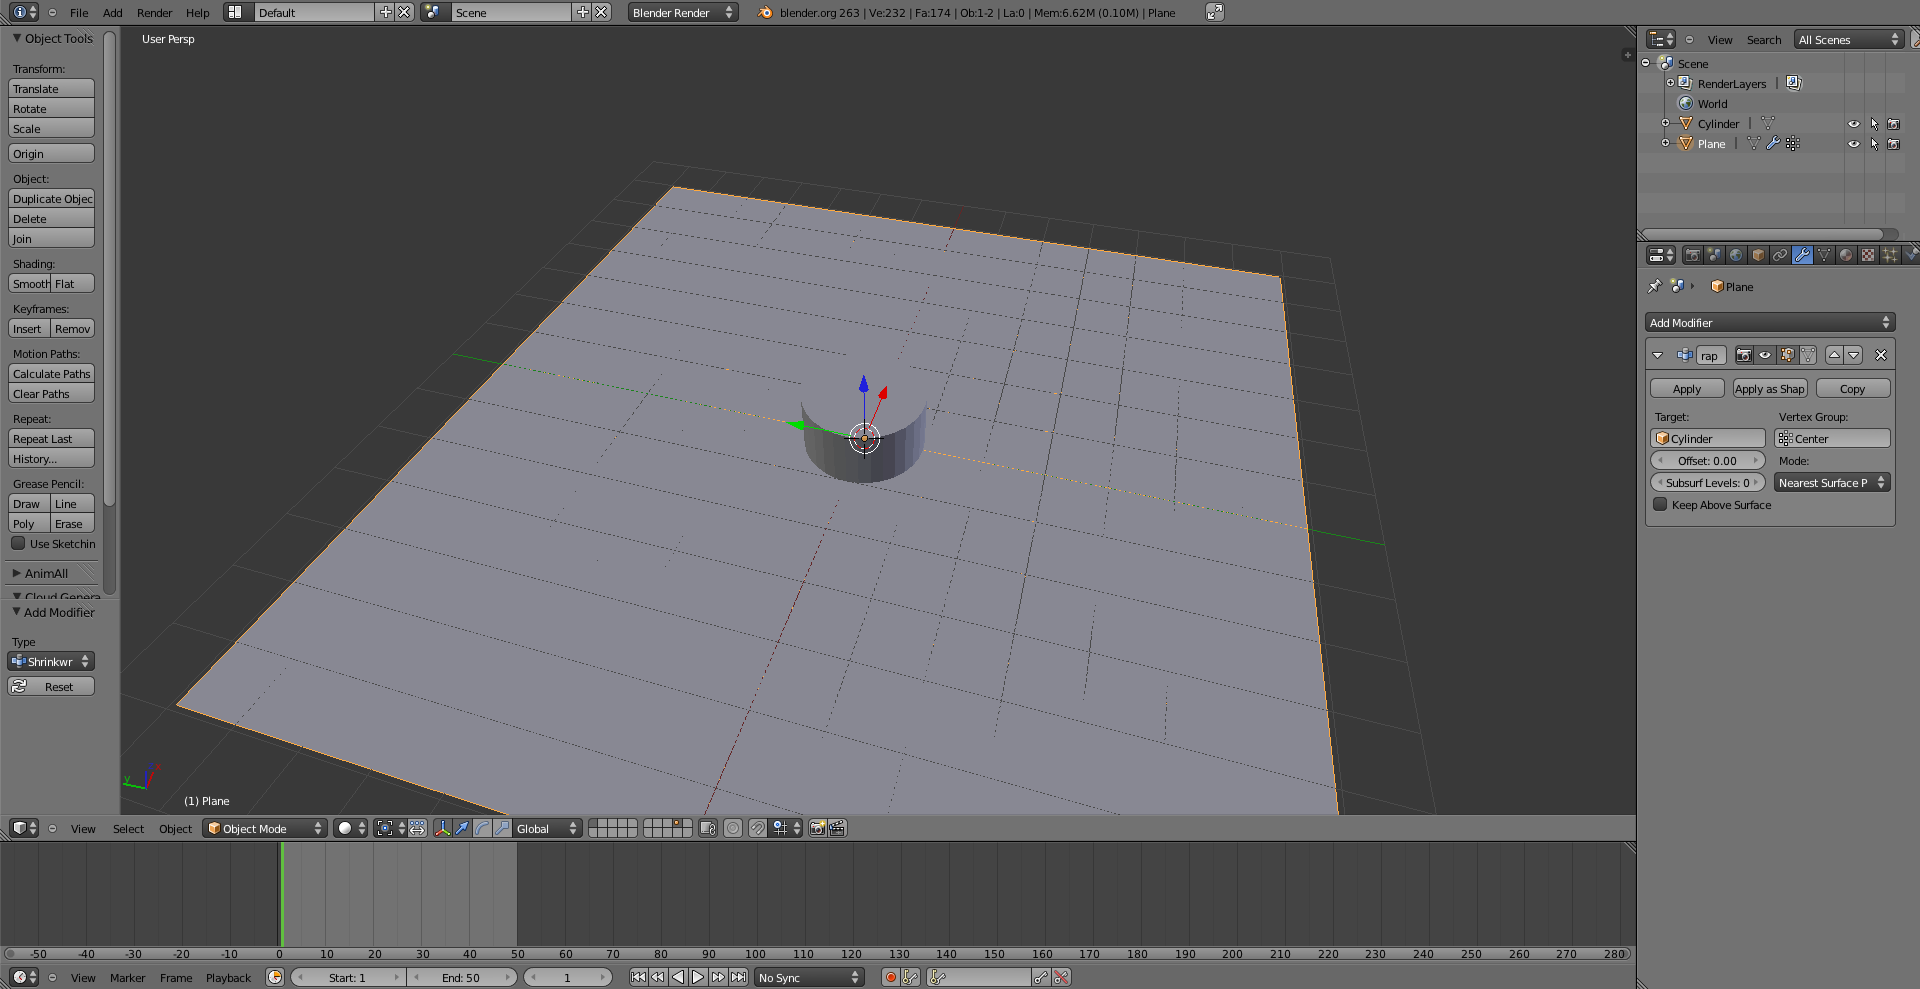
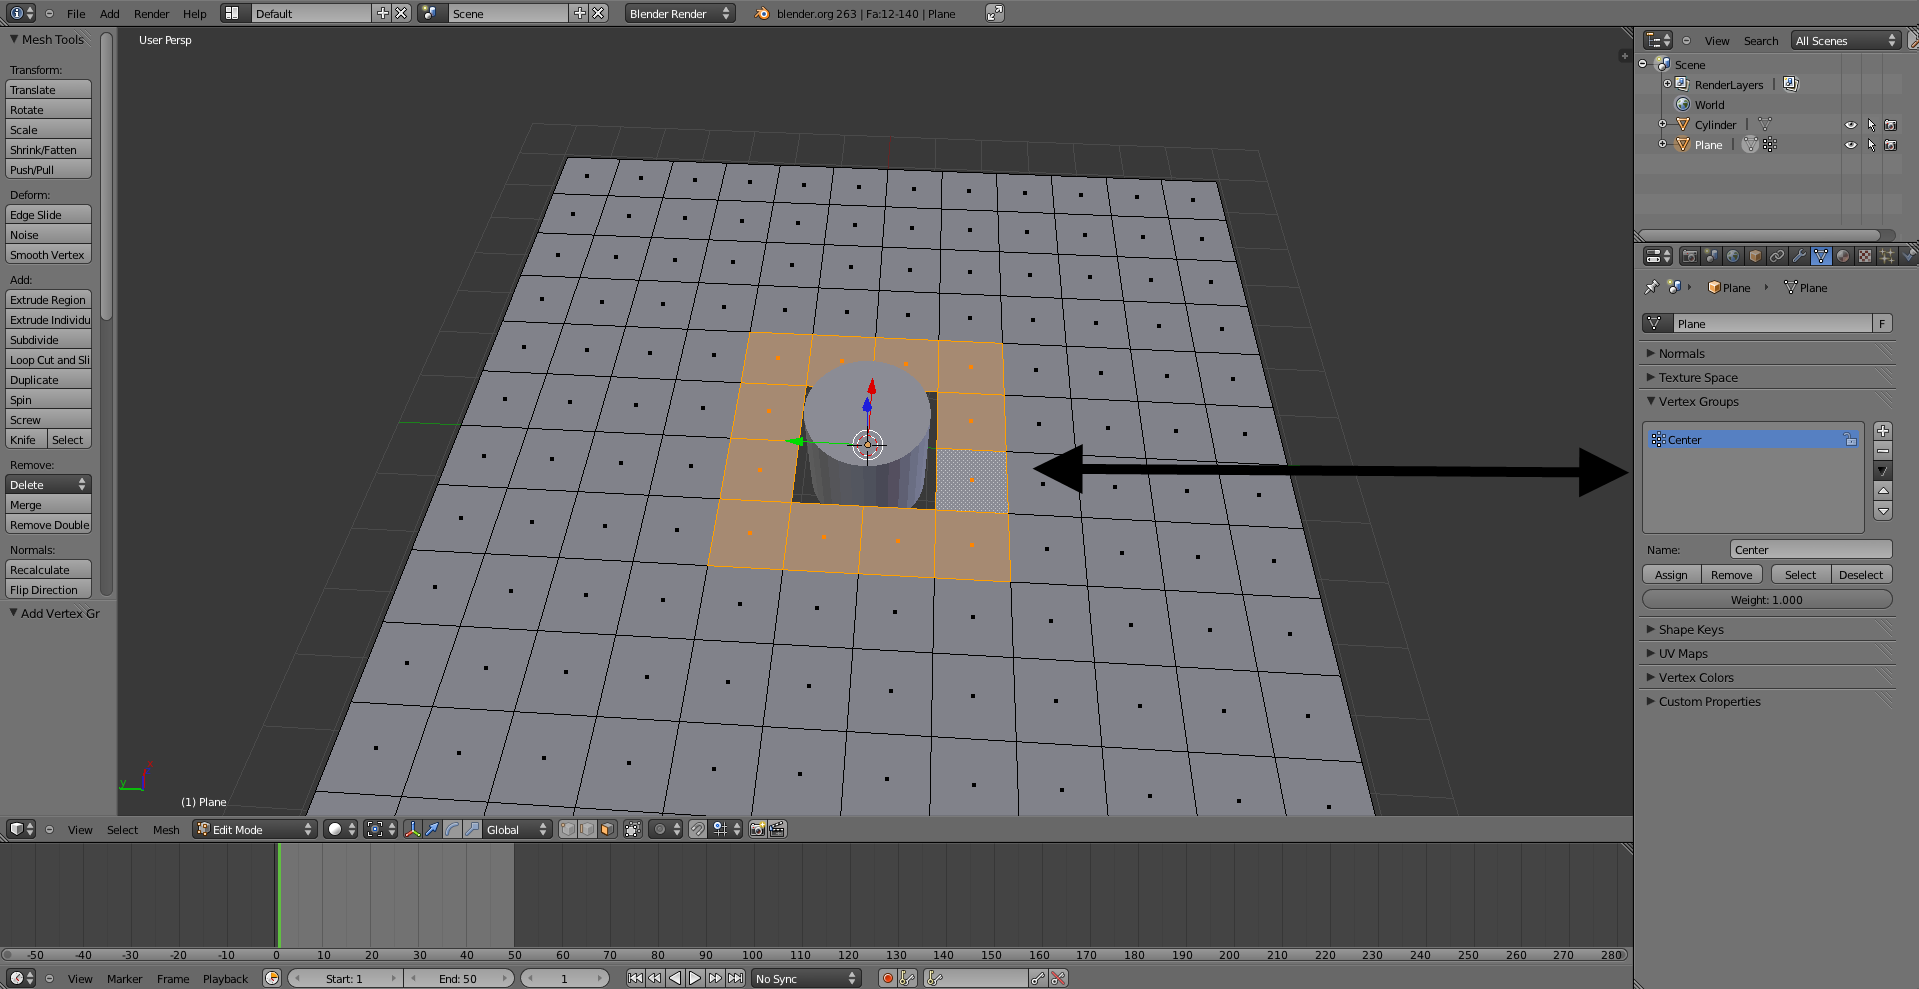
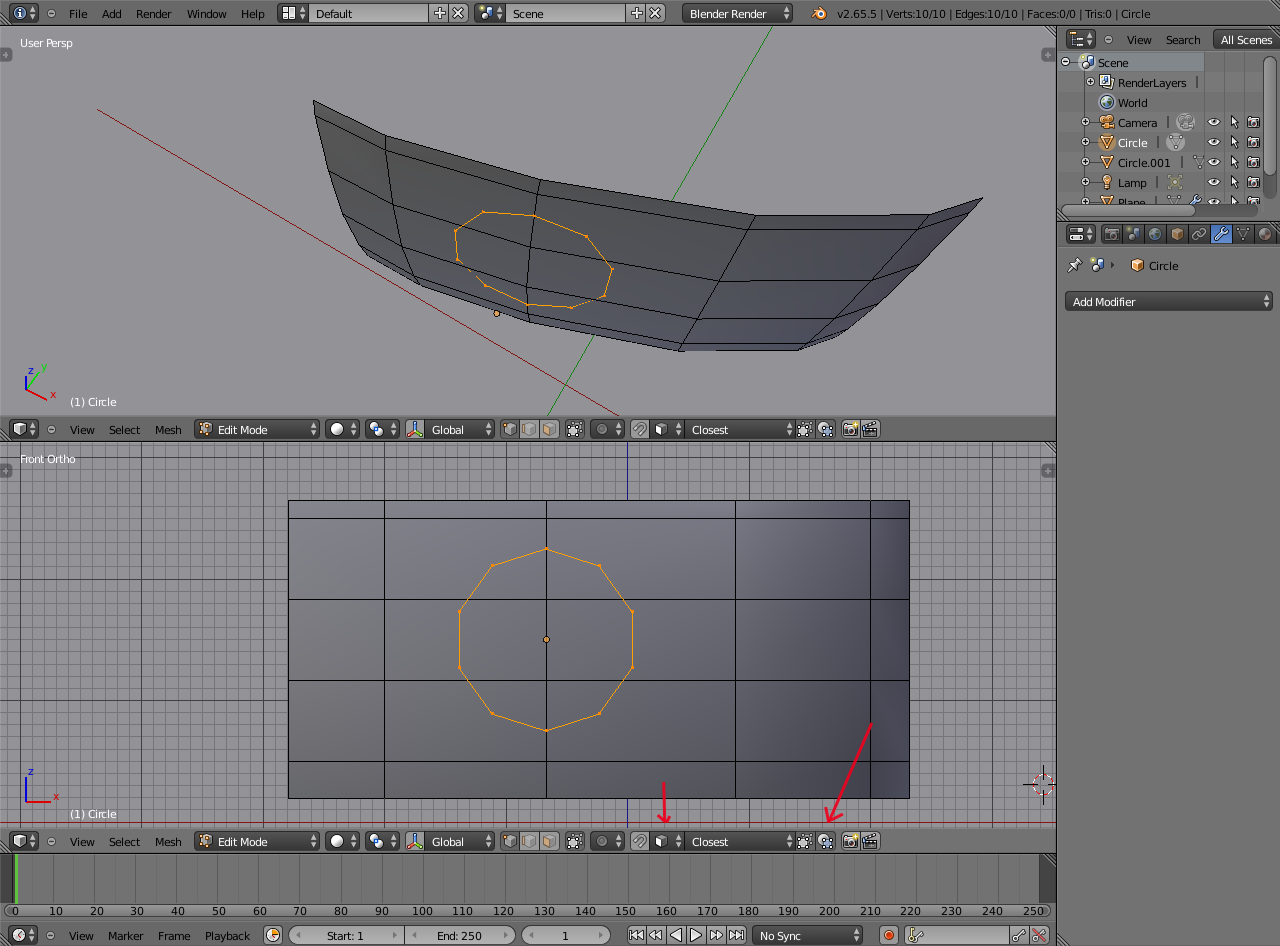
Add plane. 2.Subdivide plane to desired detail. 3. Delete the center faces so your cylinder or other mesh fits. 4. Select the faces around the hole in the center and add them to a vertex group. 5. Add the “Shrink-wrap” modifier to your plane. 6. Select the vertex group in the vertex group field. 7. Select your mesh in the object field.
If you want to, you can apply the modifier and delete the cylinder. This is useful to make a hole.
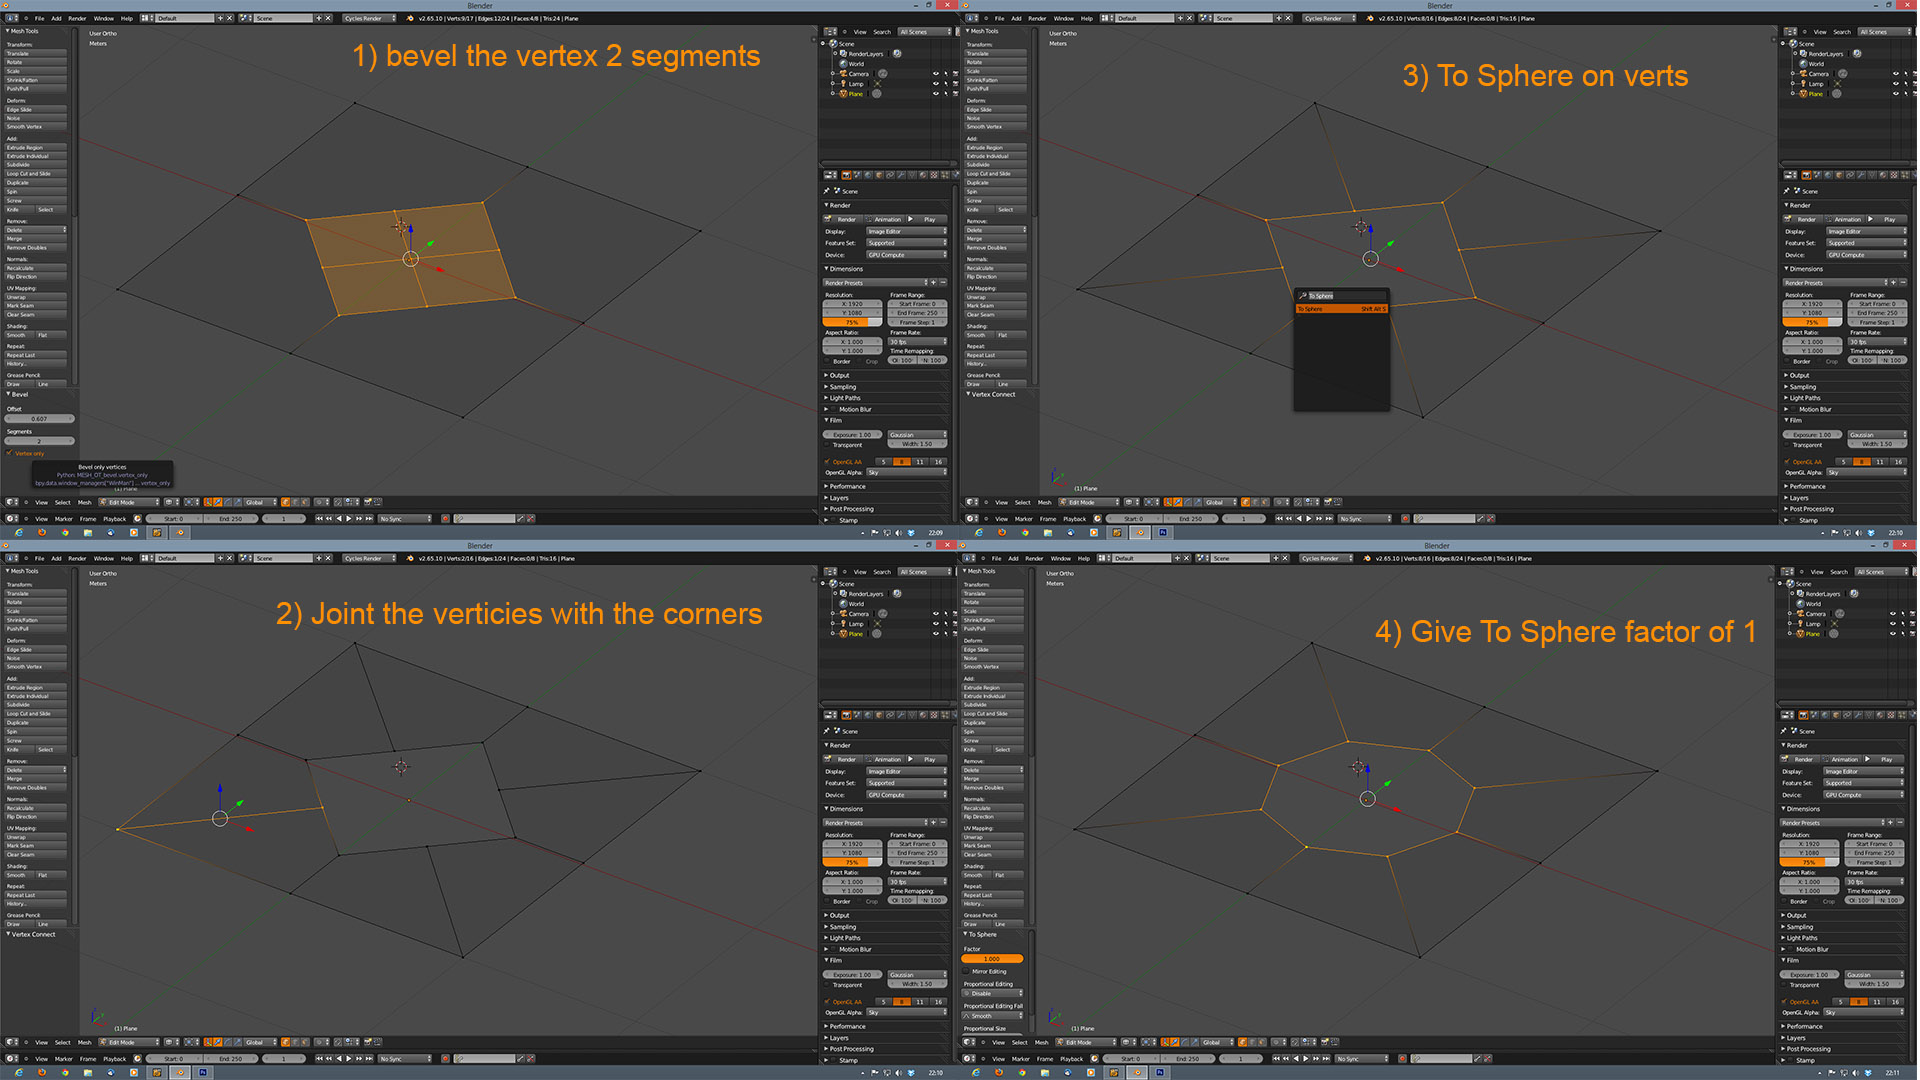
Or since now you can bevel verticies (have not tried this since the vertex bevel addon) you can select a vertex (may have to cut or edgeloop where you want it) and bevel that out to the desired size. I would recommend 8 sides at least. Delete the new center portion, select the ring of new verts and run “to sphere” with a value of 1. When I get home, I can post how this is done.
Hi guys, thank you for the replies. I didn’t explain right, I don’t want to know how to make a hole in a mesh, I’d like to understand how to use a background mesh to constraint other meshes or vertices. I can do it with the shrink-wrap modifier but is it possible to do the same with the grab tool and snapping the vertices/edges to the background mesh?
I’d like to use only the grab tool to snap the vertices.
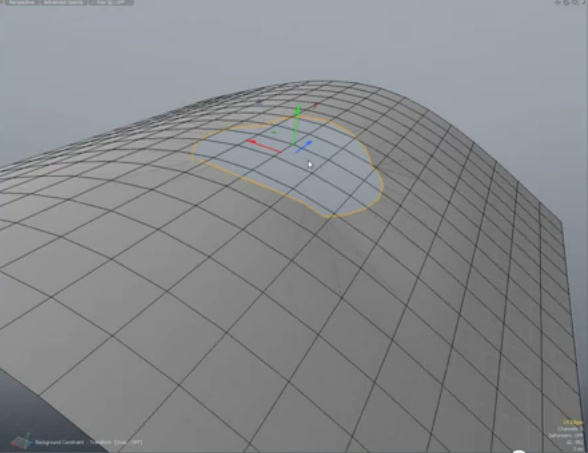
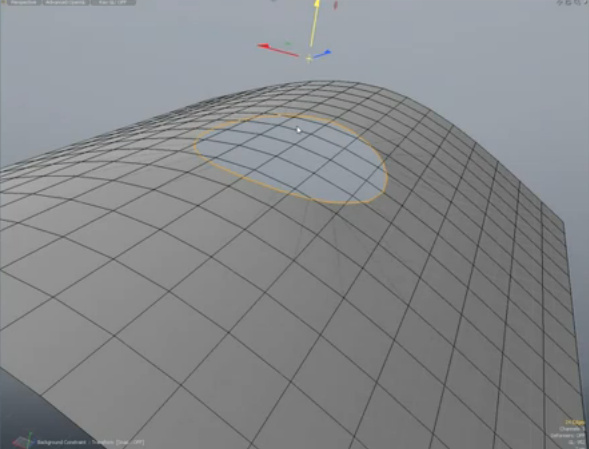
The following pictures show what I mean. The selected edges are moved up and they snap perfectly to the background mesh.
At the bottom of 3D view, tick on the magnet icon (turn on snapping). From the dropdown to the right of it, select “Face”. On the appeared additional icons tick on “project individual elements on the surface of other objects”. Now whenever you move around your vertices they will snap on the surface of nearest objects. That’s standard procedure for things like retopology. Be careful, though, as grabbing too many vertices at once may result in significant performance hiccup.
In short: turn on face snapping, enable snapping on other objects, grab, hold down ctrl and point where you want to snap, left mouse button to confirm.
In many cases the target faces don’t line up with the axes and while you could try other orientation modes and even make a custom one, it’s usually easier to project the vertices from correct viewing angle. You can line up your view to selected faces with shift+numpad_7 (shift+np_1/np_3/np_7 to line up front/right/top).