The levels control you set to 0 is for the (non-Cycles)viewport only. The setup you have here fixes the problem by massively subdividing the object until the polys are a single pixel across. Obviously, this fixes the terminator issue but can have a rather horrifying memory cost.
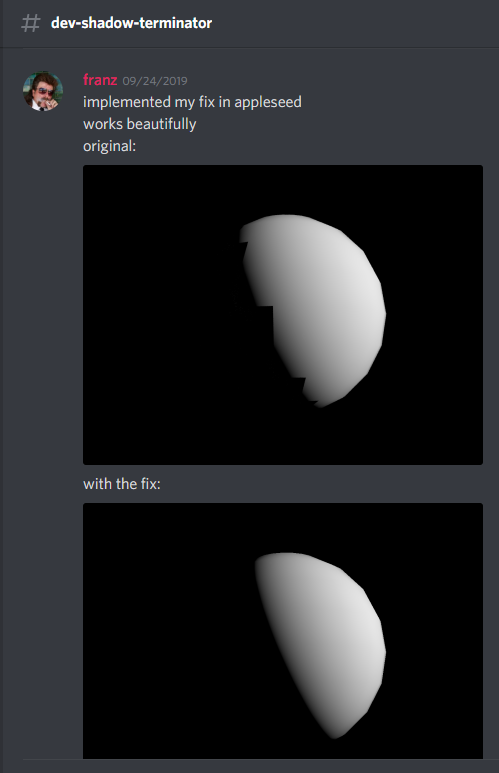
We (appleseed render) have indeed implemented a fix for the shadow terminator which will be soon in master (and also exposed in the plugins).
Though it is not automatic, one can set a correction factor for the affected (low poly) object with an object modifier.
2 Likes
Wouldn’t it be cool if this was fixed in cycles…
Heh.
Yes, I find that terminator artefact bug in Thea in 2017 
https://www.thearender.com/forum/viewtopic.php?f=54&t=20487&hilit=terminator
Our fix has now found its way into Cycles
 Cycles: Added Shadow terminator offset.

This copies the approach taken by the Appleseed renderer. A per-object
factor that pushes the shadow terminator in the BSDF towards the light
source
https://github.com/skwerner/blender/commit/5de4c6371d8f772e04e6c0383dfd8f1be6a29bd1
3 Likes
God save the queen!
It there any way to test that feature?
Hi @veti,
We have a developer-build of blenderseed with the shadow terminator fix included:
https://mega.nz/#!FIBG0KDY!zUQA2f3H8I6gIUE5Q-6rlkSXf4wcxBv6icAc6mLRLtI
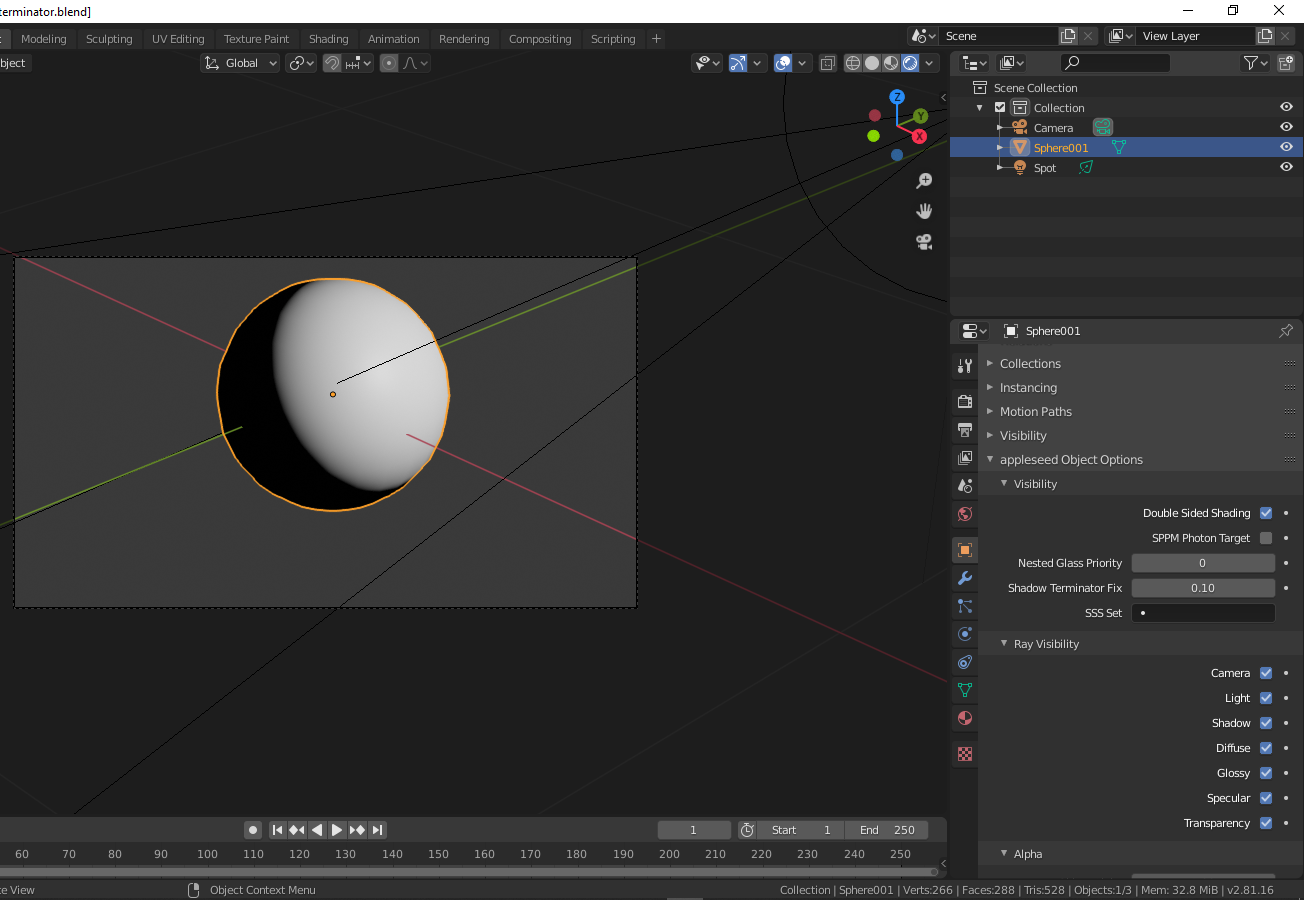
In the appleseed-object properties one has to set a correction factor (e.g. 0.1) for the object which shows artefacts. 0 is the default (no correction), higher values give stronger correction (see screenshot of sphere object with fix applied)
The simple test-scene is here:shadow_terminator_appleseed.blend (2.2 MB)
Is there any news on this officially becoming a feature in Cycles? Would be a godsend. Makes low poly projects using Cycles almost impossible in some cases.
1 Like
Yeh!? When!
The Appleseed fix is a workaround but not really precisely. The shadow edge is shifted with an offset to the right to cover the Terminator effect. So it breaks a realistic lighting and shading. I made some tests in Blender using the above described nodes for the object normals and this will also affect specular and reflections. They will be wrong.
Indeed, it is a workaround. There is a simple solution. If you want to be precise you have to increase the low polygon resolution (e.g. subdivide the mesh) which is the original cause of the artefacts.
You can sort of simulate the same thing in Cycles using a diffuse Toon shader instead of regular lambertian Diffuse. Tweak the size and smooth values to shift the terminator towards the light source.
Yeah I tried that. I mean it works. But if it’s a particularly spectacular material, things go wack.
Yup. Unfortunately there is no shader trick around it.
In Blender 2.9 there is a “fix” (the Applessed fix) for this: https://developer.blender.org/D7634
3 Likes
Works well at about .33 for most of the meshes I tested. Passable result! Just need to be a little more specific with lighting, but it looks fine!
Also, the Optix mode with Optix denoiser is next level stuff!
I know increasing the polycount is not something most people want to hear, but, I just recently faced this issue and I didn’t have to increase the poly count as much as I thought I would. With the subdiv modifier on, I have to crank it to like 8 to get rid of extreme terminator artifacts, and even then I still had them but they were smaller than a pixel in the scene so not noticeable so long as it wasn’t a close up. Not reasonable for a quick render. But, if you only subdivide it once or twice but apply the modifier it actually completely can resolve the issue. I dont understand why pressing apply some how has a completely different effect but some how it does the trick. I know there are a lot of “non destructive” folks out there and this upcoming work around will likely be the way to go for them but if physical accuracy is the goal than if your scene can stand the poly count, just subdiv once and apply.
It greatly depends on what kind of shading effects you’re using. A bumpy glossy can be extremely sensitive.
Thats very true. It does greatly depend on the shading effect. I know I have run into the problem before in various engines and never been able to solve it. This method is a new discovery for me and in some very brief testing so far has not failed me. I was just using a bump, a normal, and a displacement tiled 20 times per inch to scale for a proof of concept and stumbled on this thread moments after finding the solution to the problem in my particular situation. I ran the subdivisions up to 12 and was still getting the problem which makes sense. Thats expected. I don’t know an engine that wouldn’t take issue with that. Someone else I read somewhere simply said, apply the subdiv. I wasnt about to apply 8 layers of subdivisions so I ran 1 layer and it worked on the first mesh. Took 2 on the second mesh but I then forcefully created the problem in different scenarios and never had to go above 2 layers applied to solve the problem. This certainly won’t always 100% fix the problem. I know theres a lot of ways it can be caused. Just an observation from my own recent experience in case it does help anyone in a similar situation.