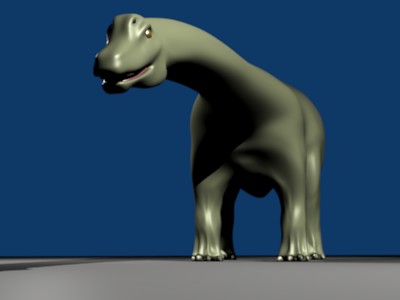
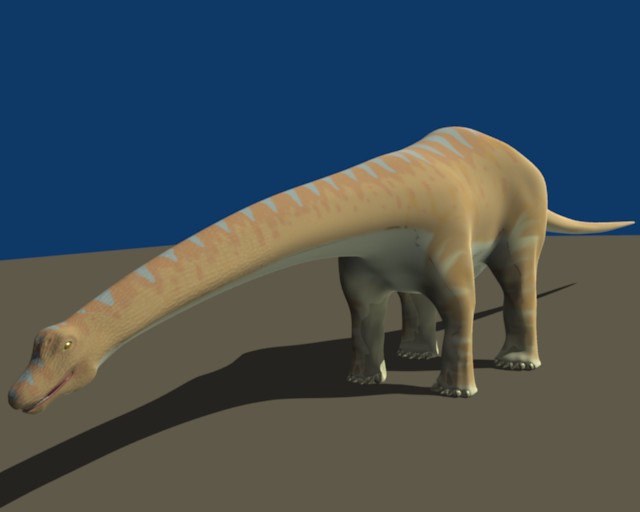
Well, I started using Blender to do architectural renderings, and I really love it. But then my daughter had an assignment to write a report on an apatosaurus, and I started poking around here, and found env’s website, and my jaw dropped…absolutely incredible work! I just had to do a dinosaur in Blender, texture it, and animate it. I’ve started the modeling, and I’ve just about finished with the seams for the UV maps. Anyway, here she is. C&C is welcome, but I’d really appreciate focus on the rigging part - pitfalls with what I have so far? (BTW: not a tri on this baby, not one.)
Next stop, bump maps, coloring, and the whole UV thing.
two things:
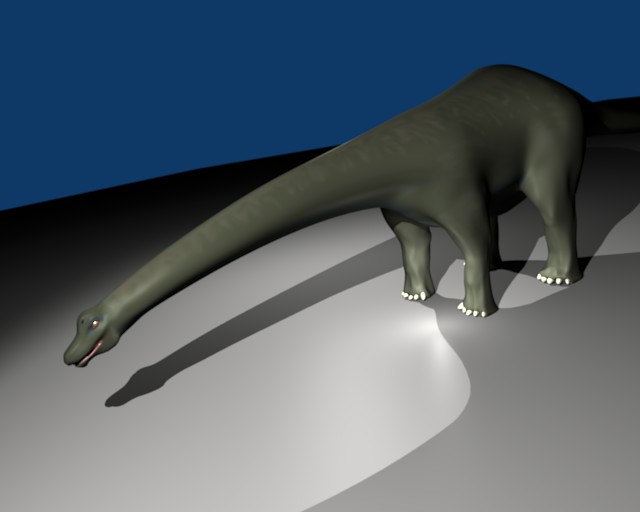
-he can’t have his neck like that. It has to be straight up. There are long-necked species that look like this, but not this one.
-His feet are a bit weird…
apart from that, looking good.
Actually, Apatosaurus did have a neck that laid out straight in front of the body. Most sauropod necks were long to balance the tail, and Apatosaurus had a particularly long and whiplike tail. The brachiosaurs had necks that raised up from the body, but not the apatosaurs.
Sums up the latest research AND provided me with a plan, elevation, and section of my sauropod (I did an image box with the skeleton, modeled over it). That said, I’m no scholar, so Pat’s not going to be a perfect specimen. This is just for fun, although I’d prefer that it be as close to life as I can make given my time constraints.
As for the feet…yeah, you’re right yoeri. I’ll work on making them a bit less pronounced.
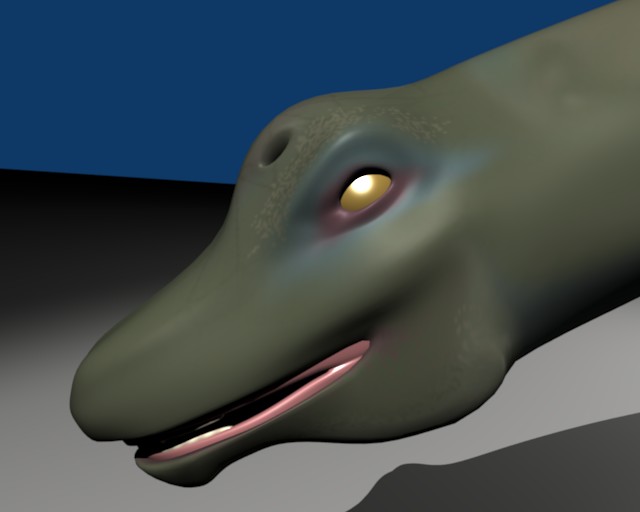
OK, I put in some time on the feet. Think elephant. Note that the front feet of the creature actually did have those weird side-ways projecting claws, making them look pigeon-toed. (Word of advice to all who do bilaterally symmetrical objects: DON"T join the duplicated half until you’re sure you’re completely done. I’ve had to do more blasted repair jobs to the mesh… :< ) I’ve also included a close-up of the head for any advice from more experience riggers - the jaw and eyes always seem to be a challenge to get right at the modeling stage - am I on the right track so far?
I think the model will be greatly improved by the texturing. I’m planning on doing a bump-map for both scales and wrinkles, and then a color map. I’m assuming its best to texture first, then rig, yes?
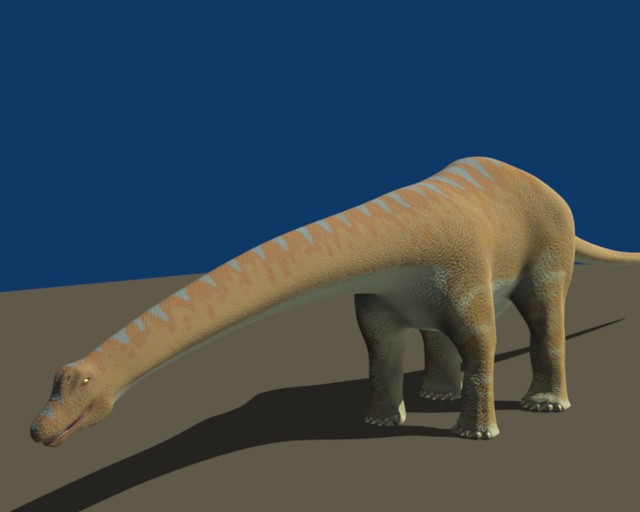
I agree that I think the markings are too subtle. Typically in nature variations on color are for one of two purposes. To warn off a preditor or as camoflauge. I really dont think something as big as an apatosaurus would need or use camoflauge but who knows, the point it it definatly needs more contrast between the markings on the back and the top.
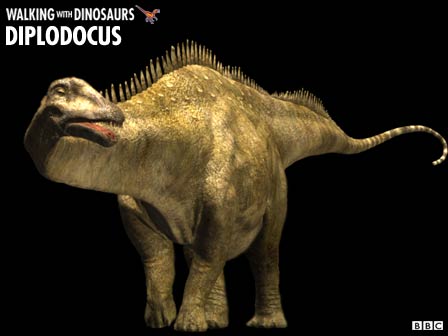
Here are a couple pics I found you might use for reference on the texture.
As for modeling I think youve done pretty good just needs some work on the textures…plus will look alot better once you get the bump maps.
Tuggles: thanks for the inspirations! That diplodocus just rocks, eh? I watched that “walking with dinosaurs” movie about a week ago. The funny thing was, they modeled those dinos in clay first, then did laser-scanned 3D models from them.
Nikko: couldn’t load your file on my (slow) computer, but I’ll try at work.
Below are my updates with more contrast. Still tweaking, but I’m getting there, I think.
VERY nice project you have going on here! If you go about this in the right
manner, it’ll be able to come quite close to the magical stuff EnV, has done!
Brilliant!
Well, now for critique:
I don’t think there is more contrast in the texture now than there was earlier.
It all just seems brighter. Contrast is, as you propably already know, when
both the darks and brights of color are present…
Somewhat related to the stuff above: You need more texture! As it is now
it looks like it’s just one solid color most of the time. Have you read EnV’s
texturing tutorial? If not, go read it! It’s great, and got the stuff in it that
your Pat-texture needs!
Hope that helps a bit…
BTW: Nikko: Did you really do that clip yourself??? I mean, those are THE
Jurassic Park T-rexes - they REALLY look like 'em! It’s ILM quality!!!
Sure it’s not some animator from ILM, who has been toying with Blender
in his sparetime? I can’t believe it!
Absolutely amazing! I really would like to know who did it, and how they
did it! Modelling, texturing, rigging, animation - everything!!!
//The M.h.p.e.
OK, all I can say is: tweaking takes %^&ing forever! How do the “big guys” do this stuff within any kind of time constraints? sheesh…
Enough whining. Here’s Pat, with a bit more contrast (but not so much she looks like a circus act) and the beginnings of her scales. Lots of work to go.
M.h.p.e.: thanks! If I can even be mentioned in the same paragraph with Env’s stuff, I’ll be happy. (I’m still a noob at this.) As for Env’s tut’s, yup, read 'em and I’ll be going forward as time allows with the texturing. Going to be tougher going, I’ve discovered, because I didn’t UV map quite right…those seams have to break somewhere, and making the scales and wrinkles come out right will be a challenge.
Still can’t see nikko’s stuff, but I’ll get to it tomorrow.
I find UV-mapping to be a good way to do things - gives you all the control. It’s like making a jig for making furniture: you spend lots of time doing something that at first seems like a waste of time, but then you have this great template to use that really makes things easy to work with.
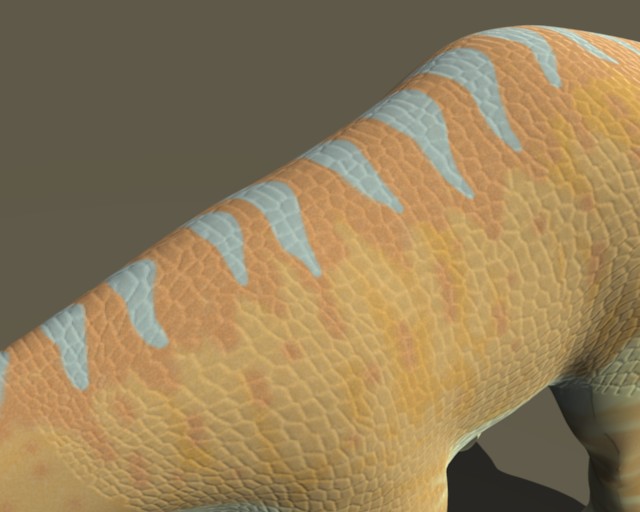
Anyway, here’s the begninnings of the scales bumpmap. Something’s not…quite…right…?
Yep, those scales do not look very good.
I would do the following to the scene
Add a scene full copy to same blend and make the
scales very reflective and put colorband in them too
and then blend the scenes with sequence editor.
Maybe model and render a scales map to be used for pumbs.
Such would not be random though.
SirMikey:
I’ve uploaded my color map (made transluscent), with the UV layout in the background. All I did was export to Photoshop and color it with brushes and such, and then did some smudging. I tried a filter, but it gave odd results at the render where the seams meet.
j:
hmm, you lost me. I’m not sure how to do what you’re suggesting. Is there a tut I can look at?
Thanks for the comments, folks. Its keeping me at it.
(And, you’ll be glad to know, I used Blender for a project at work today for the first time…the boss was really impressed. It wasn’t a dinosaur.)
No, there is no tutorial, and well it would have been
pain in the neck to do anyway, since combining two
renders doubles up the render time to name one.
Anyways perhaps slight reflectiveness to skin might
do good to the scales. But that would need something
for it to reflect, some stones and vegetation maybe or
simplest would be just an environment gradient in the
world settings.
The skin/scales just seem to need some
work put into them to make them look realistic, and
reflectiveness is the only thing i can think of. If you do
test out reflectiveness then altering the pumb/nor map
or its effect slider has a huge effect.
OK, here’s the latest on the scales. All I can say is I’ve gained a respect for people who do this professionally. I can see what I have to do, and I just don’t think I’ll have the time or patience. Crud.