INTRODUCTION
I’ve recently been reading The Art of Fire Emblem Awakening and have found myself very inspired by the collections of weapons and their corresponding concept art. As a way to get myself out of my usual groove when it comes to hard surface modeling, I’m doing something similar. I’m randomly choosing three descriptive words, randomly choosing a color palette from my collection, and making a weapon series around those. I’m doing the 2D concept art in Photoshop, and making 3D versions in Blender.
If anyone seeing this wants to try something similar, the list of words I’m using is below. Pick three randomly and go wild.
word list
quick
strong
light
deadly
ancient
cursed
blessed
forgotten
carved
forged
cast
heavy
durable
cracked
glowing
penetrating
efficient
bladed
toothed
blunt
hefty
delicate
slumbering
glowing
accurate
nimble
dark
light
celestial
ethereal
demonic
nasty
living
mechanical
organic
radiant
airy
sturdy
curved
angular
aquatic
icy
fiery
volcanic
glassy
shiny
dull
opal
electric
poisonous
superior
horseslayer
wingslayer
wormslayer
armorslayer
beastslayer
ripping
slicing
#1: RIPPING MECHANICAL HORSESLAYER
Painting

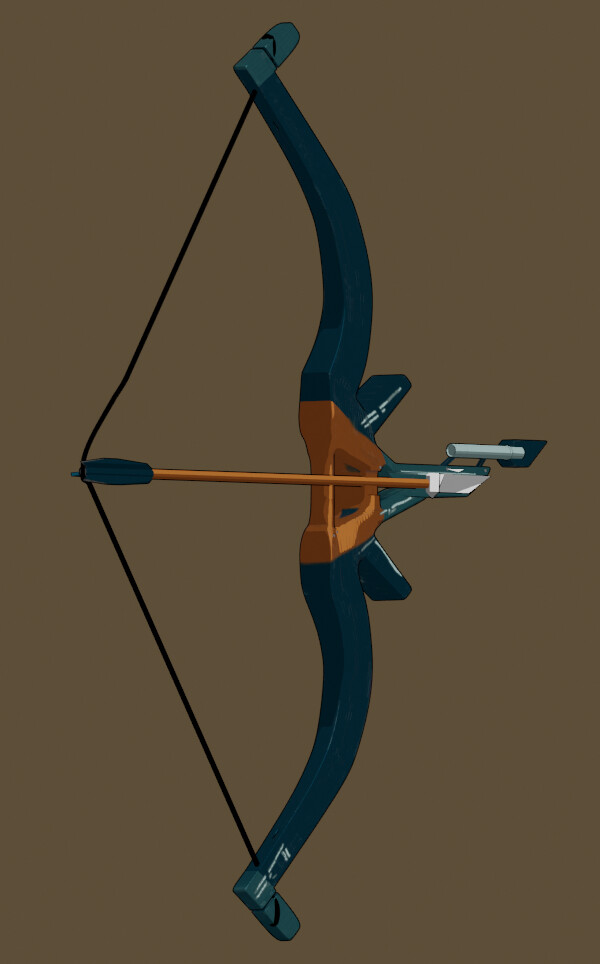
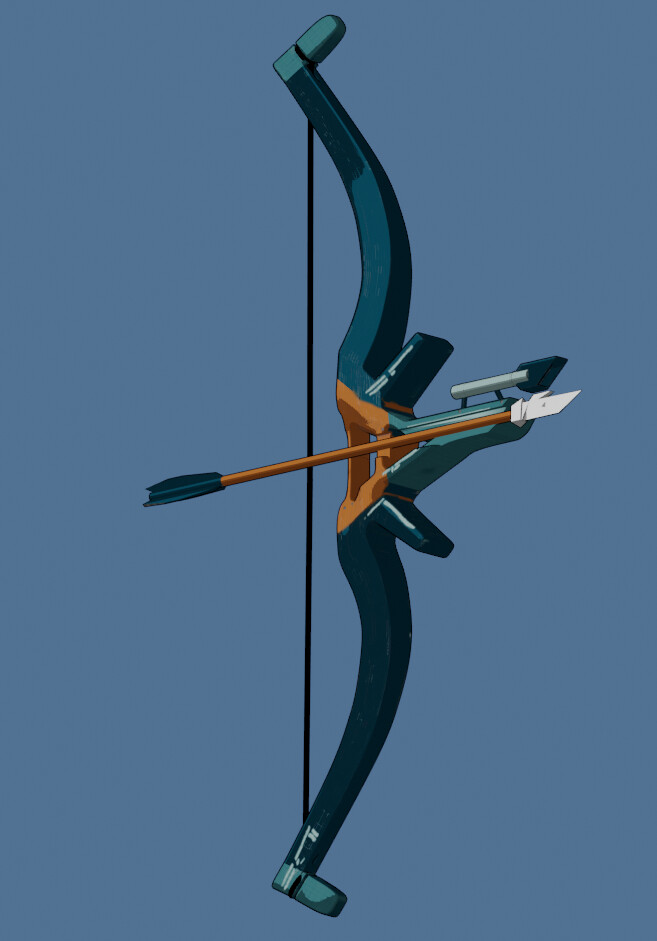
My thought with this set was that “ripping” meant a lot of sharp, nasty, blades. I wanted all the blades to have razor-sharp edges, edges that look like they hurt. Going from that, I tried to make everything very angular, while still seeming sleek and advanced. I also wanted to add some futuristic detailing- I used metal rivets to join everything together and used circuit-board-esque paint detailing.
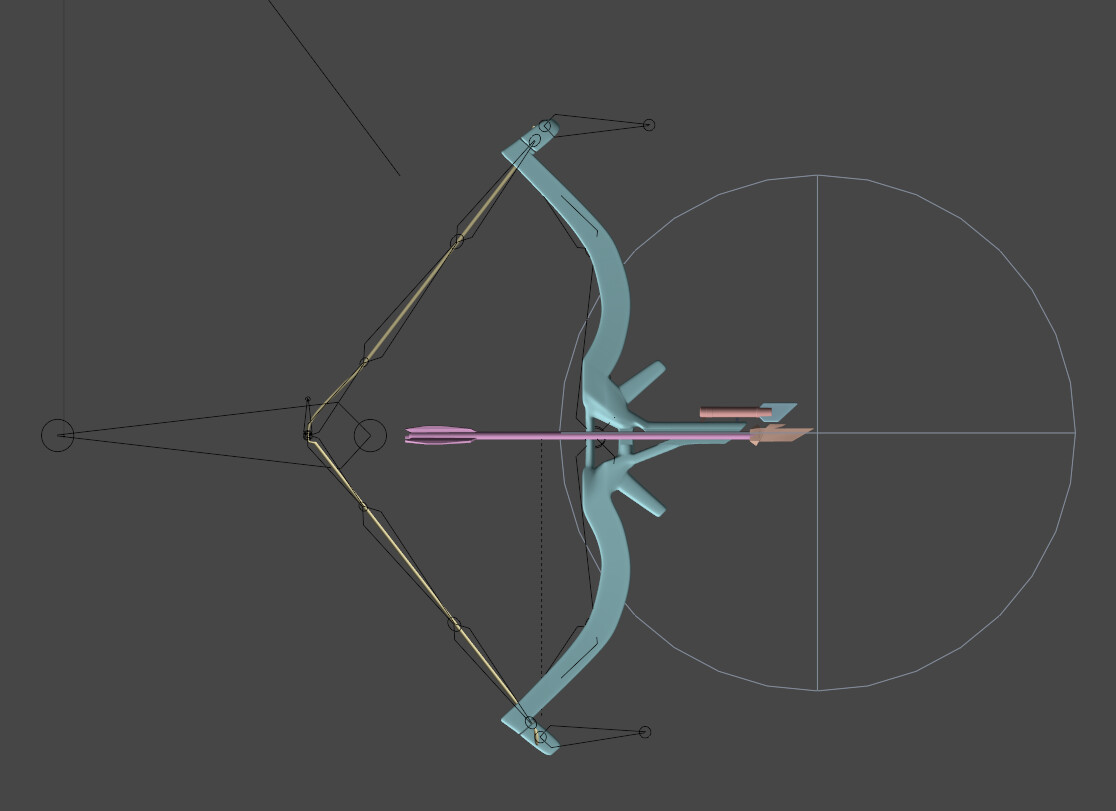
I made the sword first. Visually, It’s somewhat inspired by the Great Thunderblade from Breath of the Wild. A hit moves the longer blade back, which allows the second blade to do some damage as well. This is clearly a very heavy sword, so I added lots of cut-outs to reduce the visual weight. Because of the structural shortcomings of these cutouts and all the mechanical parts, I would say this set of weapons is very powerful but also very fragile.
Sword

From top to bottom: blocked out, sculpted detail, final result.
Showing off my toon shader and working spring (Eevee viewport.)
I used a Stretch To constraint for the spring, and added a small amount of Emission to the painted details for a nice glow.
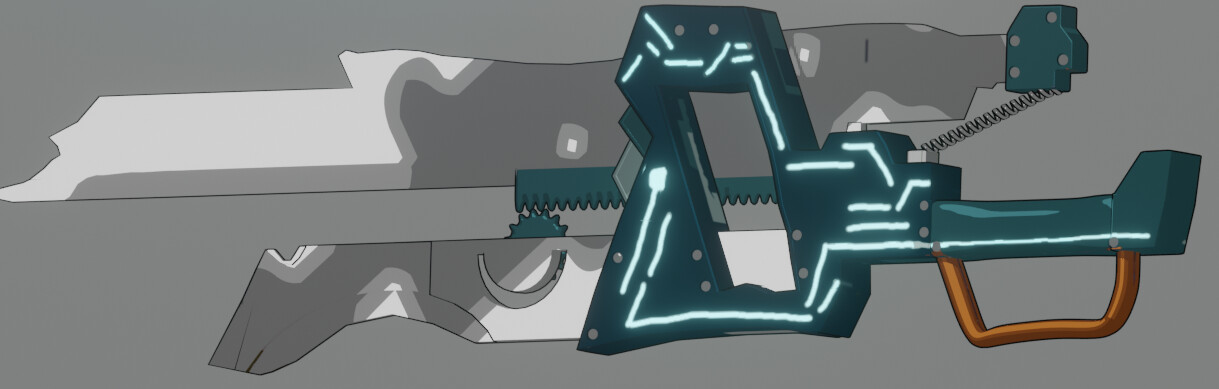
Ax
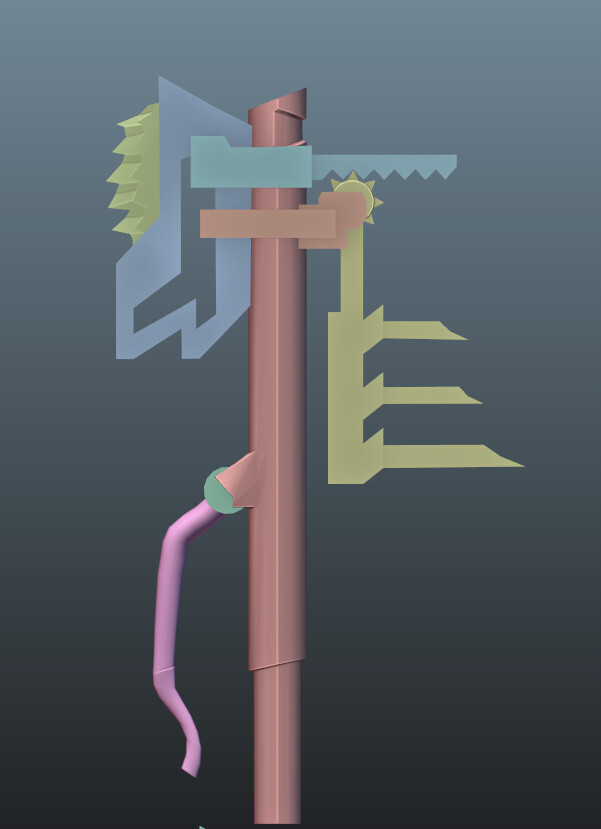
Here’s my blocking for this one. My topology was a lot more sloppy on this one.
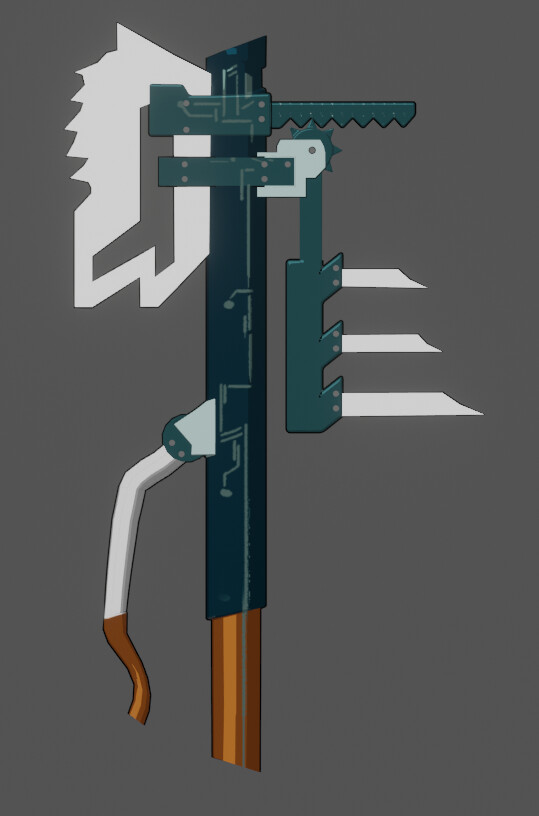
Here we have the painted version. I didn’t add the glow on this one, I’m trying both to see which I prefer. (So far I’m leaning towards the glow.) Below, you can see the toon shader and also the secondary blade mechanics.


updates below