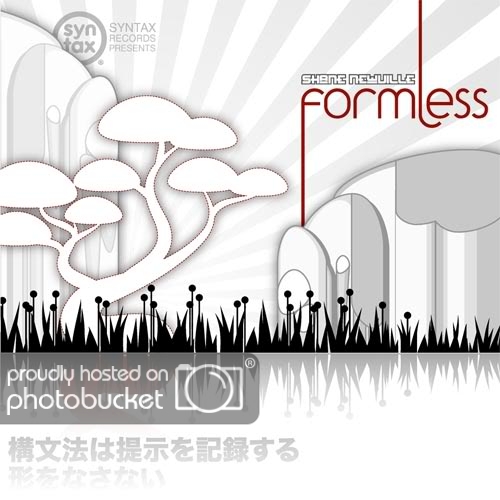
I’ve been working hard over the last week on this little project to promote several Syntax Records releases. Originally it was for the song “Samurai Showdown”, from the album “Formless” by Shane Newville (that’s me!). The song chosen as the theme song for the show “The Beautiful Life” (The CW Network). Sadly the show was cancelled not too long after airing in September 09. Since this project was already started we did a little brainstorming and though of something even better. A video mash-up! The artwork was already there so it made sense.
Anyway, I was heading the project and had to thing of ways to get the job done quickly and nicely. Of course Blender is on the top of my list for software and it ended up being used for biggest section of the animation. I used a few other commercial programs but I don’t need to get into that part. (…awe heck: Final Cut Pro, QuicktimePro, Apple Compressor, Adobe Flash, Illustrator and Photoshop.)
You can view the finished video here:
Kaboose & Shane Newville - “Knuckle Up” (Experiment X Remix)
So the process went as follows:
-
I obtained the original CD cover art Illustrator files from Ian Polanco (Creative Director for Syntax Creative).
-
Figured out how to use Illustrator, organized and exported layers from the image (Background, Forground, etc…)
-
Took the separate images into Photoshop for cropping, editing, resizing then exported as PNG files (also taking note to the pixel dimensions)
-
Organized each group of images in their own folders (Kaboose_SideView, Kaboose_Front, Formless, etc…)
-
Each image was imported into Blender one at a time. I created a plane, scaled it according to pixel dimensions of the image (For example: If the image was “Hills_(1237 x 984px)” I would scale the plane (in Object Mode, using properties (press N)) ScaleX: 1.237, ScaleY: 0.984)
-
After scaling press Ctrl+A then choose “Scale and Rotation to ObData” (making this the default scale for the plane (will now show up as ScaleX: 1.000, ScaleY: 1.000)
-
Enter edit mode, select all vertex, press U to unwrap the plane, then apply the chosen image as its texture (not going to get into texturing, there is plenty of info online already).
-
Repeat steps 5-7 for every image to be used.
-
Import the actual image of the album cover (or whatever chosen image is)to be used as Background Image for reference.
-
In Orthographic view (5 on Num Pad to toggle, then choose either top (7), side(3), or front(1) view to see background image), line up each plane to the background image being used as reference. (Also do this with Textures visible Press Alt+Z).
-
Once everything was in place I gave it a LocRot key frame (press I) at frame 1 just to make sure they don’t get moved by accident.
-
I duplicated each plane and moved it to the side (while snapping to grid) along X axis till it was just out of view. Then make the original the parent for each duplicate.
-
I then, for example, grabbed the parent plane at frame 400, moved it left along x axis until the first duplicate plane was sitting exactly where the parent was at frame 1, then set a new LocRot keyframe. I did this to each layer. Once the keyframes are set, you can move the one at 400 to make it move slower or faster. (moving to frame 800 makes it move twice as slow). The background should move the slowest so I set it to frame 1200 or 2400. And the planes closest to camera should move the fastest so it was either 400 or 800. (I kept intervals of 400 for the sake of being organized). Also, I set each object’s LocX IPO curve to Cyclic (press E in the IPO window to choose).
-
Organize your layers. For example: all background places go to Layer 1 (Select a plane, the press ‘M’ to assign it to a layer), Forground to Layer 2, etc…
-
I then rendered PNG images sequences of each layer (with Alpha transparency (choose RGBA in the Scene buttones (F10) on the Format tab), (also used Premul on the Render tab so the background is transparent).
-
I then used QuicktimePro to turn image sequences into a Reference to be imported to FinalCut Pro (which would allow the sequence to show up as one movie clip instead of separate images for each frame.
-
I did all the compositing and final motion tweening/editing/audio/video syncing in Final Cut Pro, then exported using Apple Compressor.

FWEW! Done. If you made it through this I congratulate you for your determination to learn. I hope it wasn’t too tedious.
There are probably tons of better ways to get this stuff done, but for the amount of time I had and complexity of the project, I did my best to create the most efficient workflow.
Originally I wanted to animate Kaboose completely in Blender, but due to the lack of time to learn Jazzdalek’s replacer script, I animated the different imaged with both Flash and Final Cut Pro.

Here are the other covers used in the animation: