Keyboard Heaven.

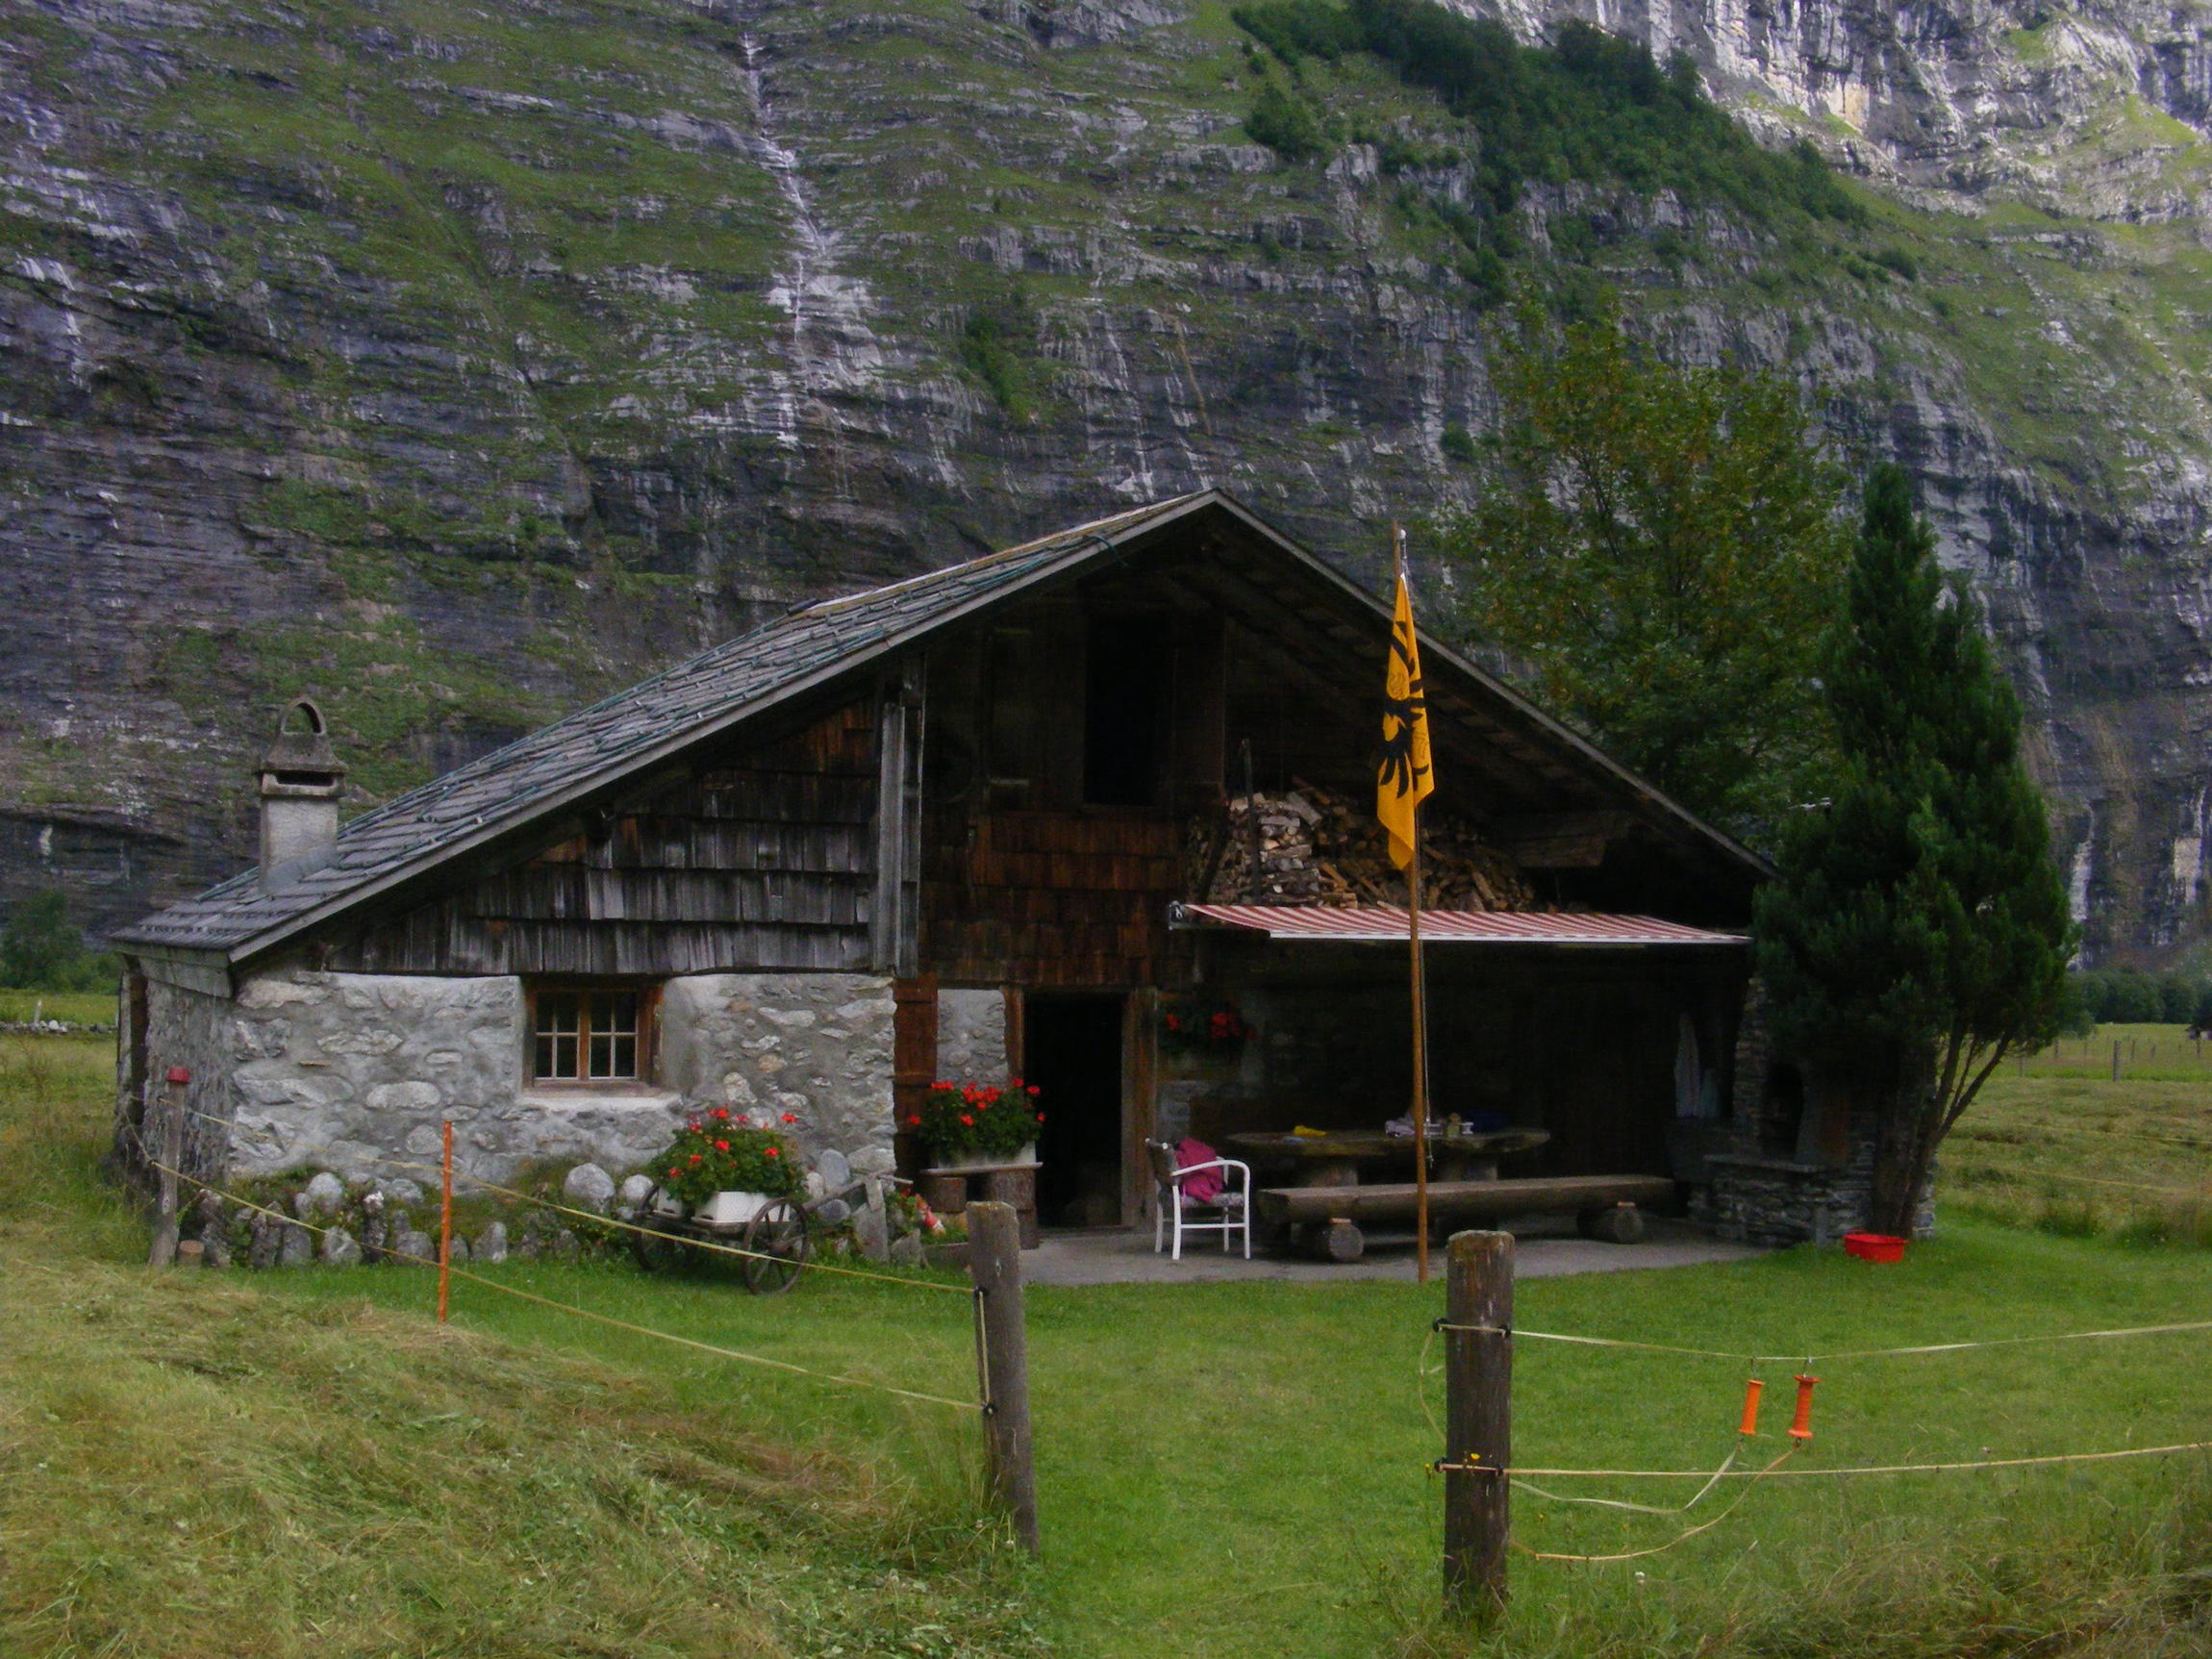
I’m back, after three glorious weeks in a very remote part of Switzerland this is the house I stayed in, it had an outside toilet, the bedroom was in the attic, and the shower was in plain view of the entire Urbachtal valley. (mind you you only took a shower when the sun shone, the hot water system consisted of a hosepipe tacked to the roof, solar energy at its most basic). I love this house with a passion though, and will go back whenever I can. I also mean to build it in blender when I have the time. By the way the cliff behind the house is half a mile away, and forms the east wall of the Engelhorn, which is over a mile high. (this is modest compared to the big mountains in the Berner Oberland).


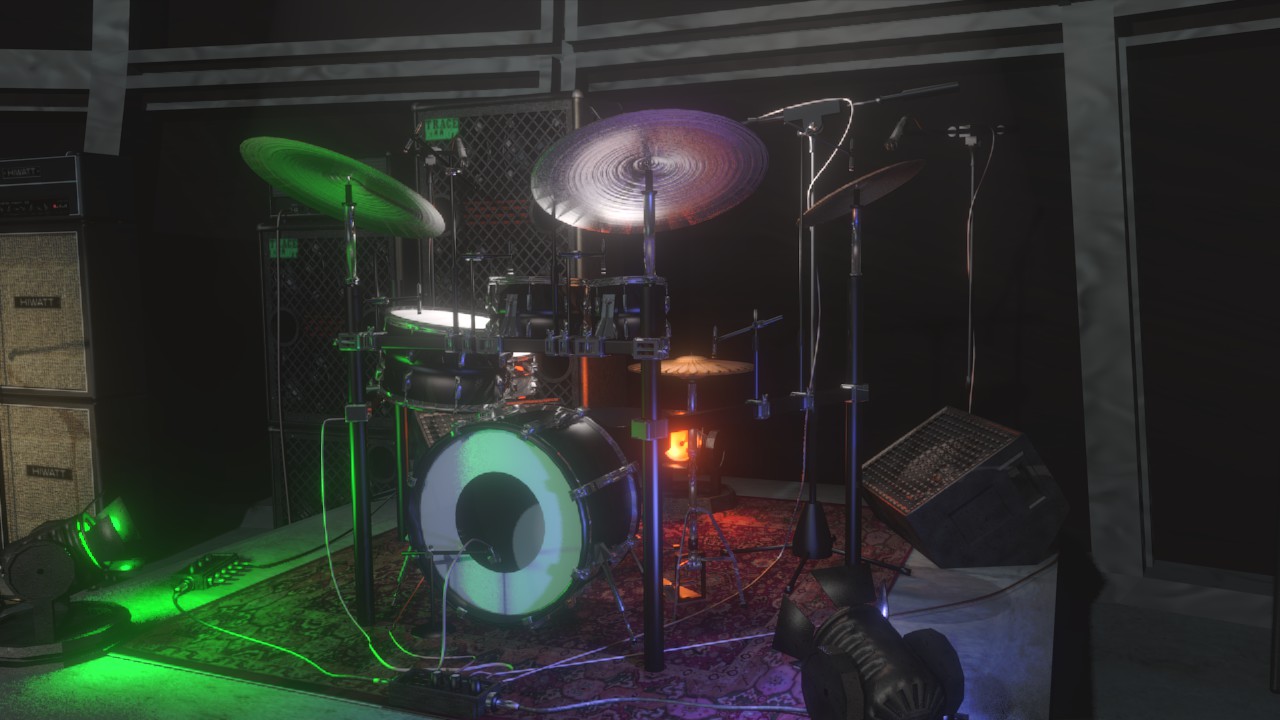
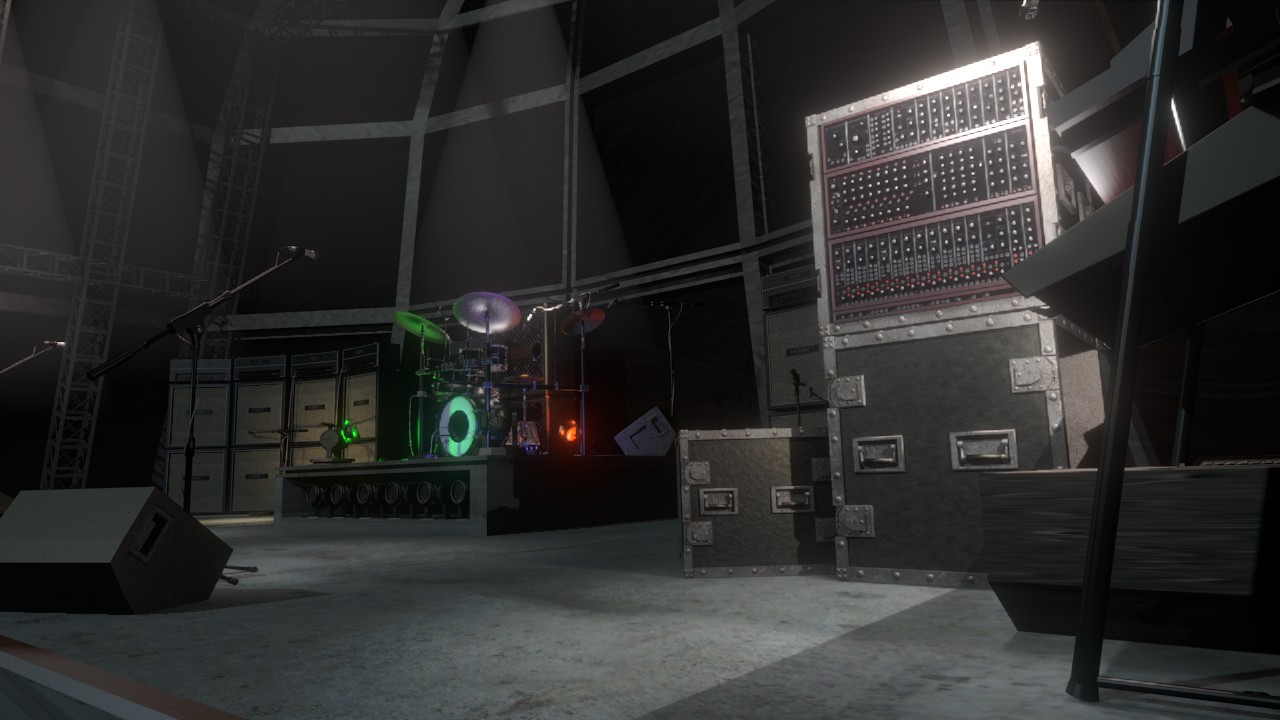
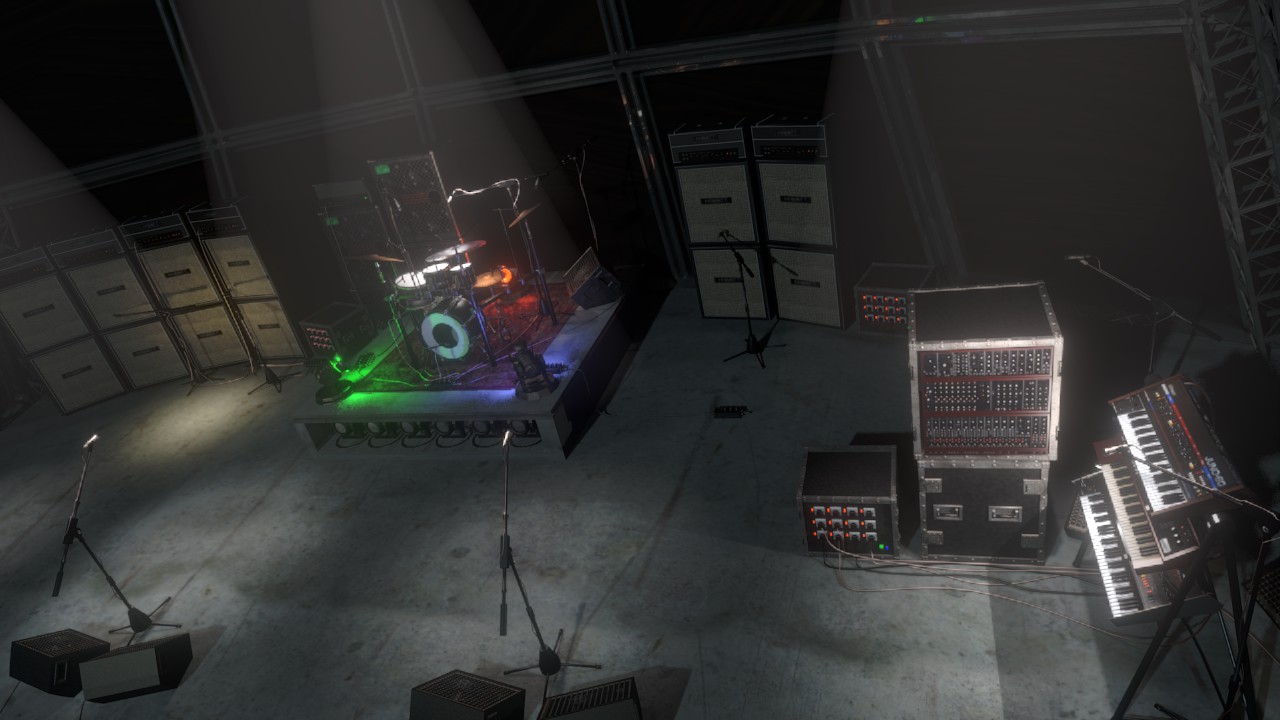
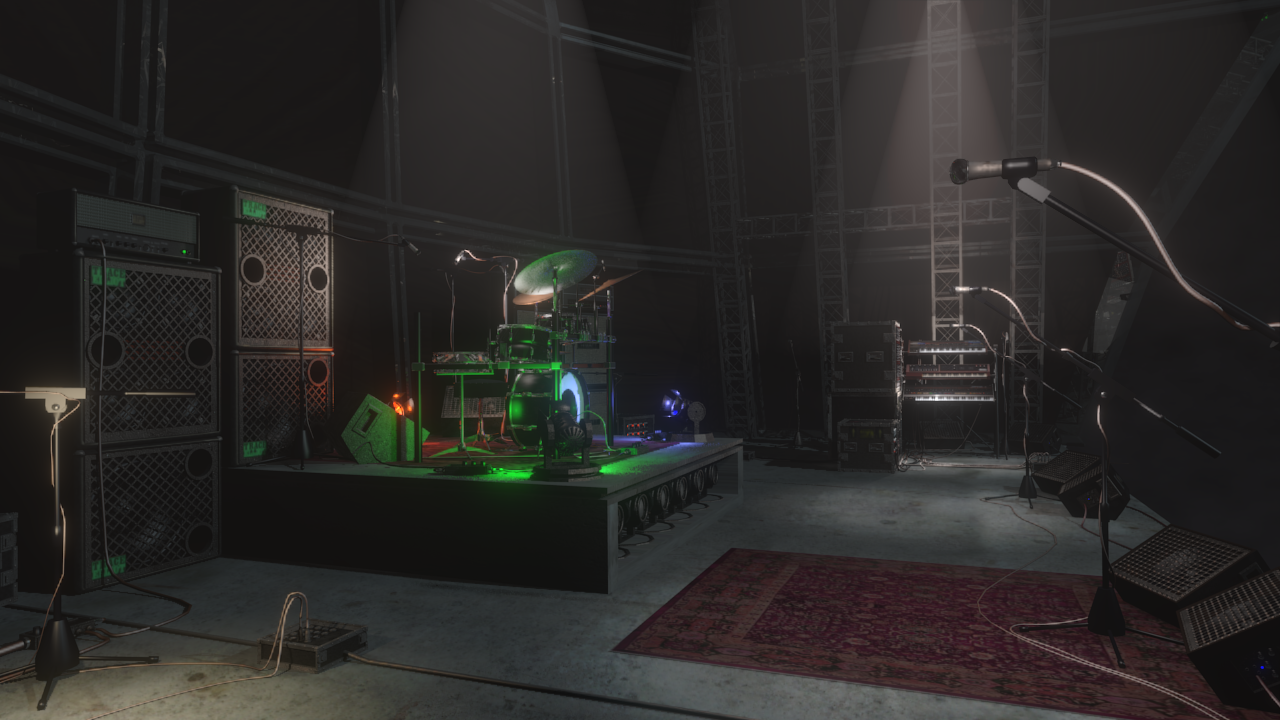
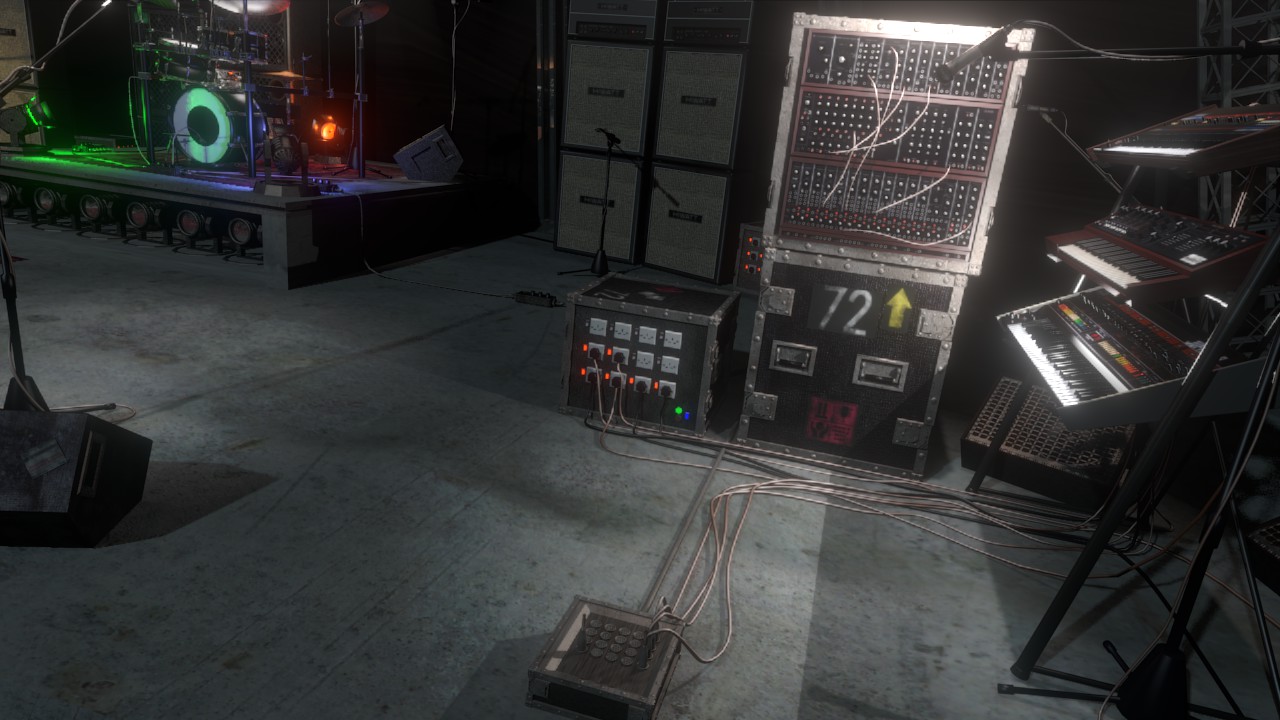
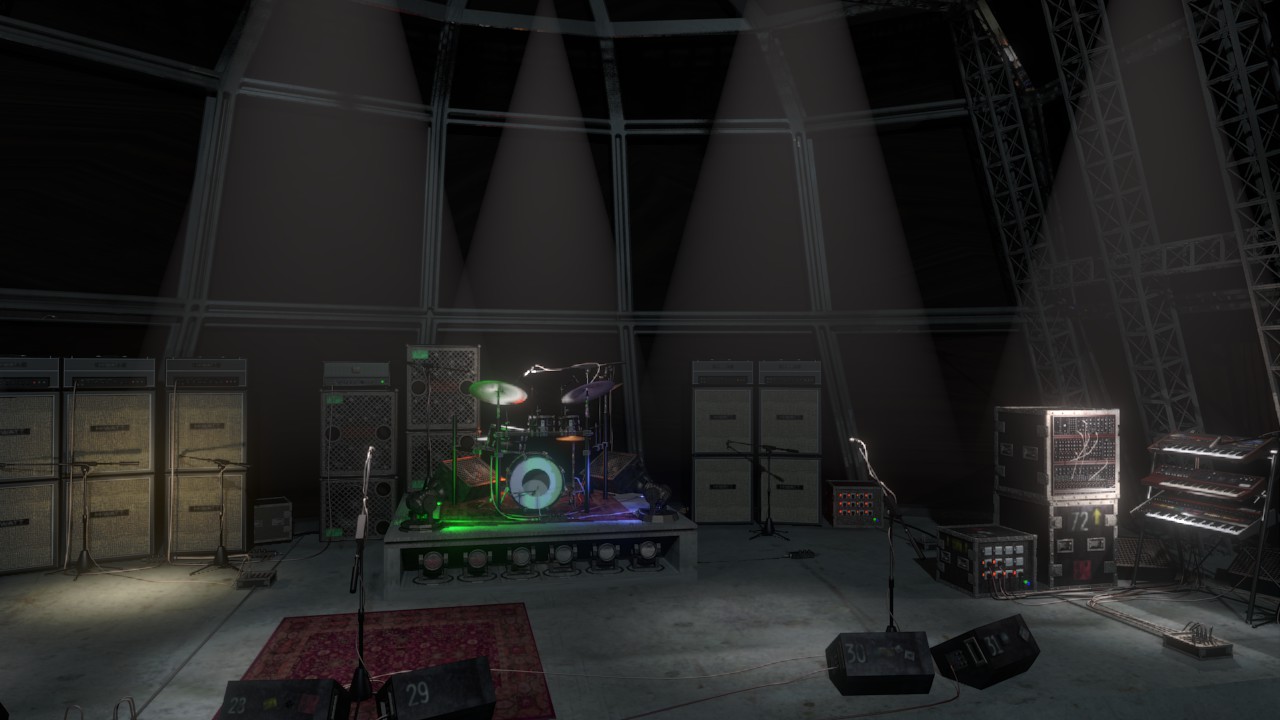
Anyway, since I’ve been back, I have carried on with the stage, the main addition is a stack of Hiwatt 100 valve amps. This was always going to be my final choice, as I used one for 20 years in my band. I bought it for 50 quid off a friend in the eighties, and then sold it a few years ago for the same amount as lugging it around to gigs was doing my back in. You can imagine my horror when I saw an identical amp in similar condition sell on ebay for over 1000 pounds. Additionally, I have added a fairly well detailed mike stand, and some wiring, which I will continue to add to. There is no addition to the lighting as yet, but once the stage is done, I will be spending a lot of time on it
.


I can’t believe that cliff is a half mile away…looks like you can reach out and touch it. A very beautiful escape for sure.

You can imagine my horror when I saw an identical amp in similar condition sell on ebay for over 1000 pounds

I’m guessing they may have been tube amps. The mike stands look great as does the whole scene… Mick and Keith are itching to take the stage. It really looks great and welcome back.

It was a valve amp, built in the early 70’s, I used to have to order replacement valves from Russia in the 90s as they were the only people still making them. I believe that has all changed, but these days I use a roland fx unit with amp modelling through a decent keyboard amp, it weigh less, and is far less temperamental.

Two views, one of the drumkit, with cables now added, I experimented with bezier curves but settled in the for extruding long thin rectangles in edit mode, and adding a subsurf modifier, this was easier, and proved less of a performance hit. The drumkit has acquired a carpet. It is common practice among drummers to do this, as it stops things from sliding around. The second photo is stage right and features the modular synth. I’ve also added a fog glow in the compositor, which helps to simulate the slightly smoky atmosphere.


The additions you made look great… I think I would take a second pass at texturing the metal material that forms the all of the girders and stage rigs. I didn’t really notice until the closeup on drums you just posted.,something looks off on it.

I always liked those type rugs they like to use on stages… A lot of times you see the singers and guitarists having them in front of their mikes.

the Ferrari F40 of analogue polysynths :stuck_out_tongue:

really nice models of great objects man - keep up the good work!

as an aside I know that d16 (who make the Phosycon 303 emulation VST etc.) use blender for their interface modelling/rendering, I remembe their modelling guy chatting about it on wiretotheear.com once.

The girders were undercooked, so I’ve had a bit of a fiddle. Most of the time however has been spent adding cables, including a new powerbox. The cabling is tedious in the extreme, but it doesn’t look right without the spaghetti, so I’ll be spending another couple of evenings on it.
Anyway, here it is from another angle.


When the cables are done, there is some paraphernalia to add, music stands, set lists, beer glasses, a couple of chairs, (The bass player is quite elderly), possibly a couple more rugs, (The carpet worked quite well), then the lights!

I looked Phosycon up and found a demo on youtube, the UI looks pretty impressive, if anyone is curious, here’s a link.

it is a very good 303 emulation - esp. at the roary nasal distorted acid sounds, I think for the waterier, rounder ‘cleaner’ 303 sounds Audio Realism Bassline is more suited though.

Update, I’ve decided I’ve done enough cables. I’ve also added some stickers, and also tweaked the textures on the monitors.


I am starting on the lights, these will get more complex, as I go along, as I will be choreographing the different sets to music, I will use Sony Vegas for the video editjng, as the UI is very flaxible when dealing with this kind of sync, as well as having a large selection of animatable effects. I am working up to a test video with music, but until then will put up a set of stills with the different light sets, often from different angles. These are the first, blue light, centering on the keys, and I have also added the video screen.


Attachments


So are you compositing the lights in Vegas… or are you doing them in Blender… looking forward to your test video. The video screen was a nice addition. Just curious… how are your render times in this project so far?

I just love concerts…everything about them…well except for the ridiculous ticket prices that are being charged these days. The staging has always fascinated me for some reason, that’s what keeps pulling me back to this thread.

I am hoping to try a sleight of hand with this. What I hope to do is rather than rendering an animation on a frame by frame basis, is to produce a series of stills, from the same angle, with different lighting arrays which can then be composited together in time to the music.
I am not sure yet whether this will work, but theoretically I think it might. It has two advantages, firstly it drastically reduces render time, so I can afford to tweak and turn on the bells and whistles, secondly it enables me to sync the lighting changes to the music very accurately.This is where I use Vegas because it is particularily well suited to this kind of editing.I can give an example in something I did several years ago (Not HD I’m afraid) but the point being, this only took a couple of days to edit

Also you will see how fluid the effects can be, and this is using an earlier version of the programme. Then I add live action using greenscreen, compositing the two in blender.

Render time for the full stage is currently 1 minute 11 seconds, I expect this to rise as I add more lights,
Closeup of the keys is somewhat longer, weighing in at 1min 39 seconds, this at 720p using an i5 2500k at factory settings.

This has come out pretty well, bear in mind that the stage will probably not be shown from this position in the final video, but as a proof of concept it works. Also it only took a couple of hours to edit and render.:eyebrowlift2:

the music is also part of what will be used in the finished piece.

This is my first greenscreen test, I’ve posted in the blender tests section, but as this has direct relevance to this project, I will also put it here.:slight_smile:

There is a little bit of lateral thinking, behind this. I needed a long shot, of the type you see here, but there is not enough room in a small flat! this will work anywhere that there is a green lawn, it was filmed from the top of a bank, so that the green fills as much of the screen as possible. But it can also be done at ground level if the bank is high enough. This was done on a Lacrosse field, but I am sure that cricket, football, or rugby fields would be equally suitable.

The greenscreen was produced in Blender, after following this excellent tutorial,

It proved easier than I expected, and the most difficult part was adding the shadow, which was done frame by frame in photoshop.

Man, I’m impressed with the sync test you did with the lights… as well as the green screen test you did. Are you planning on greenscreening some live playing musicians into the stage?

That music in your greenscreen, reminded me a little of an old band called Alan Parsons Project (dating myself here :slight_smile: )

The only area that seemed off to me was maybe some of the lens flairs, But an excellent job syncing the lights to the music. No doubt there is many times, where it makes a lot more sense to go outside of Blender for certain effects.

So basically you rendered a number of different light setups in Blender, Brought those still renders into Vegas and synced them to the music. Was the syncing done manually?

Man, I’m impressed with the sync test you did with the lights… as well as the green screen test you did. Are you planning on greenscreening some live playing musicians into the stage?

That’s the idea, also, the greenscreen that you saw is connected to this project.

That music in your greenscreen, reminded me a little of an old band called Alan Parsons Project (dating myself here :slight_smile: )

I still have some Alan Parsons in my vinyl collection. Did you know that he was the engineer on Dark Side of the Moon?

The only area that seemed off to me was maybe some of the lens flairs, But an excellent job syncing the lights to the music. No doubt there is many times, where it makes a lot more sense to go outside of Blender for certain effects.

I got a bit carried away with the lens flare, but when I do the proper version I’ll be a little more tasteful :yes:

So basically you rendered a number of different light setups in Blender, Brought those still renders into Vegas and synced them to the music. Was the syncing done manually?

That’s right, I could have used the VSE in blender, but in this case Vegas has a UI that is ideally suited to the job. With blender it would have been hit and miss, whereas in Vegas you can see the results as you do it. Additionally the waveform editor is more like those associated with Digital audio workstations such as Cubase with which I have some years of experience.

Don’t get me wrong, Blender is one of the most astonishingly exciting programmes to work with, even if you don’t take into account that it is open source. but there are other programmes that are more flexible in certain areas, notably Vegas and Photoshop, and particularily with photoshop, I have about ten years of working experience, so it doesn’t make sense to use a programme that you don’t know so well, other than for the challenge of learning it.

A little while since I posted, and quite a lot has happened on the project. I spent a long while trying to get the greenscreen to work, including dying (sic) bedsheets bright green, and assembling all the standard lamps and anglepoise lamps in the flat. I had varying degrees of sucess, but seemed unable to produce any degree of consistency. In the process I managed to drive my wife and son to distraction, turning the house upside down on a daily basis. Cathy is very forebearing however, so rather than throwing me out on the street, (totally justifiable in my opinion), she bought a greenscreen apparatus on E-Bay (price 81 pounds with free delivery), and gave it to me as an early birthday present! For the money you get a very large green muslin cloth, a collapsible frame, and a couple of decent quality diffuse lamps. The setup is definately worth the money, and I could be more ambitious, the only limitation now, is the rather small size of my living room. Anyway chromakey is now a viable option, and I have done most of the shooting. At the moment I am editing, and this is proving to be quite a handful. Here are some of the results.


OK… admit it… you were considering painting every wall and floor in your home bright green … making it in essence one giant green screen :slight_smile: I always wanted to get one of the portable units like you mentioned.

Glad to see your back at it… I’ve got to tell you it is looking great. The scaling of the set relative to the musicians look very good. I’m curious on your workflow… right now you have this set that is rendered with spotlights… you did some greenscreening and rotoscoping of the musicians and have composited the two. How are you getting the musicians to match the coloring the spots are giving? It does seem like they are being “washed” in similar light, which of course helps sell it.

I dig the one man band!

this project is looking awesome, keep it up!