Hello Khalibloo,
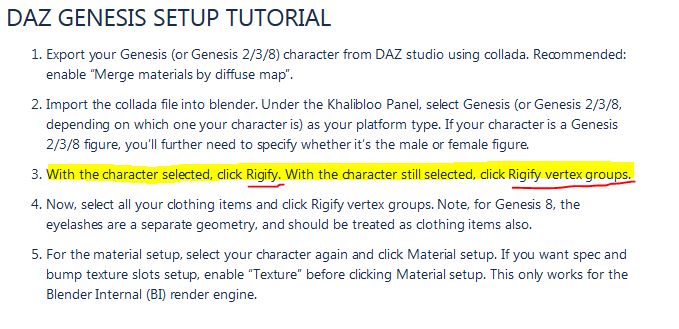
I am new to your amazing addon and i am facing an issue with it. Before i talk about the issue, i would like to mention that i am using Blender 2.79 and DAZ Studio 4.9. Following the instructions in your wiki, I am following the DAZ GENESIS SETUP TUTORIAL and am stuck in the 3rd step “Rigify”.
Coming to the issue, I am importing a Genesis 3 Female mesh as DAE (Exported the DAE with Default options and selected “Merge materials by diffuse map” as mentioned in the wiki) into Blender and when i click on “Rigify” button under your panel, nothing happens. There are also no errors thrown of any kind. I enabled the Blender console and tried the “Rigify” again and still nothing happens. Again, no errors thrown in the console. My python scripts option is selected so that they are enabled to run in Blender.
Hello Khalibloo,
I am new to your amazing addon and i am facing an issue with it. Before i talk about the issue, i would like to mention that i am using Blender 2.79 and DAZ Studio 4.9. Following the instructions in your wiki, I am following the DAZ GENESIS SETUP TUTORIAL and am stuck in the 3rd step “Rigify”. I have tried both your master and 2.79 branches and both versions don’t work.
Coming to the issue, I am importing a Genesis 3 Female mesh as DAE (Exported the DAE with Default options and selected “Merge materials by diffuse map” as mentioned in the wiki) into Blender and when i click on “Rigify” button under your panel, nothing happens. There are also no errors thrown of any kind. I enabled the Blender console and tried the “Rigify” again and still nothing happens. Again, no errors thrown in the console. My python scripts option is selected so that they are enabled to run in Blender.
It’s easy to think that that’s an oversight in Blender. But I think it’s due to blender’s structure. The armatures have no idea which meshes are using them. Remember the Armature modifier itself is on the mesh itself. So only the mesh knows which armature(s) it is using. Pressing shift + g in the armature’s pose mode, there’s no way to tell which mesh to go to. there could be multiple meshes (shirts, hats, gloves, etc) using the same armature.
There are many other similar reasons why such a system would be extremely difficult to deliver.
There are a few reasons where the rigify button ignores the click. One common reason is that you’re clicking on the wrong rigify button. For example, if your figure is a Genesis 3 male, clicking the rigify button under Genesis 2 male or even Genesis 3 female will just ignore the click.
Another possible reason is that you do not have your Genesis figure mesh object selected. For example, if you selected the shirt instead of the character itself, clicking the rigify button would not produce any response either.
The only other possible reason I can think of is that the mesh has been destructively modified. Perhaps some vertices were added or deleted. If you delete the eyelashes for example, this could cause the issue you’re having.
It’s very easy to make such mistakes. I myself still make them so just give it another shot. Make sure you select your figure and click the correct rigify button.
In hindsight, I should have added some sort of error messages. Thanks for bringing it up.
Edit:
So basically, when you run into cryptic issues like this, try to make sure you haven’t introduced any extra steps while following the tutorial. Something as simple as applying a modifier can end up causing a lot of problems if you do it between the steps in the tutorial.
Hi Khalibloo,
First of all, my sincere thanks for your quick response.
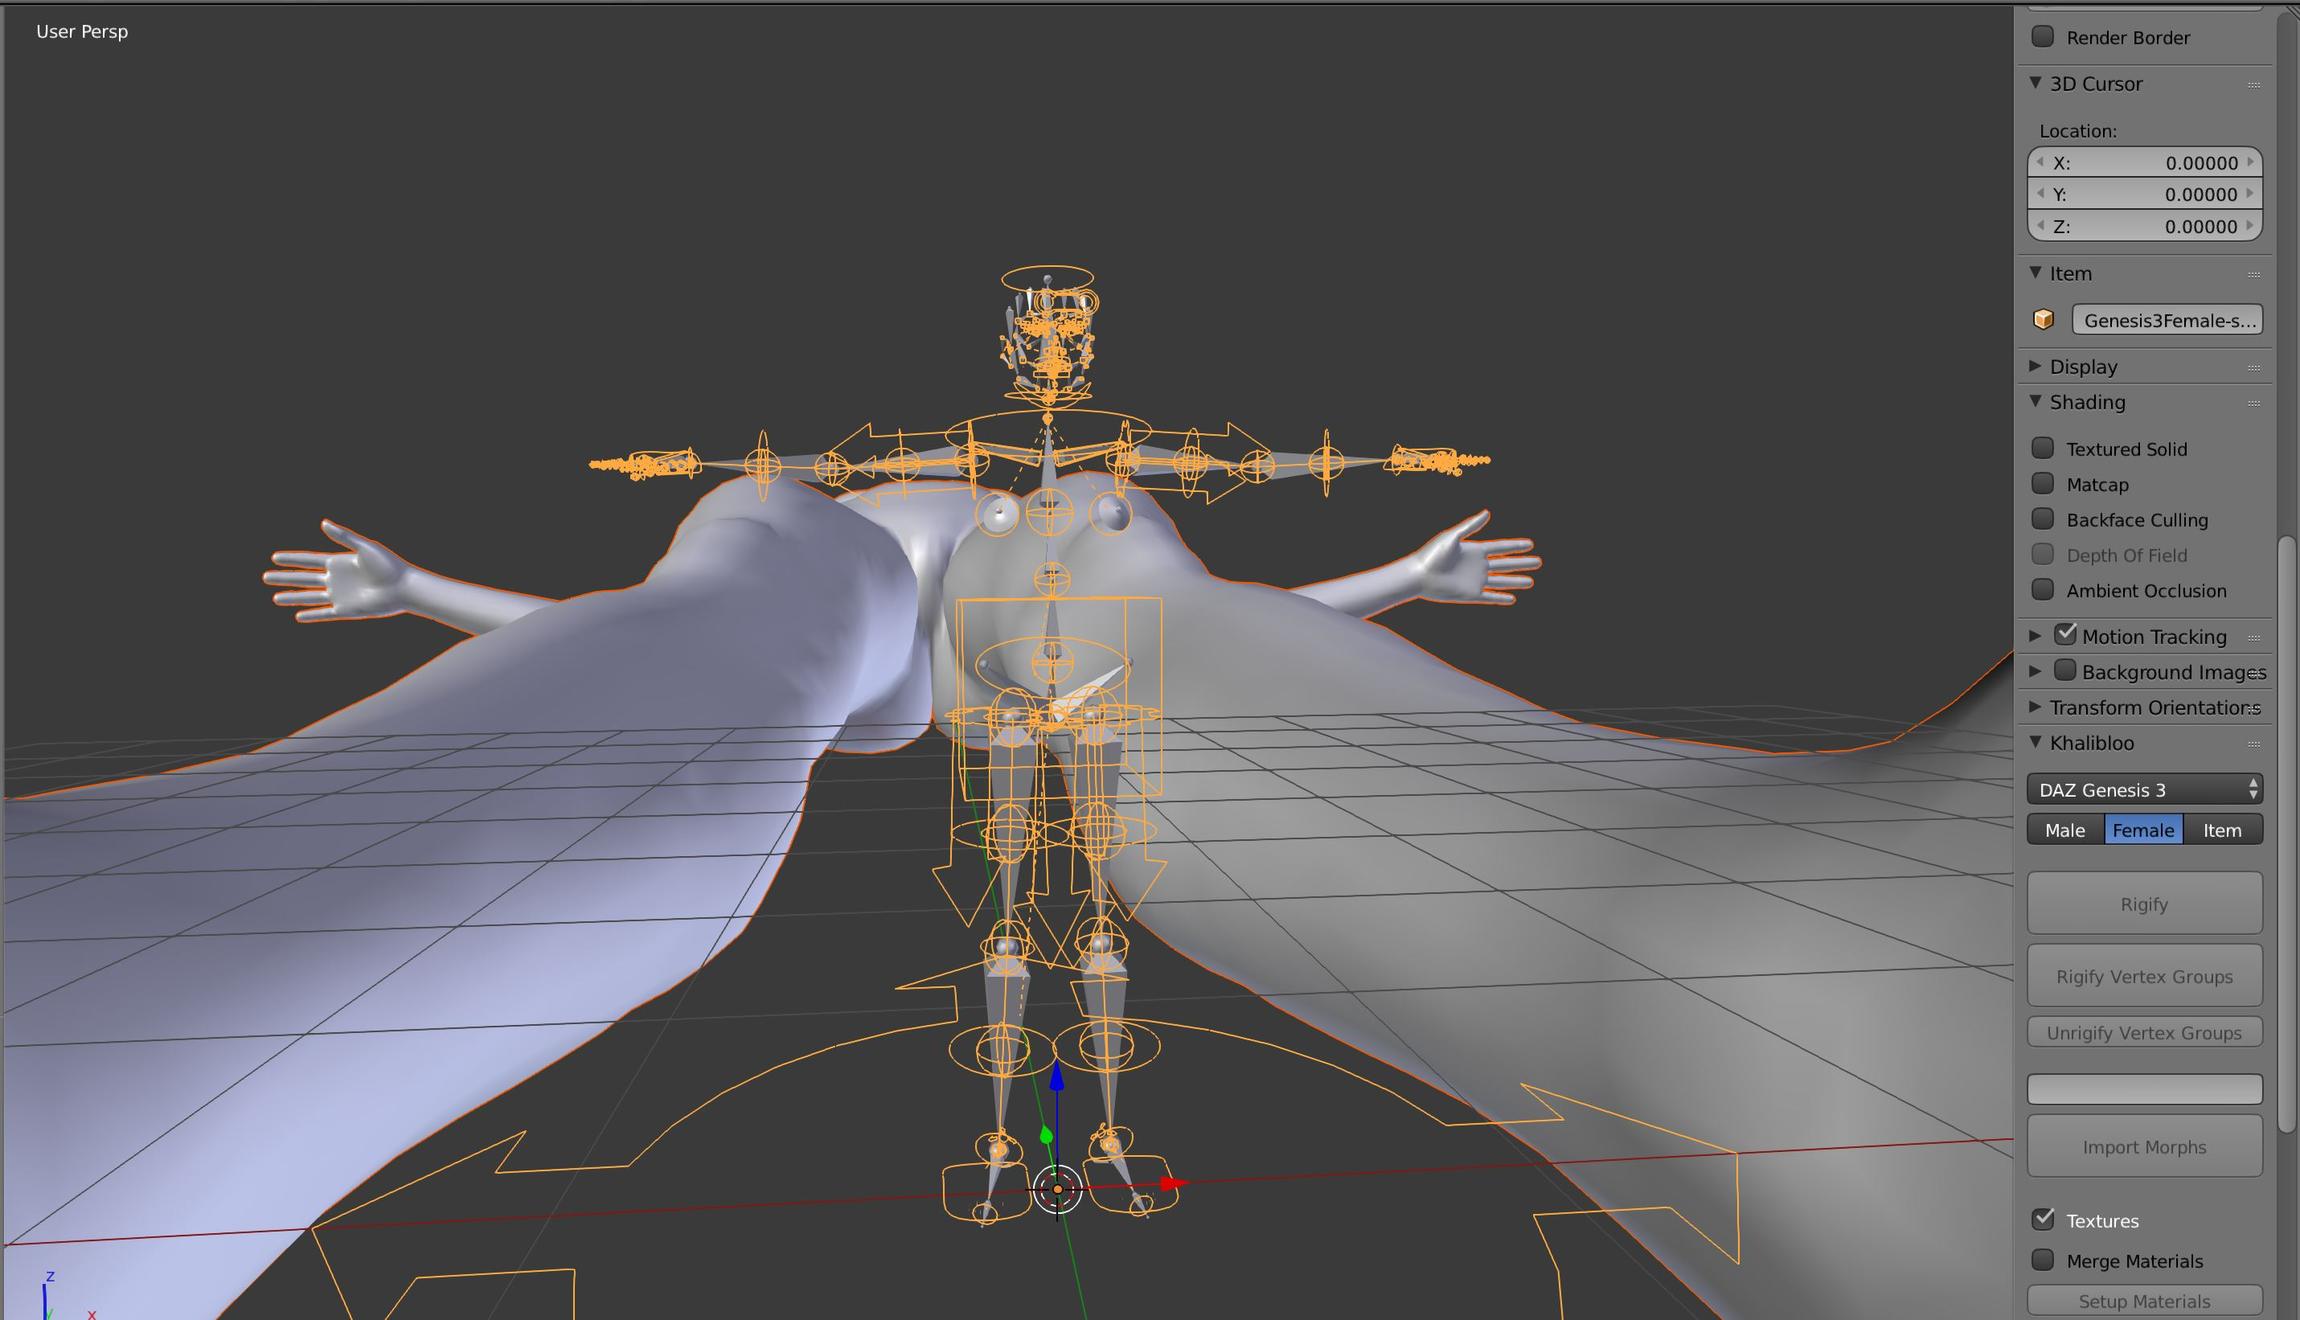
Secondly, i figured out why my mesh was not rigging. Its because in DAZ, i use additional external body part meshes to define the body more clearly. But there are still issues that persist. For example, in my mesh, i added additional nipples since the stock Genesis 3 Female does not have any. I tried the following .
I first imported the Genesis 3 female model into blender as a DAE file and it bought the nipples as additional meshes. I hid them for the time being and followed the first 3 steps in DAZ GENESIS SETUP TUTORIAL mentioned in your wiki, since my first focus was to rig the model and try animating the model first and besides my model does not have any clothes. So i did not find the need to follow steps 4 and 5 of the DAZ GENESIS SETUP TUTORIAL. Its a simple Genesis 3 female with additional nipples i added (which i hid, as i mentioned earlier)
After step 3, i was able to see object controls for the rig as shown in the below pic.
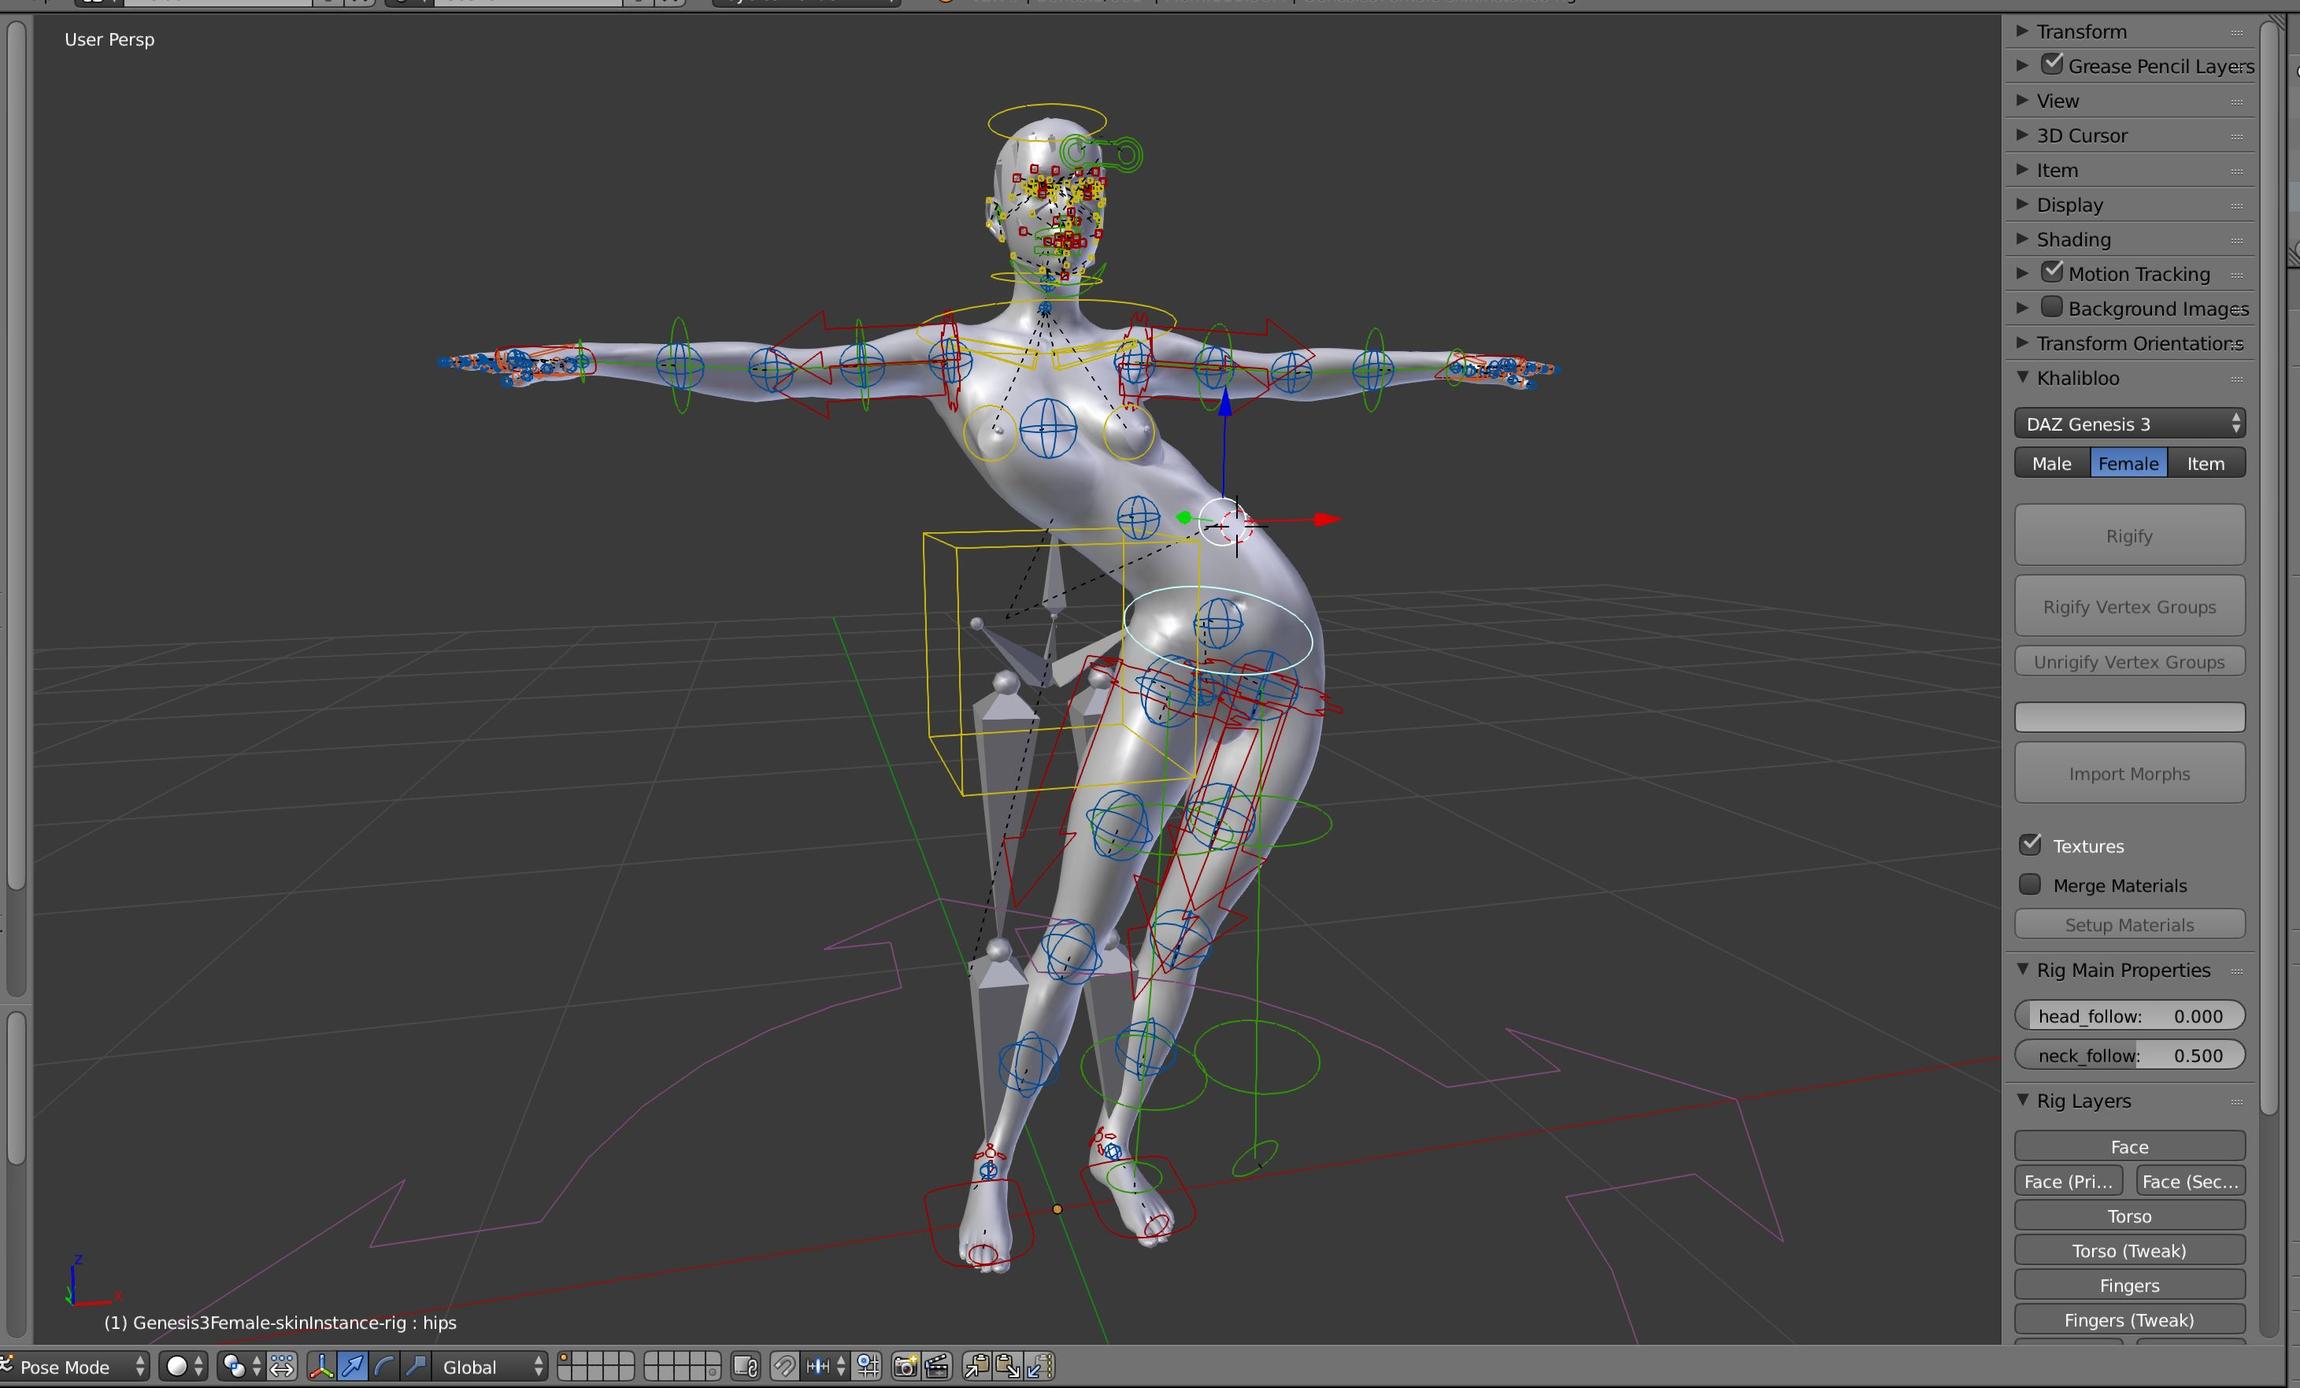
Next, i then tried binding the controls to the body mesh by selecting the body mesh first and then Shift-Selecting the object control and clicked Ctrl + P and selected “Armature Deform with Automatic Weights” so that i can try and pose and animate the model and then this happened.
Basically, the whole body mesh distorts itself to a giant and lies flat on the floor. Does your panel automatically weights for posing? Because, before i performed the “clicked Ctrl + P and selected “Armature Deform with Automatic Weights”” step, i tried moving the or posing the character and it just separated the Object Controls from the mesh and did nothing.
So in a nutshell, what i want to do first is to import a simple Genesis 3 Female model with the additional nipple meshes, rig it and animate it. Nothing Else. Without figuring that part out first, i don’t see any sense in performing steps 4 and 5 of your DAZ GENESIS SETUP TUTORIAL.
Next thing i want to know is, is there any way you can support Genesis Body meshes with external modification like the one i mentioned? Because i tried joining the nipple meshes to the body meshes by using Ctrl + J and then perform your rigging step and it obviously did nothing.
Again, to remind you all the above was done in Daz Studio 4.9 and blender 2.79 and i also used your 2.79 version branch khalibloo panel version. I have also attached the Blender console output as a text file in the below link for your reference if that helps you in anyway. http://www88.zippyshare.com/v/UYYOpKwG/file.html
Additionally, i am attaching the DAE file for your reference. When you import it into blender, make sure, you delete the floating nipple meshes in sky as they are already part of the body mesh, but unattached. so, if you click on the body mesh and move it around, it wont move the nipples as well. You will still be able to perform your rigging operation on it, but once you attach the nipple to the body mesh using
Ctrl + J and then perform the rigging operation, it wont work.
The Khalibloo Panel automatically binds the character mesh to the armature, so using Ctrl + P is not needed at all. Once you Rigify, you’ll have a rig generated for you. Then “Rigify VGroups” will match up the vertex weights and bind the figure to the armature. This step can also be used on clothing items or body attachments like the nipples you mentioned above. Just select all the meshes that need to be bound to the rig and click “Rigify VGroups”.
When you have a fully rigged character that follows the rig. And the body attachments also follow the rig. Then you can merge them and there won’t be any issues.
The reason why you faced those issues is that the addon uses your character’s vertices to position the bones for the rig. For example, it might use vertex #1234 to position the shoulder bone. But if you edit the mesh in such a way that vertices are deleted or added, this process will fail miserably because vertex #1234 is no longer where the addon thinks it is. It might now be in the character’s toe. This is why it doesn’t try to rigify modified character meshes. But sure, once you’ve rigified your character, you can edit the mesh as much as you like.
Amen.
But I’m desperate enough that I’ll just assume that, if the active object is indeed an armature,
and we are in Pose Mode, then the first child thereof that is a mesh object,
is the relevant mesh that we are trying to populate with proper vertex groups;
and I assume that, if the active Pose Bone is not deforming, then there is nothing to be done,
but, if it is indeed deforming, then etc. etc.
Right now, I was wrestling with the blessed report function, which, I just found out,
is extremely elusive: it is not found unless its call comes from inside a registered class! :rolleyes:
In many cases, meshes aren’t even children of their armatures. I normally just add an armature modifier to the mesh without any parenting. So like I said, it’s a very tricky functionality to add from a technical point of view. There are so many variables that it’s impossible to make assumptions and get away with it. The first child might be the vest that the character is wearing, not the character itself. the first child might not even have the associated vertex group. A vest would not have “DEF-foot.L” for example. It might not even have vertex groups at all. Maybe it’s using bone envelopes. Maybe it’s just parented to the armature but is not being deformed by it.
Keep in mind also, the selected bone is usually not a deform bone. When you move “hand_ik.L”, the constraints have to be evaluated. And in so doing, a whole lot of bones might have moved. in such a case, when I press shift + G, how does the addon know which deform bone I’m interested in? is it the upper_arm.bend.L, upperarm.twist.L, forearm.bend.L, forearm.twist.L, DEF-hand.L? And when you consider that the mesh might be some mechanical contraption with more complex IK setups and multiple rigs deforming multiple separate objects, it gets more and more difficult to make such a system.
I refrain from using the word impossible, but it’s very very close to it In any case, it’s not within Blender’s roadmap as far as I know.
OK; you’ve convinced me that what I’m coding is not going to be an add-on for the general public.
But it will be, for me! I’ll make sure that the vertex groups I’m trying to populate [will] belong to
a mesh that is THE ONE that, in fact, I see in the 3D View, and that said mesh is, indeed, child of
your blessed Pitchipoy accomplishment, except that a few vertex groups are missing.
Those vertex groups shall have the name of the corresponding Pose Bone that I select, one by one,
except if said bones are non-deforming.
My code shall have the courtesy of starting a vertex group, if one should exist but doesn’t.
Relax! At this stage of the game, the character shall be stark naked.
The script will always cue on the active Pose Bone.
Okay, but YOU have made a Herculean effort, complete to over 80%;
you well deserve to have your free-loading users complete what’s missing,
don’t you think? :yes:
As far as I’m aware, “what’s missing” is all in the face, isn’t it?
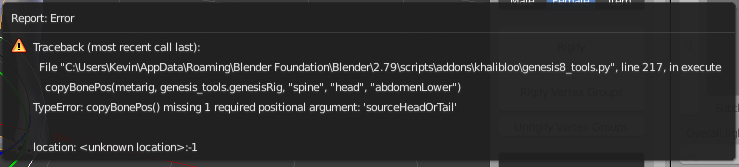
Additionally, when i performed the “Rigify Vertex groups” step by selecting the body mesh and the nipple mesh, i noticed the following messages in the console.
Info: Applied modifier was not first, result may not be as expected
Info: Applied modifier was not first, result may not be as expected
Info: Applied modifier was not first, result may not be as expected
Info: Applied modifier was not first, result may not be as expected
Info: Applied modifier was not first, result may not be as expected
Info: Applied modifier was not first, result may not be as expected
Info: Applied modifier was not first, result may not be as expected
Info: Applied modifier was not first, result may not be as expected
Info: Applied modifier was not first, result may not be as expected
Info: Applied modifier was not first, result may not be as expected
Info: Applied modifier was not first, result may not be as expected
Info: Applied modifier was not first, result may not be as expected
Info: Applied modifier was not first, result may not be as expected
Info: Applied modifier was not first, result may not be as expected
Info: Applied modifier was not first, result may not be as expected
Info: Applied modifier was not first, result may not be as expected
Info: Applied modifier was not first, result may not be as expected
Info: Applied modifier was not first, result may not be as expected
Info: Applied modifier was not first, result may not be as expected
Info: Applied modifier was not first, result may not be as expected
Info: Applied modifier was not first, result may not be as expected
DAG zero... not allowed to happen!
DAG zero... not allowed to happen!
Have you tried rigging the mesh yourself from the link i gave in the previous post?
I dont think i have did anything wrong or missed any step. I also did not in anyway do any kind of modification in the body mesh before rigging it. What is happening? :eek:
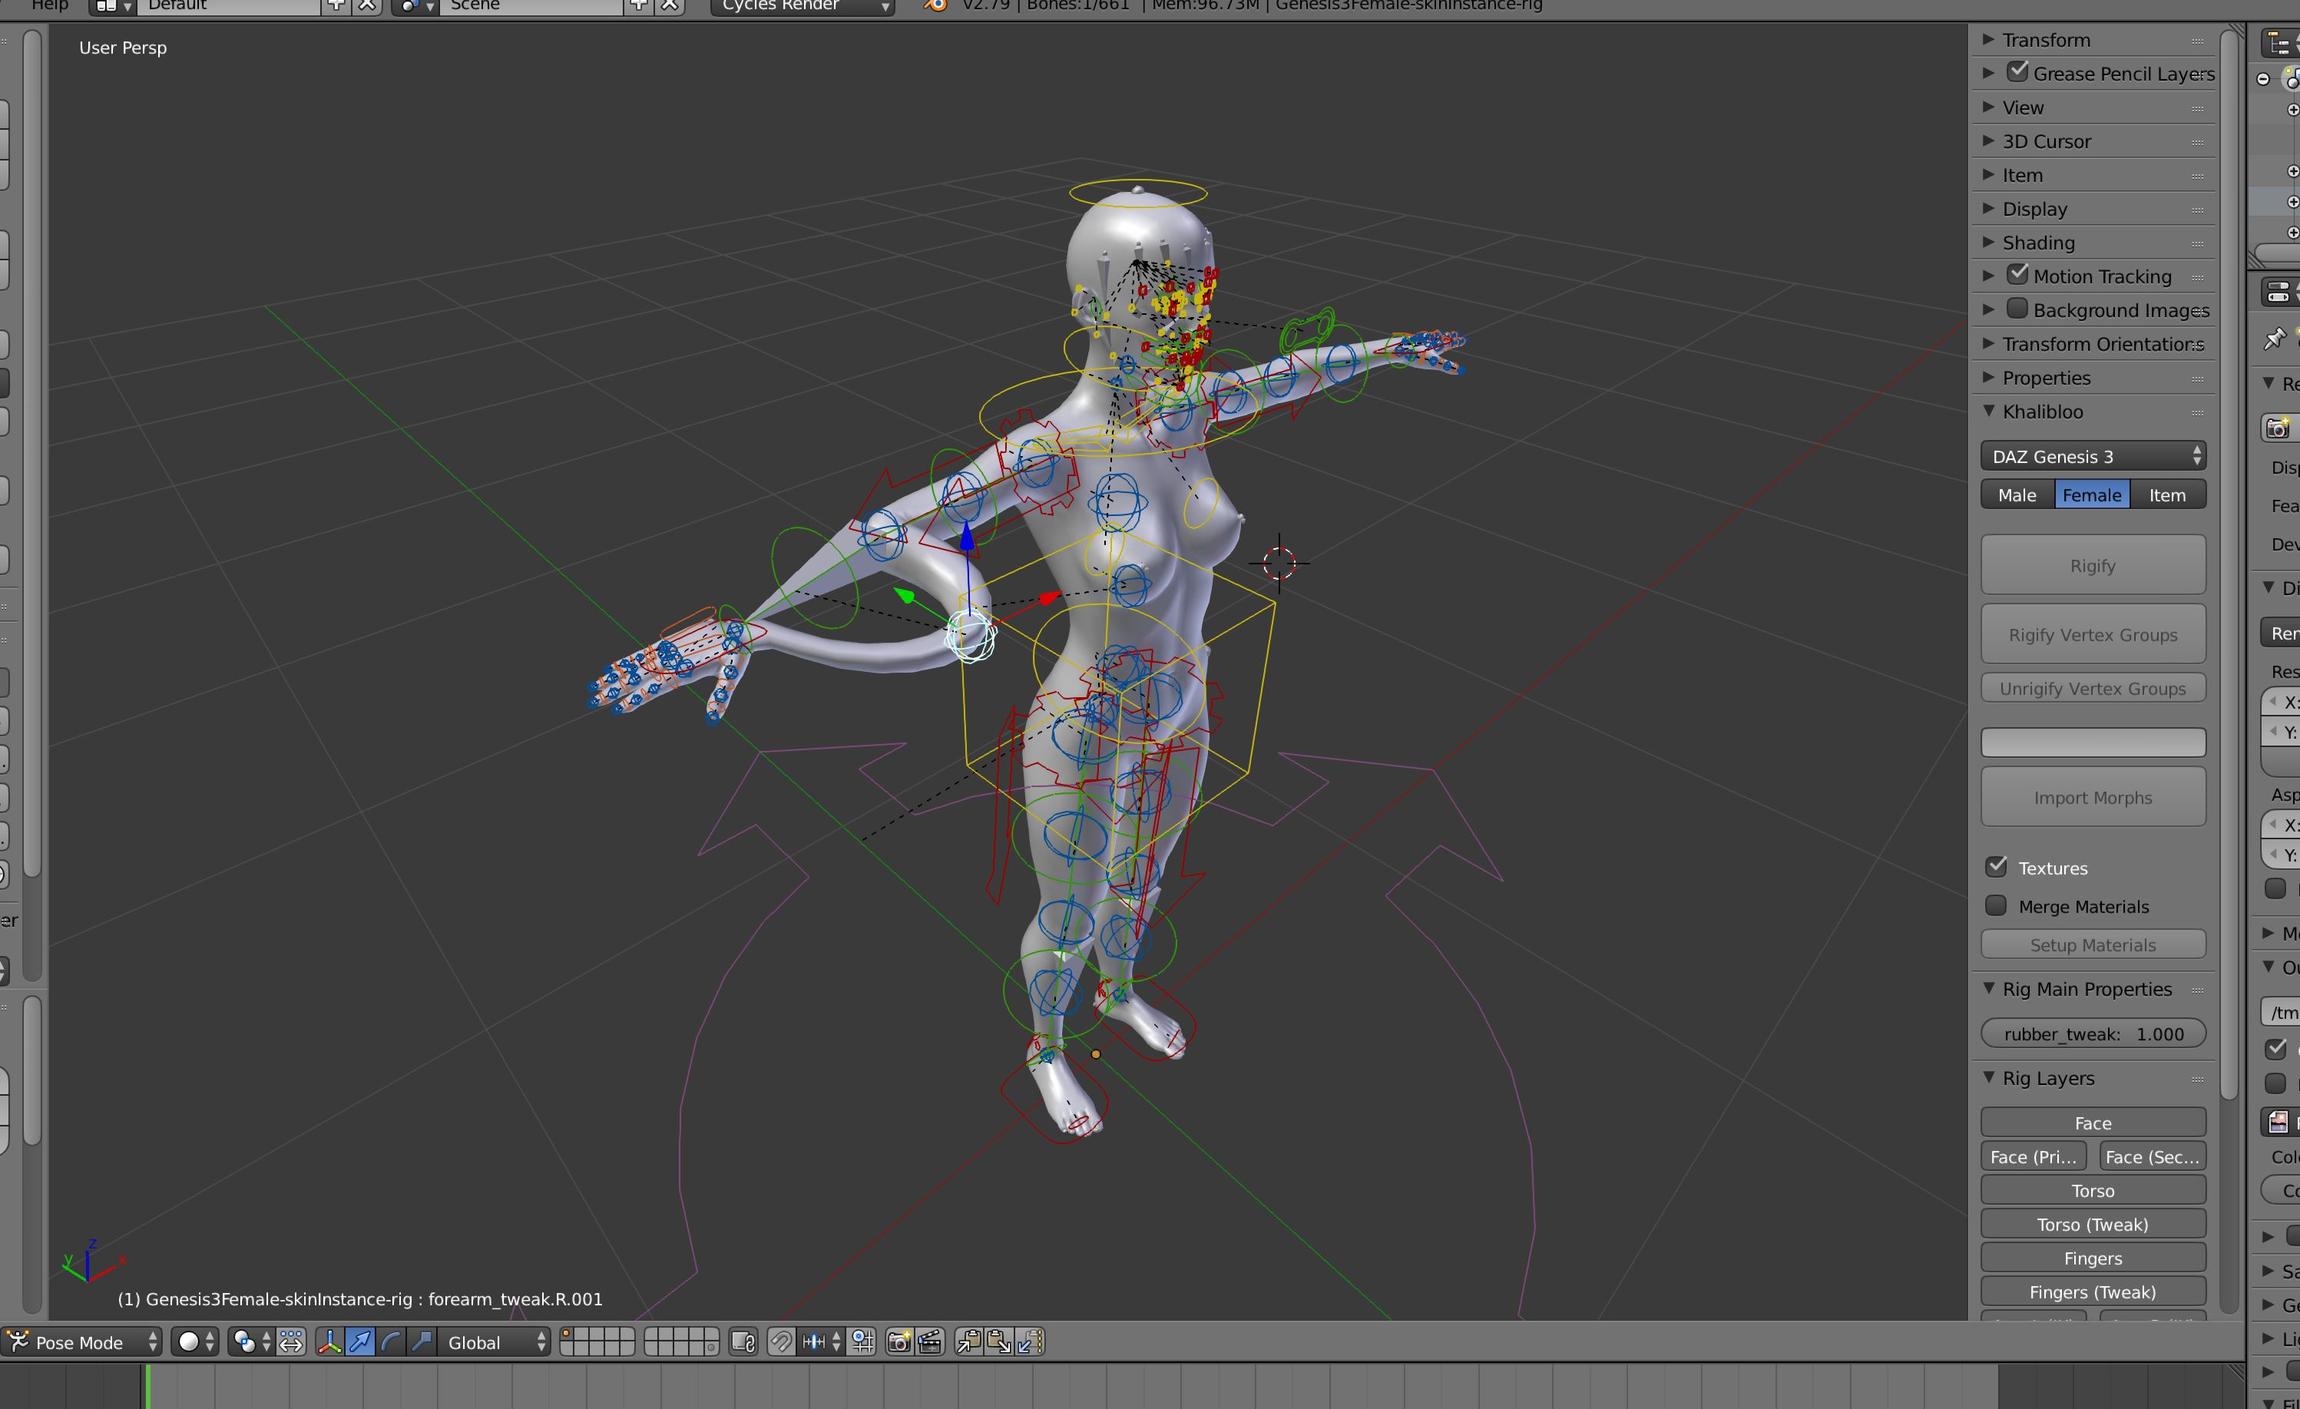
Tried that too as per your suggestion. That did not work either. In the previous method, it atleast distorted the mesh, this does nothing in the Pose mode.
Has anybody actually made this work here? My model is very basic genesis 3 female model with just additional nipple meshes. its frustrating
Actually, I’ve loaded a G2f character, and gotten the Khalibloo Panel to generate a Pitchipoy rig with 661 bones [sic],
most of which are non-deforming, and most of which I can’t move at all, in Pose mode.
What surprises me the most is that the lip bones are non-deforming. [SUB][/SUB]
Dear Khalibloo: have YOU ever succeeded in making a character’s lips move, by way of bones?
P.S. I now have a script that, when I select a deforming bone in Pose Mode,
helps me generate a corresponding vertex group,
but if the Pitchipoy lip bones are non-deforming, then-- ?? [SUB]:eek:[/SUB]
P.P.S. FOUND ’EM !
Bones called “ORG-lip…” and “lip…” are non-deforming;
the deforming ones are on the antepenultimate bone layer,
which therefore must be clicked visible, and are called “DEF-lip…” [SUB]:D[/SUB]
Try this:
Having generated a Pitchipoy 0.5 rig --rigify vertex groups first-- get into Pose Mode
and make visible a bone layer containing red bones that look like little square tiles.
Those are IK bones; whenever you move any one of them,
they cause a lot of other bones to move as well, to varying degrees.
The ones for the face are currently having no effect on the mesh,
because there, the mapping of “DEF-” bones to vertex groups is still missing,
but the ones for arms, legs, torso, yes: they do work,
and by moving them you can make your figure dance!
In most cases, you cannot in Pose Mode move a “DEF-” bone directly,
because it has constraints that tell it to be moved only by other specific bones.
Okay; I haven’t tied it to Shift G, V, but by devoting a large area to 3D View
and a small area to Text, I can easily Run the following code, and it is actually helping me.
First practical result: after Run, space finds command, so no need to re-register.
Eight vertex groups corresponding to “DEF-” bones for lips were created in a jiffy.
Output on Terminal follows: