Cycles is not “wasting your time” and you should care. Also the BI’s development has been stopped and eventually might be eradicated so learn cycles while you still have time my friend! 
good point…
but i like BI as it is…even if development is stopped
if it gets eradicated, well…i’ll look for other options
i’m not gonna change my style just cos of blender 
The female character model looks pretty good. Can you show us the topology of the character?
she’s my 1st blender humanoid character…so the topology isnt perfect and there are 4 triangle faces in the model…
btw, her dressing is a popular traditional attire of the fulani tribe of nigeria
Keep posting, khalibloo and Exanimis! I still don’t have the courage to post mine.
And Laila looks great. What do you plan to do with her in the future?
well, to be honest, right now, i’m not sure…
but i know she’ll be useful when i get deeper into character animation.
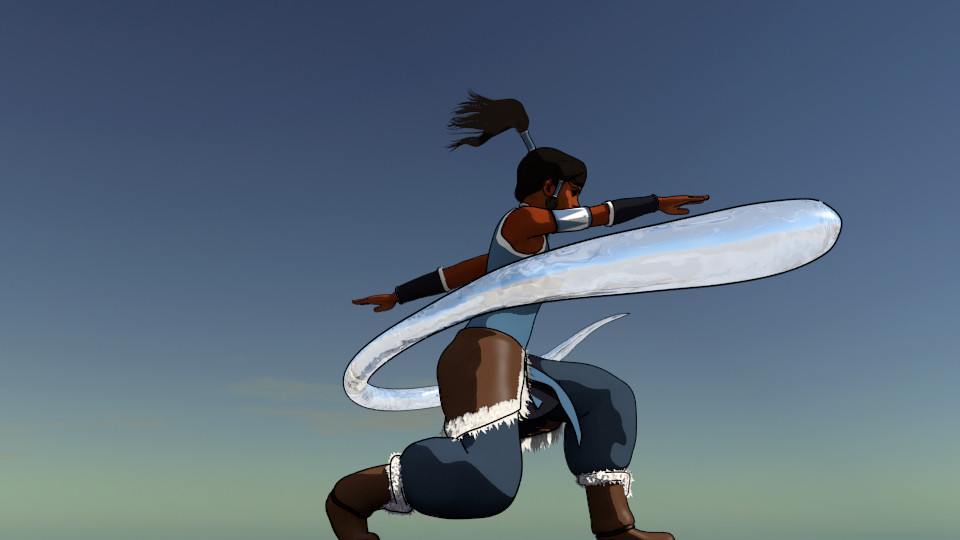
for now, i still need to work on texturing and UVs. i have almost no experience at all with 2d softwares like gimp or photoshop. and the few times i do make textures, i make them in blender. like korra’s armband for example
i opened photoshop and just stared cluelessly at my screen
but as soon as i jumped into blender, i made this
due to its simplicity, i was able to get away with just blender…but i know i need to learn how to paint textures if i’m to progress any further than my current level
Nice character! Don’t get discourage when there are no or little comments. Post your work in focused critique to “level” it up a bit will always helps.
by the way, about the comment that says there are more pros than casual, I am sure there are more casual here (ummm…I think?)
thanks 
i’ll try that
I have a very poor level of English, which is the reason for the limited acquisition of information about Blender. But try to explain some things, as far as I am aware.
- With the topology you are all well. To increase the realism and quality of models - using sculpting. From the resulting models can be made normal map, when it is necessary to use it in a game.
- To create a texture:
- AO bake
- Open the GIMP
- In GIMP open the UV map and AO
- Create a new transparent layer, and a new top layer on the map, draw monochrome texture using UV map of your character. Move this layer in mode “Hard Light” and make a layer with UV map invisible.
- Combine the two visible layers. Pre can play with “levels” of these layers to bring the image to the appropriate view
- In blender in texturing mode can be modified resulting texture
- If possible, use several layers of skin, and mix to a certain degree
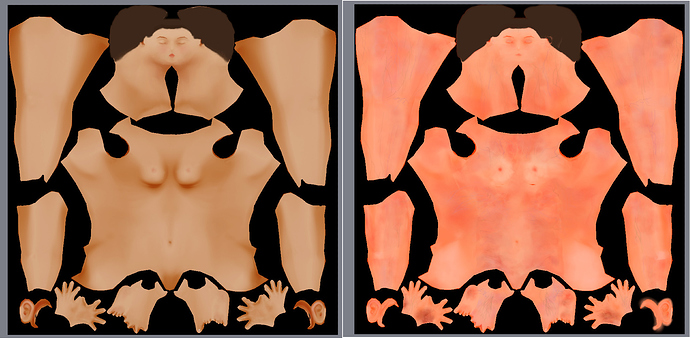
for example, look at the attached picture
hopefully able to do something to help. Good luck in your work! ![]()
Well, while this isn’t really the right thread for it, I wouldn’t blame cycles for any result really. It’s relatively easy to get nice lighting with cycles and at the same time it can be relatively hard to get rid of the noise/fireflies depending on the lighting you are using. My scene renders virtually noise free using a gradient world lighting in only a few hundred samples, but start playing with HDRI, mesh lights and lamps and techniques that are found online come into play.
I find cycles is very ‘literal’ (as it should be). Slight imperfections in textures can stand out, but can also be countered with node work. Here are two examples, both at 200 samples, both took close to 3 1/2 minutes to render (they were only 10 seconds apart), the first 1:45 of the render being ‘building the scene’ before rendering began. Of course, this is on GPU. Neither lighting example is good, and neither is necessarily better than the other, but they have a significant difference in noise especially in shadows on the ground.
Here’s the first example with gradient lighting:
Here’s the second with a mesh light, point light and sun just to mix it up a little:
Your topology is doing pretty good :eyebrowlift: You could have used less polys in the skirt and more in the shirt, it would look nice to get some of the fabric stretching into the shirt with it. If your concerned with poly count you could try baking normal map to it (After its UV’ed)
And about Cycles, don’t forget that it is still an immature render engine. Its has come a long ways in the last couple years but it still suffers from missing functionality’s and firefly’s (Although it is always getting better). And there are already render engines based off the same technologys that have already have had solutions to Cycles problems for a while (Such as IRay). I find sometimes BI is usfull since it can be used along side Cycles via compositor to alleviate some of the render blues. Not to say I have anything againsed Cycles, its great. Sure we could have development focused on fixing a number of long time problems and deficiency’s in Blender but why bother when we could have yet another new feature…
thanks hikkikamori
i saw a tutorial about baking normals on the blender wiki…the dominoes tutorial
i banged my head on the table, wishing i’d seen it sooner. i have so many models that could have used that baking technique ![]()
so i’v slowly started improving on my sculpting skills…
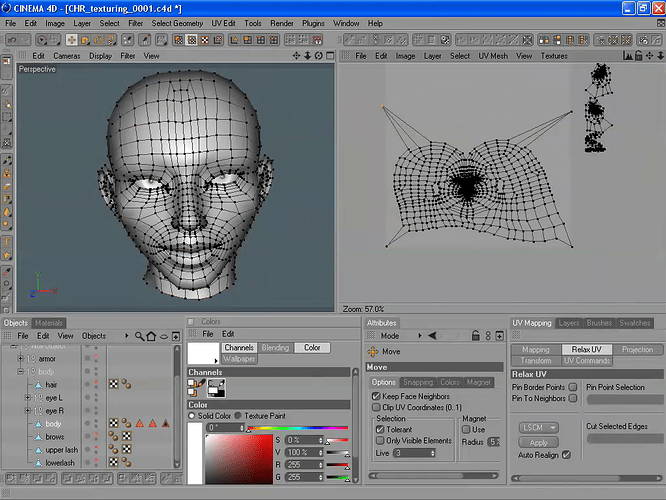
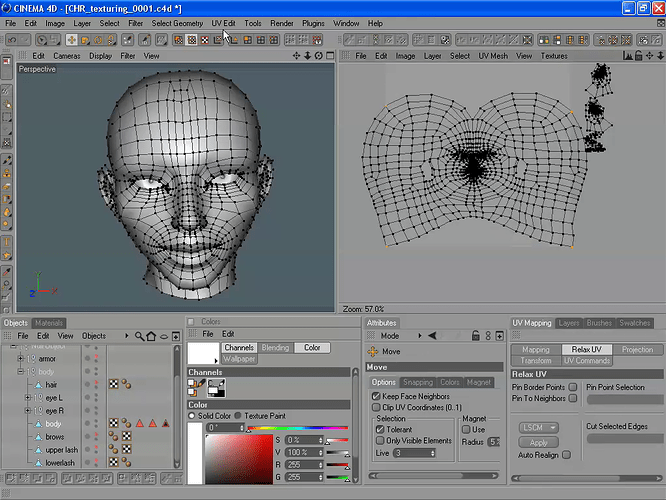
but my UV unwrapping is still poor. i cant get it to be symmetrical, and it’s a lot of work moving vertices on a 2d plane one at a time. i saw a technique once on c4d where u could just pin 4 vertices to each corner of the grid and automatically have the remaining vertices adjust their positions to fit the layout. if only i could do that in blender ![]()
honestly, i’m just hearing the words “mesh lighting” and “gradient lighting” for the 1st time…will read up on that, thanks
seems to be exactly what i needed for that scene with the trophies…i find it easy to light up a scene in cycles, but it just doesnt give me the options i have with BI…for starters i cant limit the spread of light.
in most of my blender scenes, i’v had to use separate lamps for individual objects scattered across the scene layers, some lamps for diffuse lighting and some for spec lighting. i’m still unable to replicate that level of control with cycles. the light just scatters around the scene. and when i use planes for lighting, there doesnt seem to be a “this layer only” option (hold on, is that mesh lighting?)
@jeremy, i’v uv unwrapped the shirt…but after sculpting in the wrinkles, the UV map goes crazy and it’s impossible to unwrap and align them perfectly again
i love those tyre renders…the lighting looks well controlled. it still has very dark areas and nice spec lighting. did u use negative lights?
or is it just a trick of the lights? u know, cos the tyres r black and they give the illusion of darkness…
but my UV unwrapping is still poor. i cant get it to be symmetrical
The whole secret lies in the fact that before making the UV map, you must select the object and press consistently ctrl+A (Location, Rotation, Scale)
aaaah  that’s it! u r a genius! i just tried it
and to think i’v been going thru unnecessary trouble all this while 
Why do you absolutely symmetrical uv-map?
Incidentally, in the above example, uv-map produced using only blender. The result of the above described technologies for creating textures you can see in the previously laid out my work “Aerith Gainsborough. Final Fantasy VII”
Keep on posting, khalibloo, because you have something to show to us. Blender isn’t easy to manage. But you don’t have to compete with your posts, unless you participate in a competition. Take your time, to ask and to learn from the feedback you will get in the forums.
i find it easy to light up a scene in cycles, but it just doesnt give me the options i have with BI…for starters i cant limit the spread of light.
Yes, I started using Cycles just a few weeks ago and like others I miss some possibilities I had in BI, shadow catchers, volumetric lighting … There are workarounds but they are complicated. On the other hand I found that with Cycles I have a toolbox of new possibilities to get the renders look the way I want them to look and not how a biased engine guesses that they should look like. The node system is ingenious - complex but ingenious.
There is absolutely nothing wrong with using blender internal if that’s the render engine that fits to your style. I would only recommend to learn to use several of them (BI, Cycles, the upcoming Freestyle) so that you are not limited to and by the one render engine you know.
And Laila is good work. She is perhaps not in the mainstream of the forum posts and we have some very big main streams in the forums.
@hikkikamori, i particularly liked how well-textured ur aeris model was even though she was lowpoly. but how did u re-align the UV maps of the sculpted model and the lowpoly model? once i start sculpting a UV unwrapped model, the uv data is thrown out the window
it’s sometimes very important for me to maintain symmetry in a UV layout so that if i do paint in any detail, i can just mirror the image to the other side. also, it helps me keep a uniform scale on the image so that if i were to use procedural texturing, one side would not appear to have a scaled up texture while the other has a scaled down texture (if that makes sense) 
@minoribus, thanks
i’v been experimenting with freestyle in blender 2.67 RC (they released it just at the right moment ![]() )
)
i just rendered this
when i fully grasp how it works, i’ll update Laila to use freestyle
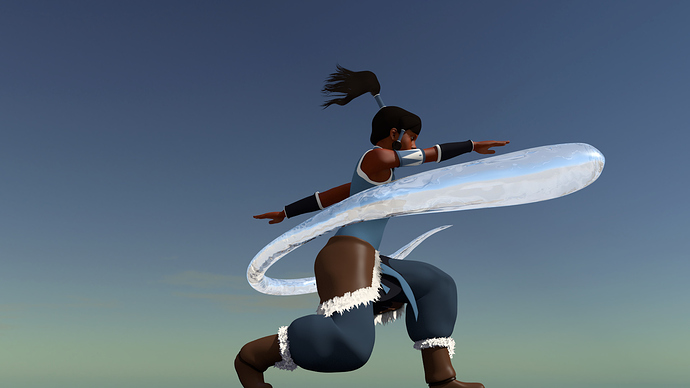
as u can see in the korra pic, i cant get the lines to NOT show thru the particle hair. might have to use compositing
Not exactly fills the question, but try all over again
-
- First, create a low-poly model
-
- Make her UV-map
-
- Assign modifier model multires
-
- Sculpt
-
- Create a copy of the high poly model and move it to another layer
-
- In the first model, removing the modifier multires
-
- Bake normal map and AO with high on a low poly model
-
- Seventh paragraph should be done with the included “Blender Render”
before making the UV map
The whole secret lies in the fact that before making the UV map, you must select the object and press consistently ctrl+A (Location, Rotation, Scale)
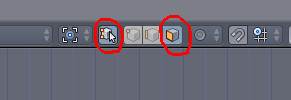
Once you make a UV-map, its or its individual parts can move, rotate, scale, using the G, R, S. But should include the following buttons
p.s. I apologize for my English
