My attempt at a light cycle type thing:
The rider is Low Poly Female from the Blender Model Repository. Lightning is based on a Blender Guru tutorial.
My attempt at a light cycle type thing:
The rider is Low Poly Female from the Blender Model Repository. Lightning is based on a Blender Guru tutorial.
Ok, how did you pull of the light wall off the cycle? The lighting could be better, but outside of that I seem to like that video.
Thanks! (and yes, work needed on the lighting). There was some trial and error as there are different ways of interacting with a curve path. The cycle is simply parented to the path so runs along it during the animation. The light wall is a tall, thin rectangle with an array modifier and a curve modifier. The array modifier is set to “fit length” and then the length variable is keyframed at start and end and at four or five other places through the animation so it matches the position of the cycle - without at least few keyframes it either lags behind the bike or overtakes it.
Interesting concept. What were the settings for the light wall material?
Bright yellow colour for diffuse lighting and emission, specular white, low intensity but not zero, Z-transparency on, and a blend-type texture that influences alpha and emission but not colour to get the horizontal bands. I added glow in the compositor.
Here’s a question: I can’t control reflections the way I’d like to in the compositor as they are part of the reflecting material. So for example here, if I add glow, colour correction or some other effect to this render layer, it affects the original object but not the reflection. Any suggestions on how to manage this better?
Hmm, to be honest with you I haven’t had much luck with reflecting objects. In fact, I’m still having problems with the windows on my animation project. So, I can’t give you a straight answer on this.
I like the nice smooth flow to the animation.
Thanks! Trying out different approaches to animating the camera too. Still struggling with those reflections though - wish the layers system took care of this (if an object doesn’t appear on any given layer then surely it’s reflections shouldn’t either?)
Instead of a layer pass in nodes try a colour key to isolate the yellow (there isn’t much yellow so key should be good), apply glow to that and add mix the glow back on top.
Thanks 3pointEdit, didn’t think of that…:spin:
Allways check out the 2D solutions first they are way cheaper in cycle time. 
Couldn’t resist from tinkering after I saw Cole Harris’ lightcycles:
http://blenderartists.org/forum/showthread.php?t=205063
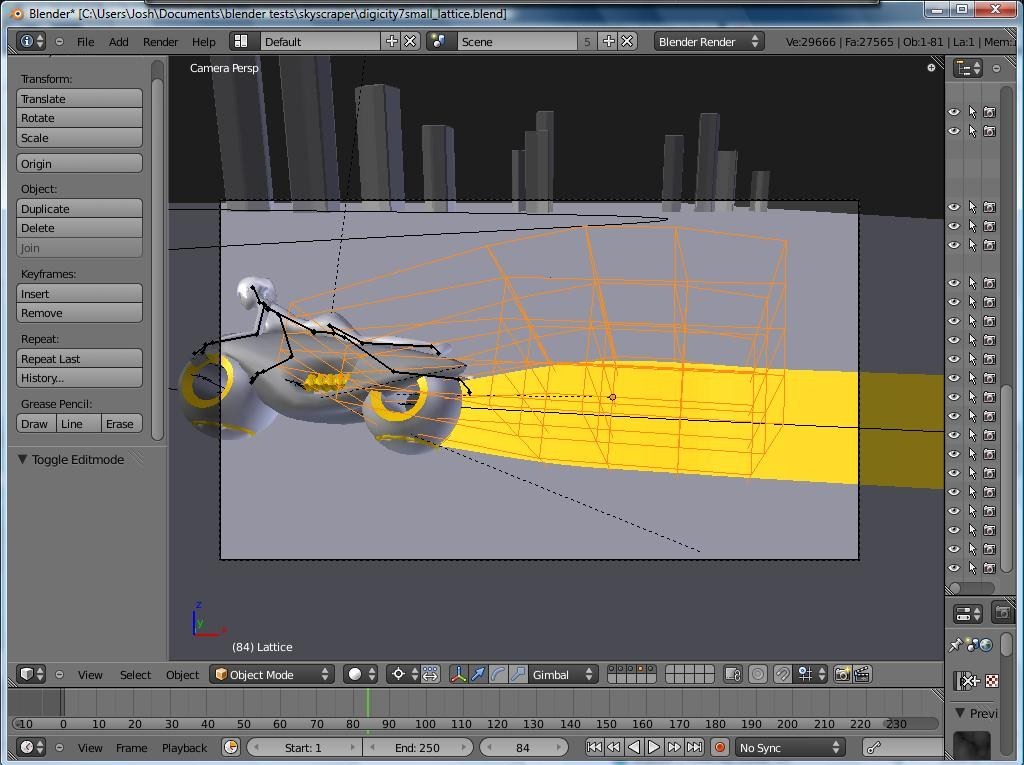
anyway, I wanted the light wall coming out of the back of the cycle, and that fluid bulge before it settles into a steady height, so I deleted the end cap object and used a lattice modifier instead An advantage is that, unlike the end cap, this method distorts the material too. I had to tweak the animation again but keyframes every 25 or 50 frames seem to do the job.
Pretty cool.
I think the way she’s lying on the bike seems a bit odd. At the very least you should adjust the model so that the parts of her that are touching the bike are flattened out a bit. Human flesh is very soft and it will compress when pressure is applied to it.
Just use proportional editing. Or even just move the model down so it intersects the bike. No one will notice.
thats really cool 
I am guessing you have seen blender cookies tron inspired tutorial?
If not you should really have a look, it shows a really quick way of setting up a nice glow effect using nodes.
Hmmm ok buddy…