Please could i get so help with a wall lamp making
i have had a try here but feel i’ve mad a hash of it, i used a area lamp as i wanted the diffuse over specular,
Any other tips you feel I may of missed please advise only been using blender for about 1 month now (No past training just a hobby)
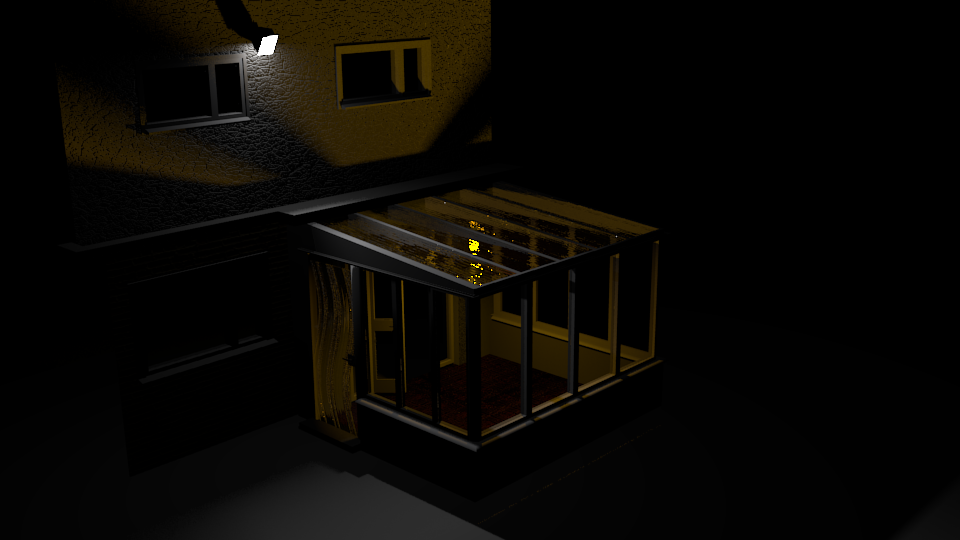
Scene is of a night time use of light and glass to bounce,
Looking to get that natural look with soft domestic lighting not commercial lighting
Blender does not work with Lux lighting settings if i was to use Kerkytha for render it would have lux or candles to set the right power
the issue i was encountering was the type of light for the strobe wall light i used are lamp 150w lamp
This is a easy scene for day time looking for the art of night lighting as a noob to blender wanted to over come the lighting shadows reflections 1st rest is easy
I am not understand what you want, is it Blender Internal or Cycles BTW? Or maybe Luxrender/yafaray? They all have very different light.
What exactly you want, decrease/remove yellow dots? Or you not satisfied with overall look of that white main emission light? what is your render settings, like bounce numbers if you use Cycles?
Maybe you wonder why road before glass box have dull shadow as it is opague, than is is definitely min/max bounce issue, or maybe overlooked not standart complex glass shader. In any case we need more details to help.
Here’s how I approach pretty much any lighting setup. I set each set of lights in different groups so that I can tweak them separately.
(1) Get the base-exposure right. This is often simply “ambient light.” It’s shadow-less and cheap, and I usually omit the specular component. But it is enough to get sufficient details in all of the shadows without blowing-out any of the highlights. If you used the histogram tool at this point, it should be a shape like a flattened bell centered in the middle third, with no "peaks’ to either end. Because it is supposed to be nighttime, this will have a bluish cast.
(2) Work on the highlights. Often using layer-specific lights for maximum control, I work on the areas that need for some reason to be brighter. These are actually dim lights because they only need to bring the lights up to the appropriate level in a specific area. Usually these, too, do not cast shadows. (Shadows are expensive.)
(3) Inject shadows! You can have a “shadow spotlight” that subtracts light from a scene. You can also have a “shadow-only spotlight” which casts a shadow but doesn’t add light. I find that it is very often easier to deal with highlights and shadows separately, literally “because you can.” I use buffered shadows whenever possible.
Now, check that histogram again. The shape will have changed with more “peaks” toward the left and right hand side, but there are no (or almost no) opaque-shadows or blown-out whites.
You can go farther and use node-based compositing for fine control. For instance, at night, colors are very desaturated and contrast is very subdued. “There’s a node for that.”
The shot when finished should look good, even if it is not technically correct.
Spot on thank you changing format currently, the main area was the strobe light spot light top of wall to elluminate the garden (in progress) thank you for this advice above
BTW when using blender lamps to make the type of spot light what would be best Area or spot ??
This is in blender render only
the yellow fleck in the glass is due to the texture that I’m happy with and will soften them with nodes later
Main area i was hitting walls with was making a high Illumination lamp to light the garden
I have googled for making spot lights no luck as of yet.
have you tried clicking on a lamp then shift d to make another and adjusting it to a certain area you want lit up?
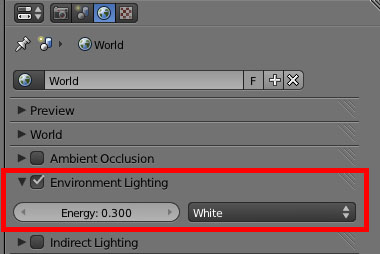
also i’d check the indirect lighting in world mode and click on approximate that might do it or adjust the bounces in world mode to your liking