The decided lack of tips and critique would mean either of two things:
This isn’t interesting enough to warrant comment or
this doesn’t need commment.
seeing as its definitely not 2 its obviously 1. Darn!
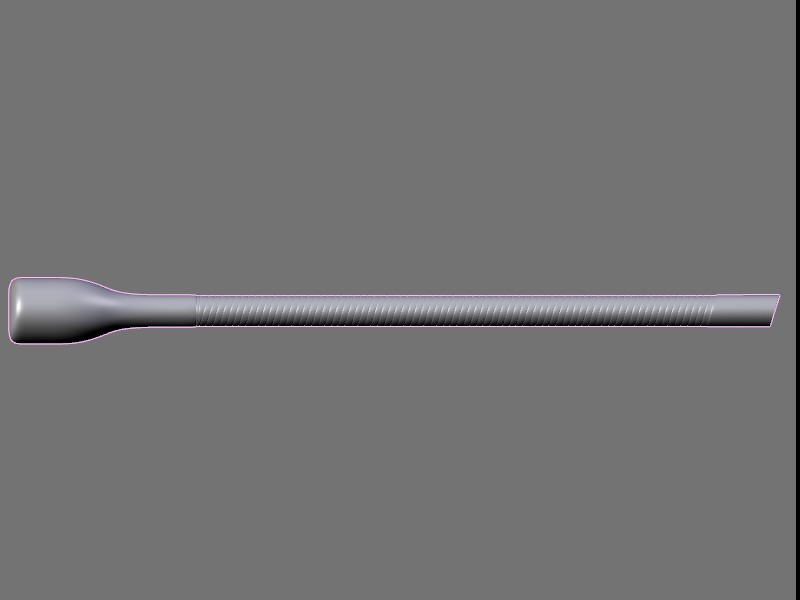
Anyways the latest, the handles coming along nicely, although I did have to redo it once or twice. The ends aren’t done yet, I’m intending to work on that so no worries.
Looking good.
That handle looks like it could be a little thicker.
That one’s for the bladestaff?
The grips look really nice, I have a leather material that you could use for a start if you like.
Keep it up, Little Jonny’s looking good!
Thanks for the comments Neonstarlight, no need to complement I think you’ve repeated yourself a few times there ;). I’m more after crits then anything else.
Thanks for the offer but I’m already using Hippies excellent leather texture, still needs a little tweaking to fit the model better but it’s excellent.
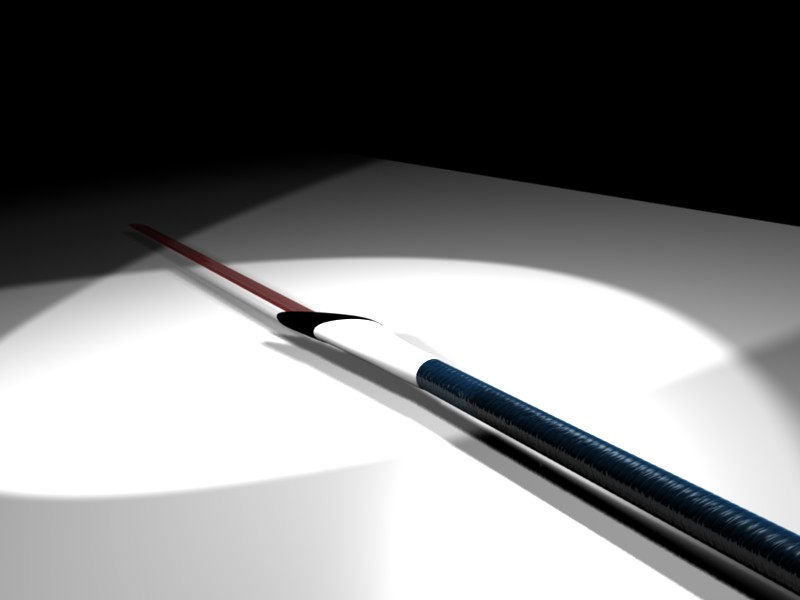
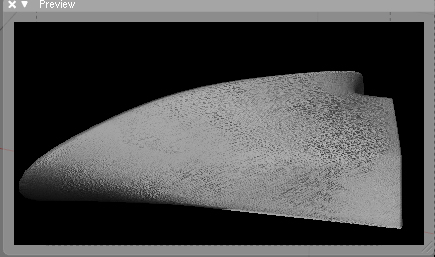
Close up of one side:
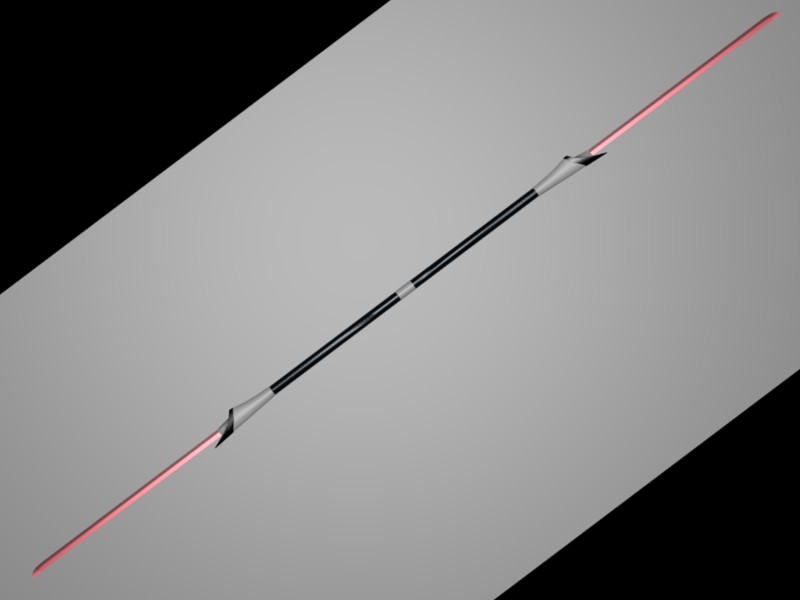
Further away shot, showing the whole thing, needs a flip on the other side but I’ll get to that.
Man, this is going way faster than I anticipated, I’ll have to start the microphone and the guitar soon. Does anybody know a good mic mesh modelling method, heh don’t ya love alliteration =).
Thanks, no I’m not using SSS, for that piece, I still need to work on a couple of things you’ve suggested, just ran out of time finishing the mesh.
Right now I’m getting really really annoyed, blenderartists forums I’m really disappointed in you! (note, the people who actually answered this thread are exempt from the ensueing rant) The one and only reason I posted to this forum was to get critique and advice on what I am doing right now. Not only have you failed to answer most of the problems I have raised, you have hardly answered at all! I know that I haven’t posted the interesting part ie the body and animation bits, but that’s because I’m right in the middle of exam preparation in my final year of school and I don’t have time to go over the character animation tutorial. I will get to that, but AFTER I’ve finished school. Right now this is just props and learning how to do things properly.
I know that I post a lot when I’m online, but when I post I try to give helpful comments and constructive criticism, to give an extra perspective where asked. Sometimes I give stupid comments, but not out of deliberate malice. And yes I know that there are a whole load of BWC threads out right now and they are much more interesting then what I am putting up. But least you can do is spend five minutes answering my questions and perhaps commenting on what I put up!
Ok now that my spleen is vented I’m going to ask nicely (again) for someone or someones to adress the issues that I have brought up and not fixed. Also:
How do you do normal map baking?
How do you use the normals to apply etching in singular areas?
On second thoughts Neonstarlight, I realise that the energy blade would benefit majorly from some particles, I just don’t know how to go about it. The ideas I have are to either duplicate the mesh then apply a halo setting to it to outline the edges or duplicate the mesh and apply a few fractal runs to it then tweak the settings a bit. Both ways have their problems.
I would really appreciate it if people put in their two cents, I will take any suggestions offered regardless of how stupid, sometime stupid is fresh and new, and try to apply them. You are free to comment on anything in this thread, not just the latest. As I’ll be moving through it relatively quickly.
Wow, that didn’t show my last post.
Darn it.
Well anyway, here it is again:
Normal map baking:
UV Unwrap your mesh
Add a new image to it in the UV Editor
In the Render Panel, click the Normal button
Then bake it. (Camera setting is probably best for the Normal Space dropdown, but I’m not really sure.)
This will render your normal to Your UV Map.
Now in the UV Editor save the image, and remove it from the UV Map.
It’s a texture now.
Go back to the material (a low poly version of the mesh?), add a texture and give it the image you saved.
Map that texture to the Nor value.
Then adjust the Nor slider and scale it until it fits.
I imagine normal etching would be similar, just painted in detail (possibly on the Normal map itself.) Dark would be grooves and light would be the bumps.
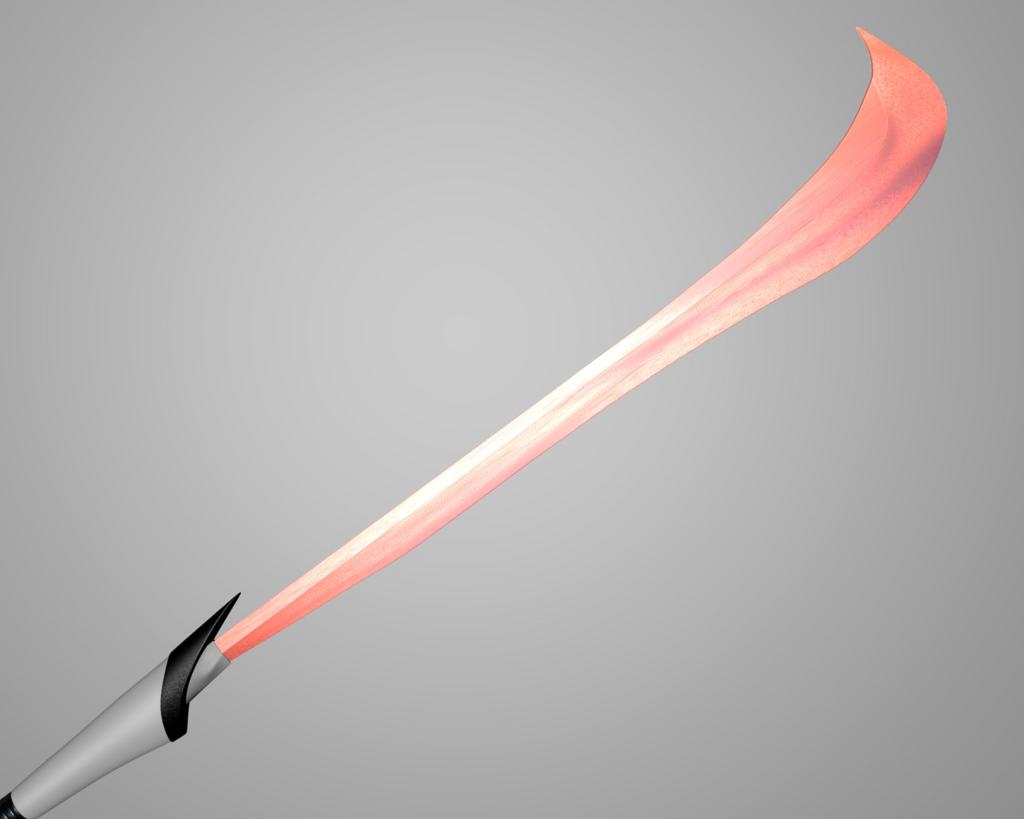
And the energy blade.
That one needs a plan.
It seems one would need to focus power to the main points.
That is, the edge and the flame.
Would it be possible to use the edge’s vertices as emitors?
Maybe a halo coming from the flames, possibly radiating up the blade.
Thanks for the advice, I think I’ll keep this out of the flames area, blenders a bit tricky in that area, but the edges as emitters were exactly what I was thinking.
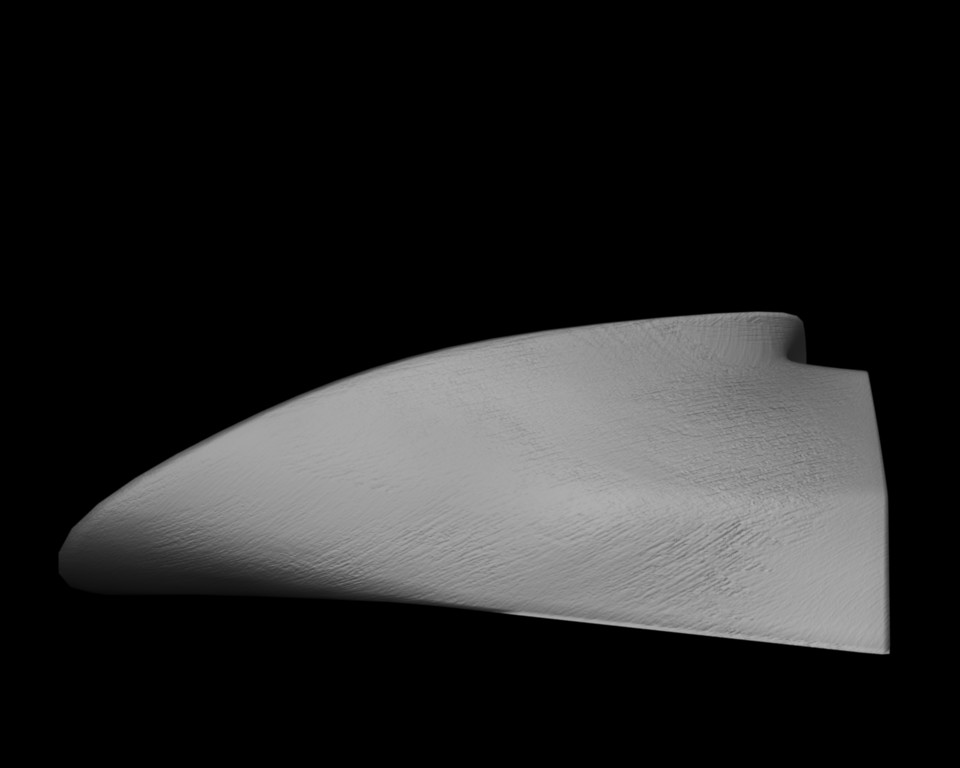
I’ll look into the bladestaff, I’ve started the guitar prop now, had to restart a few times due to problems with the way I was modelling:
One of my friends pointed out a thread showing some dud with an absolutely amazing guitar, heh, looks like I’m in for a long night…
Just wondering, how do you use the retopo function to clamp an existing mesh onto another one? The tutorial didn’t work.
Nobody’s answered so forgive the double post, I’ll keep going at this, bit by bit.
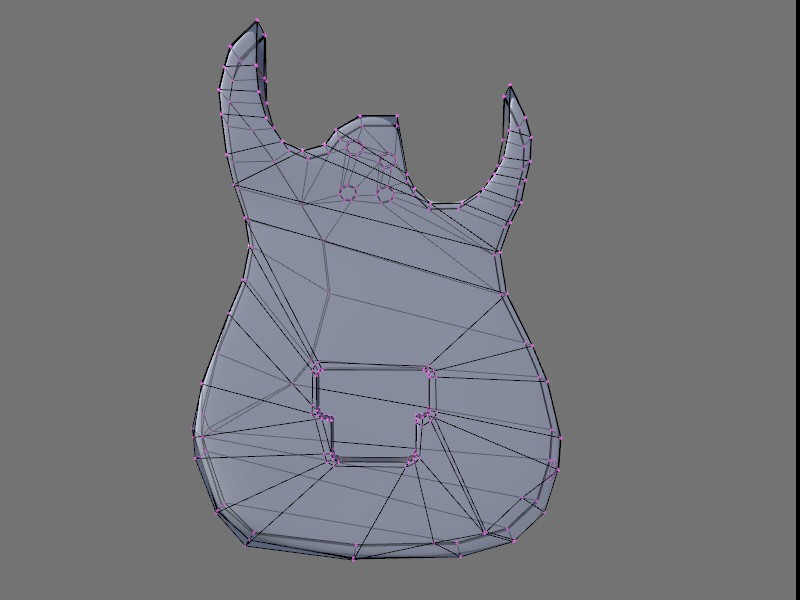
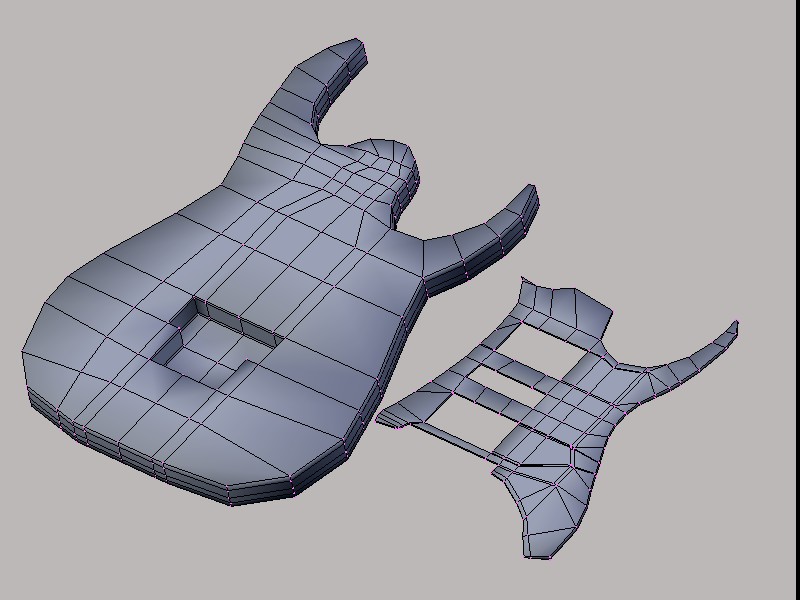
More update, mesh needs a lot of work:
the back, the front picture screwed up for some reason.
You really don’t want to know, I’ll see if I can fix it tonight, if not I’ll post it coz its badly screwed.
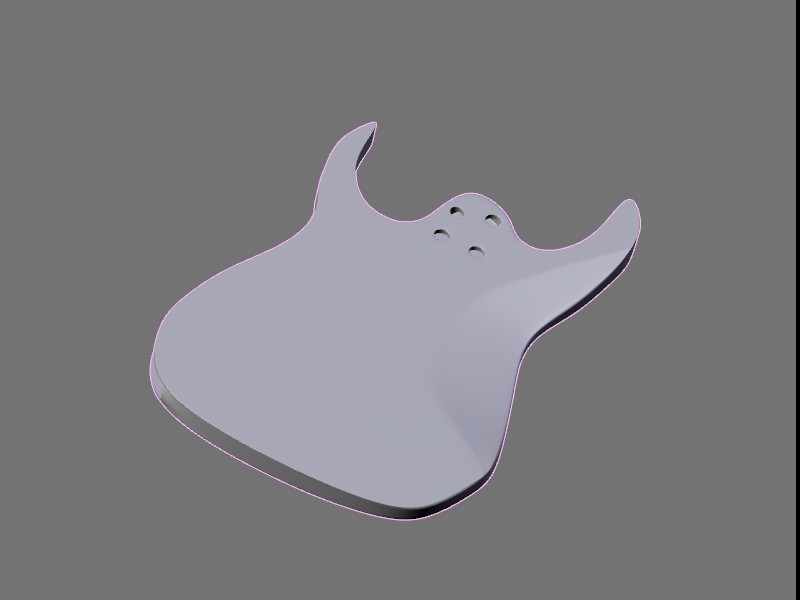
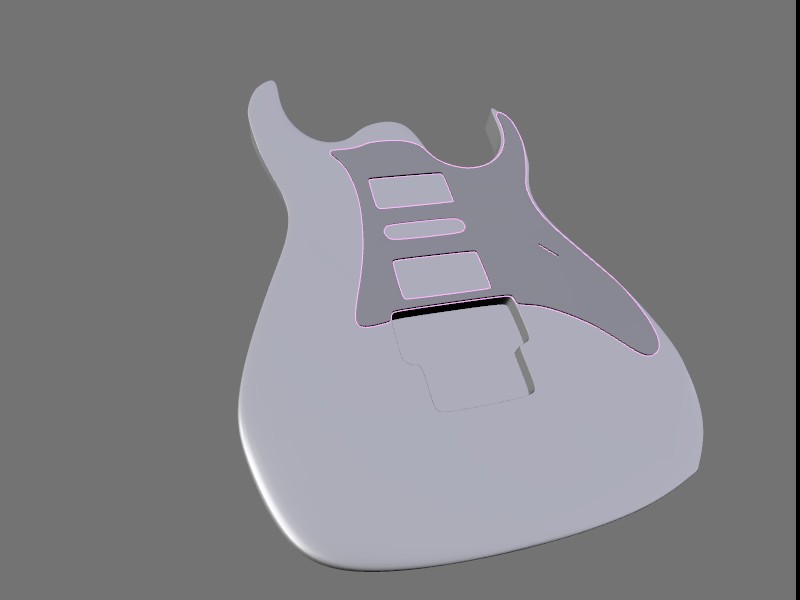
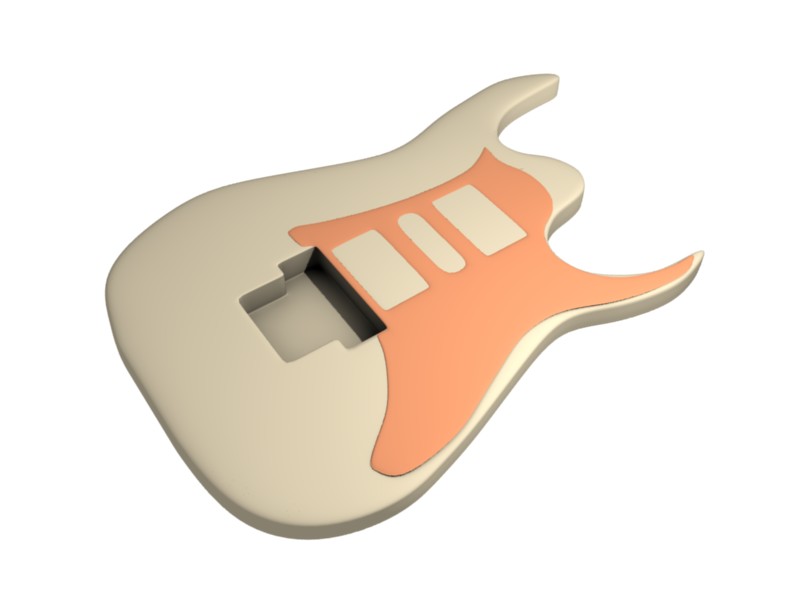
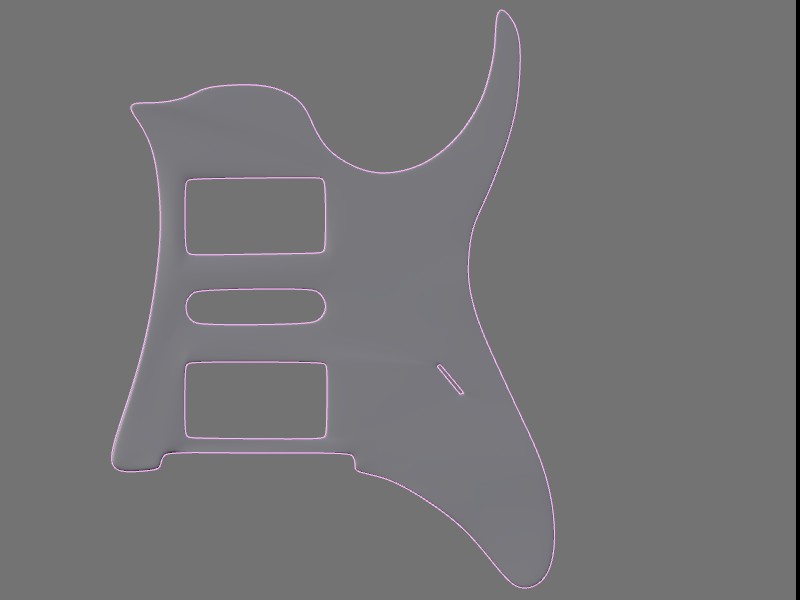
Work so far, got the shape of the pick guard and the guitar a bit better:
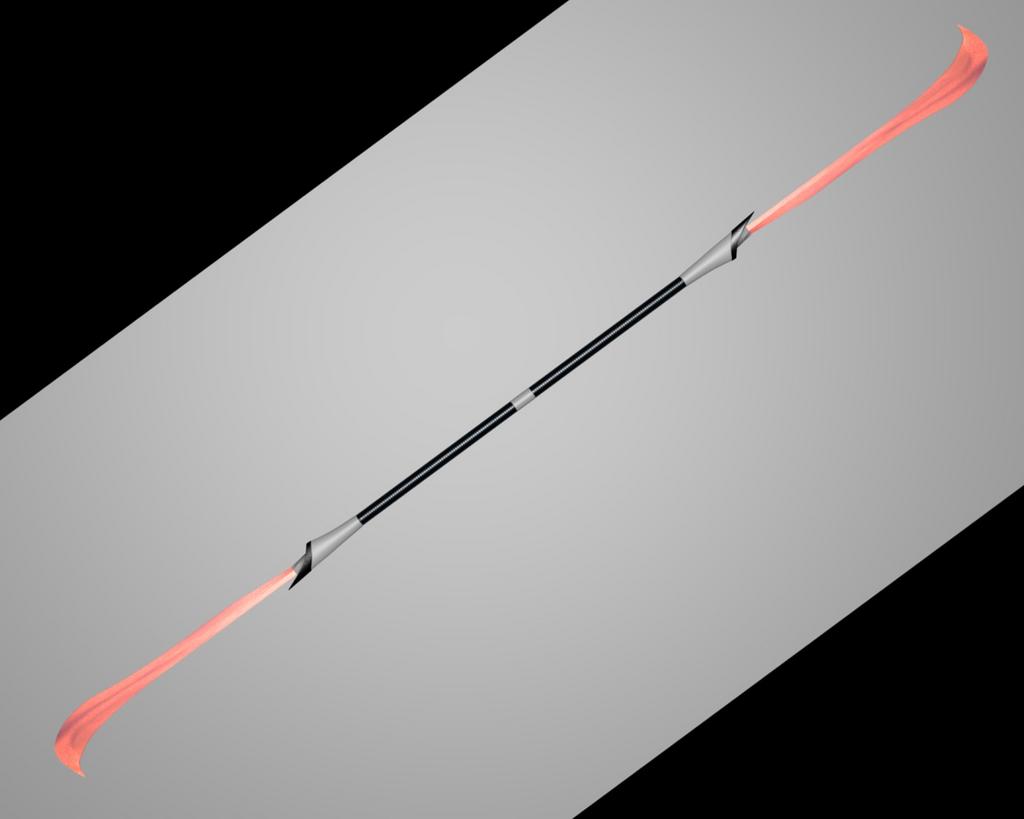
The bladestaff blades with fire… you wanted that right:eyebrowlift2: Just did it for fun to see how it’d look.
If anybodies got a suggestion on applying flow lines to the particles I’d be grateful coz right now that fire looks cool but not only does it use thousands of particles but it only works in stills since it isn’t animateable as far as I know. Anyways here’s the render:
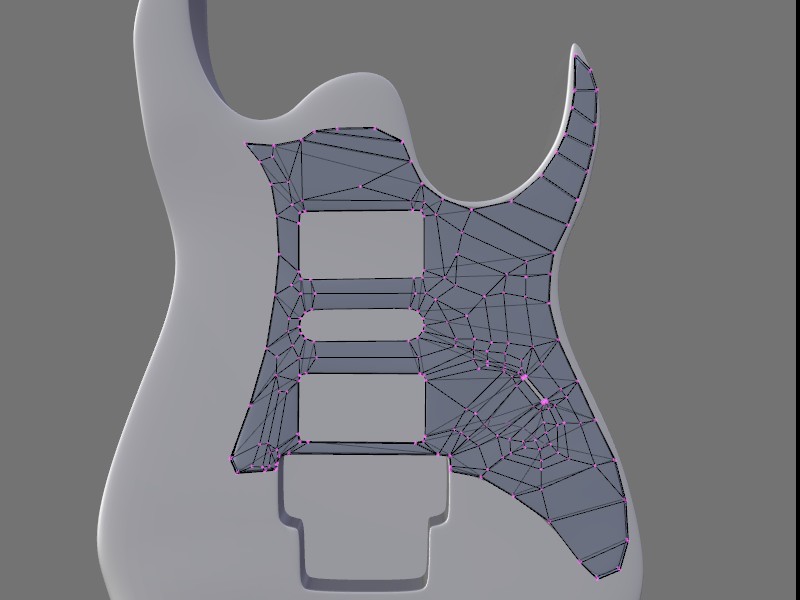
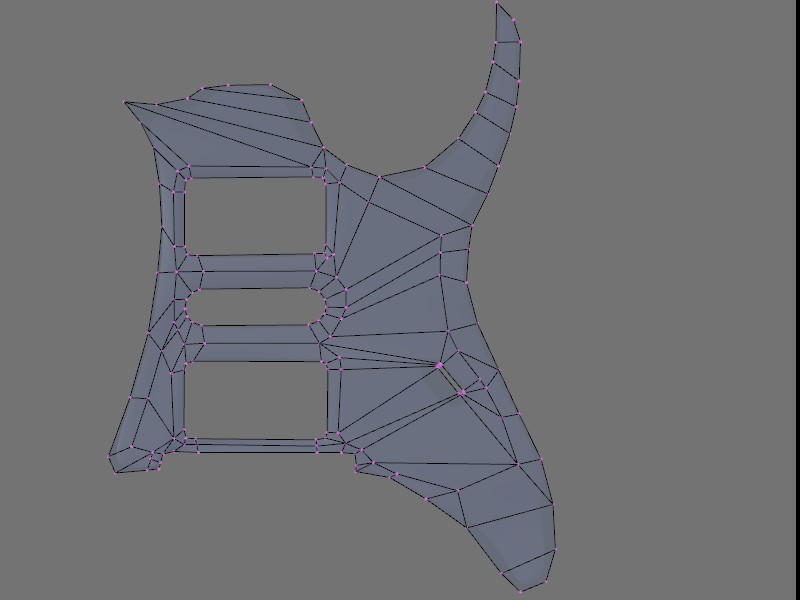
Worked on the pick board and made it a bit better in terms of the model but I’m afraid I’m pretty much stuffed now. I have no idea how to make this model clean so I’ll put it through to you guys:
As far as I know, particles pretty much animate themselves.
You just gotta tell them what frame to start on and what frame to end with.
Controlling what it looks like throughout is a different problem, but that’s what trial and error is for.
As for that wire, looks like you have a lot of vertices that aren’t doing anything.
(You know, the ones in the middle of that large flat space on the pick guard.)
I would start by getting rid of those. Refill with nice boxes that stretch from one side to the other.
(I believe that every vertex should contribute to the mesh. Otherwise, it’s trash.)
The back is much cleaner, but see if you can’t run those edges in straighter lines.
Right now, they’re poled around the central hole. (Poled, I don’t know what to call it)
I would run the first few straight across the narrow part of the guitar.
Then run the next straight to the hole, and straight back out the other side.
It would be nice if you could get a bunch of nice, parallel edge loops.
And much easier to control your shape as well.
It may require some loop cuts along the right side (and maybe around the front,) but the result would be a much cleaner mesh and much easier to work with.
Some of those extra edges running from the front to the hole could be removed as well.
Nice effect with the flamestaff, by the way. How do you control its shape?
I’ll see if I can make the changes on the suggestions you’ve made, as to the pick board, I had it with less verts before but it was completely screwed, there were problems at the edges and whatnot, I’ll see if I can give it another go though =).
I don’t mind loop cuts actually, if I can do them it means the mesh is going well. If I can’t, well its screwed.
I cheated with the flamestaff… Hey that’s what you do in animation, fake it if it looks better =P. Basically I just duplicated the base mesh, made sure there was enough vertices and then hit fractal 100 twice (in the mesh edit buttons). Set the material to a different one and set it to halo, changed the colour to yellow, set the alpha way down and dropped the halo to about 0.06 or similar and clicked render.
I had the idea of doing the same thing with several curve guides, that way I can get the particles to emit along fractal curve guides buuuut, for realistic fire I’d have to have them automatically doing fractal calculations every few frames in an animation and it would just get messier from there. As to controlling its shape, having enough vertices in the base mesh is enough, fractal tends to really make it all go haywire but the more verts, the more it will follow the general shape.
Still haven’t worked out what’s wrong with the preview/normal render texture on the blade emitter, got any suggestions, its only got a few texture layers set to normal map. I tweaked the position a bit but the actual object doesn’t have much else. By all rights the program should be rendering the preview render.
Also, my background image isn’t showing at all, I’ve tried cancelling it and reloading, hitting the reload button, testing on different projects (worked for a new workspace but not the bladestaff) I think I either accidentally pressed the wrong button, is it possible to hide a background image? Or Blender has a bug, which I have founnd tend to pop up, eg unable to select the camera when looking from camera view, 3D curser vanishes along with the ability to add any new objects to the scene and other strange things that I couldn’t really work out and can’t remember either.
C & C’s would be greatly appreciated.
Wow. I sure wish someone else would post here. There are a lot of questions I would like the answers to as well.
You can’t select the camera from camera view? I’ve never had a problem with that.
I don’t know about your preview render problem. Have you tried disabling any of the textures? I would try that, one at a time, and see if maybe one of them is causing the problem. (I wouldn’t know why, but as you say, there isn’t much else.)
Have you tried loading a different image into the background, just to see what happens?
I don’t know about hiding it, but it does seem to only work from the straight front, side, and top views (and the camera view.) I just looked over the preferences buttons, and don’t see anything that might cause it, but I could have missed something.
If you still have problems with your mesh, you could send me a blend and I’ll take a try tomorrow night, if you’re interested.
Great! That’s a heck of a lot better and really helpful. =D. Now I can move ahead. trial and error didn’t seem to be working. Thanks Odeas. Oh and Neonstarlight, thanks for the suggestion, he just beat you to it ;).
Managed to fix the background problem, by creating a new file and importing in. Only problem is that I still haven’t worked out what caused it so it’ll crop up again and I won’t be able to fix it. Overwrote the file so I can’t show and tell =). Yeah I did try loading a different image and that didn’t work, along with tweaking values.
Will try the texture ideas though I doubt it would work, it might though. Who knows?
Man I swear there must be little gremlins capering about in my computer just waiting to screw up my blender projects, I’ve already outlined a few issues above, but things just seem to appear like rats in a dump. An apt analogy, haha!
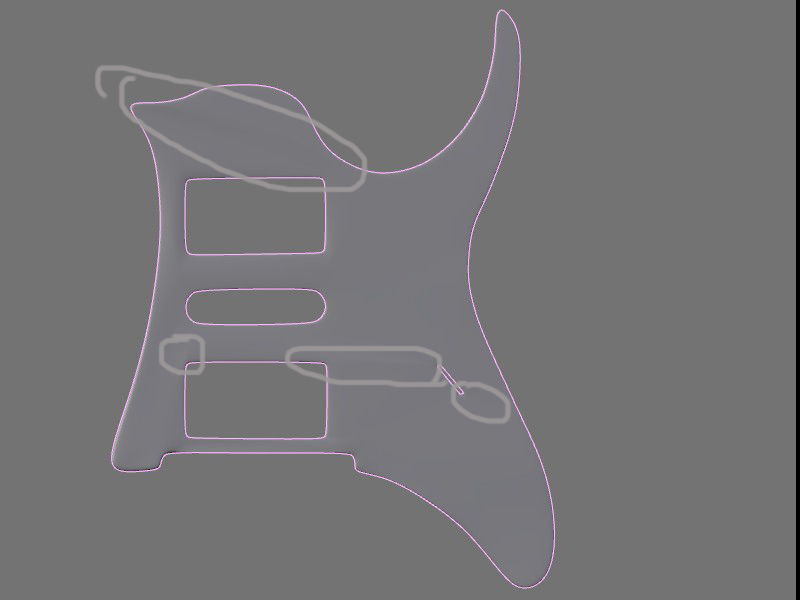
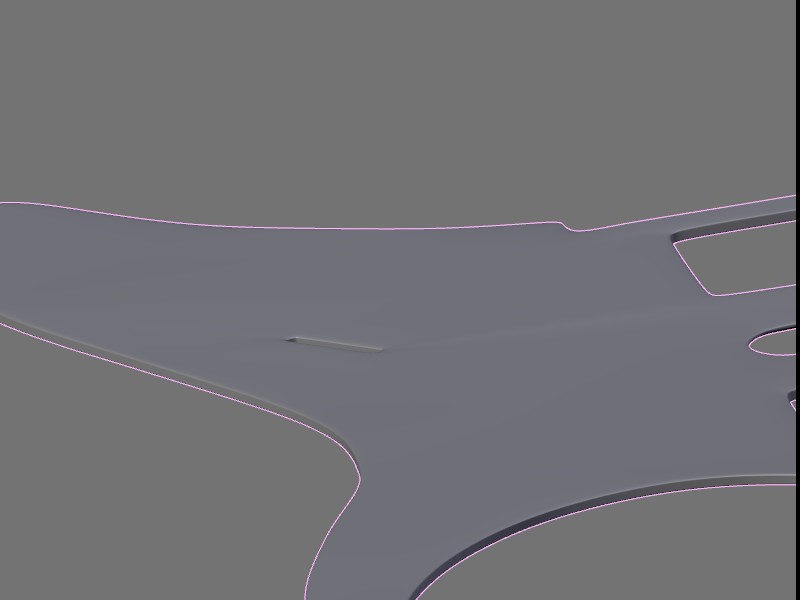
I was going to post some images but Odeas just killed the need for that, although i will point out something, the toggle switch hole often creates ‘stretch’ marks on the model when I attach it to long distant vertices as shown in the following model shots (last nights):
The mesh
I hope that points out accurately my main problems with modelling
I’ll go over what Odeas has done and see what happens, but I have a feeling they’ll pop up again…
His is much better than mine would have been anyway.
Seems that Odeas has provided some nice short-range verts you can attach to.
Just work to keep your lines straight and parallel.