I am working on a short film called “Lunch Time”. For now, most things are being created in 2.79 and then migrated over to 2.8. Production will most likely switch to 2.8 when the beta is released. Everything will be rendered with eevee.
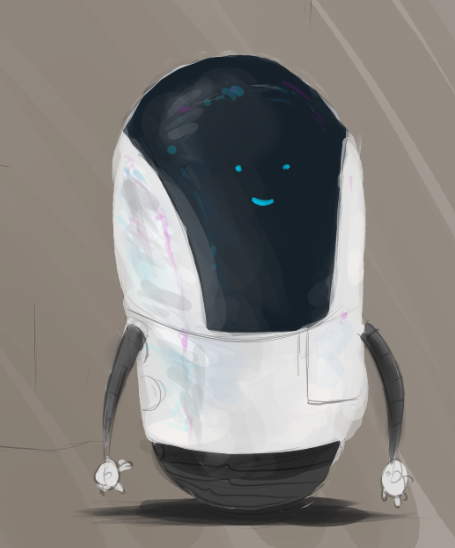
This is the main character of the film. It went through some iterations to get to this final version.
(edit: I just came up with this character’s name. Automated Delivery of Meals or A.D.O.M for short.)
The robot started more pill like. There were two reasons for changing my design. Firstly, I wanted it to be more cute. Which gives a better juxtaposition to the morbid ending of the film. Secondly, it looks too much like the gen 6 robot from the Next Gen film.
Here was the original design.
For this character I needed a rig with an infinitely extendable arm.
I couldn’t find any tutorials on this so it took me a few days to work out the rig exactly how I wanted it. It turned out to be rather simple, but hindsight is 20/20, right? Here are some gifs of the arm progress I made. I’ll be making a tutorial on it soon.
The storyboard is being created with the new grease pencil tools in 2.8. This video is the first 40ish seconds of the film.
The grease pencil tools are really cool. I did have to reverse engineer someone else’s blend file to figure out how some things were done though. If anyone is struggling with the new tools I’d be happy to share some tips.
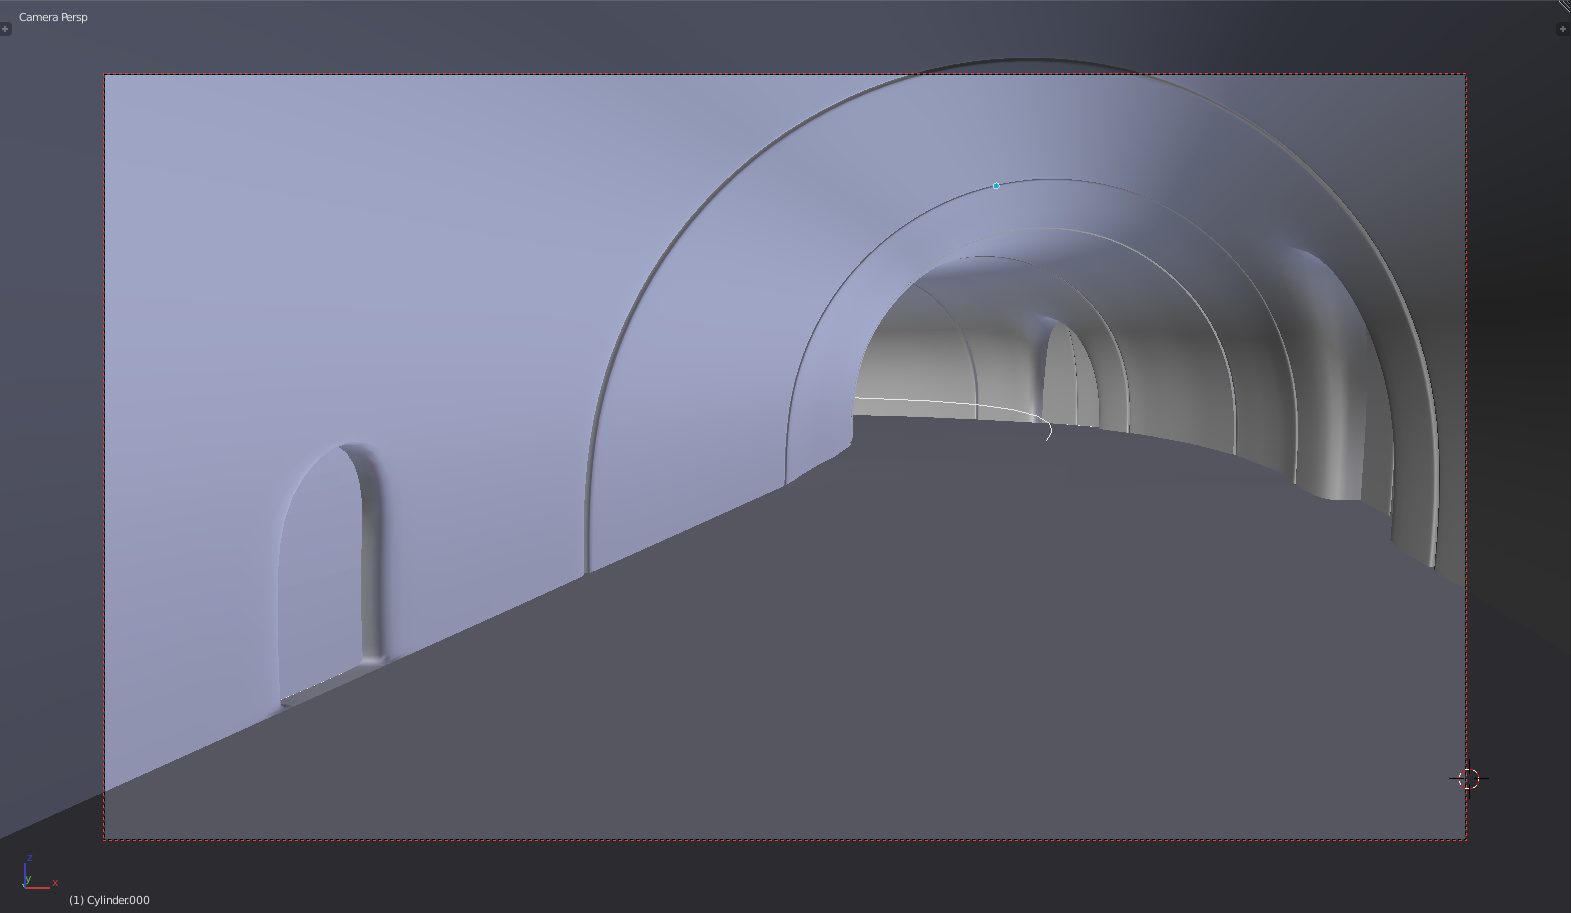
Working on a portion of the spaceship. It’s the first scene you see the main character.
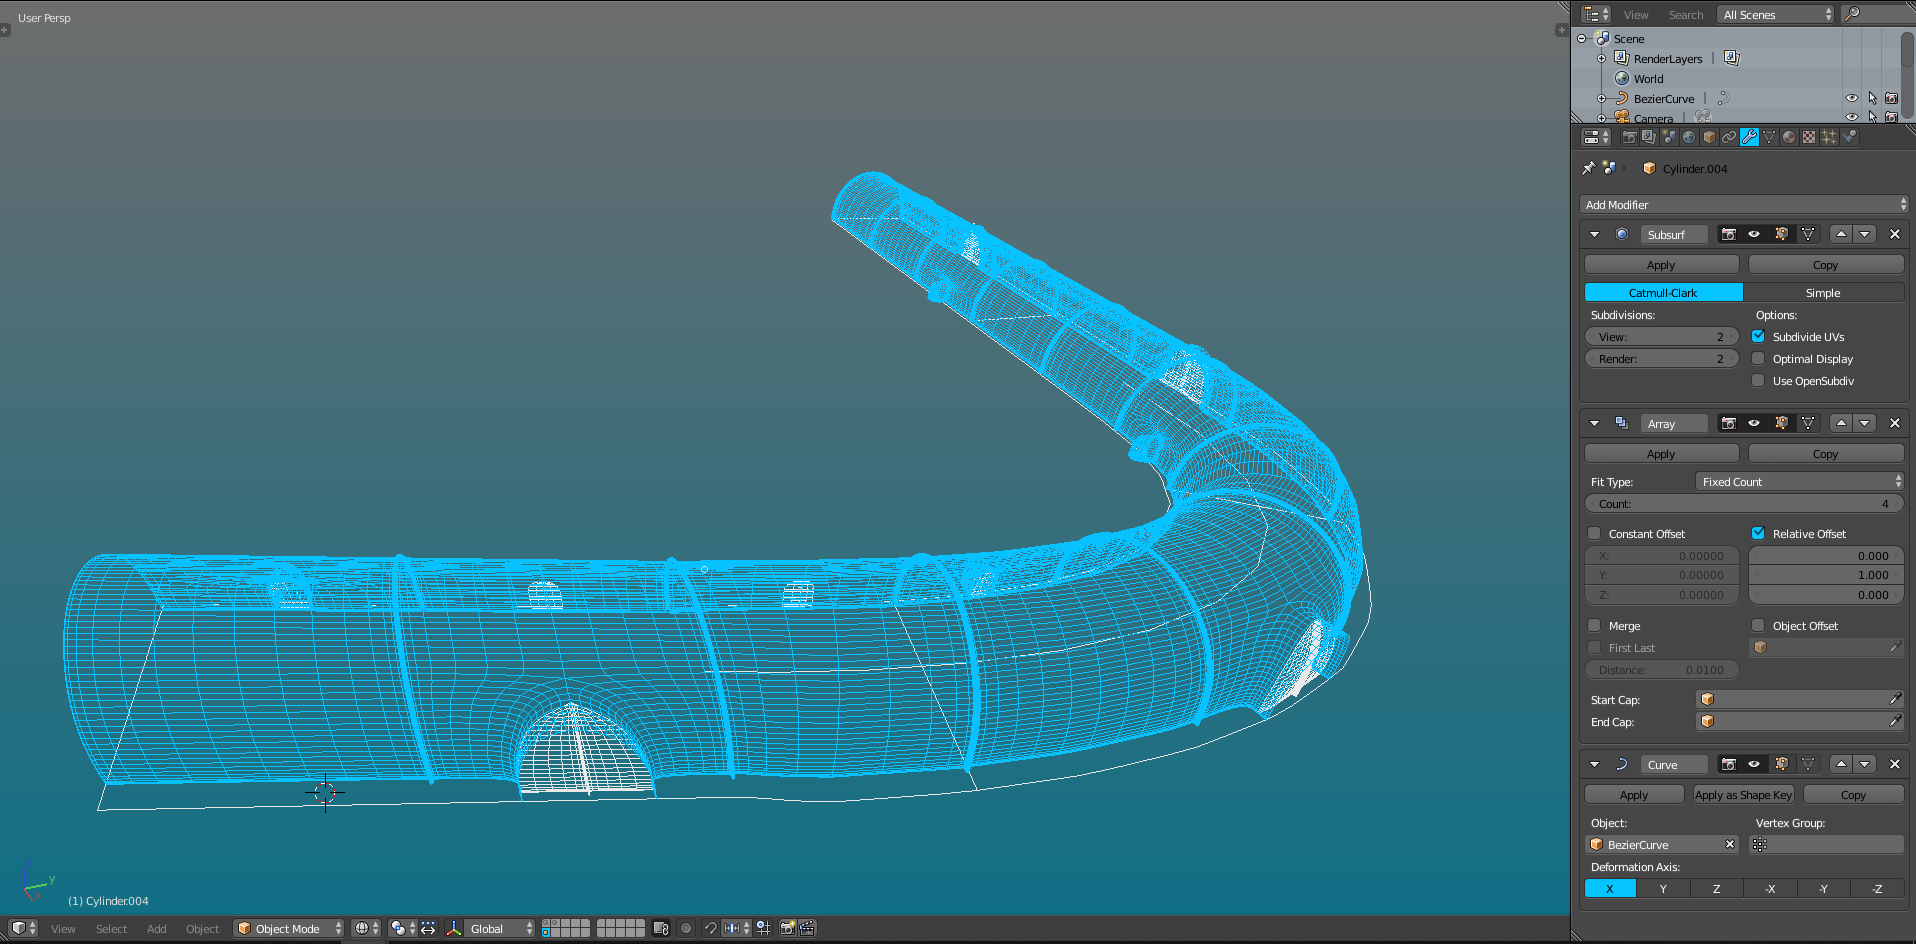
I’m finding that modifiers have been amazingly helpful with this project. This consists of 3 different sections of the hallway. Pretty basic models. I then applied an array modifier and a curve modifier to it, which allowed me to create a curved hall.
The hall is starting to come together. I need to add more details at the doors. Maybe some buttons or a panel of some kind.
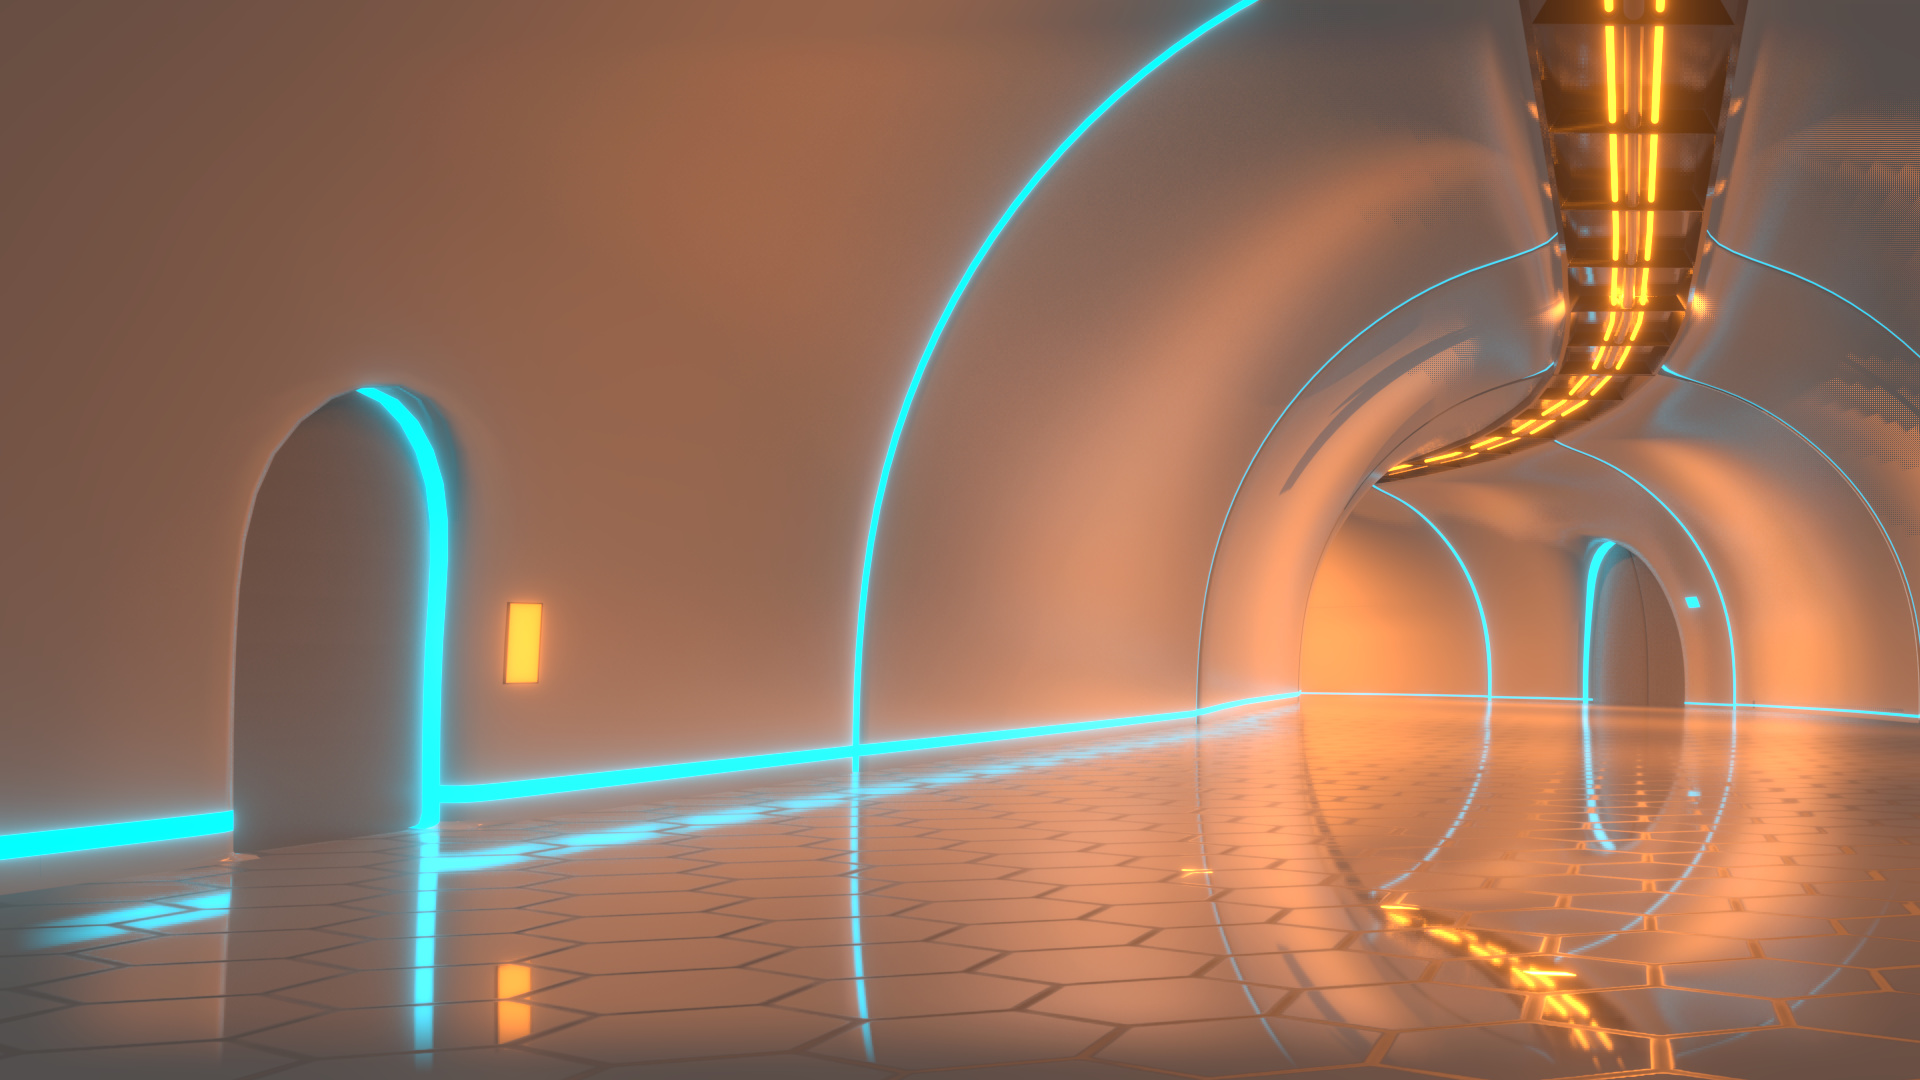
I got a really interesting result when I plugged “UV Texture Coordinate” into the metallic node. I’m also playing around with the lighting and colors of the scene. I think color will add a lot more to the scene instead of what might be typical white lighting from florescent lights.
Working out some more details in this scene. The left portion of the scene still looks a little empty. Not sure what I’m going to put there, but I’m sure I’ll come up with something.
I guess this is the same way I do infinite extending chains, a mesh of one section, an Array Mod with the iterations set to “Fit Curve”, a Curve Mod and Hook Mods on the curve. Took me a looooong time to get there…
I’m working out the shader and how I can animate the robot turning on in a more appealing way.
I created a gradient glow with a color ramp. Setting the Texture Coordinate to object in the mapping allowed me to have the light animate per object instead of all at once. Then I animated the X location in Mapping.
I put a bone at each vertex in the curve that I wanted to move, then added a Hook Md for these vertices with the bone as the target. I never now parent a curve to another object, just use Hook Mods for every vertex with the non-moving vertices parented to the Root bone of the armature - that way I never get curves distorting due to them being rotated by a parent object.
Love the glow effect above, can you post an image of the node tree please?
Hey, I like your colors! The last render is more believable in the lighting. Don’t know where you are going with this, but it doesn’t look like a “busy” place.
The glow also works here. It kinda gets overused I lotsa inane applications because its nifty lol.
Thanks! Though this is far from a finished product, things are not busy in this film. The base idea is that the crew of this ship don’t even stop working to eat, so this robot delivers the food to each area of the ship.