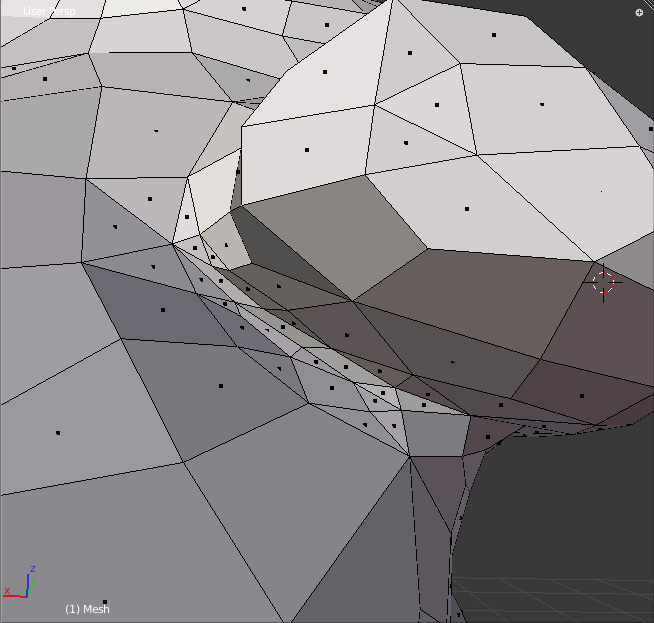
Hi, I have been a Lightwave user for most of my career, like 15 years or more. Now I am learning Blender. This is a modeling project I started as a learning process. I actually started it in Lightwave, and brought it over to Blender so I could use Blender’s sculpting tools. The method of modeling I started with gave me way too many polygons in areas that didn’t need that many, so I tried the decimate modifier which gave me a more manageable number of polygons, but really ugly topology. After many hours of trying to fix things, I’m wondering if it’s worth it. Should I try to fix more of it and make it nicer, or is it acceptable as it is? I still want to do some sculpting on it.
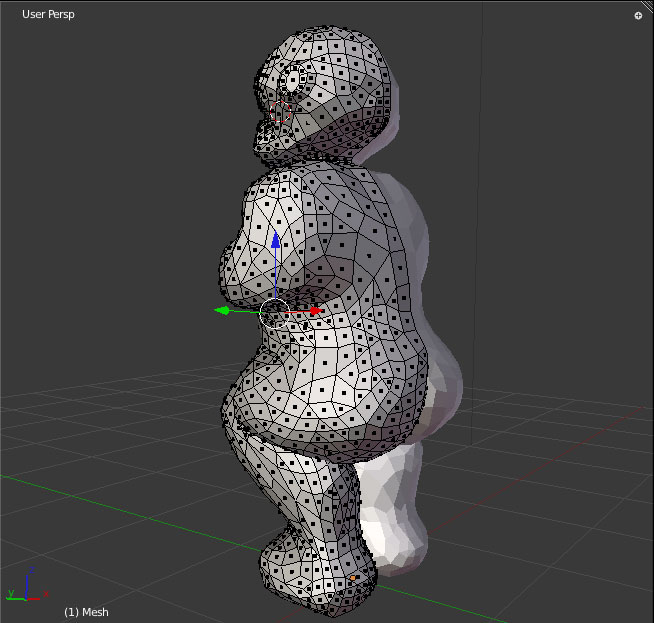
Here’s some photos of what I set out to model, and my model:
One of my problems fixing this is that I can’t find a “Merge Polyogons” command in Blender. Is there one?
Also, I would like to divide certain polygons. I found I could select to verts and make a edge, but that doesn’t divide the polygon. I had to resort to converting the quad to triangles, and then spinning the edge until it was right, which takes way too long.
A few times I have thought, maybe I should just quit and start over from scratch, but I’ve spent so much time on this, and it’s almost there.
On the legs I have intersecting polygons, and it doesn’t look exactly like the figure. Does that need to be corrected?
Look up the use of the shrinkwrap modifier and the snapping tool for use to extrude a new mesh that adheres to the form of your original - you can then retopologize your model to get the flow you desire.
Thanks. I watched a tutorial on retopologizing, but not the shrink wrap modifier. Retopo looked like basically starting from scratch to me, and I couldn’t get it to work. I’m not sure what I was doing wrong.
Thanks, but is there a way to merge polygons? not just two triangles, but two or more of any kind? and then re-divide them?
I finally just deleted certain polys and re-made them instead.
Well, using F on two triangles is helpful at least. Thanks!
I just had to delete polygons and rebuild where I wanted them. It’s looking better after tonight’s work on it. I finally had to apply the mirror modifier, but it didn’t work as expected. It didn’t properly join all the seams.
Of course I haven’t learned all about texturing and lighting and setting the camera in Blender yet, but here is a test render.
looks like retopology would be the easier option in the long term if you want good topology for the whole model , (as suggested above) to help the mirror modifier it pays to have your center verts on X = 0 you can snap them to this position by pressing shift + C using the 3d cursor and set the transform orientation to Global then press S to scale and X then 0 (zero) I think you will find once your model has a good stone texture and lighting you will be happy with it.
I got frustrated not being able to find commands in Blender, so I took it back into Lightwave to fix some of the topology and properly mirror it. I spent quite awhile fixing things. Lightwave has this cool tool called edge bevel. It expands edges into quads which was very helpful. I also added a texture in Lightwave. I’m curious to find out how that works in Blender.
Here are a couple of renders from Lightwave, just because it was easier for me to set up there. (I don’t get how to move the camera in Blender yet. It seems very awkward).
[ATTACH=CONFIG]140422[/ATTACH][ATTACH=CONFIG]140423[/ATTACH]
Way too many polygons for such shapes. If you want to learn blender
then you should just start over in blender not Light Wave, make a Low Poly
Mesh and use Subdivision Surface to get it looking like the real thing.
Then move on to Sculpting.
It’s 2750 polygons now, with subdivision surface applied. I deleted a lot of polygons and fixed a lot of the bad topology in Lighwave. I don’t think that’s too many polygons really, for a model that may go to rapid prototype. I think I would end up with a lot more if I started out with a block and just used sculpting. The modeling process isn’t really much different in either App.
Next model I do will be done starting in Blender and finished in Blender.
Sorry. I wasn’t having a spaz attack, I was thanking you. I copied your name and it made the rest of my text bold after that. I was too tired to notice. Sorry! Your answer was very helpful, and I appreciate it.
And sorry JDA. I will do my next model all in Blender, but I like that I can go back and forth to Lightwave since that is what I know so well.
The ultimate goal is to go to rapid prototype, so I’m not really concerned with the number of polygons. It’s not going to be animated. I am interested in seeing how I could have a simpler base mesh and still come out with a enough detail.
Do you use box modeling or vertex by vertex , I find the vertex by vertex method best for organics as its easier to control the topology ? Auto clipping is ok but I have found it sometime grabs unwanted verts if you have lots of tightly packed verts around the center line at various angles so still stitch my models together by hand, Just my preference everyone has there own way of doing things.
Thanks. I’ve done both. I guess I usually start off with a box though.
Usually, doing symmetry in Lightwave, I select all the points along the center line and make a selection set of them. Then I can always select them and set them back to zero on the X before I mirror. I found that this was not as easy to do in Blender, for me at least, being used to Lightwave.
Good tip never even thought of that, I normaly only start with selection sets when Im making morph targets or doing dental work, I’m ex Lightwave user as well bought version 5.0 back when I first wanted to learn 3D never done it as a job though, I think if I did my skills would have progressed faster.
I certainly learnt a lot of good basic skills using Lightwave 5.0 Realy like blender but like everyone else
I thought wtf with regards to the interface when I first fired it up but I am glad I put in the time to learn it.