Material / Texture Confusion

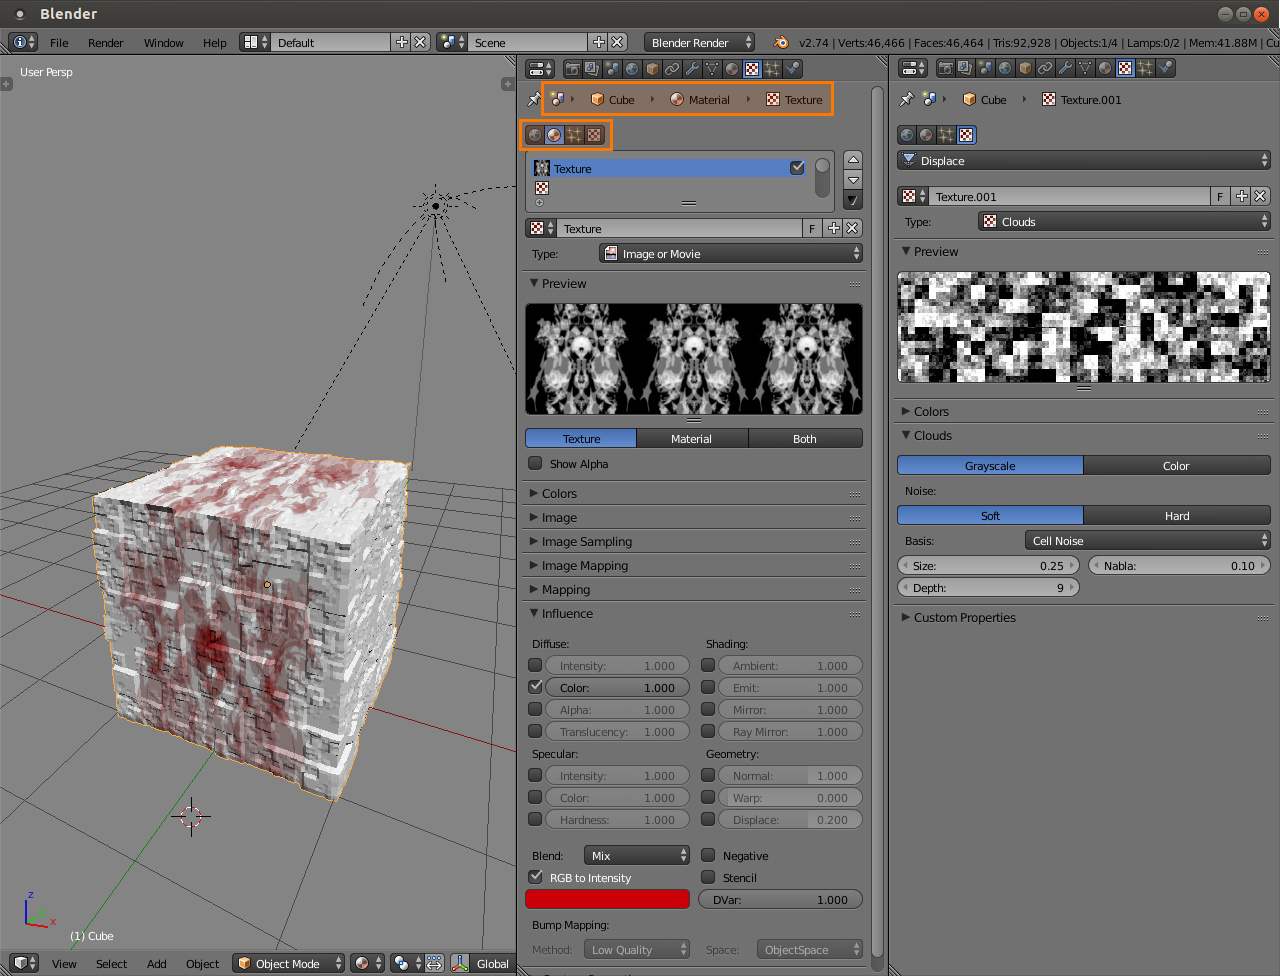
Firstly, I’ve watched the Lynda tutorials and various YouTube ones, but I still can’t wrap my head around the Materials and Textures and how they work together.

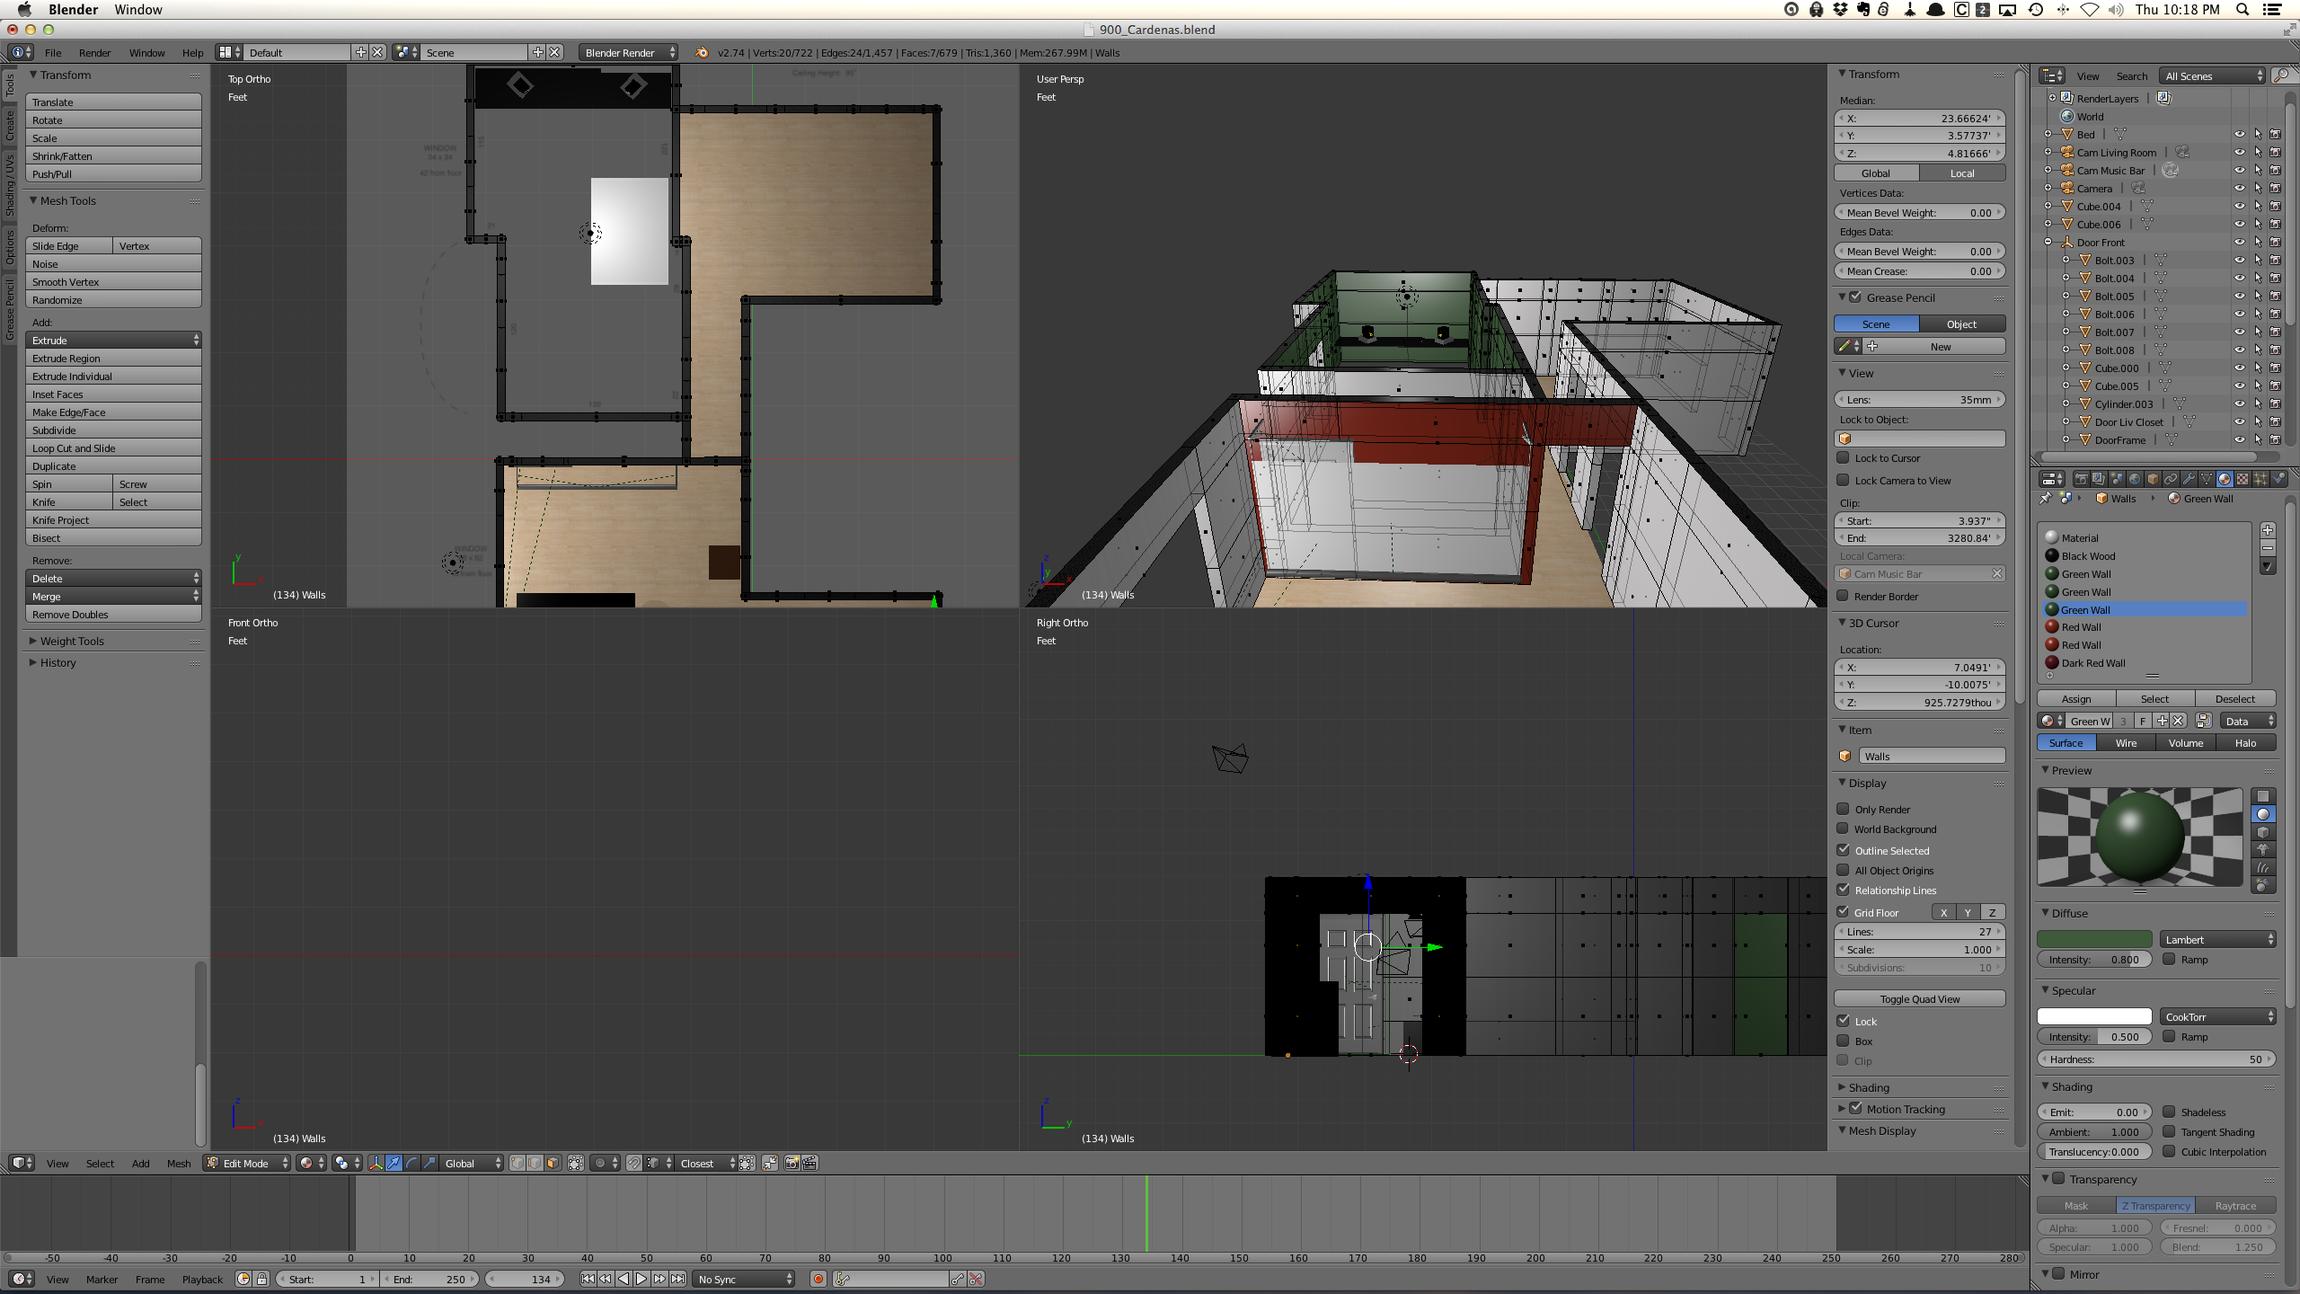
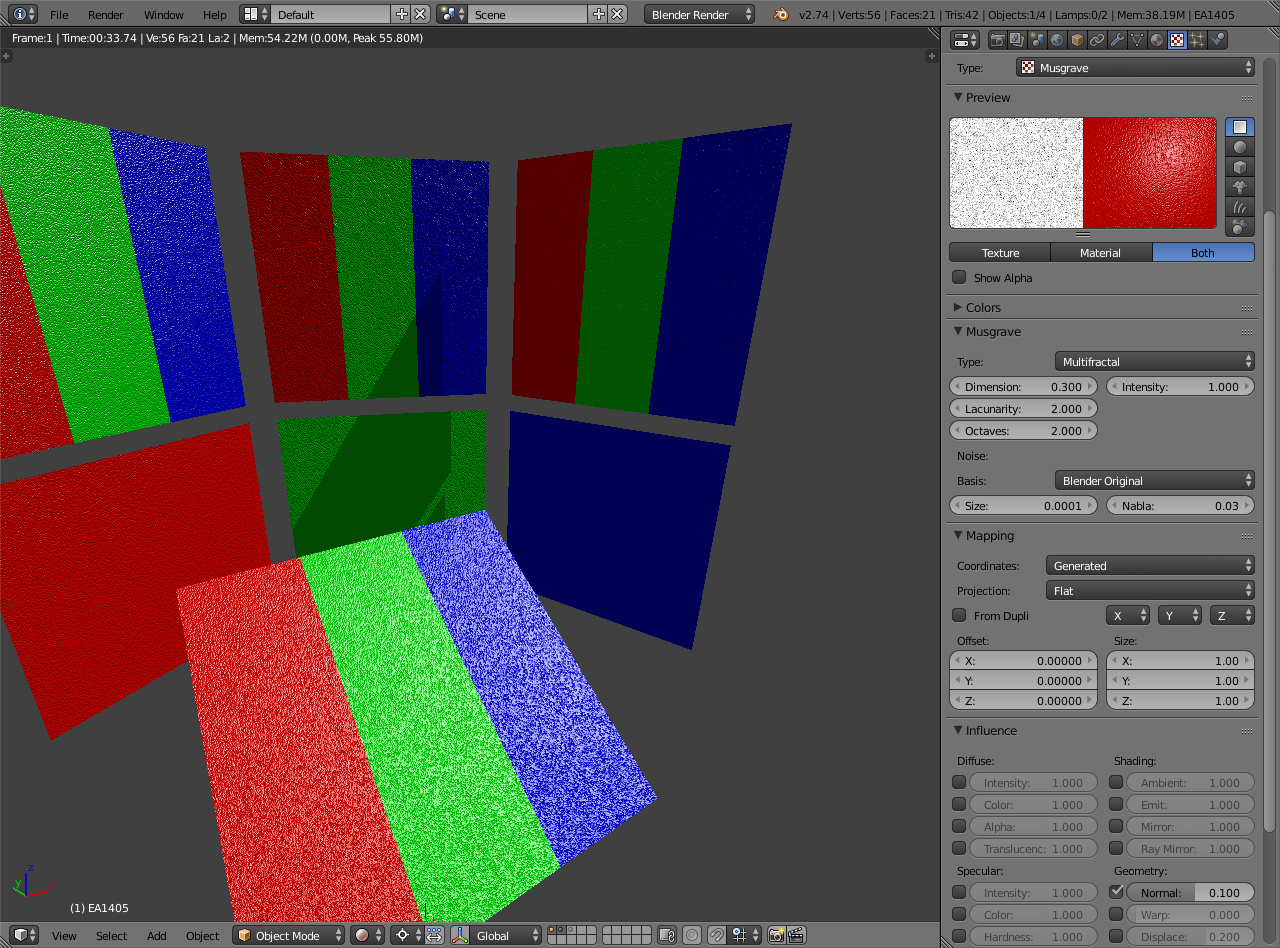
I am building a 3d house. The walls are all one object plane that was extruded. Some walls are different colors, but I want the walls to all have the same bump mapping texture.
I have gotten a few of the walls in the right color with the right texture bump mapping, but honestly it takes me a lot of trial and error and I’m never quite sure how I did it.

It seems like the software would work one of two ways. One would be if you could combine the bump mapping texture to the material, so “Green Wall” material would always have that wall texture I applied to it. The second way it could work is if the materials were totally separate from the textures. So you could assign all your wall (selected faces) colors and then select the complete wall extrusion object (all of the connected walls are one object) and then apply that one texture.

It does not seem to work either of these ways, at least from my perception, and I am completely confused. It also seems extra important to understand how this works because if you mess up something and you aren’t sure what you did, the command Z undo function does not work. At least on my computer, if I mess up something on my materials the command Z will undo other things I have done but not anything material related.

I also have ended up with duplicate materials in my material list (Green Wall, Green Wall, etc). I’m not sure how that happened or if there is a way for Blender to show me which objects are using what materials, so I can delete materials that aren’t being used.

All the tutorials online show you the basics, such as one object with one material with one texture, and it makes complete sense. I was very confident about my understanding. But now that I have gotten slightly deeper into it I feel like I have no idea what I am doing :eek:


The post is also confusing. You reported that there are problems but aren’t asking any questions to respond to. The mentioned texture and its settings aren’t shown.

Maybe there is confusion because these can be done in multiple ways. A material assigned texture influences material properties or shading in some way. A grayscale alpha map for example could control how transparent the material is: value 0 on the texture would make material transparency 0 and value 1 would be completely opaque.

What you can’t do is have a texture separated from materials because it has to be material assigned for it to influence it. You can map it over an area that has multiple materials but each material would have to have the same texture assigned to them.


This uses image type texture and UV mapping over 3 faces. Each face has its own material and each material has the same texture assigned.

The problem with that would be to get each area mapped and it would cause some work to do it with UV’s. A procedural type texture with generated mapping doesn’t have that problem


Same setup as before except that the texture used on all materials is now a procedural musgrave texture with generated mapping.

Or a bit more obvious


Apologies for my vagueness, I think part of the problem was that I didn’t know what exactly was confusing me in the first place. Thank you for your thoughtful response, this is helping me a lot. I’ll be more specific in this post as I narrow down my confusions. A few of them will be redundant, but it will help me understand.

  1. It sounds like a Material encompasses everything; material color, texture, etc. Even though there is a separate “tab” for Textures, this isn’t completely separate as it actually changes the material that is currently selected. True?

  2. In terms of controlling which material you are editing the texture of, you do the following: Select an object, Select the Material (already applied to that object), Go to the Texture tab (checker icon), Edit the Texture. Any edits you make here will affect that one specific material you had previously selected in the object’s materials. The texture settings you change will not affect anything but this one material. (but, of course that material can be assigned to multiple objects) True?

  3. Additionally, there is no way to edit a material unless you select an object using that material. In other words there is no “Library” you can go into and edit materials which you later apply; you cannot “pre-make” your materials or have unused materials you may want to go back to in the future. True?

  4. Does the material projection link to the material itself? For example, if you set it to "cube” would it always map as a cube? So if you had a cube and a sphere with the same material texture on both of them, you would still need two materials (one for mapping to a cube and one for mapping to a sphere)… True?

  5. If a material exists in the drop down list, it is used by an object somewhere in the scene. True?

  6. How do you delete a material from the drop down list? I can unlink it from an object using the “x” button, but it still appears on the list. Sometimes I create an accidental duplicate material and want to remove it, but I can’t figure out how.

  1. True. Materials and Textures are separate forms of data (let’s think of these as ‘objects’ for now). A Material holds one or more (or none) slots which are filled by Texture objects.
    Like the same instance of a material can be applied to multiple objects (you can apply the same Wood material to 10 different objects without having to have 10 identical wood materials), you can slot in the same instance of a Texture to multiple materials (if you want to have 10 different shades of wood all with the same woodgrain bump-map, you could use one woodgrain bump-map Texture on 10 different materials).

  2. False. See above. If you change a material/texture, it will update any object using that material, and any material using that texture.

  3. True and False. You cannot directly work with a material (unless you’re using Nodes, but I assume you aren’t) unless you have an object using that material selected. You can, however, Append and Link materials from other blend files, and “orphan” materials/textures (that is, those which don’t have any objects using them) will stay in your project. Orphan materials/textures will have a ‘0’ in front of their names on their respective drop-down menus. Blender tends to trash orphans between closing the project and opening it again (although not always?). Click the F on the drop-down menu to force it to stay even if it has no users. Tip: The number to the left of the F is the number of users (objects in your scene) that have this material applied to them.

  4. True. The projection setting of a material is a property of that material, and therefore ‘linked’ to that material object.

  5. False. See above (Orphans)

  6. Shift+click the X to delete a material/texture/image. It will actually still be there, until you close-and-reopen or File->Revert the blend file. After that, it will be gone.

  7. (the question you didn’t know you needed to ask) Like there is a distinct ‘object-like’ distinction between a Material and a Texture, there is the same distinction between a Texture and an Image.

The questions were already answered but a bit more information to the first one


Properties editor shows what is being edited at the top. There’s the currently selected scene, that has a Cube object, which in turn has a material and we are looking at texture that belongs to that material. You could think it as a hierarchy if it’s easier.

The context buttons on the properties editor start to make a bit more sense that way too; More universal properties on the left: Render, render layers, scene, world. It gets more granular when moving to the right: object that is in the scene, object’s constraints, modifiers, data, material that by default associates with object data (mesh faces) and finally textures. Particle settings and physics stuff are placed last because they are less often used.

First row of buttons in textures is what type of texture it is. These are context sensitive so they will change depending on what type of object you have selected and what has been added to it. In the screenshot it shows types: world, material, particle, and textures for other data.

I’ve added a material assigned texture there and the object also has displace modifier that moves vertices based on texture values. Nothing special there either, displace is set to have midlevel at 0.5 so texture value of 0 would push vertices inside and 1 outside.

Other programs also have material systems and textures can be used to influence them. How those are assigned can change though. For example it could list various material properties with a value field, and next to that could be a texture button. Blender separates all textures which then has those texture type buttons and material textures have a influence panel.

thank you both for your answers. I think I understand now!

But a quick question: Say you have two objects that share a material and it says “2” next to it. Clicking the “2” basically duplicates the material and applies it to your current object (and your number goes away because this is a new material). This would allow you to quickly edit the material without affecting other objects that you already have mapped correctly…
Am I correct on this? The guy in the datablock video didn’t explain this well at all and worded it something cryptic like “this converts it to a single user datablock” and I had no idea what that meant. After playing around with it for awhile I realized it appeared to be (and this is how I would word it) creating and assigning a duplicate material.

Finally… what does the “F” button do? It says “save this datablock even if it has no users”. I searched for this on google and could not find an answer. It just seems to make the “users number” disappear, toggling on and off.

Yes, that’s what it does.

An analogy might help: Let’s say Blender is a company with multiple workers and they use company cars. The cars are big and heavy so they could represent data that takes up resources and keys to those cars could represent datablocks. When the workers need to switch cars or need to use multiple different vehicles, the keys are easier to move about from worker to another than organizing the parking lot by moving the cars.

So if two workers have keys, the corresponding car has two users. A completely new key would mean a new car, and if that car needs to be used by 3 users, you just give a key for each instead of buying two more cars. That is less costly way of handling it. In a company that would mean saving time and money, in Blender that means saving resources.

Datablocks (keys) are linked to data, be it a material with its properties, texture definitions, mesh elements (vertices, edges, faces, loops) and so on. The cars. Those can in turn be located in memory or in the .blend file, and their source can be an external asset (images, movies, sounds, etc).

It’s a fake user for that datablock. Blender gets rid of datablocks (and data located in the .blend file itself) that don’t have any users, like a company would. Giving it a fake user means that the company wants to keep the car even if no one has a key to it.

The analogy can go on and on. Blender exposes this functionality so that you have control over how the data gets used and you can do things like creating/collecting many materials with all having fake user enabled - You would then effectively have a .blend that works as a warehouse for material type cars and can go and pick one whenever you like.

Blender still doesn’t have an asset manager so it’s a bit of a necessity too. It’s in the works though.

(As a side note, keys-cars analogy is also how pointers in C/C++ work. The data sits put while the keys get moved)

so the “F” un-applies that material from your object, but keeps the material around in case you want to use it later?

F doesn’t unapply it, it simply makes it a “Fake user” so that if you were to choose a different material or delete that material from a specific object, it will stay in the file, even if no other objects are “using” that material.

Usually, if you don’t give a material a “fake user”, if you were to choose another material for an object or delete it from that object and no other object is using that material, if you save the file and close the file, the next time you open the file, that material will be gone. Assigning a “fake user” to the material will keep that material with the file, even when no other objects have it besides the fake user, so that the next time you access that file, the material will still be there.

i guess the part that confused me was that the number next to “F” goes away; the number that shows how many users the material has. If this is how it works wouldn’t it make sense to still display how many users it has, but be able to toggle the “F” on and off almost like a “lock” saying “don’t delete this even if there are no users”?..
Let me know if it sounds like I understand this.

The number should only go away if there is only one user for the material (ie there is no fake user and only the object is using it). If there is a fake user (the F is pressed), then you should have at least a number of 2 (the object and the fake user).