Added Visemes, Mood and Eye Simulation Blendshapes that would make this rig VR Chat ready. First time doing Blendshapes in Blender. Getting the hang of it.
–
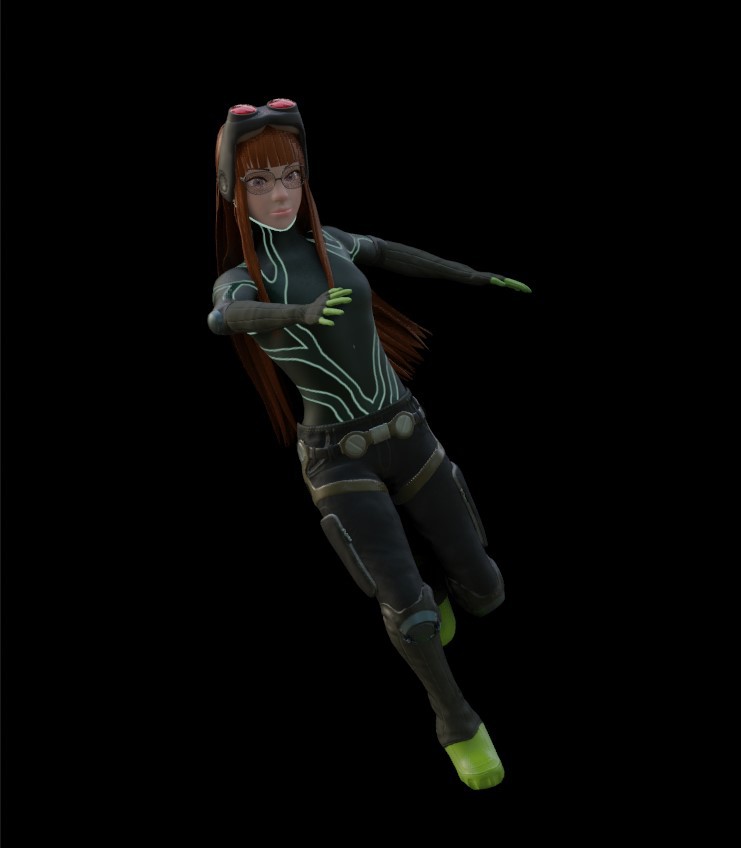
Now trying to pose her, before starting a live wallpaper like animation that I want to upload to sketchfab
1 Like
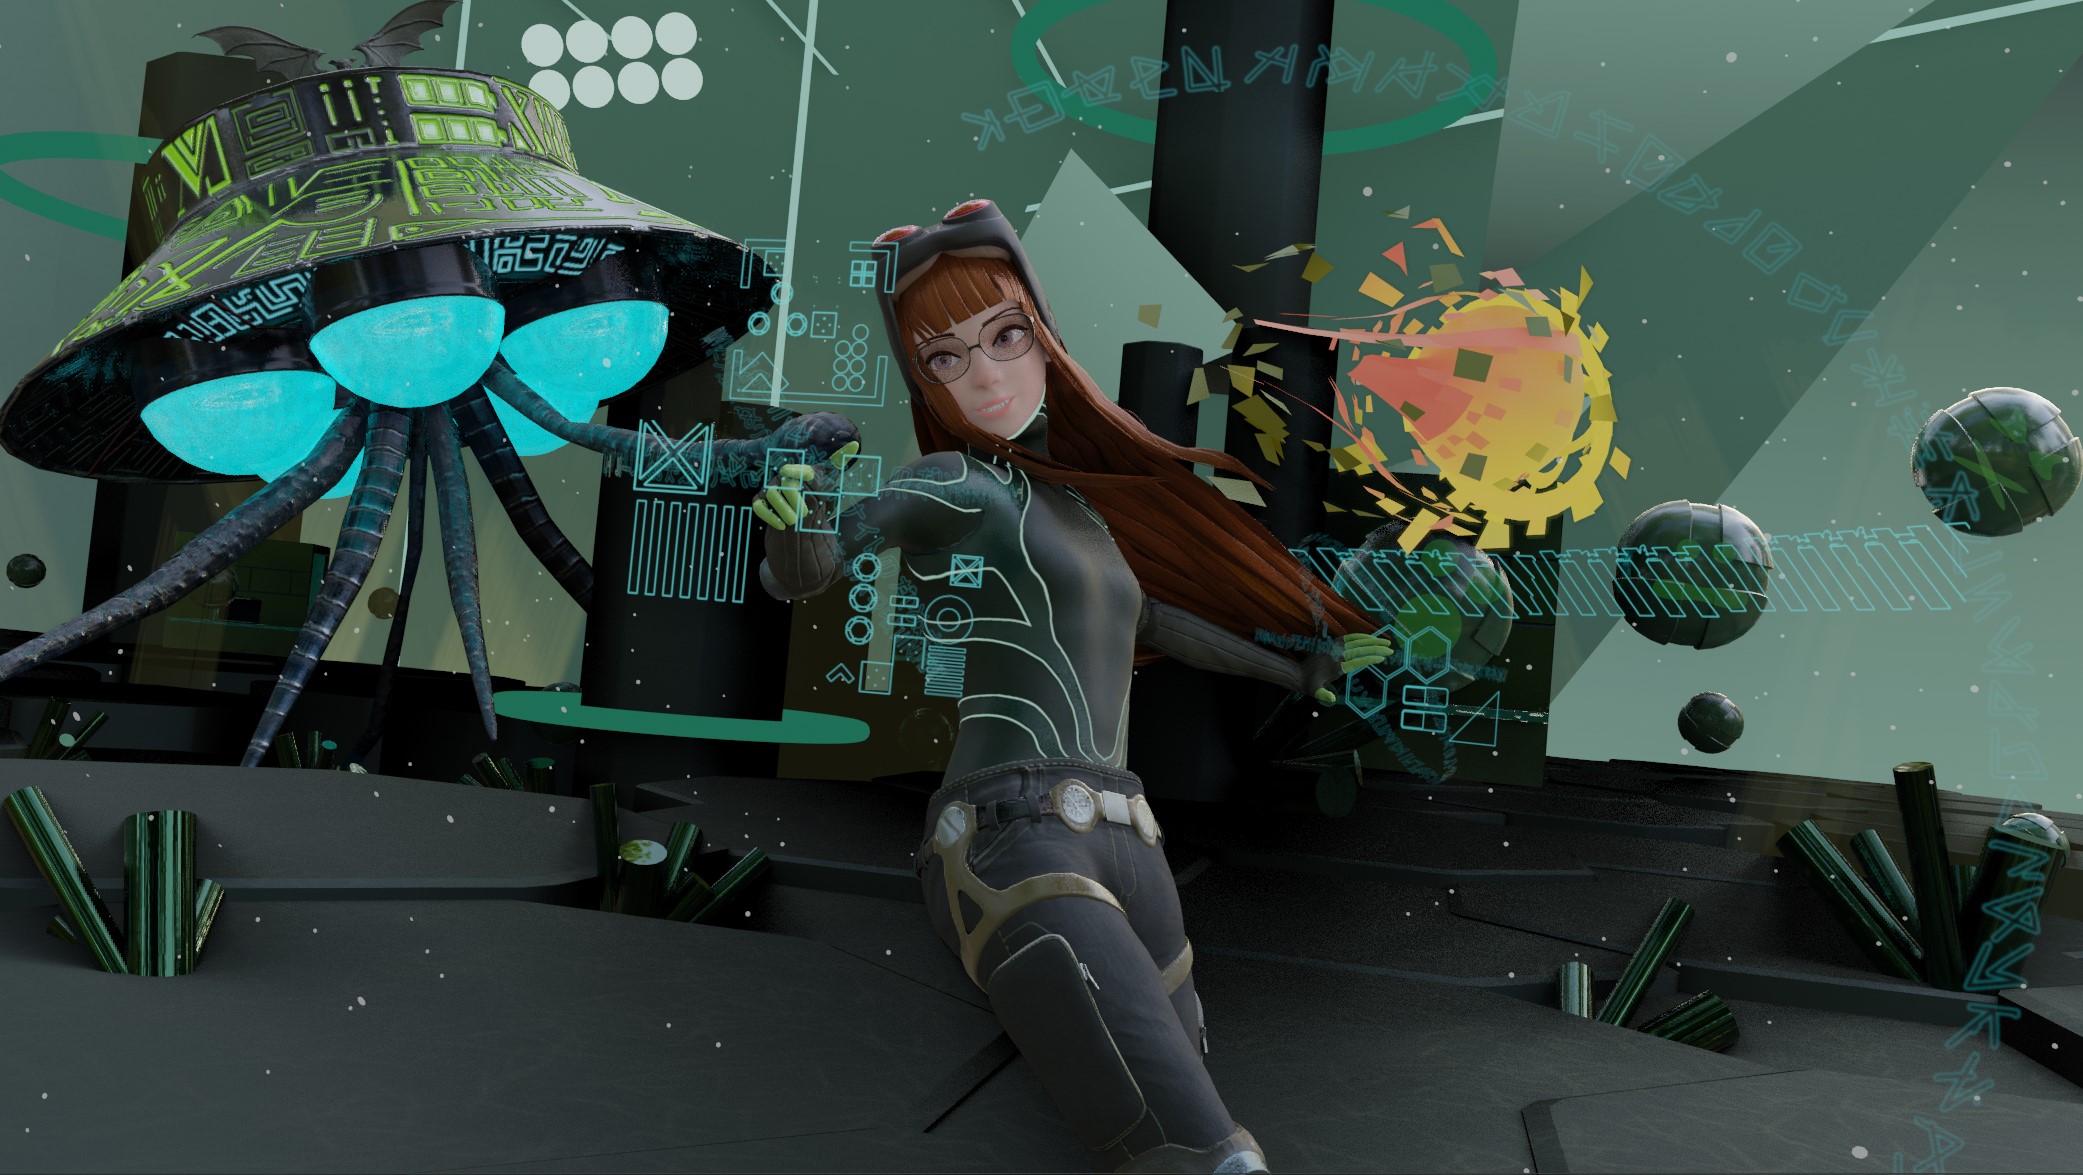
Going to use this composition and animate it into something like a wallpaper and upload to sketchfab.
I do feel a lack of contrast, too much things and no focus so I’ll be working more on the lighting and post effects of that when in the Sketchfab editor.
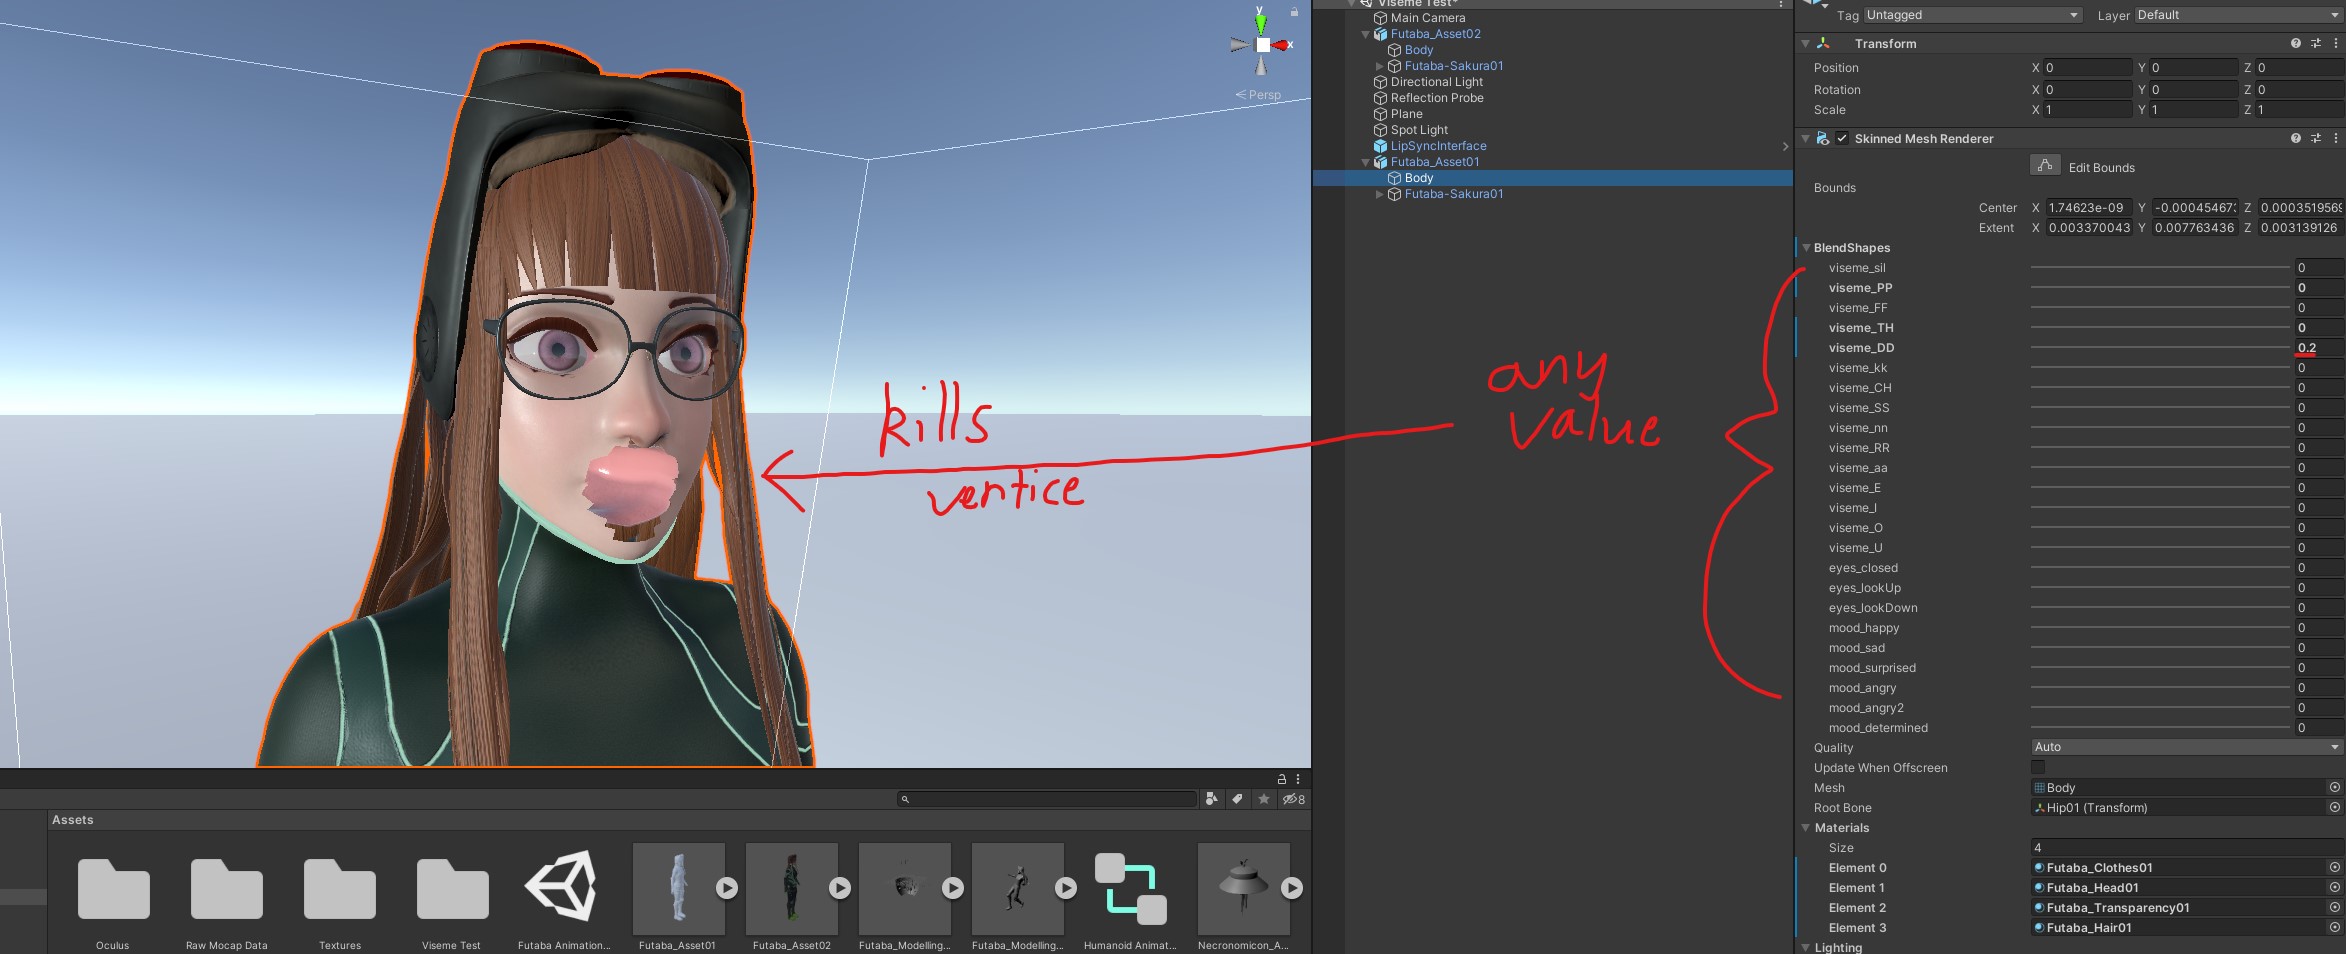
I ran into a bug where the model would disappear during the animation. I was banging my head against the wall until I found some settings during Unity animation tests that the blendshapes were the cause. Certain import settings that handle blendshape normals created the problem below but at least the model wasn’t disappearing into the void. I LATER FOUND THE PROBLEM, was blendshapes being assigned any vertex group… Taking off the vertex group for all the blendshapes fixed the problems.
I was finally able to proceed and complete my rig and viseme tests in Unity. The initial aim was to make blendshapes and a rig from scratch that is a realtime asset standard, like something VR Chat is accustomed to and meets requirements. Although the model and textures itself is aimed for higher definition games or realtime products, there are always ways to downscale for optimisation, where upscaling would be much harder. I’ll be venturing into a workflow to decimate, atlas and lower texture res if I decide to make VR Chat or Second Life or other Video Game ready assets in the future.
Here is the humanoid retargetted animation test. I had problems with my toe pivot driver bones because it was required the toe not be parented to the feet. I had to delete the pivot setup so I can parent the toes to the feet and fix the humanoid avatar configuration.
This test is using the OVR Lipsync asset. VR Chat also uses this asset for their lip syncing. This gif can’t play audio but there is an audio file of someone talking and OVR Lipsync is lip syncing to the audio.
https://trello-attachments.s3.amazonaws.com/5eb404bb9a7cbb51a387ec0d/746x660/2b15258cee11e523bdae6f2fa929a3ce/127_Viseme_Animation_Test.gif
Then got to just doing an export test into sketchfab, fingers crossed that the baked animations made it across.
1 Like
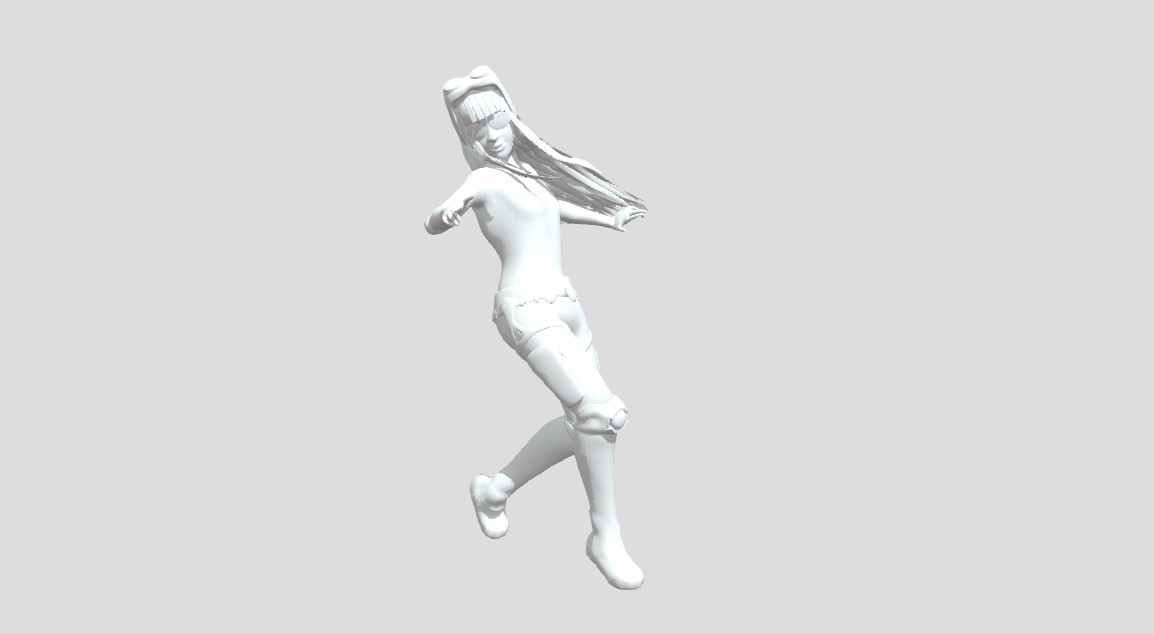
Working on making a 3D Printable model
Right now the plan is to
- Do the extra thing to add the extra details of the metal screw buttons on the belt and the lines and detail of the shoes. Then use Boolean operations to cut into those areas.
- Then use the 3D Print addon to check for current issues as I suspect the Glass frame and the eye lashes will be too thin.
- After adjusting things to be 3D Print friendly in Blender, seperate the Eye Glass frame with the handle. Then create the ball connectors using boolean operations.
- Duplicate the head and then boolean that with the goggles
- Add extra edge loops onto the goggles to maintain shape when subdivided later.
- Smooth and finalise the refinement of the wig mesh
- Export the Glass Handles, Hairs and Goggles to Zbrush
- Add hair strands to the extra hair curve meshes
- Refine the scalp mesh to properly fit with the other imported meshes
- Subdivide and finalise the goggles and every other mesh
- Join everything together with the Scalp and dynamesh
- Decimate and then import into Blender
- Check that the mesh isn’t protruding into head, if it is. Use boolean operations.
Extra sculpted detail had to be done manually again because I couldn’t figure out a way to do some sort of clean height map to mesh operation. Next time with this pipeline when in the sculpting phase, I’ll have a 3D Printing mindset to work out details that I’ll keep and then texture everything. My mindset during sculpt is to not bother much about cloth detailing and other detailing like on the shoes because I always basically do high level detailing in the texturing phase.
Huge Mistake Made…
Using Blender Boolean from past and present experience is a death sentence to time, heart and my brain. Next time I need to use Booleans for figurines, I’ll look into ZbrushCore Dynamesh Boolean.
In addition, I shouldn’t be too quick to move on after keying in the mesh to be Dynamesh in ZbrushCore as it efficiently keeps the unchanged vertices from being affected, so I could have done the boolean operations here and there and made parts fit together for printing all in Z Brush Core…
The only thing I have to fix in Blender is when Dynamesh failed to properly get rid of geometry that stays preserved inside the mesh itself.
I can even do the modelling of extra parts in Blender and import it into ZBrushCore then dynamesh boolean them together
1 Like
Now 3D Printing
I used Blender boolean to create the connectors, they had no problems to it. The only thing that it didn’t work well for me in the past is adding details to the sculpts. Next time I’ll use ZBrushCore Dynamesh Boolean to work on geometry detail and use Blender boolean for precise operations like the connectors.
Off to print!
After the first bundle, the eye glass handles didn’t even print in my FDM printer, I need to thicken it.
The front hair strand was too thin, ended up accidentally snapping the left side when pulling supports. Going to need to re-thicken those hair strands.
I’m thinking of merging the Eye Glasses with the Hair mesh, it might work while I’m thickening the glasses.
Also I think the Pedestal is too big, I can see why many figurines have really small pedestals with simpler postures/ stances. There’s a convenience with mobility and the ability to place with a lot of other figurines. I’m going to decrease the diameter of the pedestal.
After this first prototype is printed. I’ll be printing a second with the fixes to the hair, glasses and pedestal.
3 Likes
After 3 trial and error fixes
I’ve learnt to ensure connectors have extra space after boolean process, some experience with flexing attempts (hair snapped 2 times trying to pry head in) and how much thickness is needed to fail less prints.
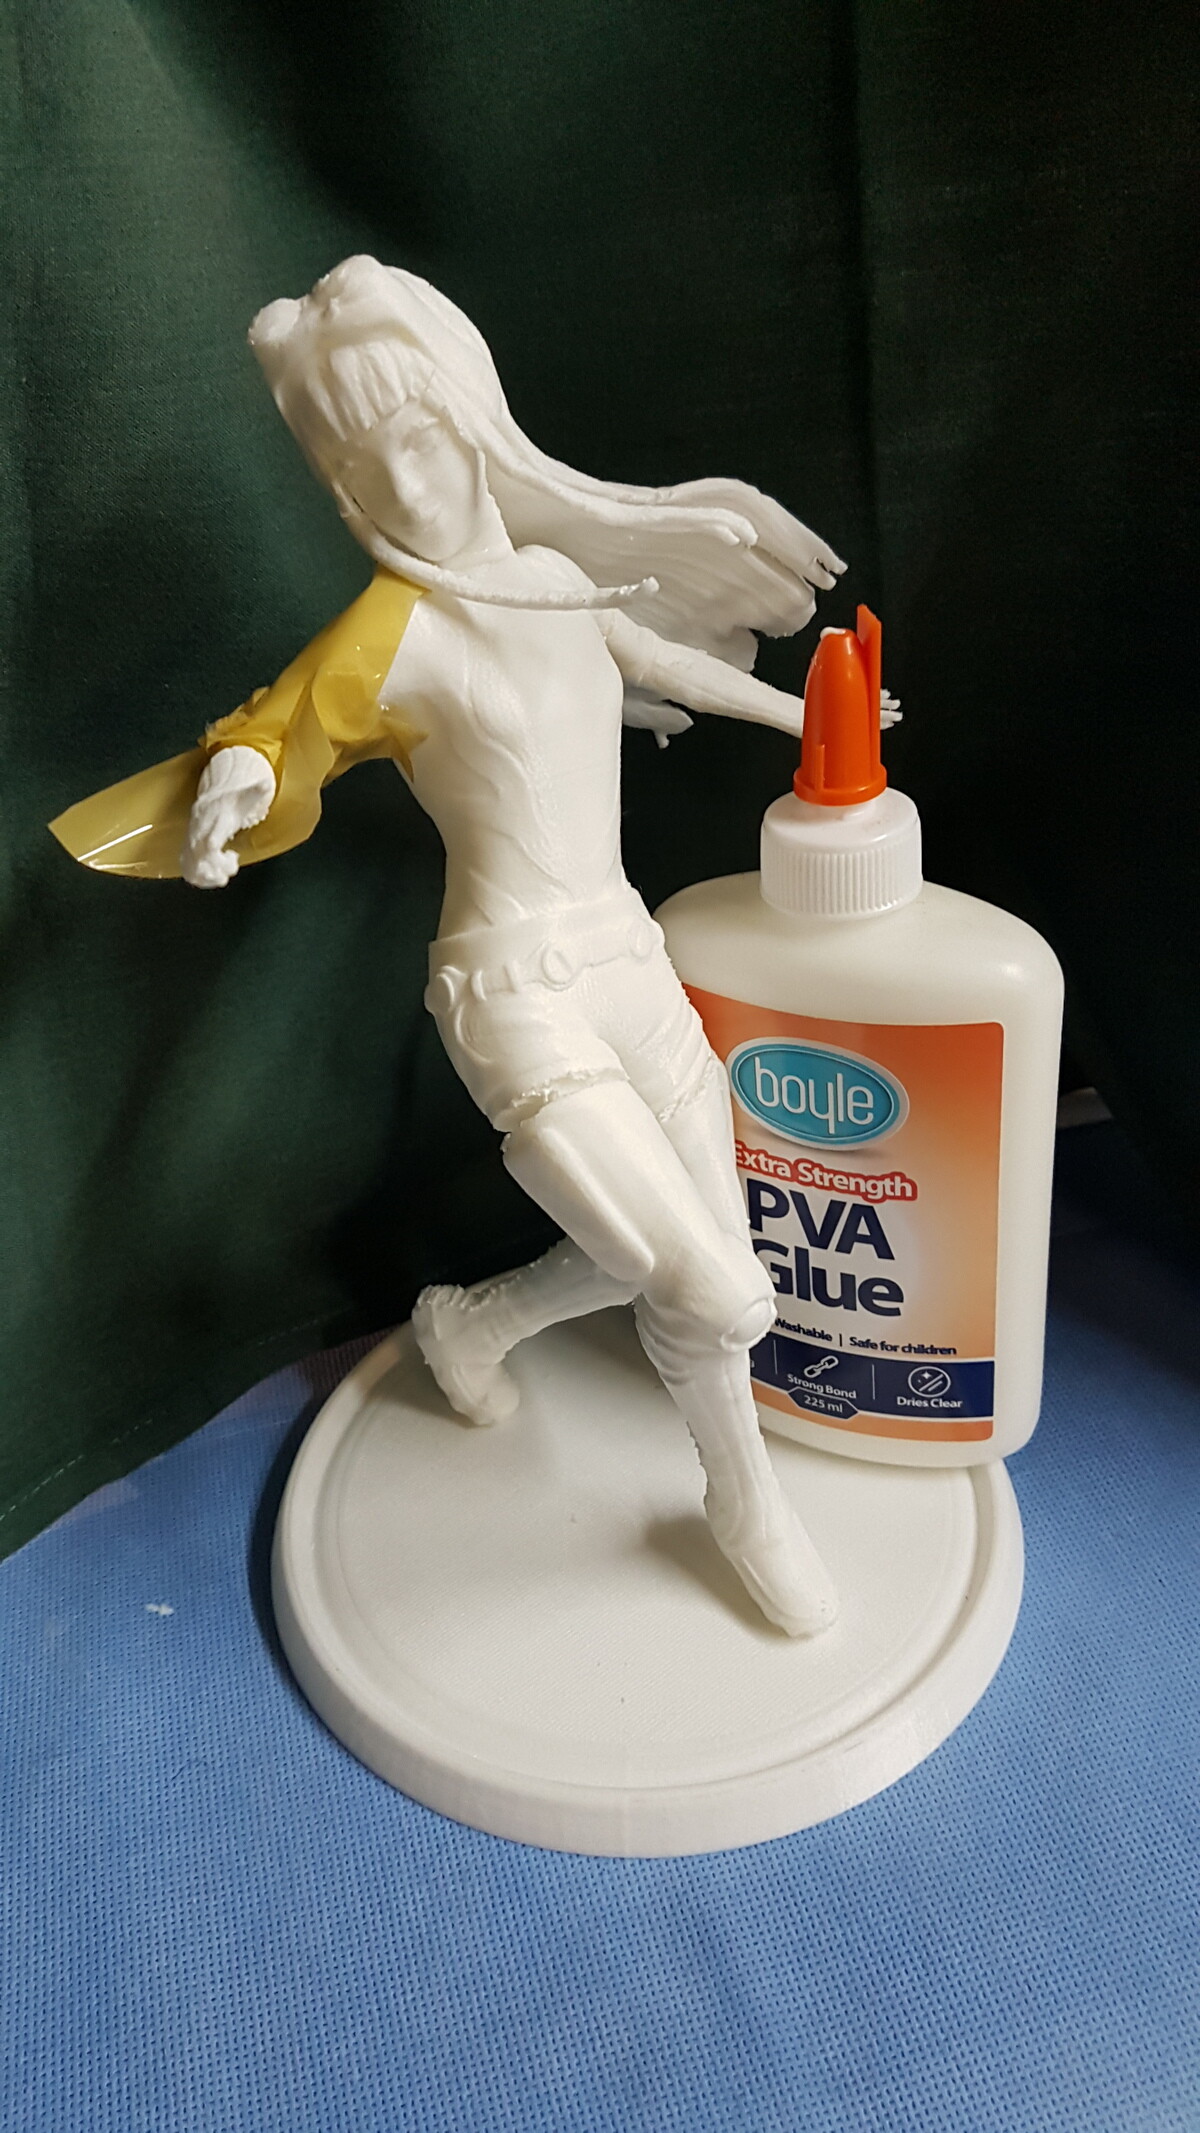
This is a preview shot, using weak glue so I can later disassemble for easy sanding.
The next thing to do is to sand, filler prime, sand more, putty, more sanding, gap filler, more sanding and spray paint. I may try to look into painting but I won’t be touching this 3D print for a while, going to jump into a new project for the time being.
2 Likes
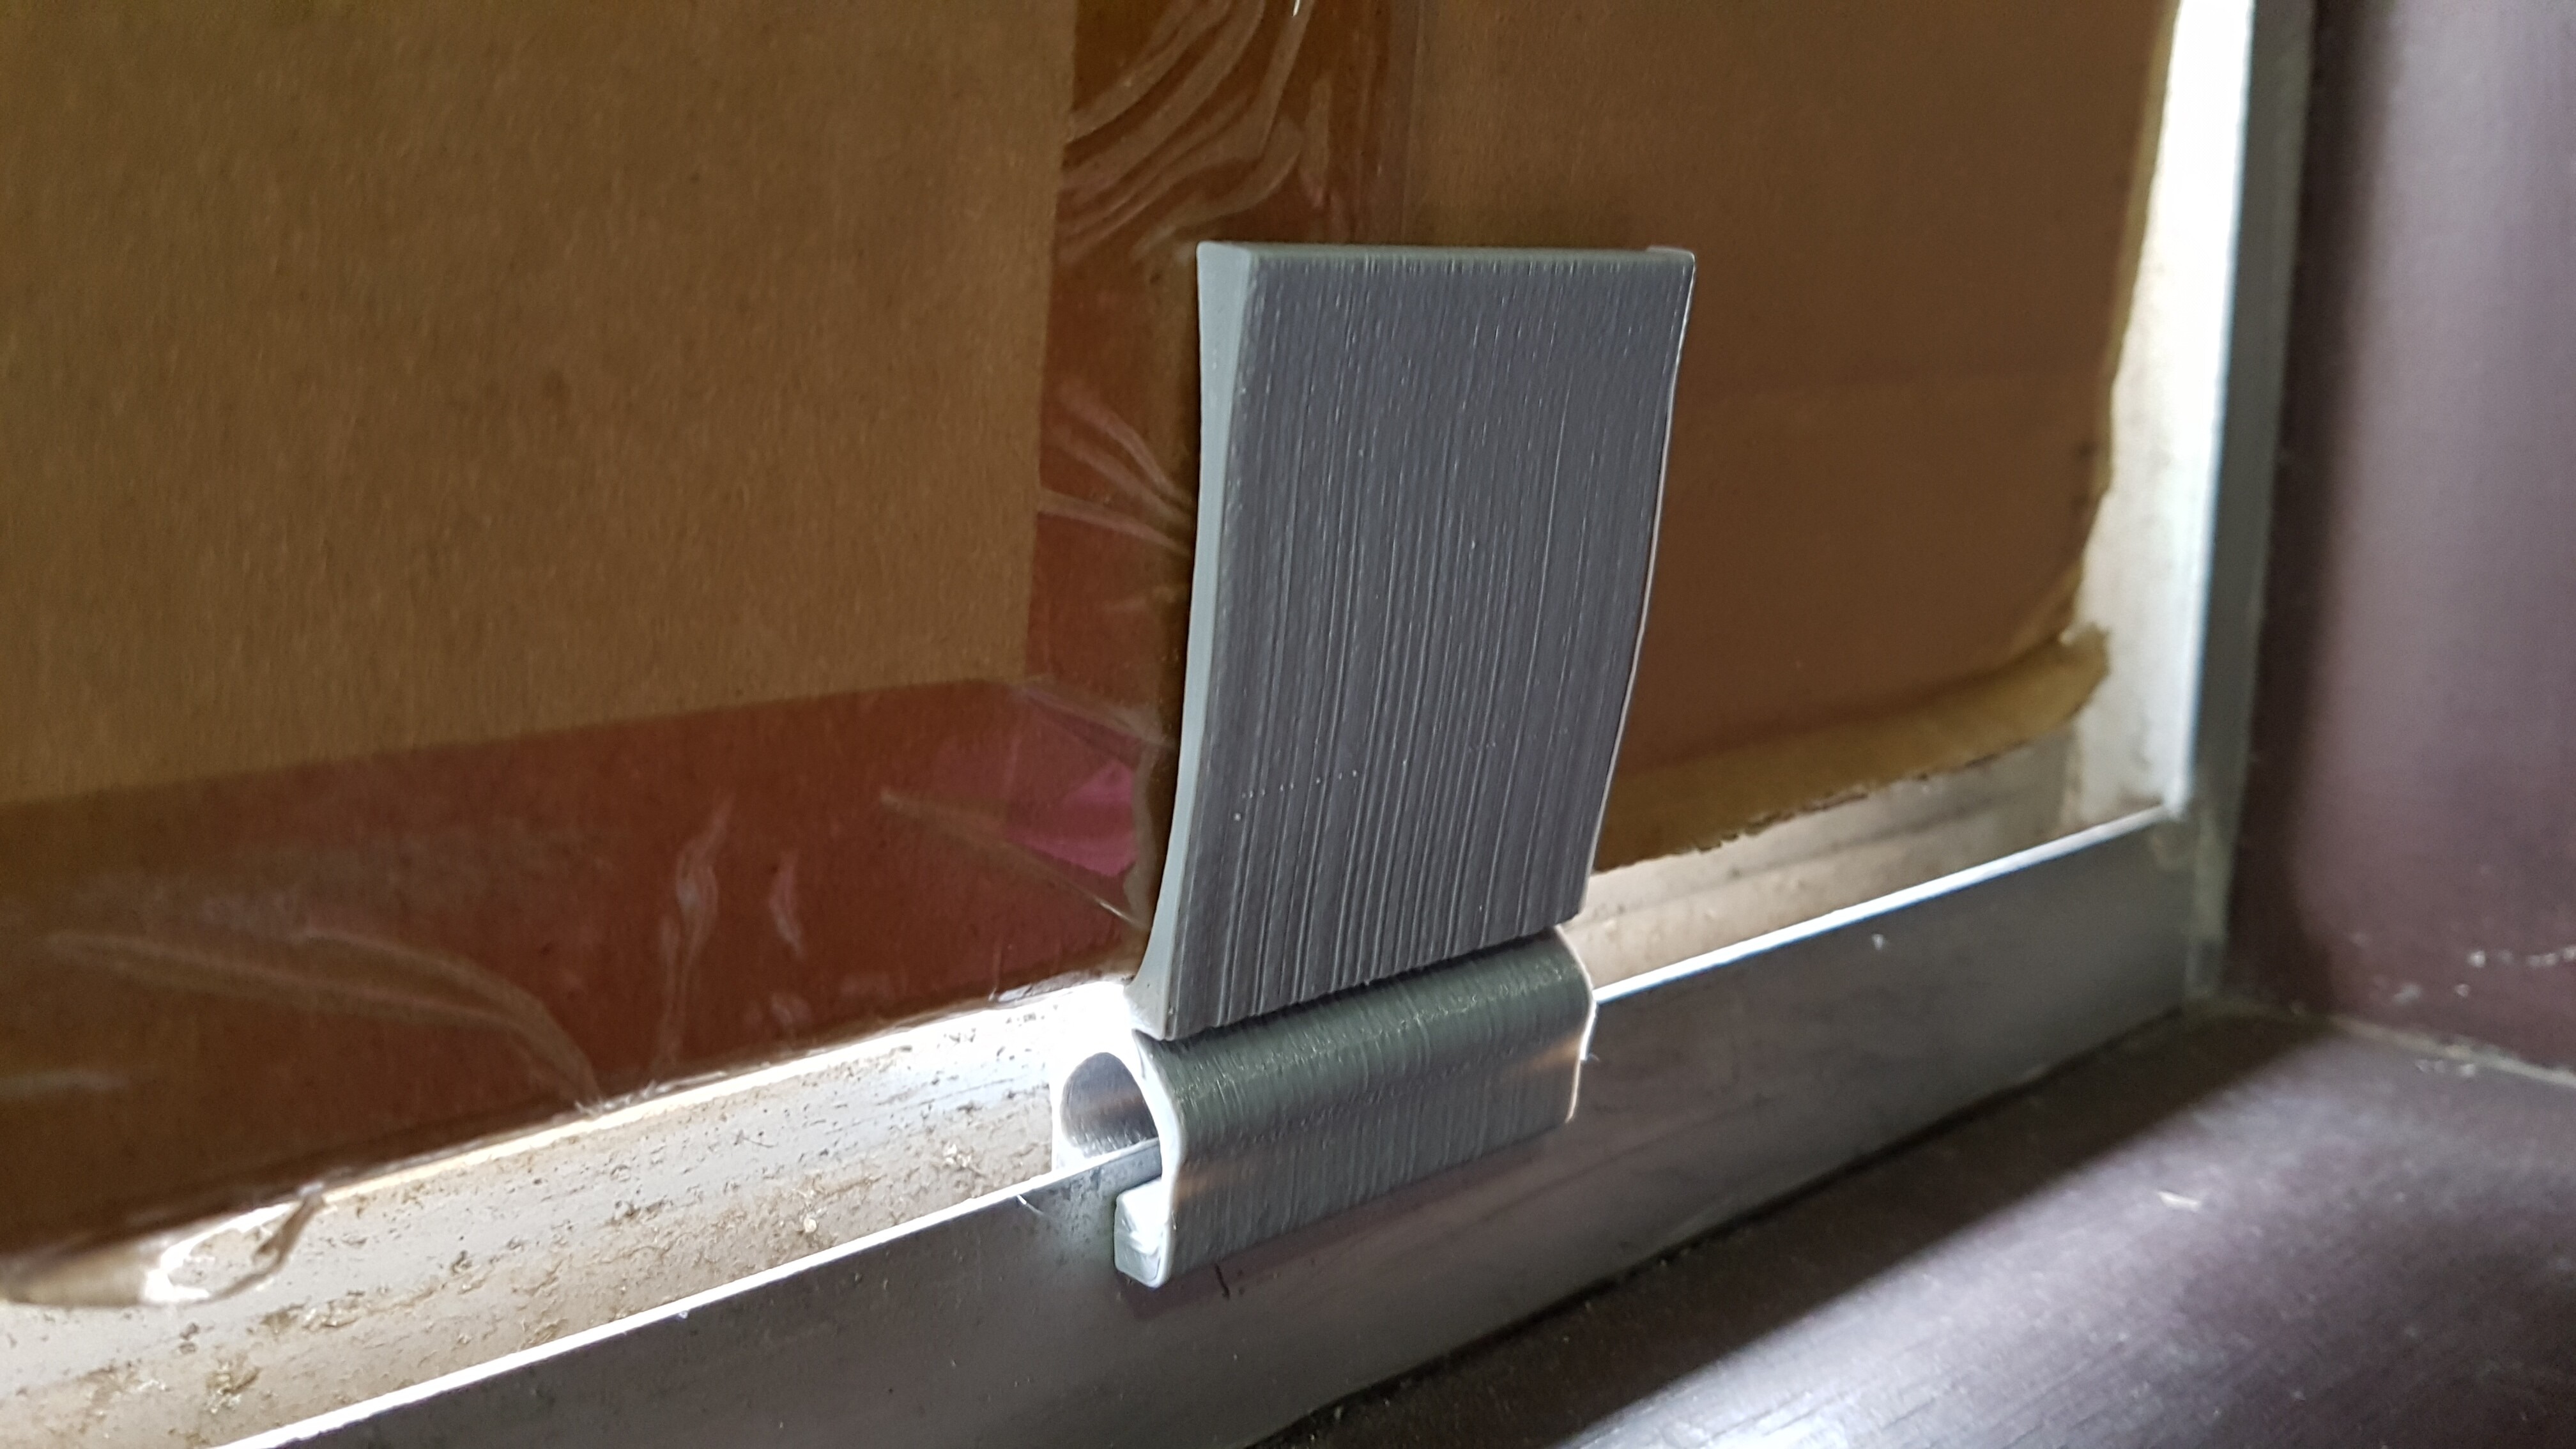
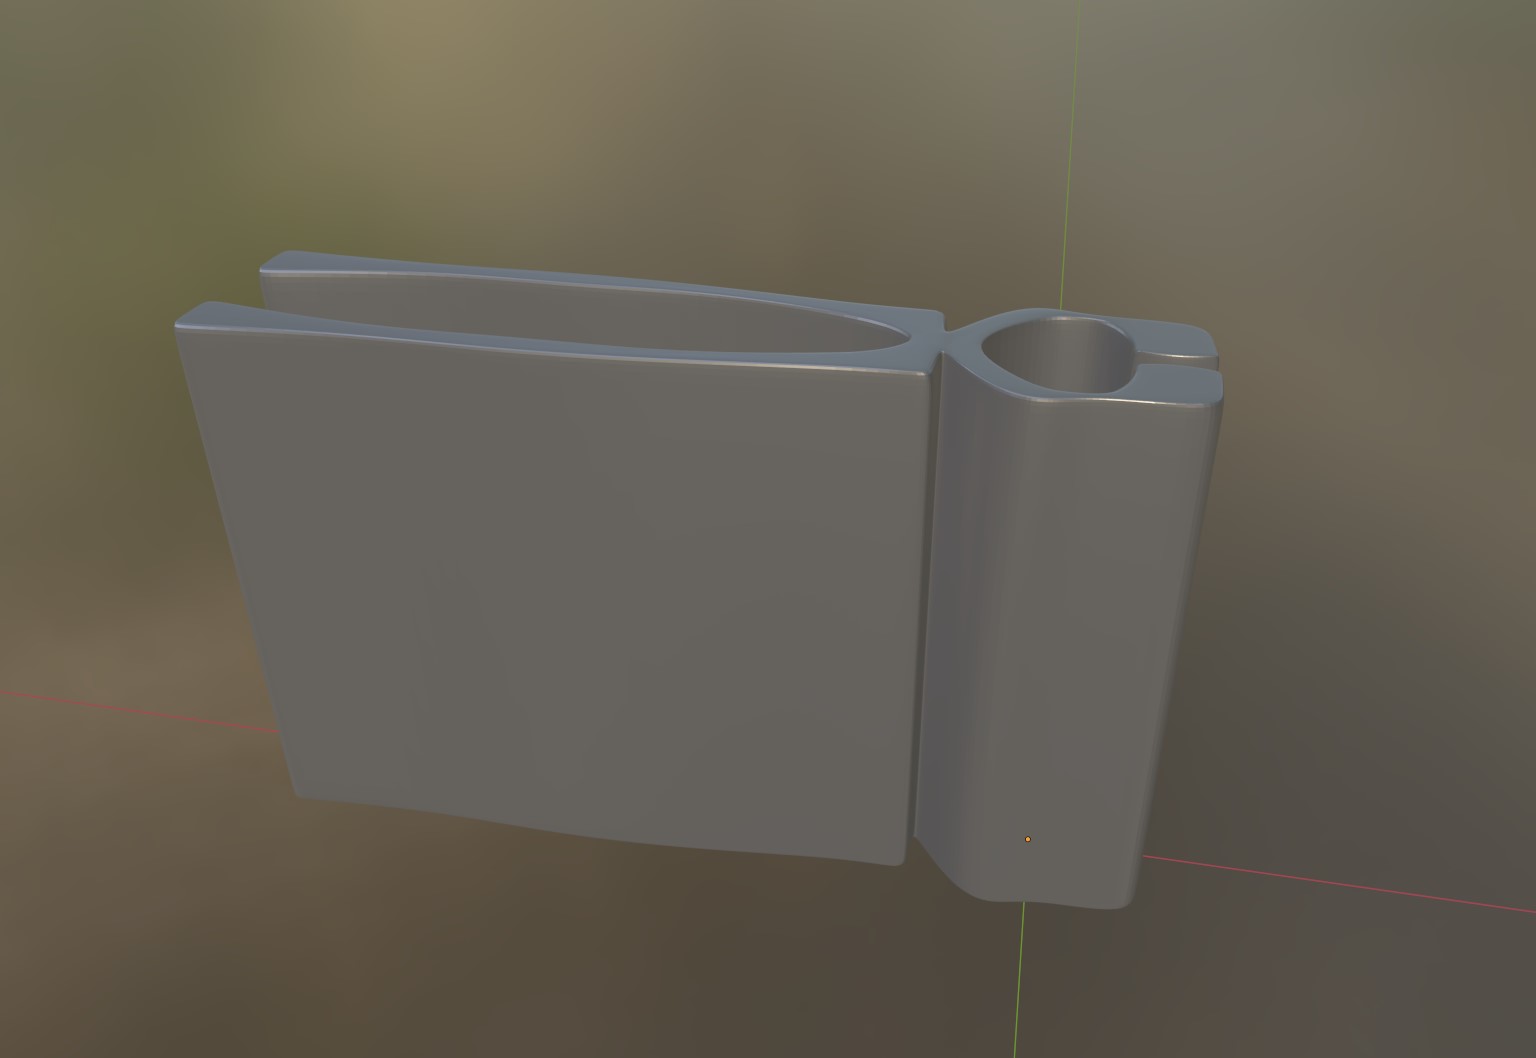
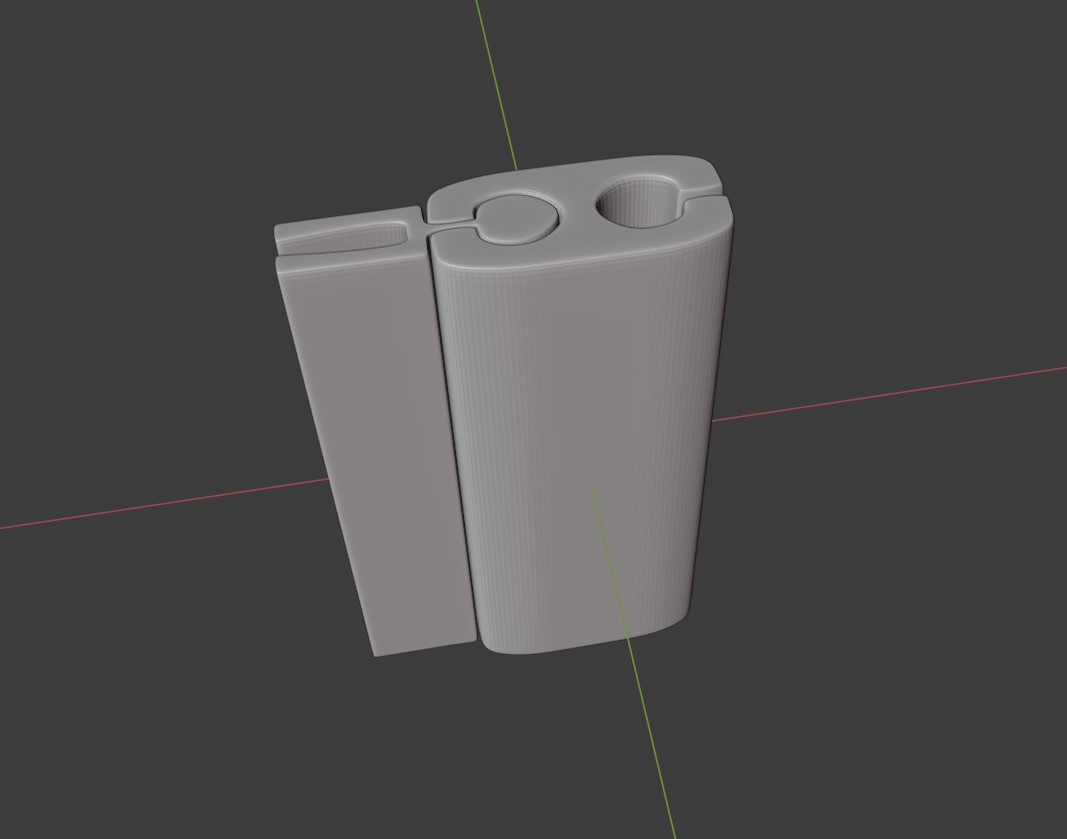
Custom 3D Printed Cardboard Clamp to hold up cardboard for a window. The use of the cardboard is to cover the window and hold together a Portable air conditioner exhaust pipe, the position of the AC is too far to have the full window closed properly, so I had to find another way and stop cold air coming out. So made this in Blender and 3D Printed it.
This is an old design, and failed because it had no flex, no length and not enough space to allow the long clamp to connect.
2 Likes
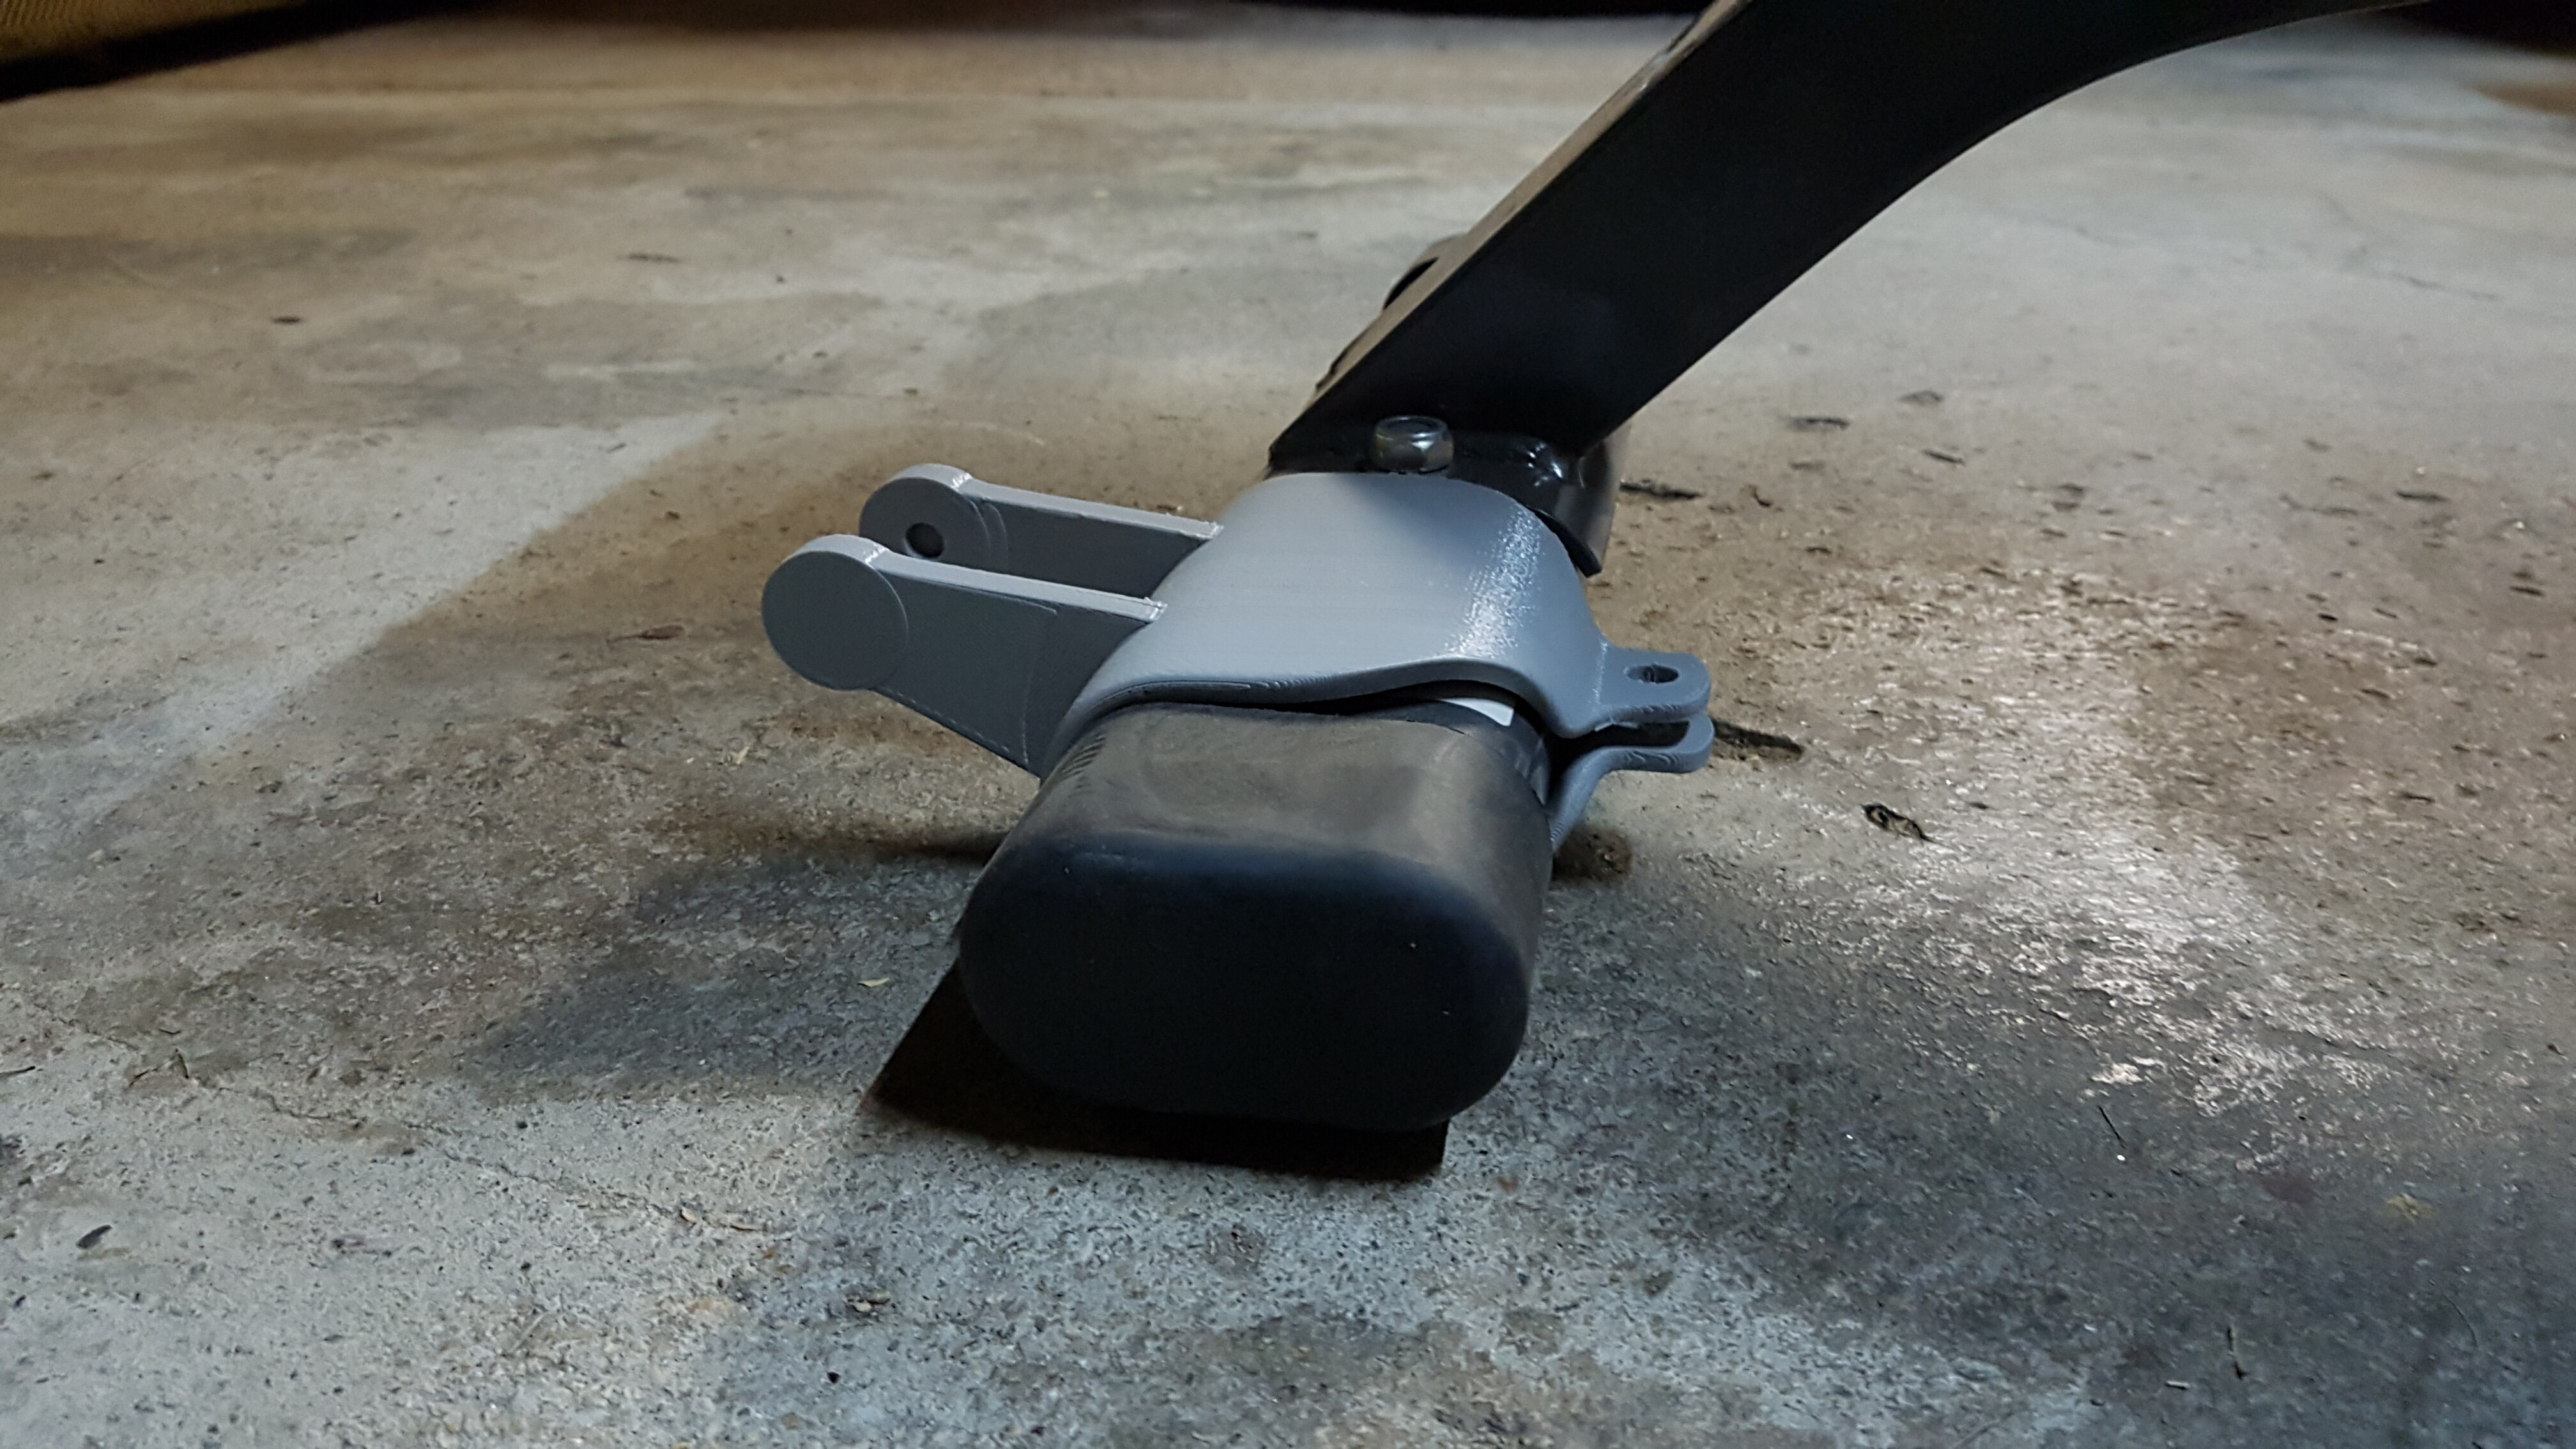
Small 3D Print Project, creating a friction cylinder (minimise pressure and friction) which is just to cover a piece of metal on my Exercise Bench. I’ll then move on to adding wheel and handle attachment so I can easily move and position the bench.
AND also making an Anime like character
1 Like
Semi Real Anime Render Project I aim to complete in 2 weeks
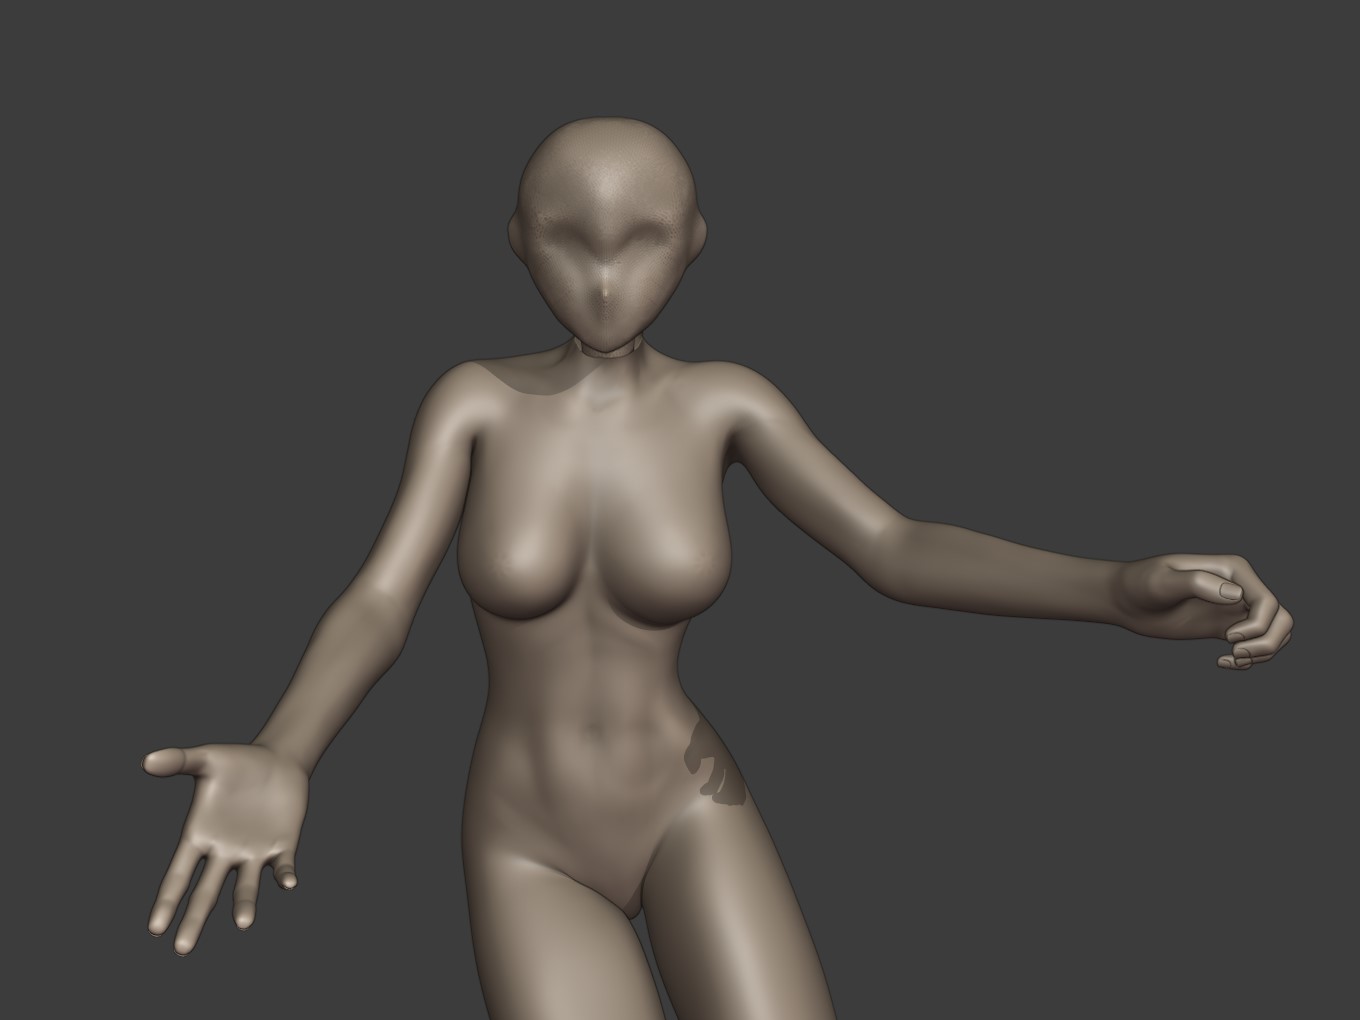
Posing in Daz3D
AAAAAAH
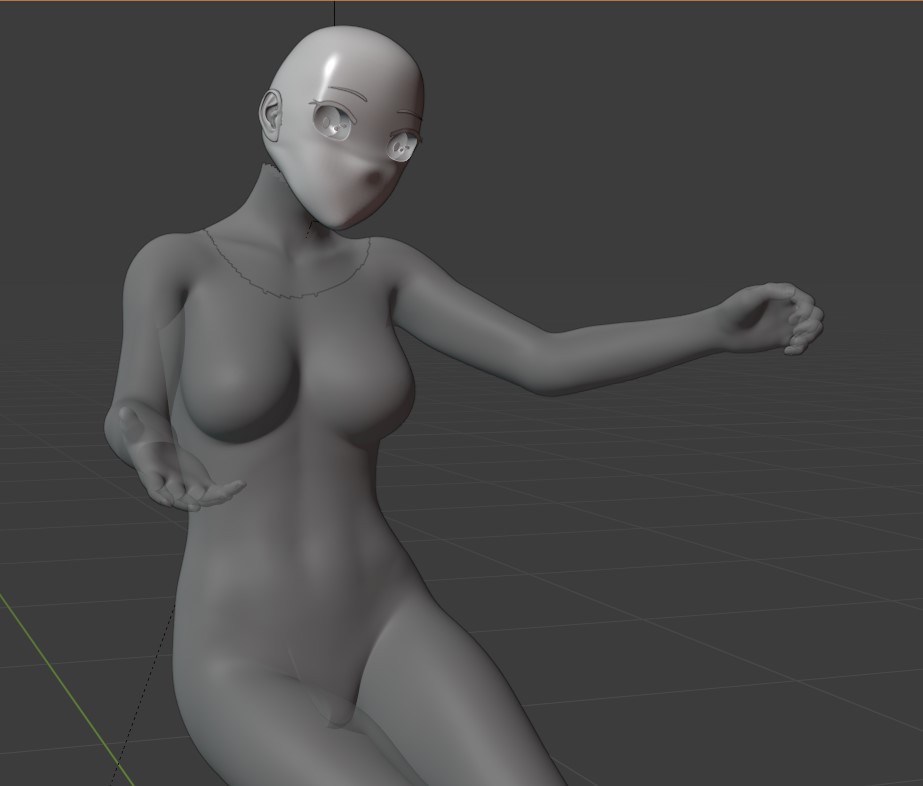
Sculpting Pose
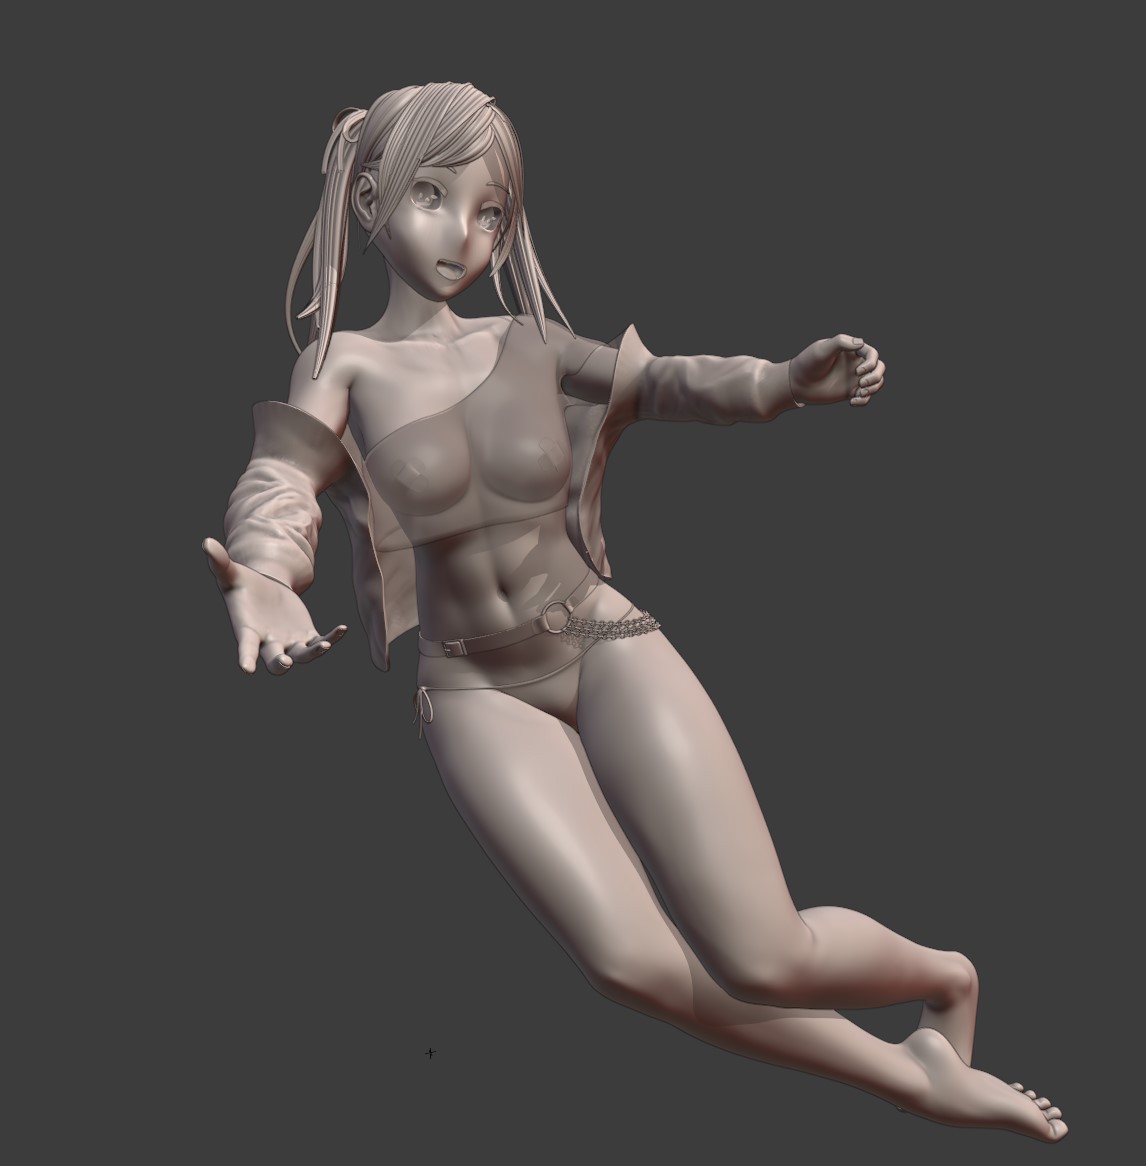
New tricks I’m learning with the anime style, mouth as boolean and using a lot of subdiv, solidify and edge split modifiers to save time on modelling the clothes. Used Array Modifier and Curves on the Chains. Used Path and Bezier Circle technique to make the hair.
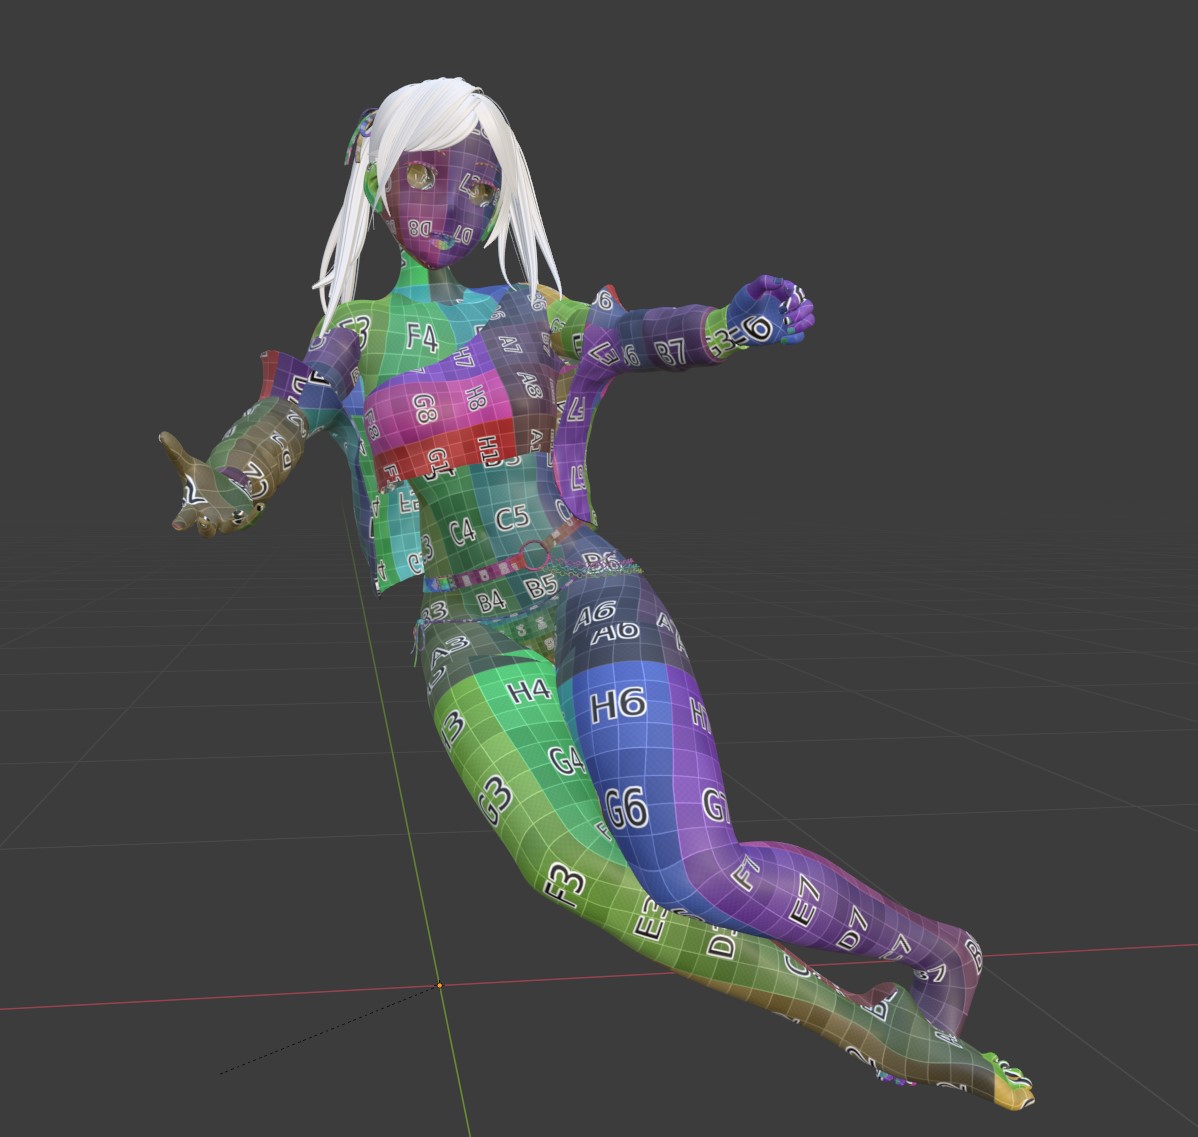
Unwrap and Topology (Setting up Low and High Poly)
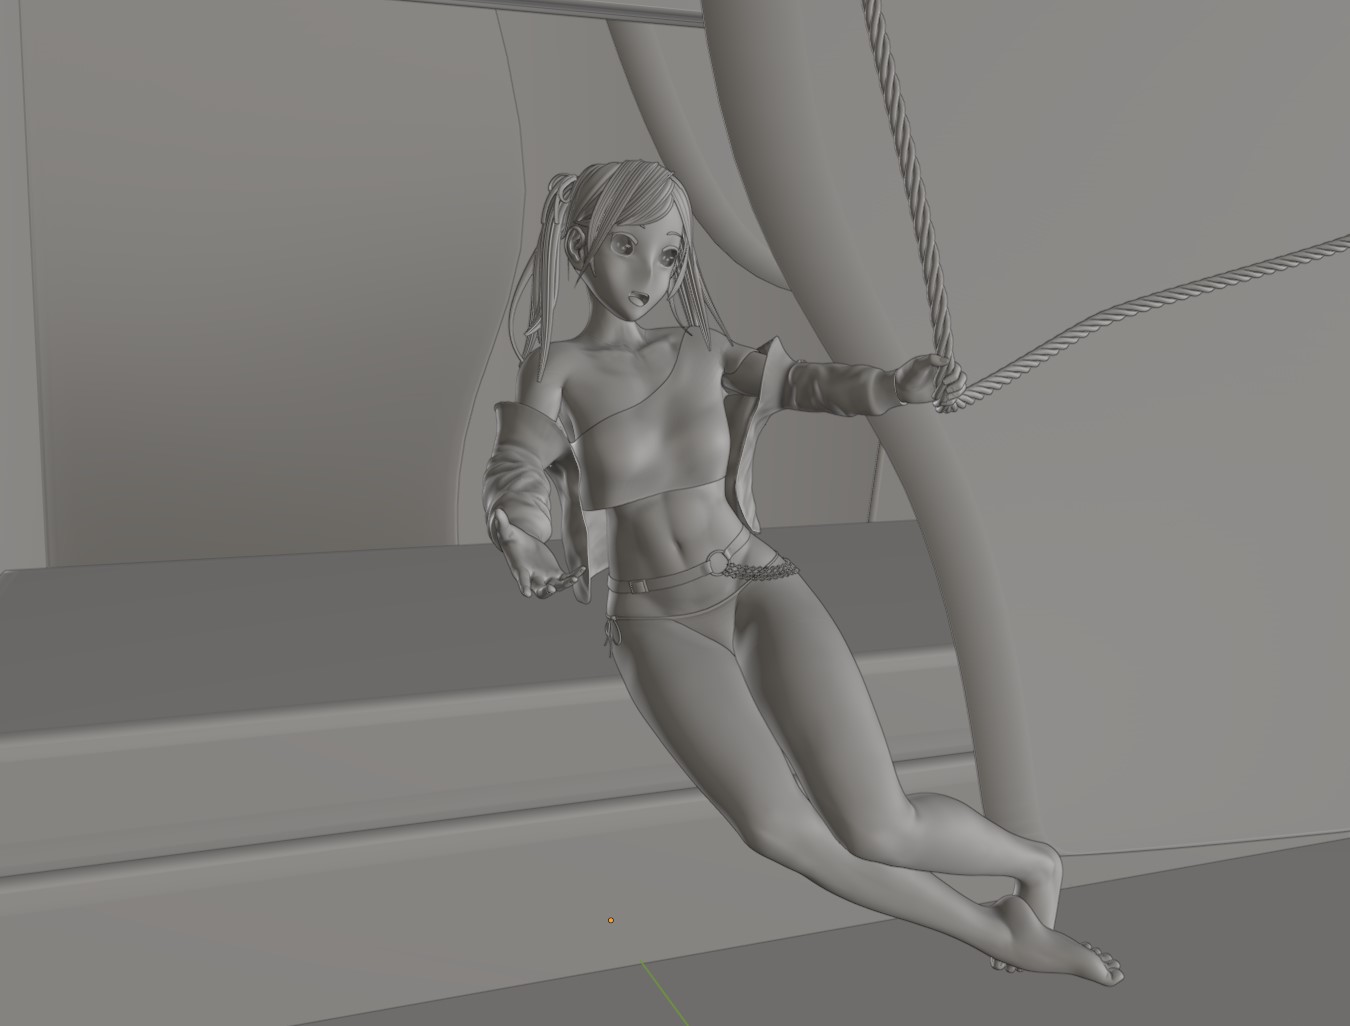
Environment - Learnt new things here; Cloth Sculpt Brush for mattress and curtains. Then array and screw modifiers to create a rope to follow a curve
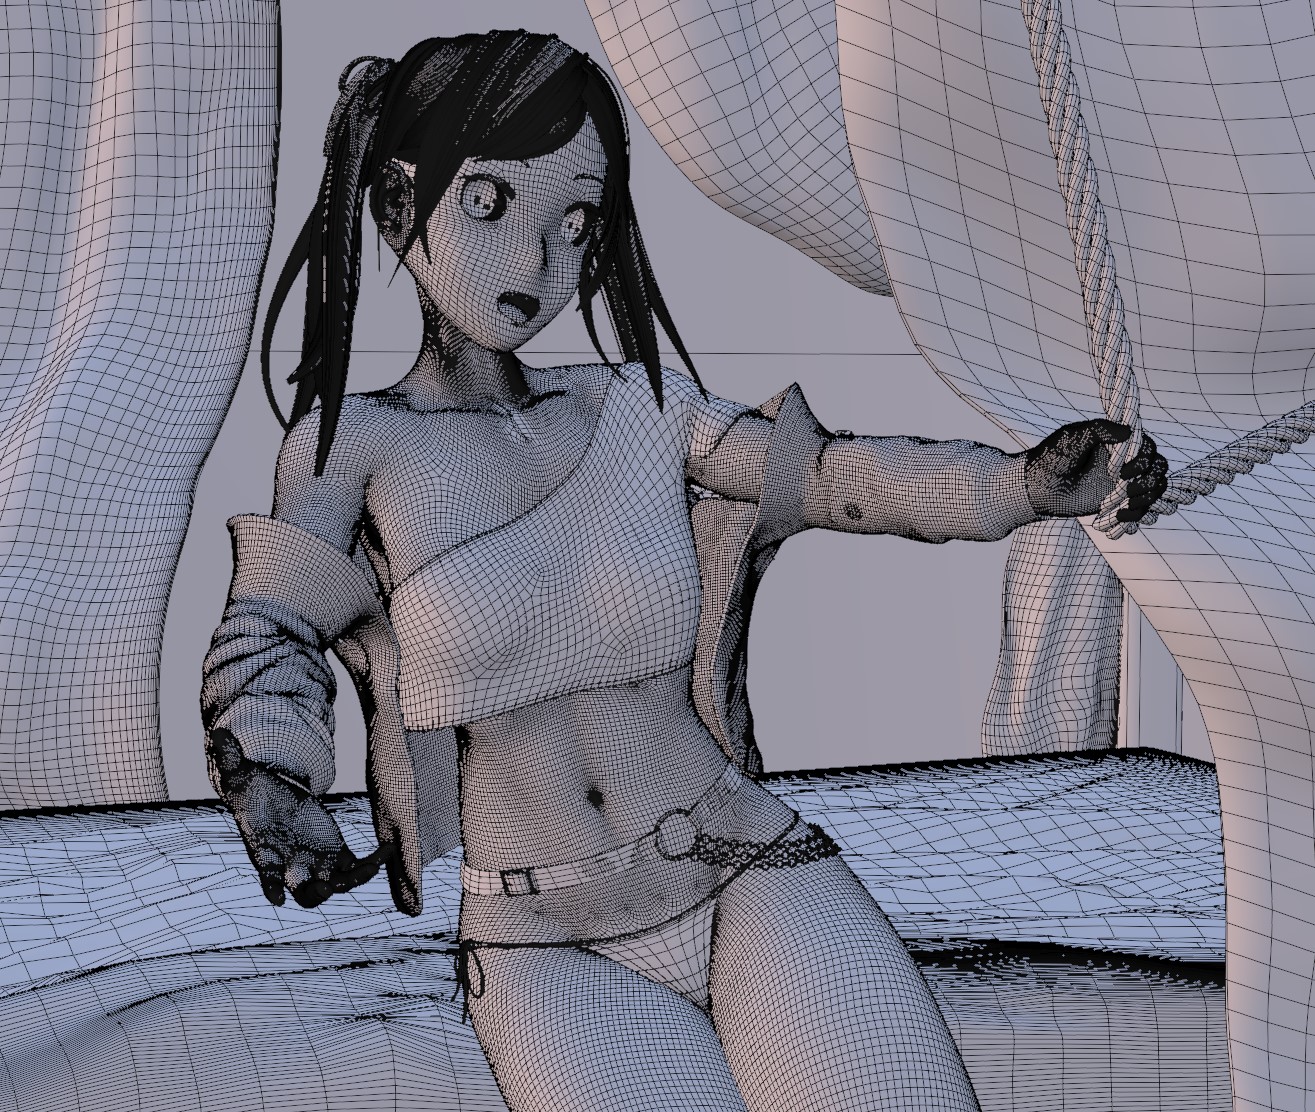
Current WIP Preview (Wireframe)
1 Like
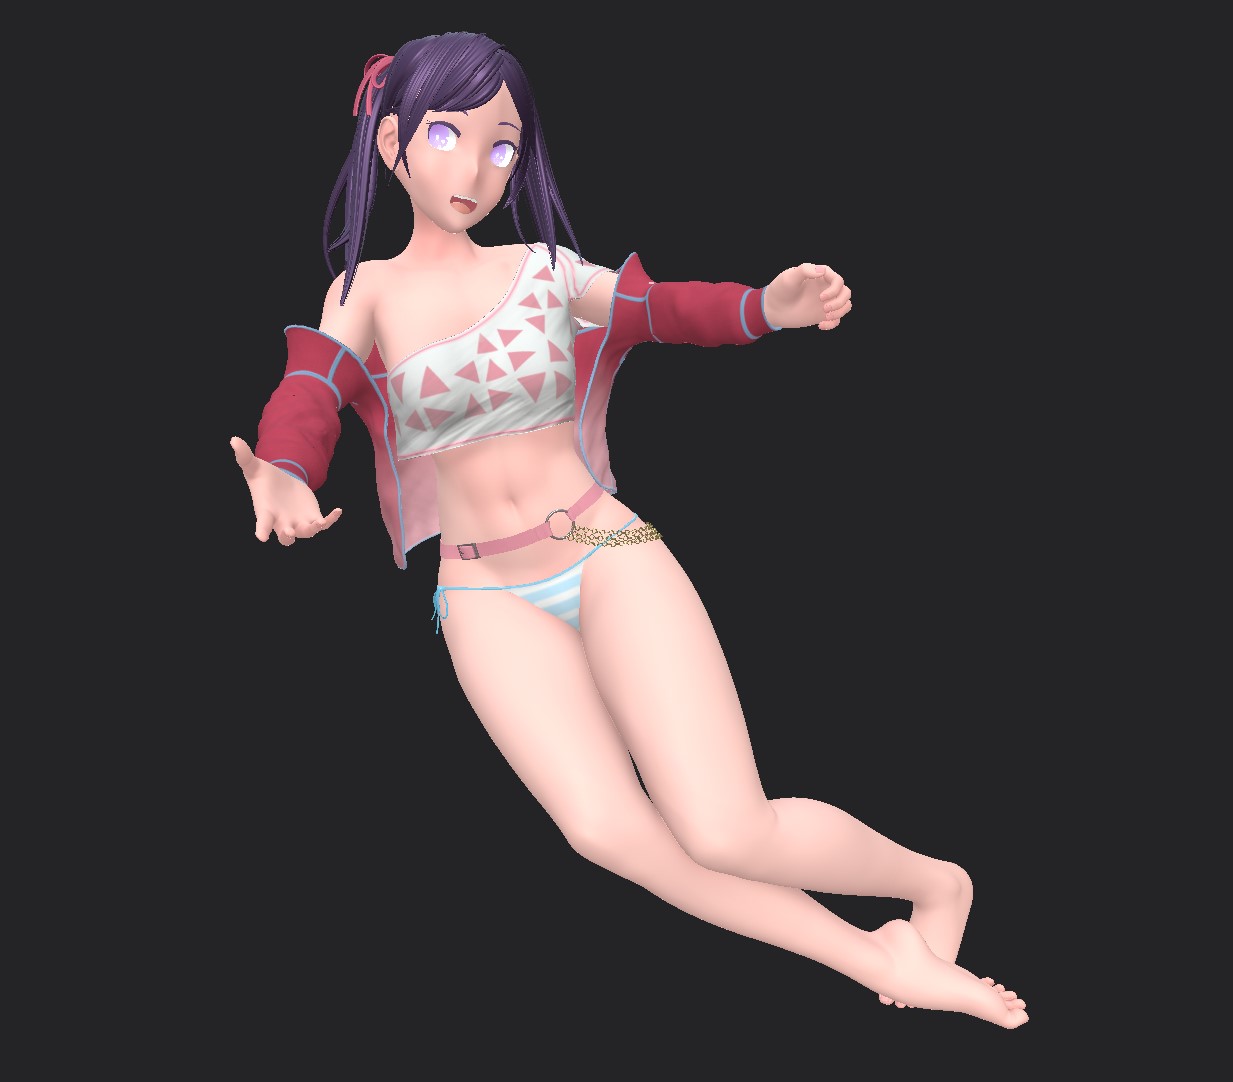
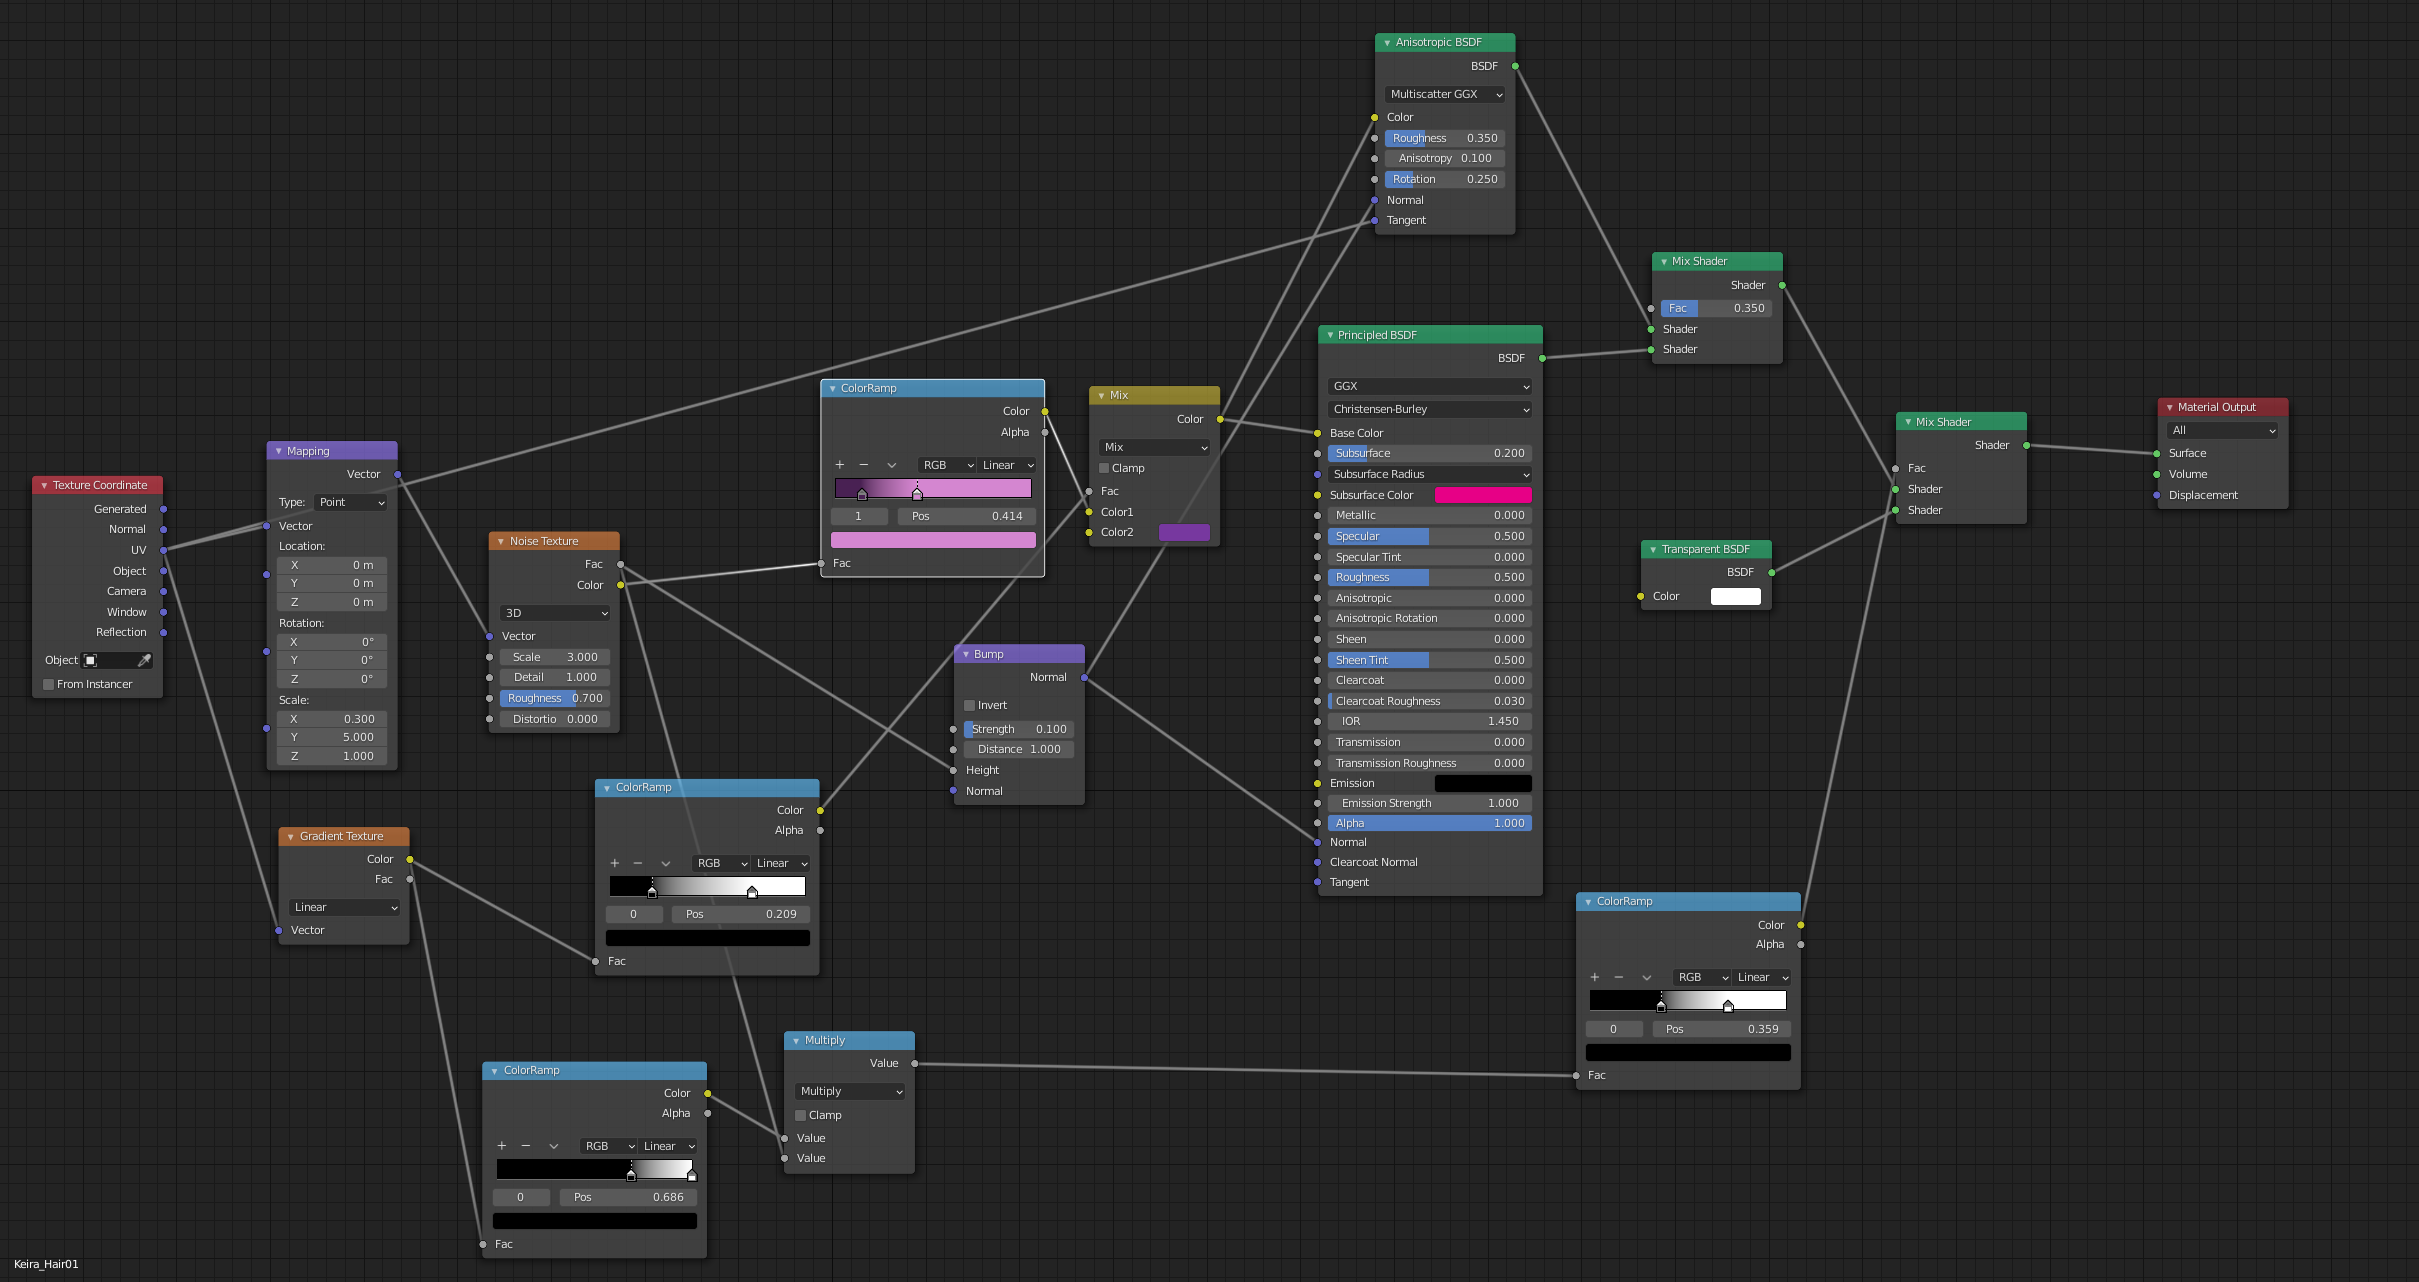
Worked on the shading of the hair curves using this tutorial
And more Tweaking
Since this is my first time attempting a ‘Semi-Real 3D Anime’ Style, I’m still experimenting and figuring things out. The head was a challenge as well as all the values related to shading, lights and textures…
I’ve found out that using Emissive Texture Maps as part of the whole texture brings out this stylised toon look.
A worry I have is with the face and head looking ‘uncanny’ because of how I’m mixing realistic PBR lighting with anime. At first I thought this would result in a Figurine look, but the Emissives have just veered that feeling away. I like how the shading looks and I don’t want to tweak things any further. So I think I’ll just leave things there. Although I feel the light around her chest is too strong, might lower those values somehow.
On the other hand a problem I’m facing is the loss of height map values, like ab detail and cloth folds. I feel like my current light rig has washed those details away…
I really like the current look, but still want to get those details back. I hope I can play around with a new Key Light and highlight those details while still keeping this render looking good as is right now.
On second thought the lights ‘washing’ the ab details and cloth folds away isn’t a bad thing, I feel I’m just going to overdo it and lose the subtlety that this light has made, in a good way it has made those details more subtle but still retain them very softly. Usually we’re all prone to over exaggerate everything, I’m going to stick with this current light detail and just slightly lower the light intensity hitting the chest.
1 Like
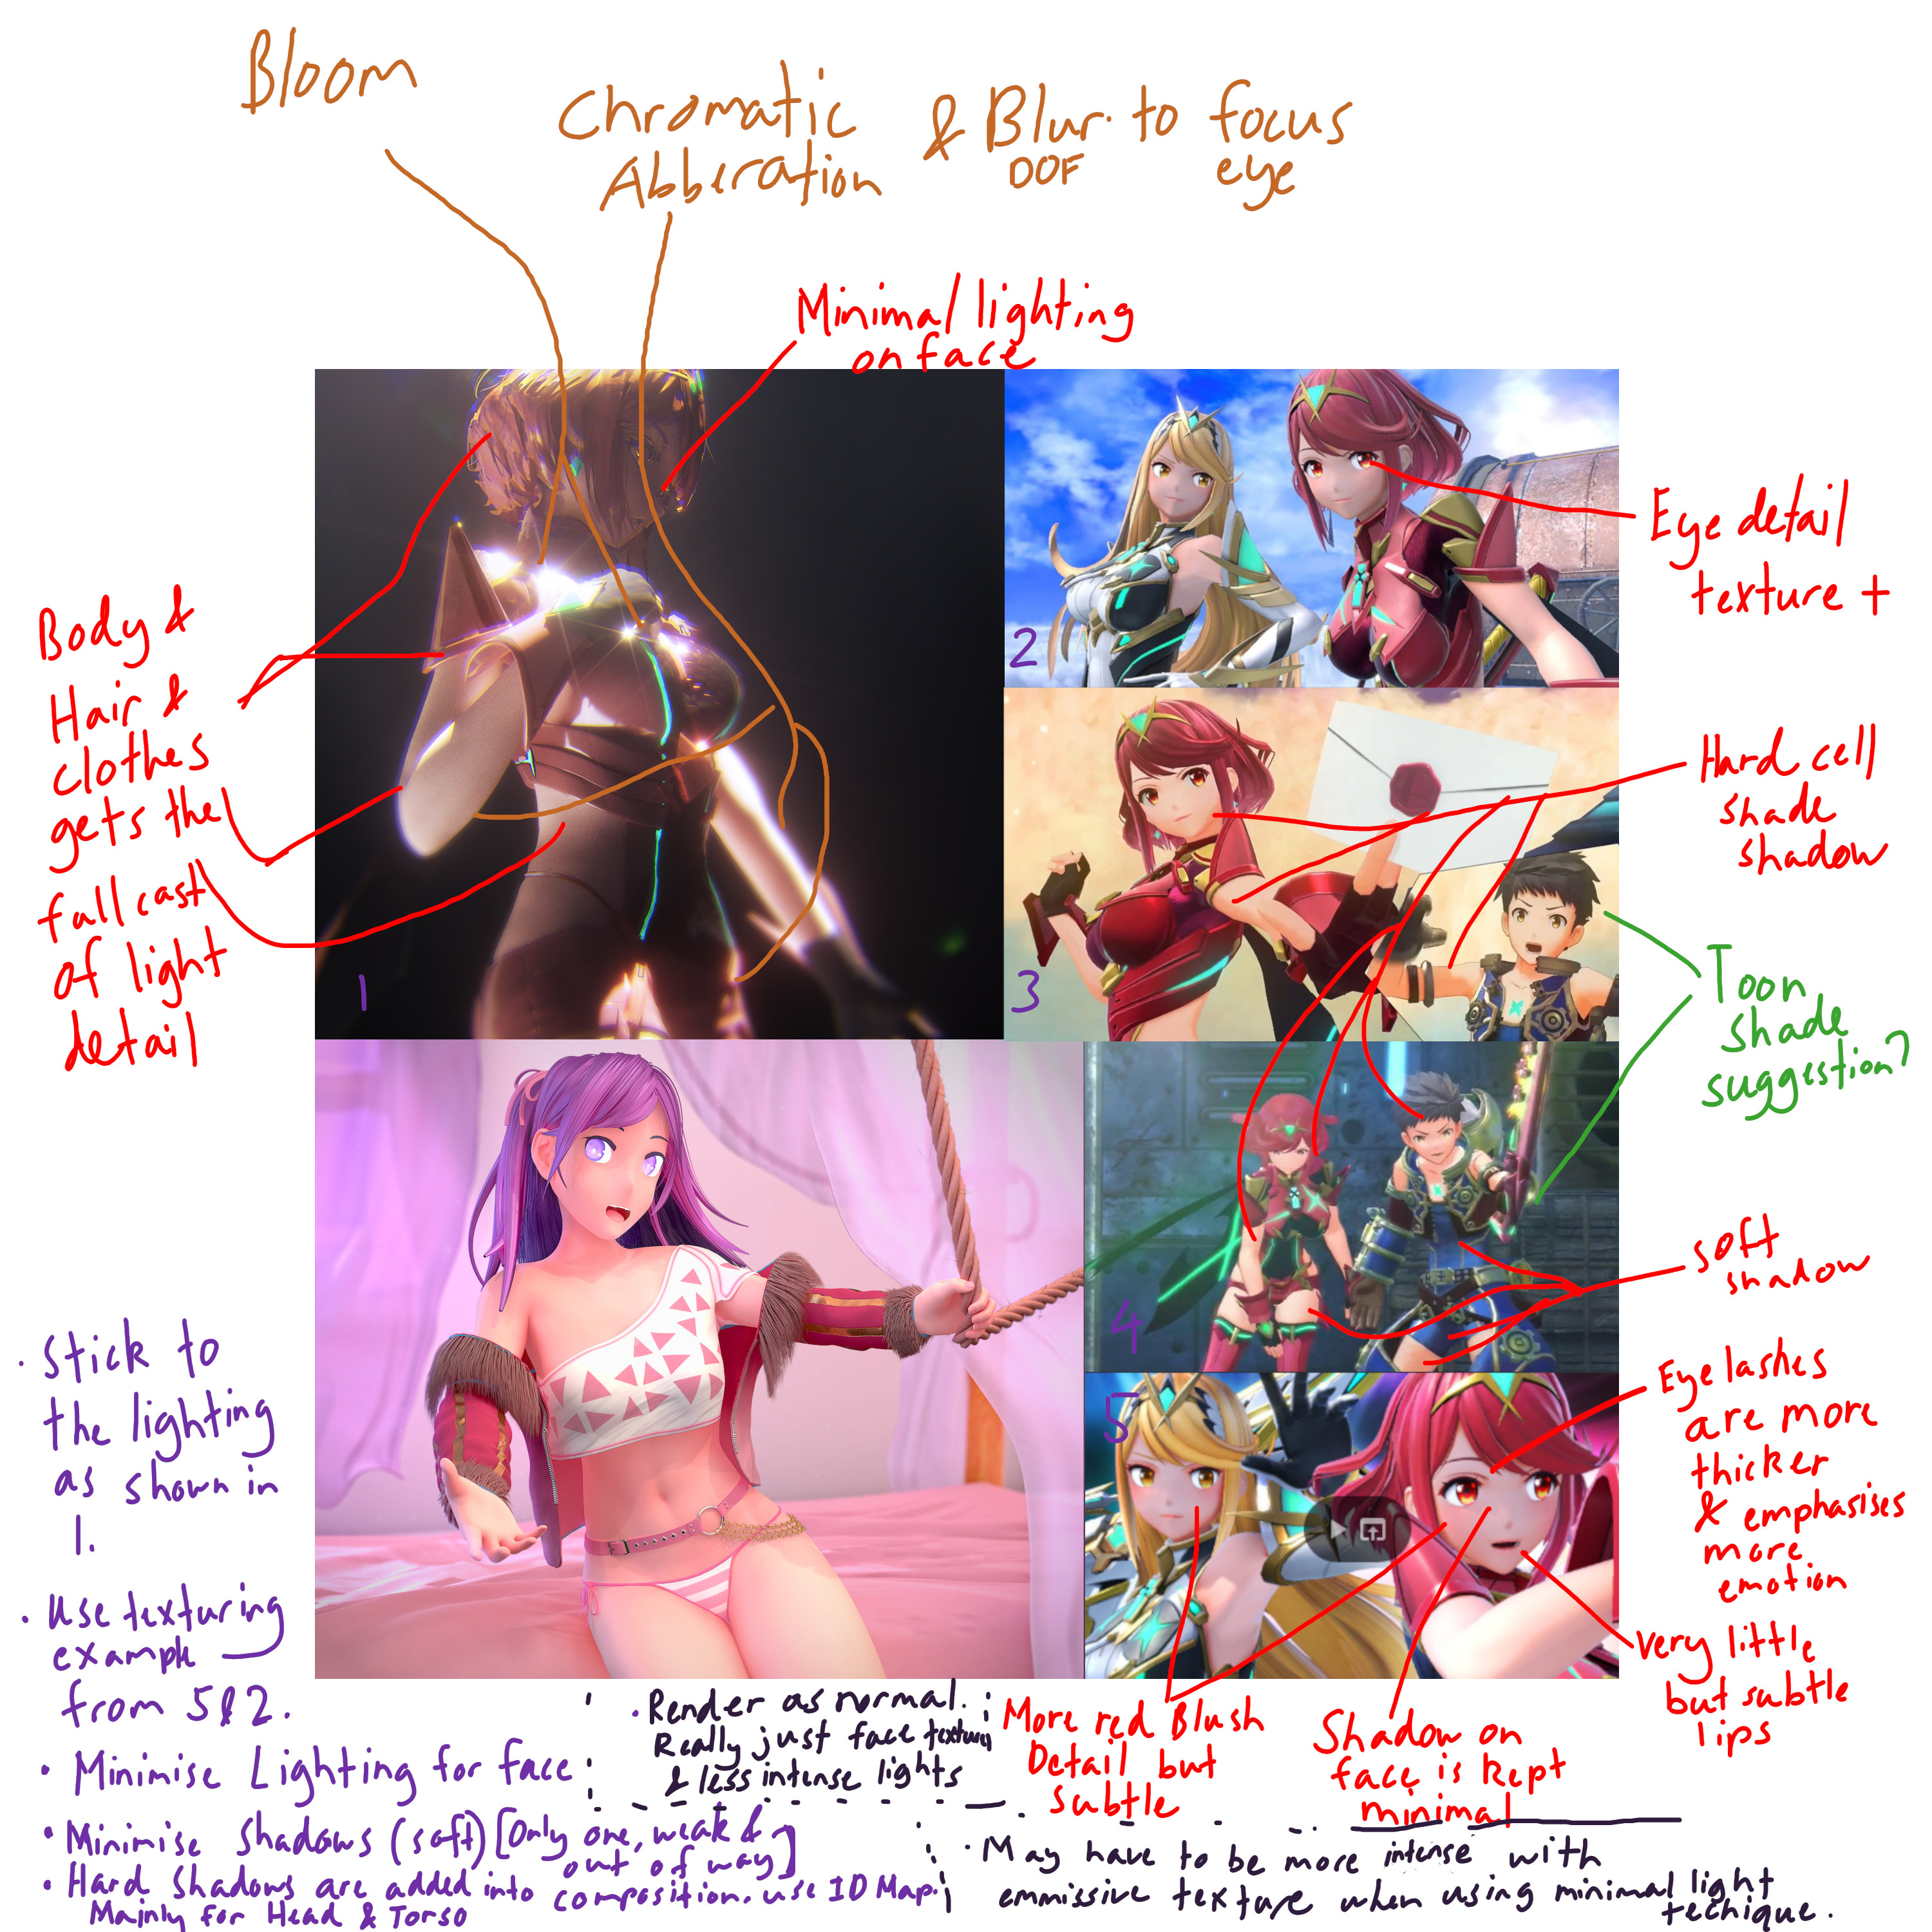
Some Research to improve and tweak next 3D Anime Project
I feel there is something messy and lacking with the lighting and something feels slightly ‘off’.
I may have overdone the realistic lighting and walked into that ‘off’ feeling. Reference ‘5’ is similar to the style I made but it looks very presentable.
Just a summary for this research:
- I will keep to the same shaders and the use of Blender cycles.
- However I will improve facial texture detail as shown in references 5 & 2
- WIll need to play around more with Emissive mapping
- Minimise lighting for face and be less intense with lights (may emphasise more on emissive map)
- Minimise Soft Shadows (Just try to keep it weak and out of the way)
- No Hard shadows in render. It can be painted on with the help of ID Maps later in the Composition phase. This will be applied to areas mainly for head and torso to emulate the cell shade.
1 Like
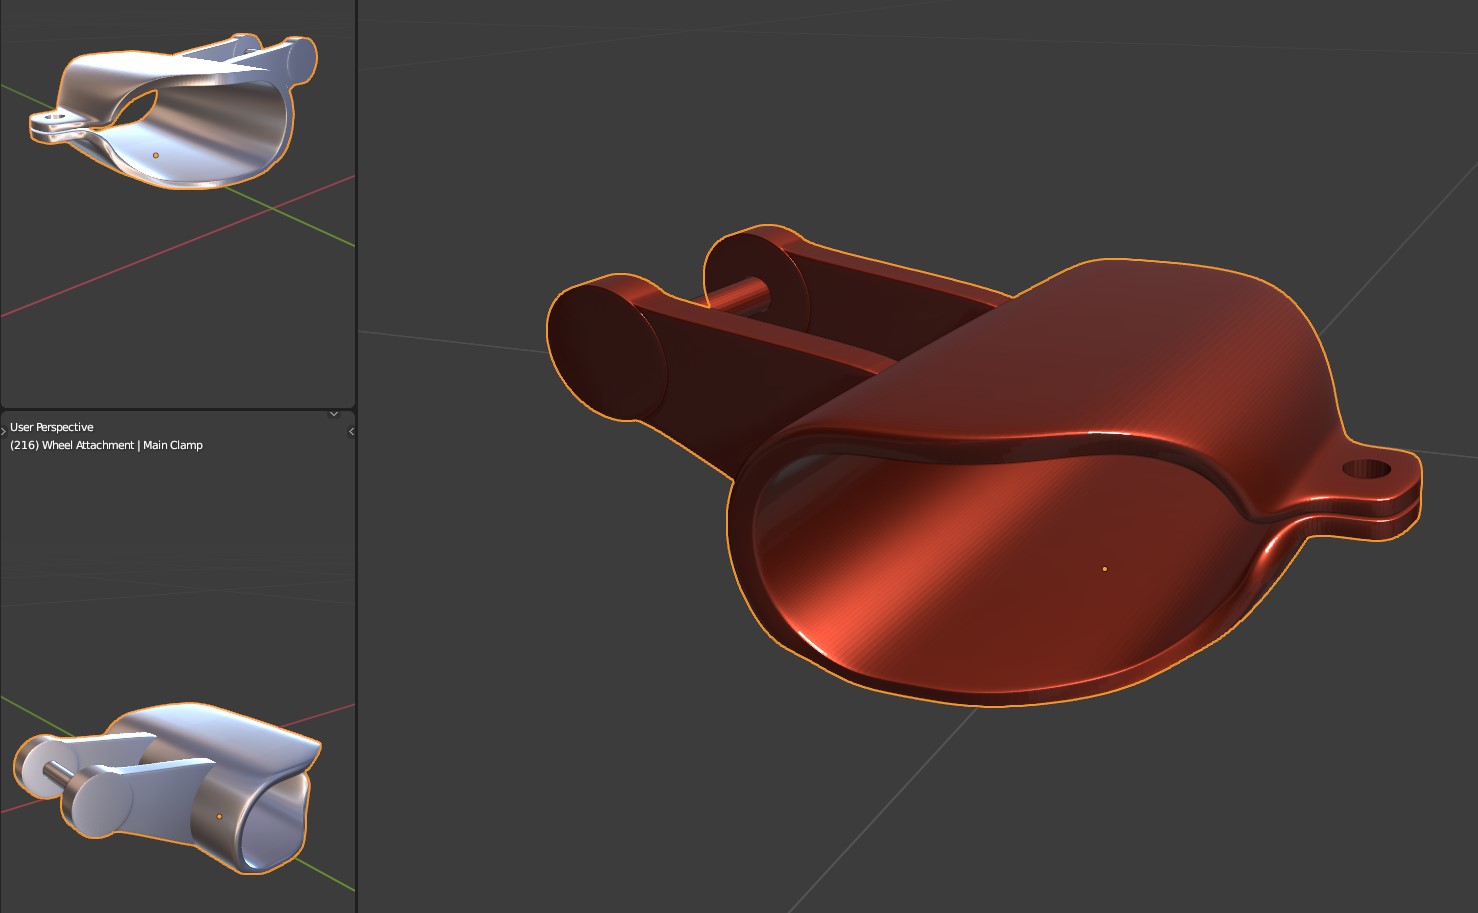
3D Print Project - Exercise Bench Wheel Attachment WIP
Measuring and layout in Blender
Modelled in Blender
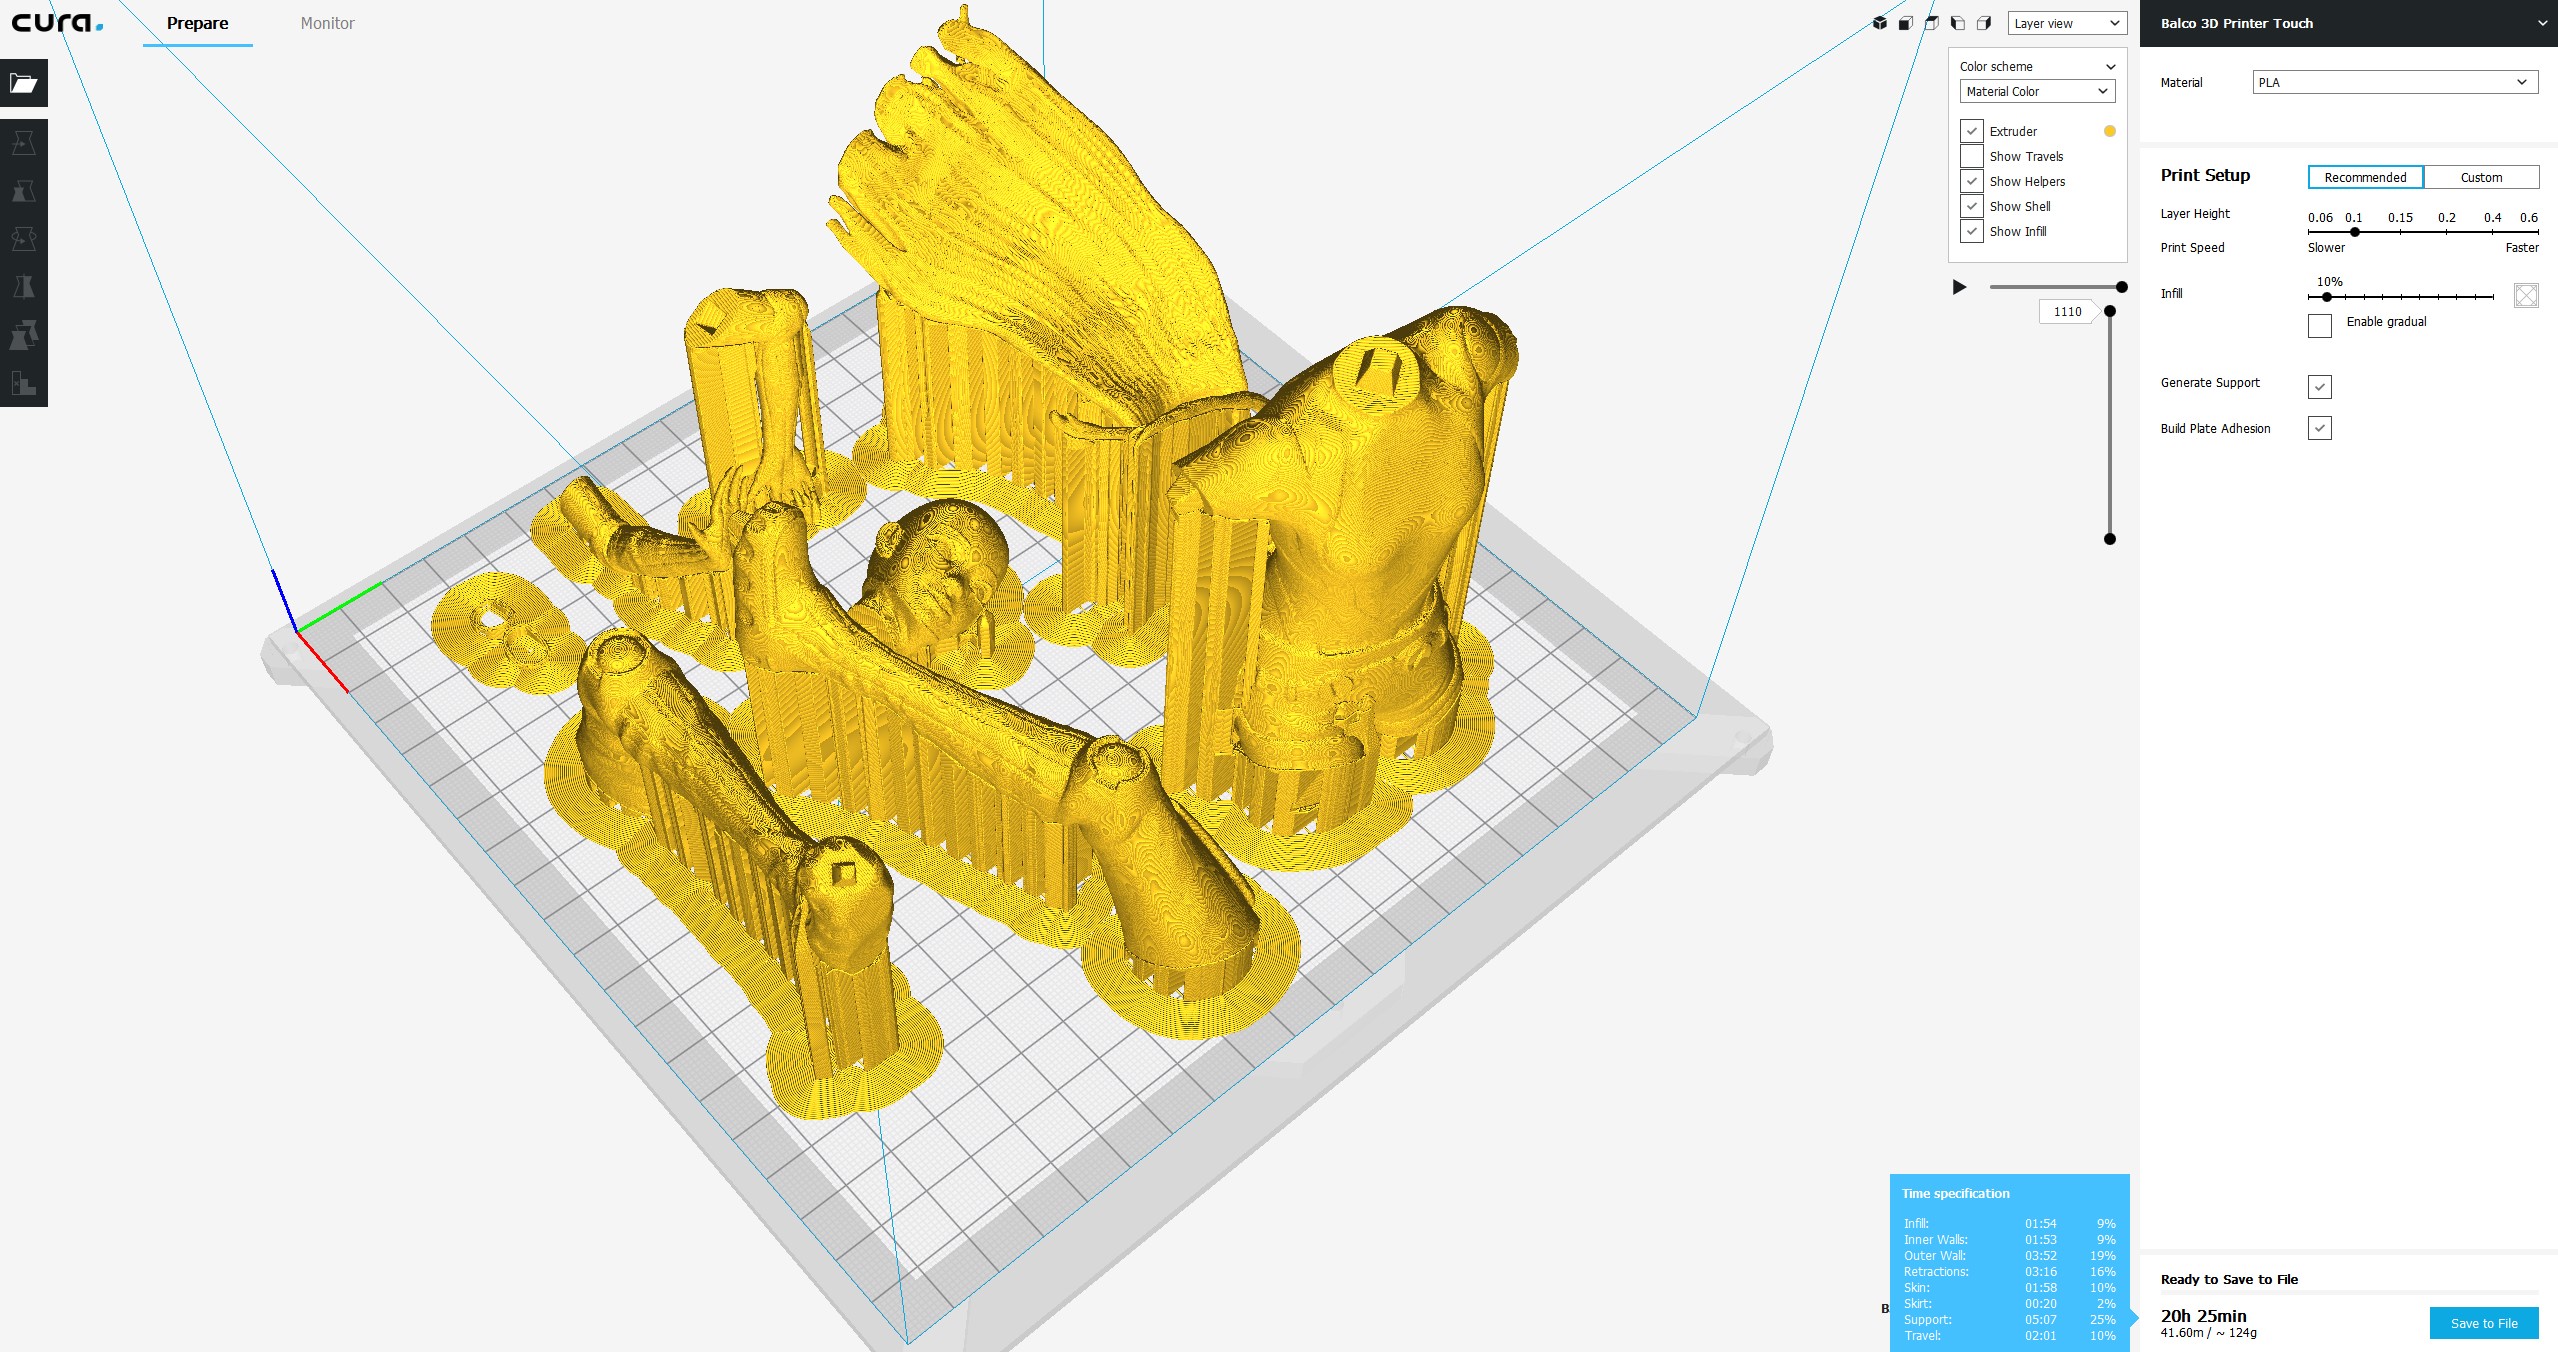
Prepped in Cura for GCode export
3D Printed with my Cocoon Create Touch
Had some minor measurement flaws, so the second clamp printed came with the fixes.
Issue so far
The cylinder holding the wheel has to be secured and strong enough to carry the entire exercise bench… I see some space I can use to create thick sleeves and hold those cylinders more firmly.
It is actually pretty strong, I reckon it will work, just need to increase the strength of the cylinders holding the scooter wheel.
2 Likes
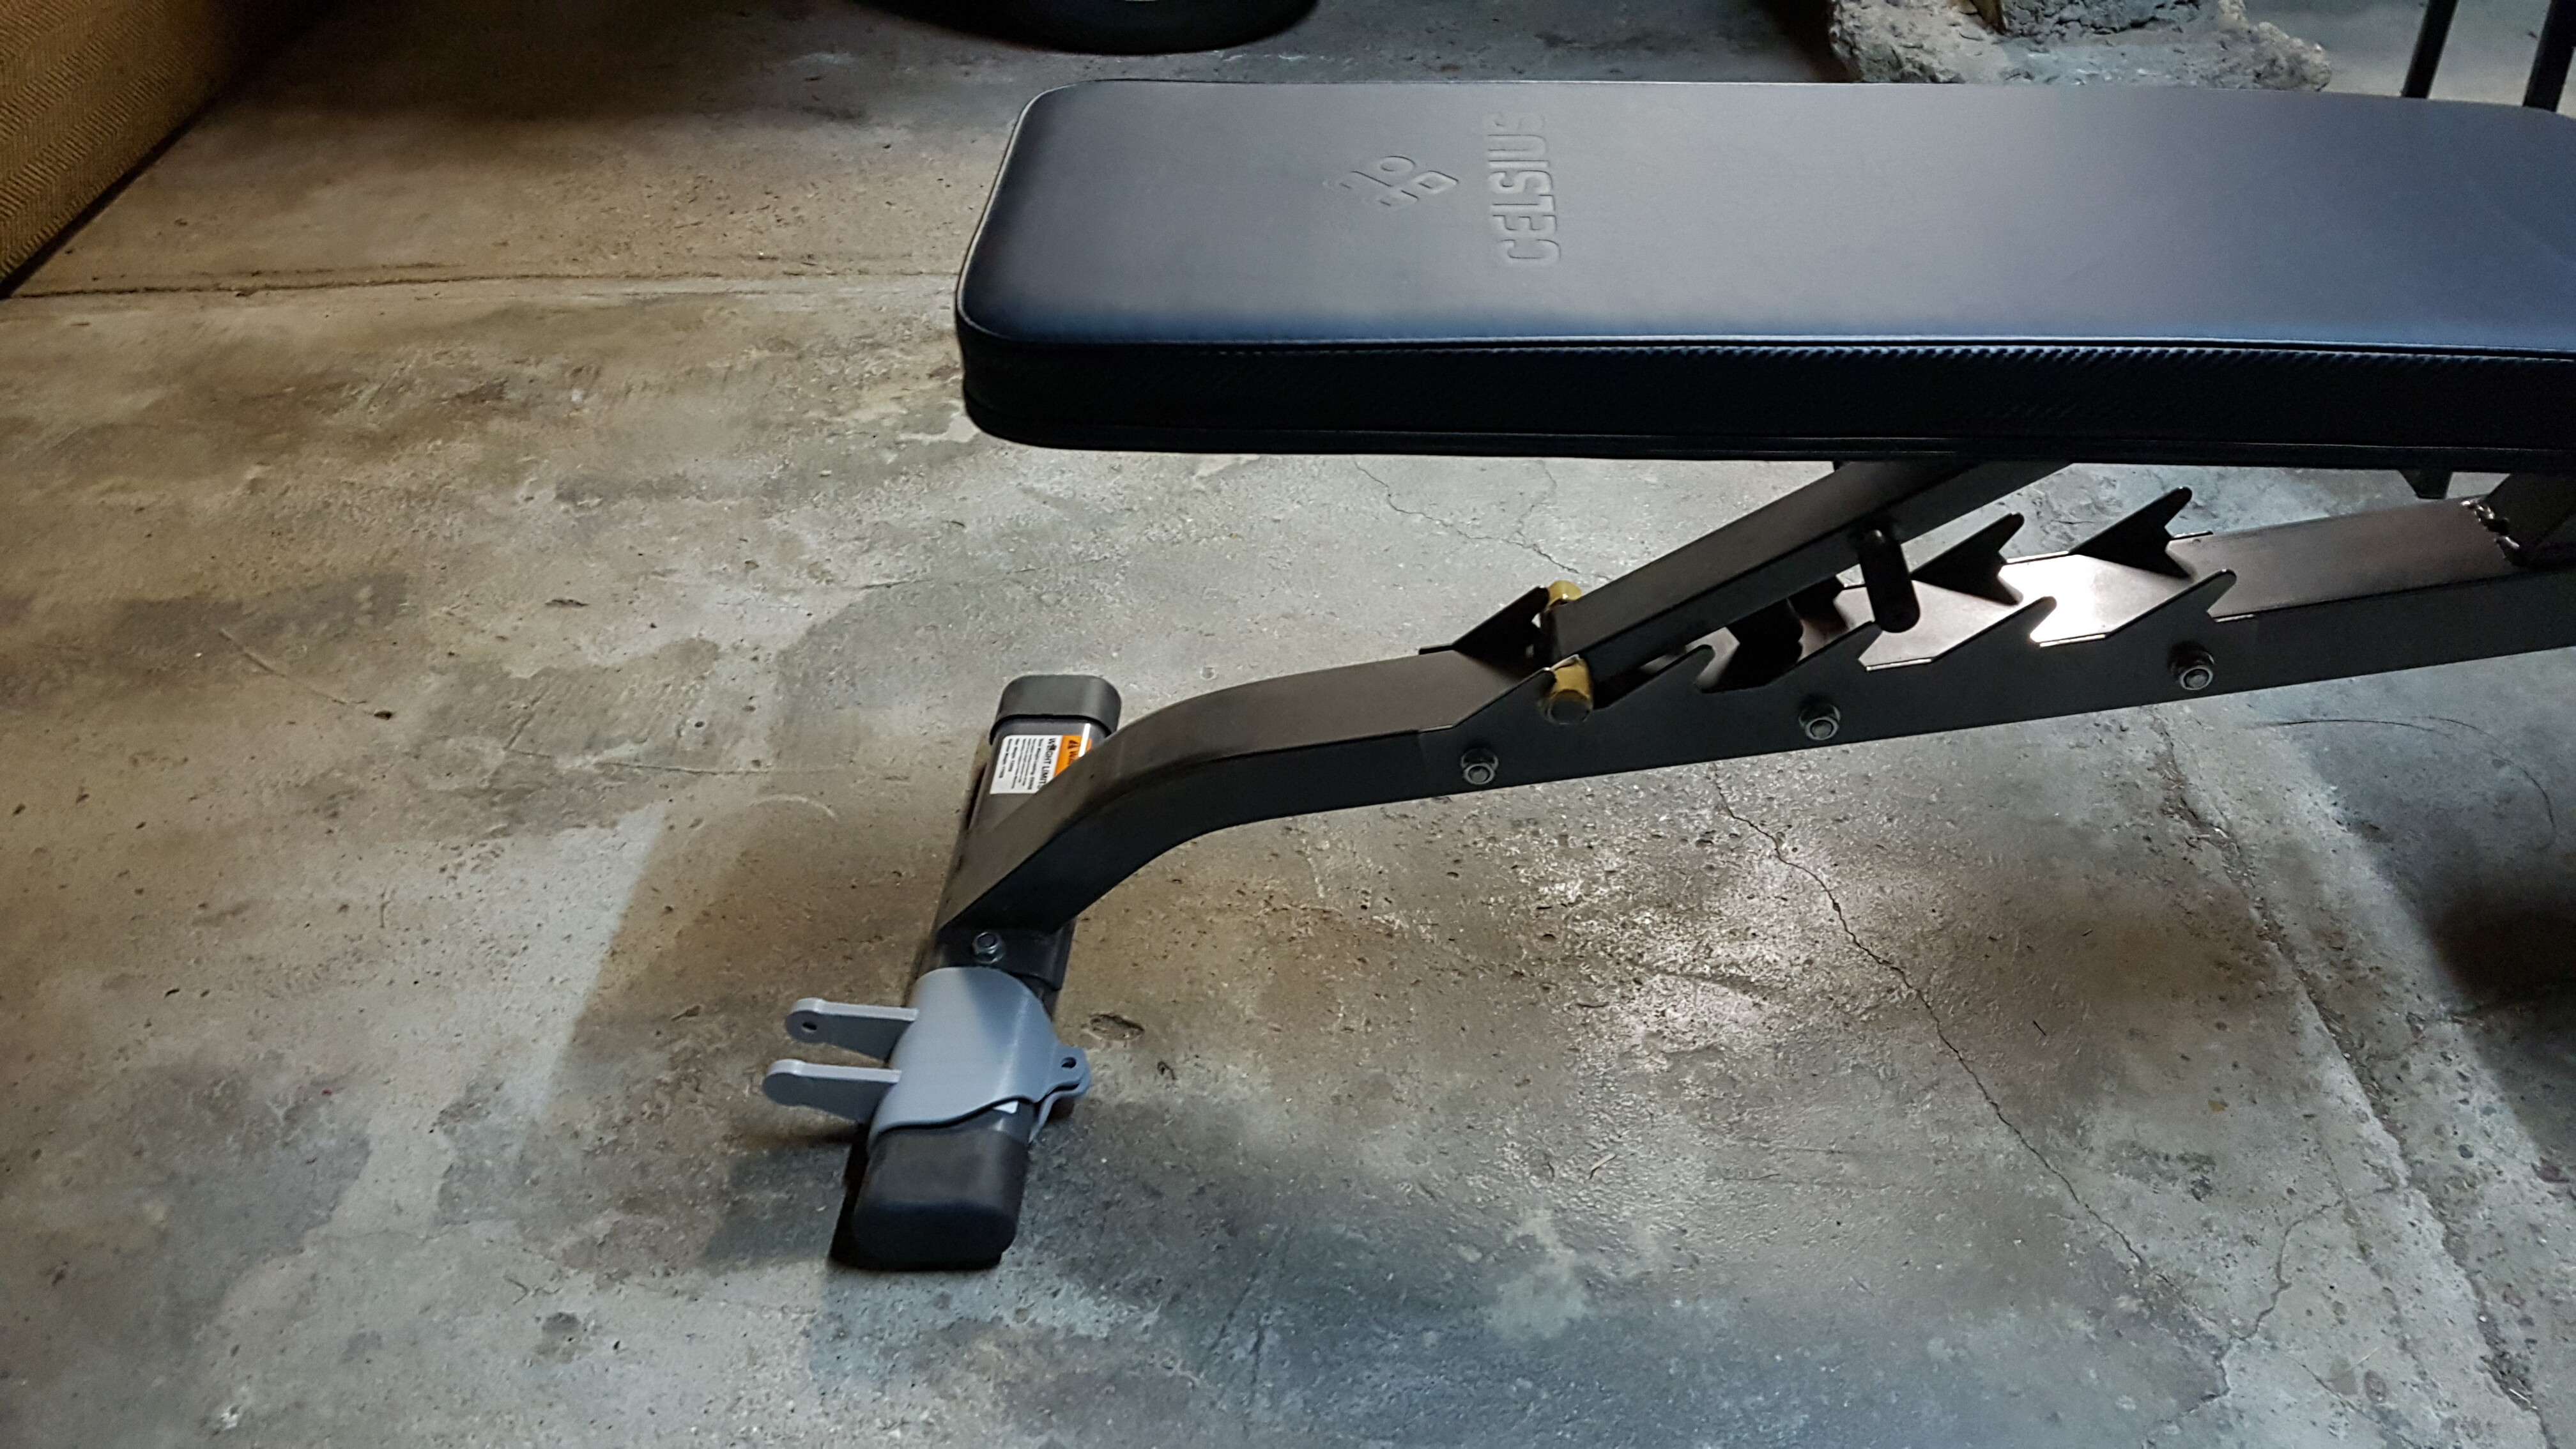
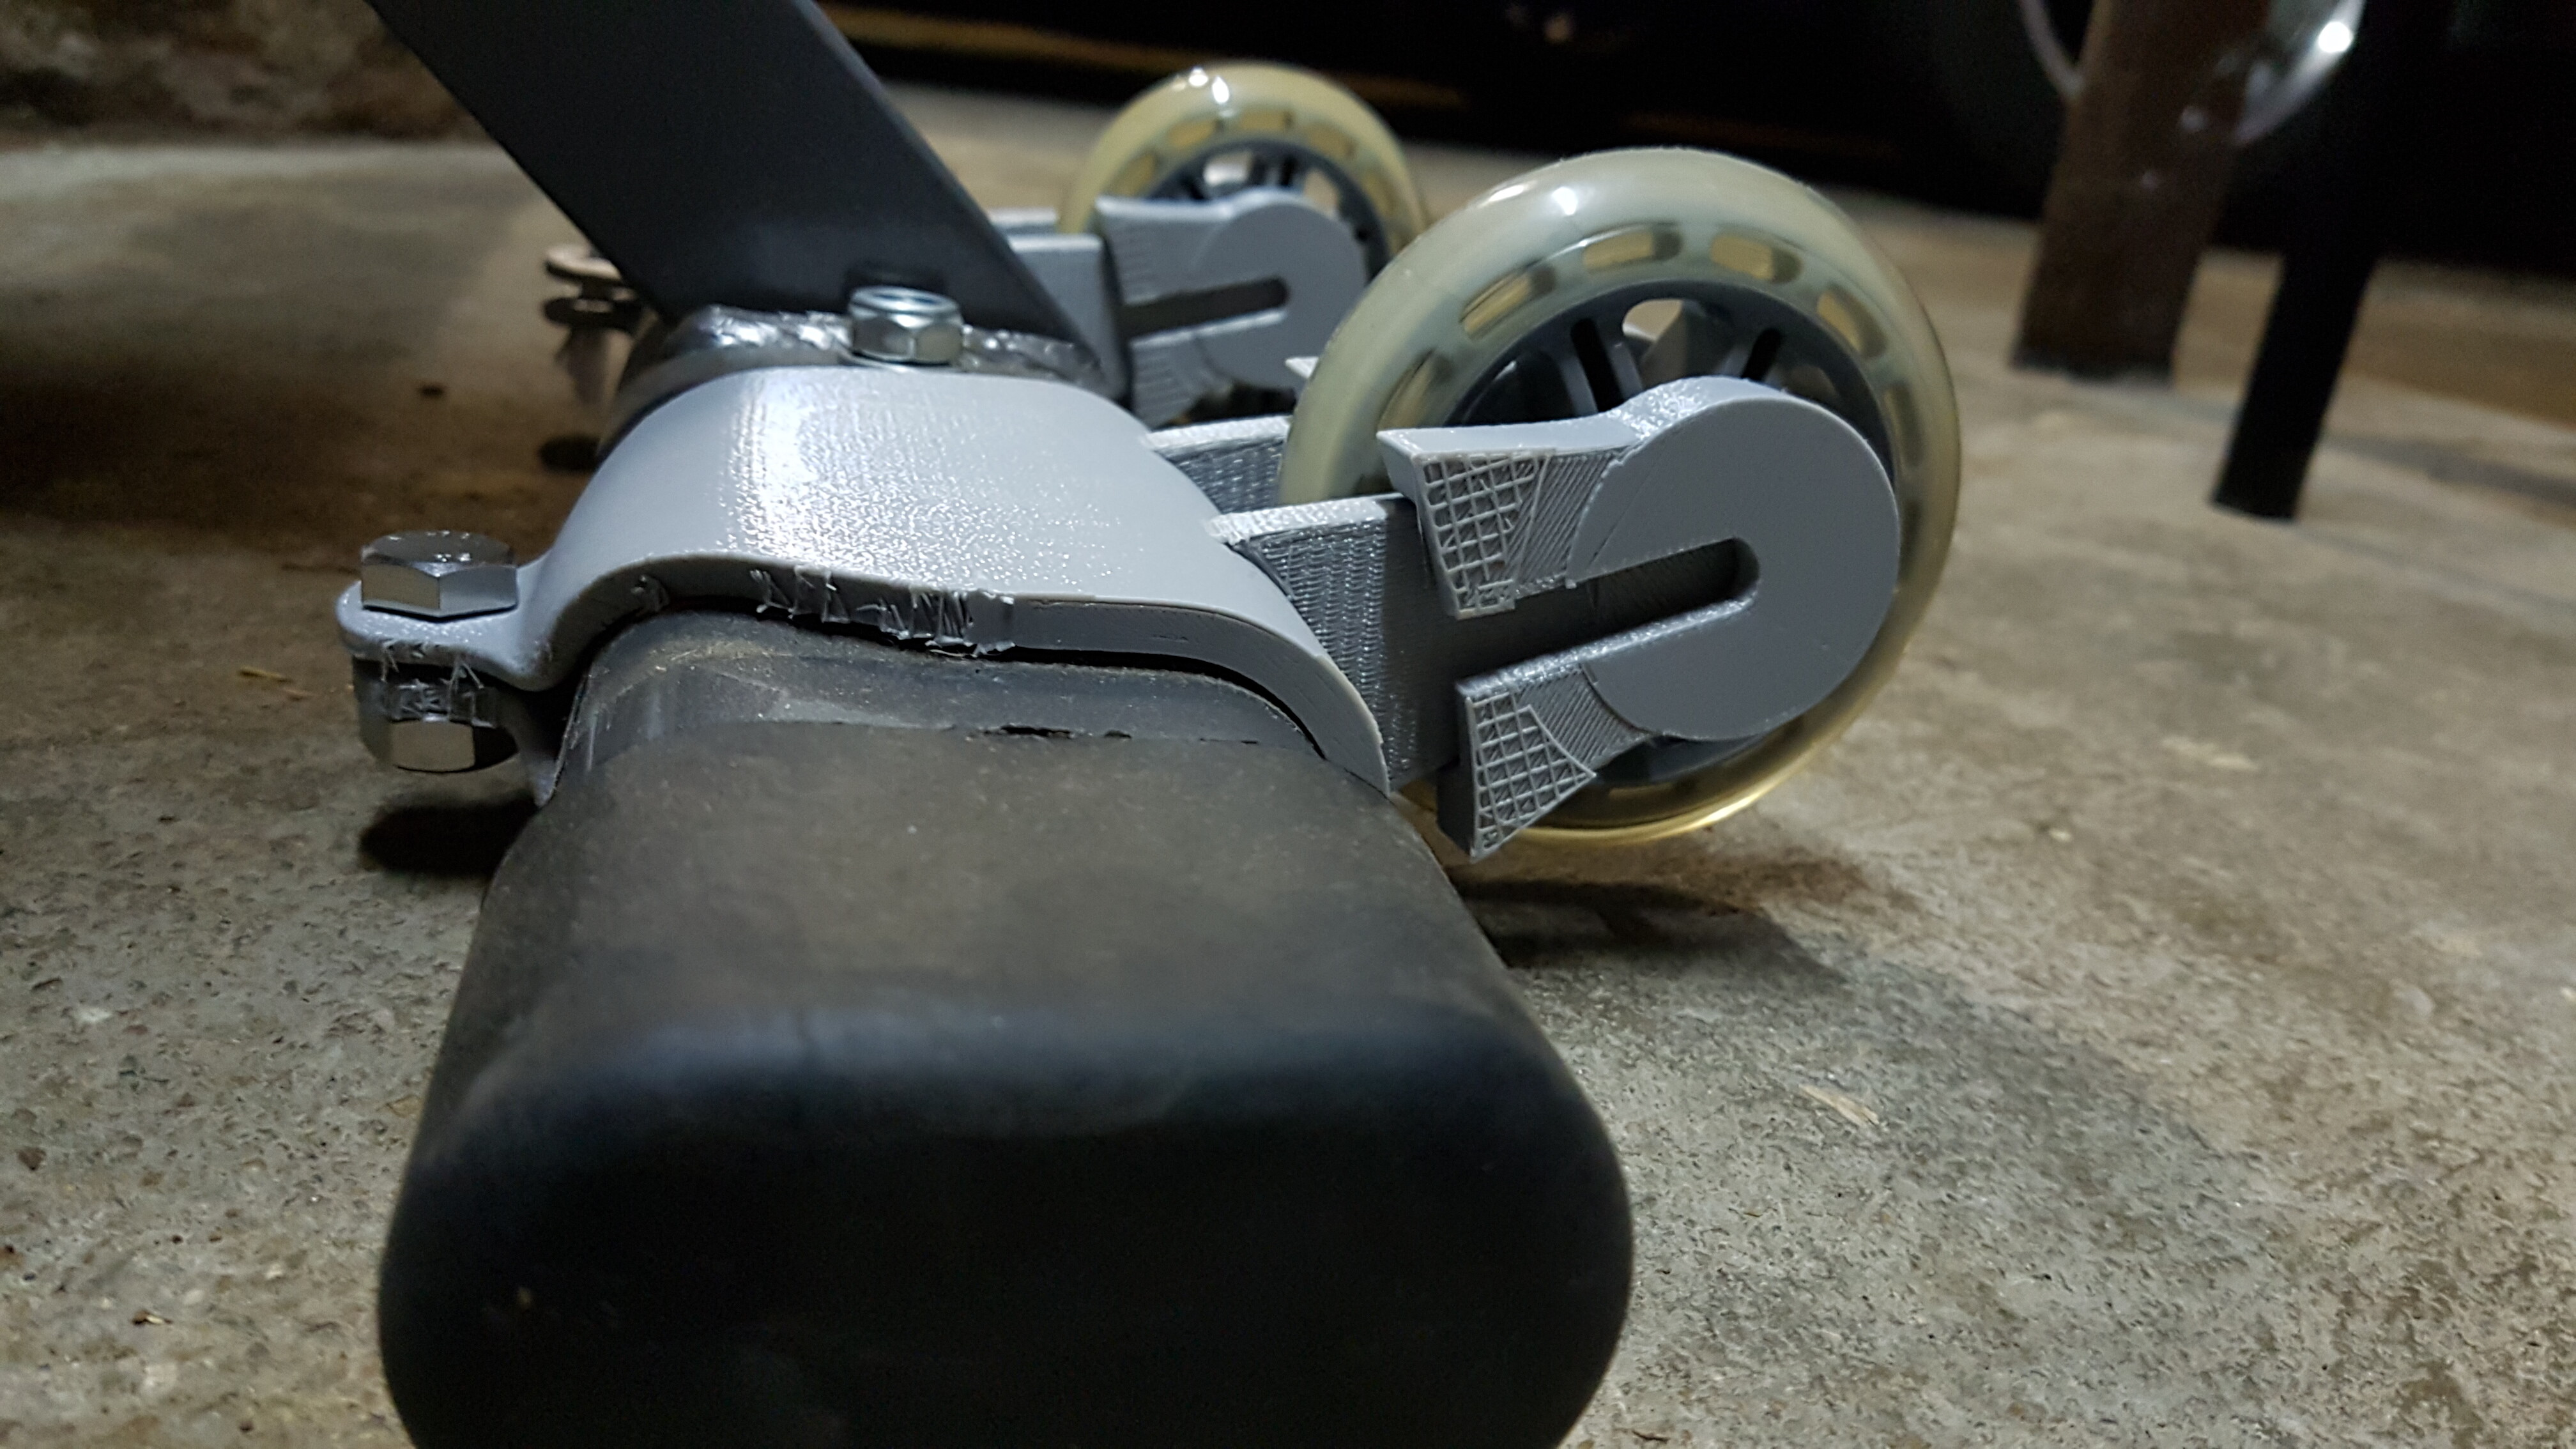
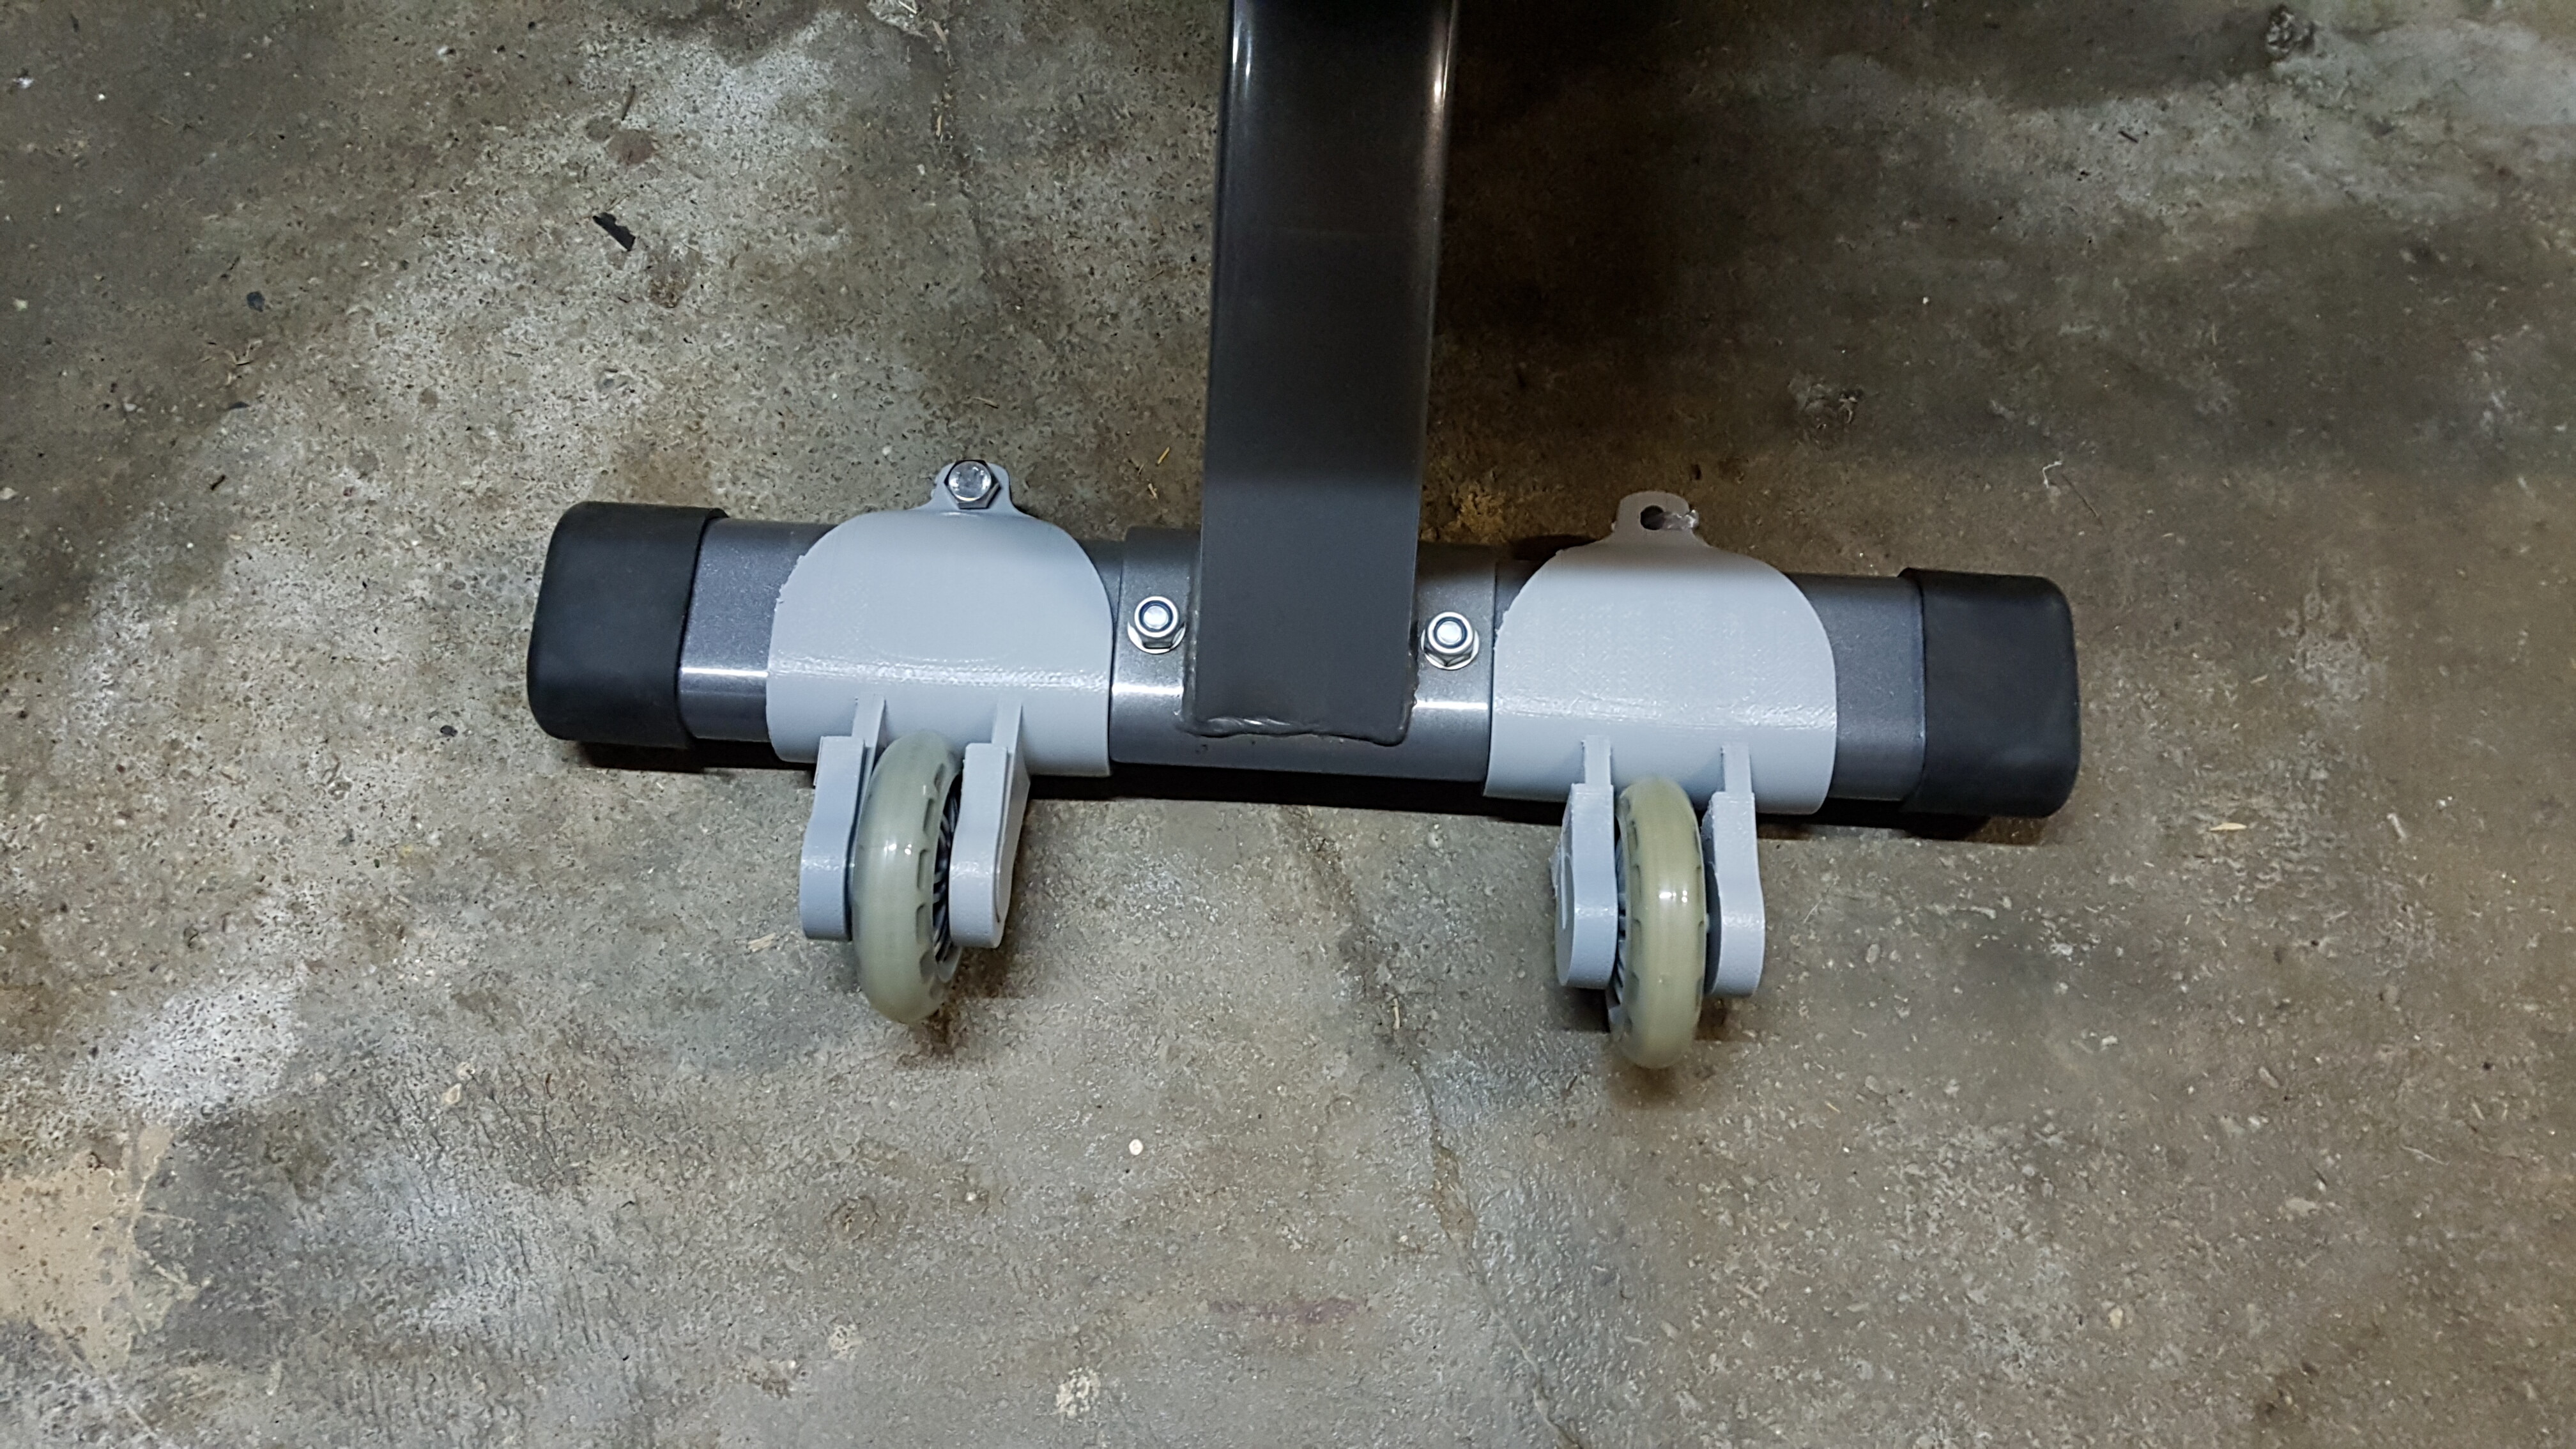
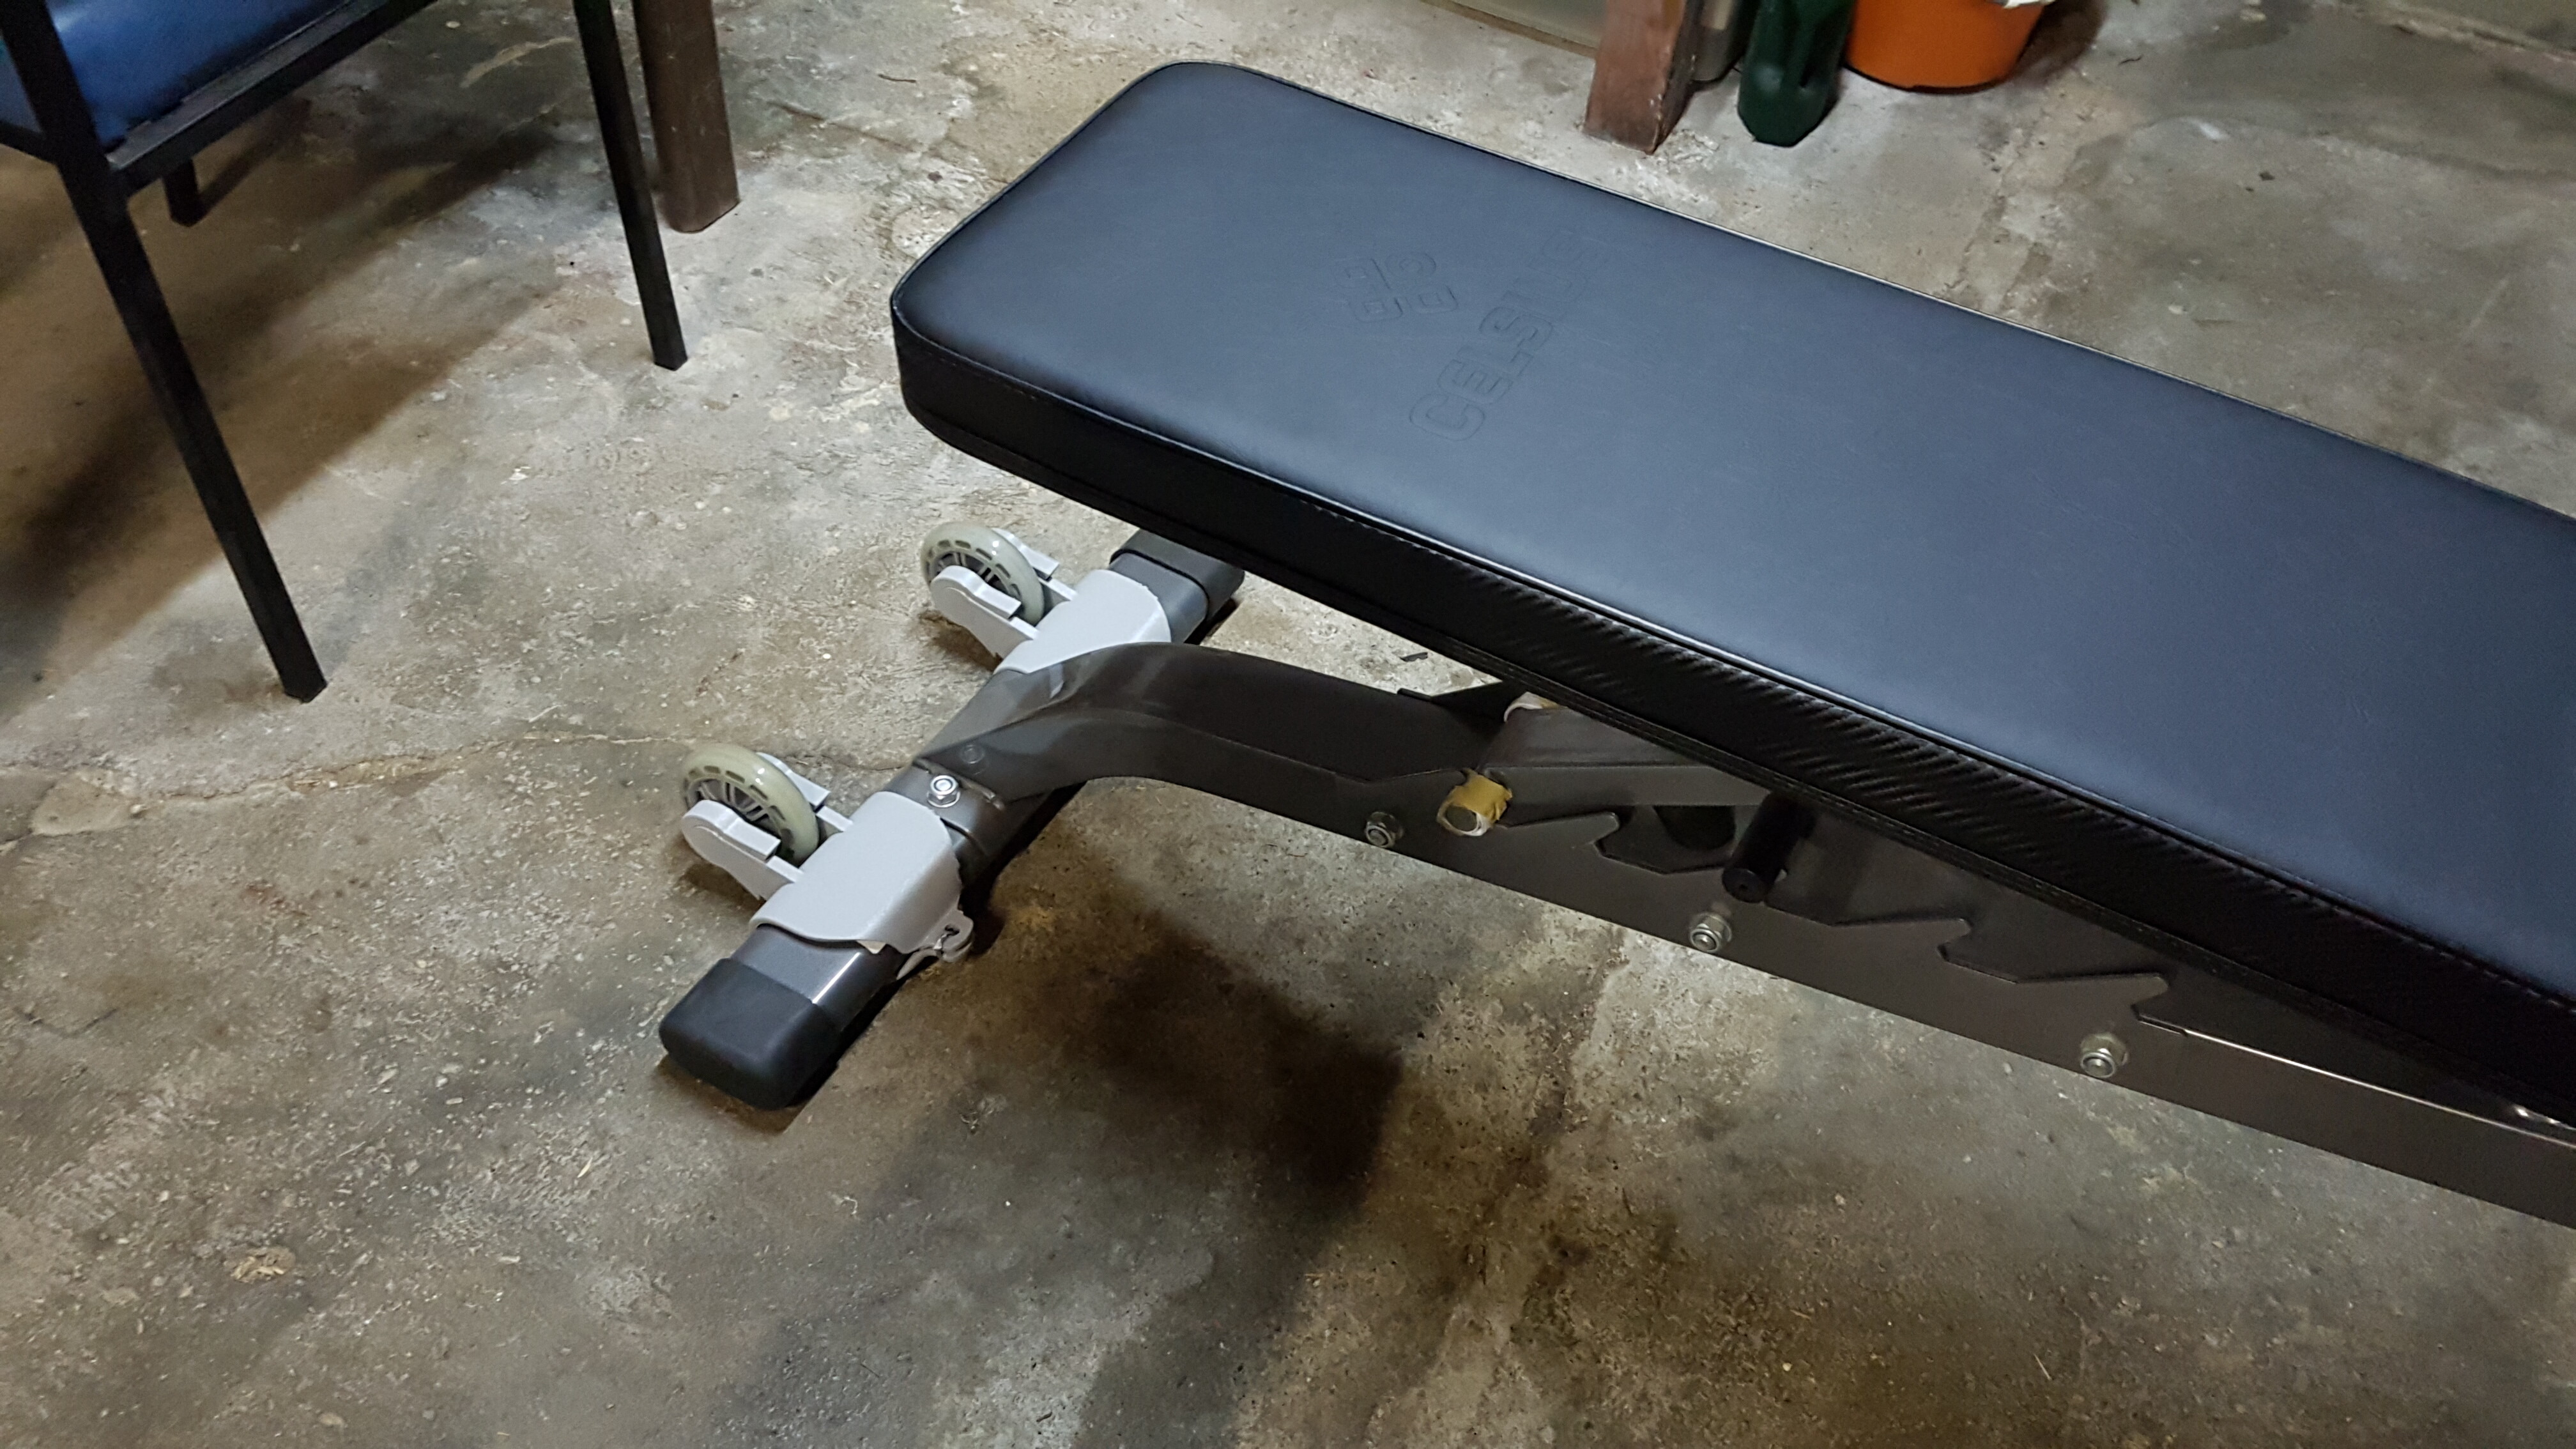
3D Print Exercise Bench Attachment
New Attachment to add more integrity to the cylinders holding the wheels
It works!
Some issue is that duplicating that inner wheel clamp didn’t work properly, because I duplicated one piece instead of mirroring and using the two pieces. Next time I need to mirror so all the pieces will fit. Only one could fit because the duplicated piece didn’t symmetrically fit.
3 Likes
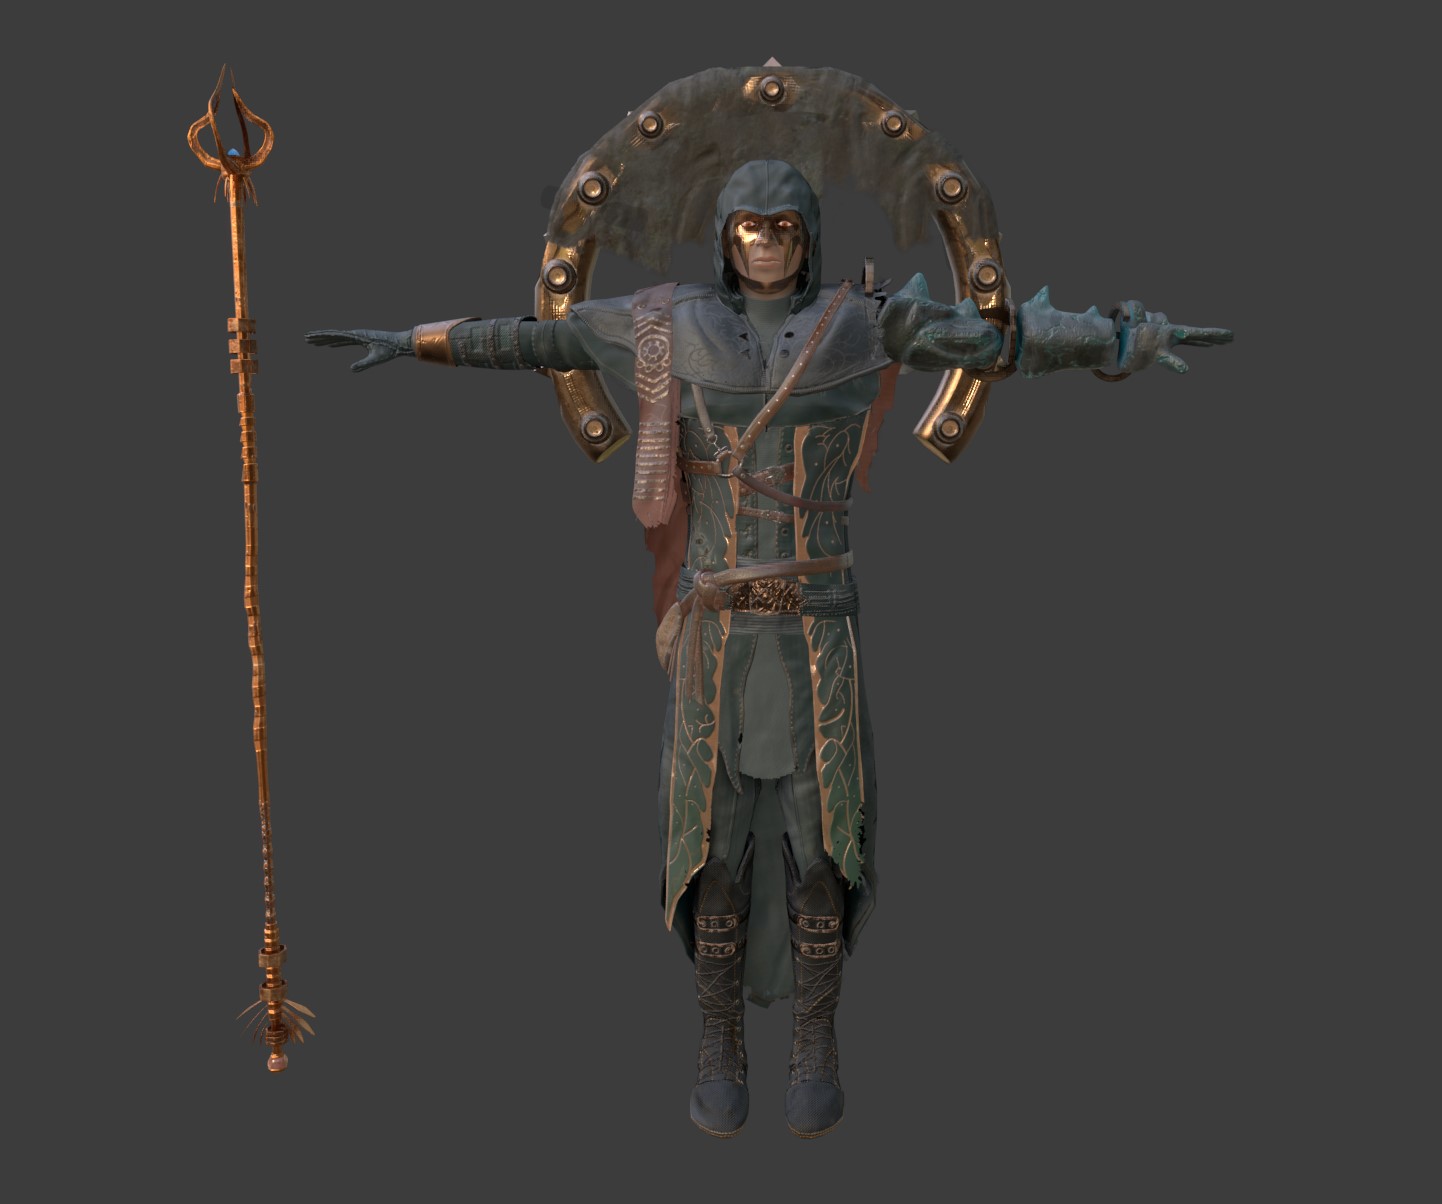
Back to Project Esper
Such a long hiatus, decided to tweak the textures a bit
Up to the Rigging Phase
Used Auto Rig Pro for the first time for this. I’m so surprised how well it works.
Just need to fix the weights mainly around legs because of the cloth, fingers, then upper torso because of the leather top & cape.
After the rigging, I should move onto Rendering this guy using Marmoset Toolbag.
Resources
ARP Addon
http://www.lucky3d.fr/auto-rig-pro/doc/
Video Tutorials I Used
1 Like
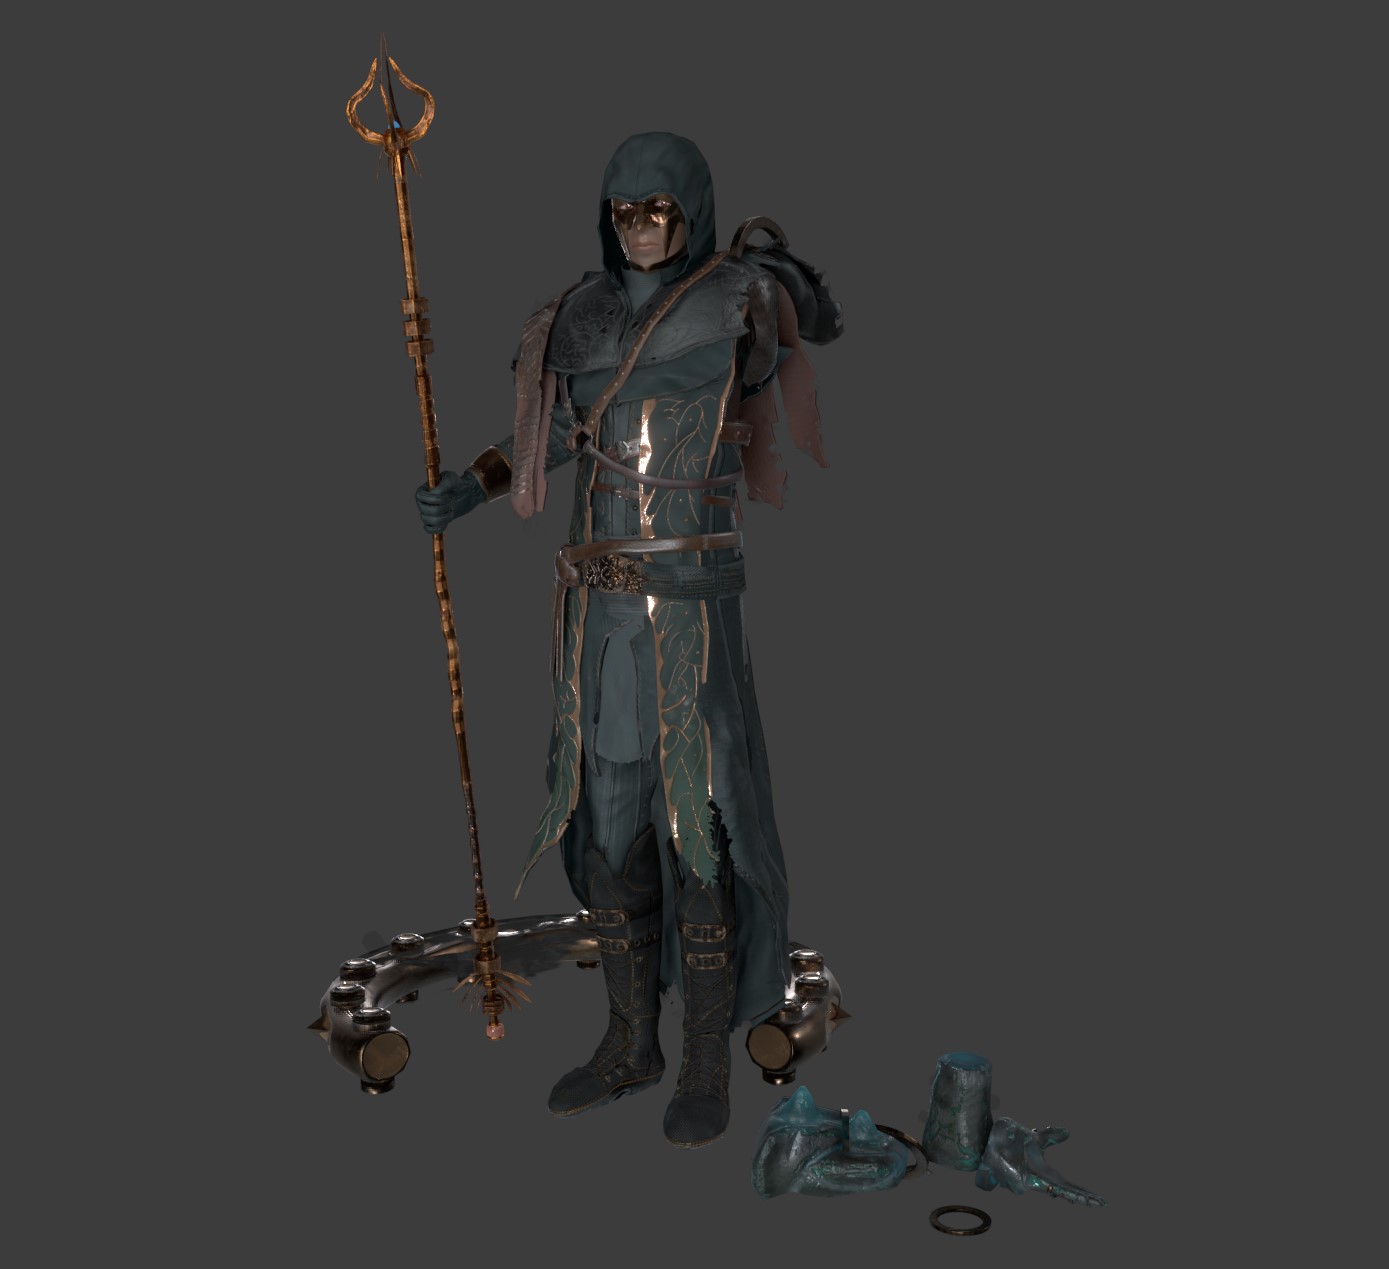
Weight Painted and Posed. Just need to tweak the skin weights a bit more as this pose brought out those imperfections. Then I’ll send over to Marmoset Toolbag and setup the lighting.
2 Likes
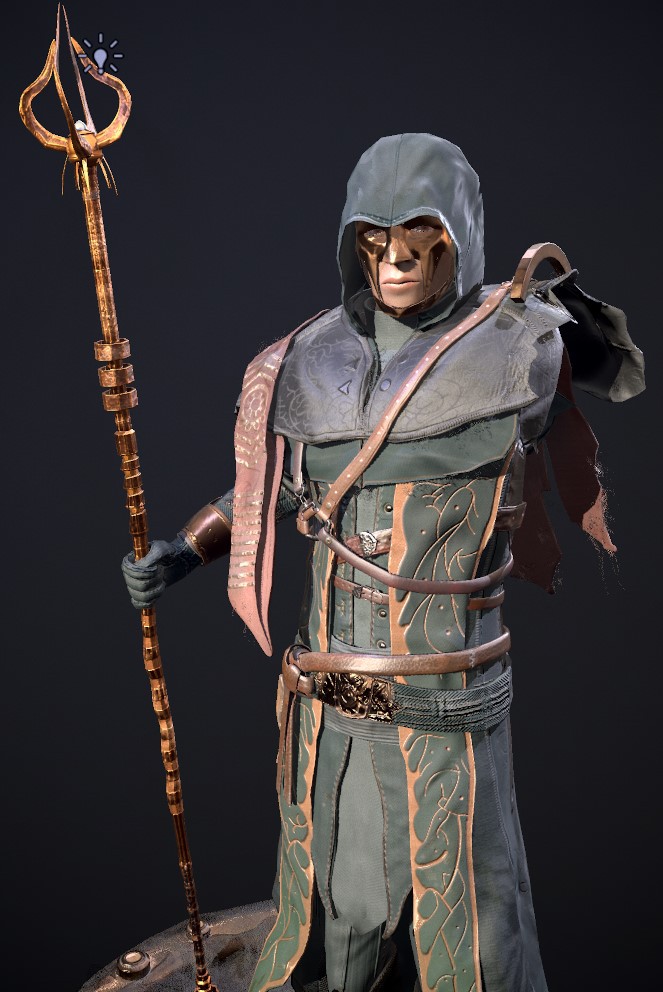
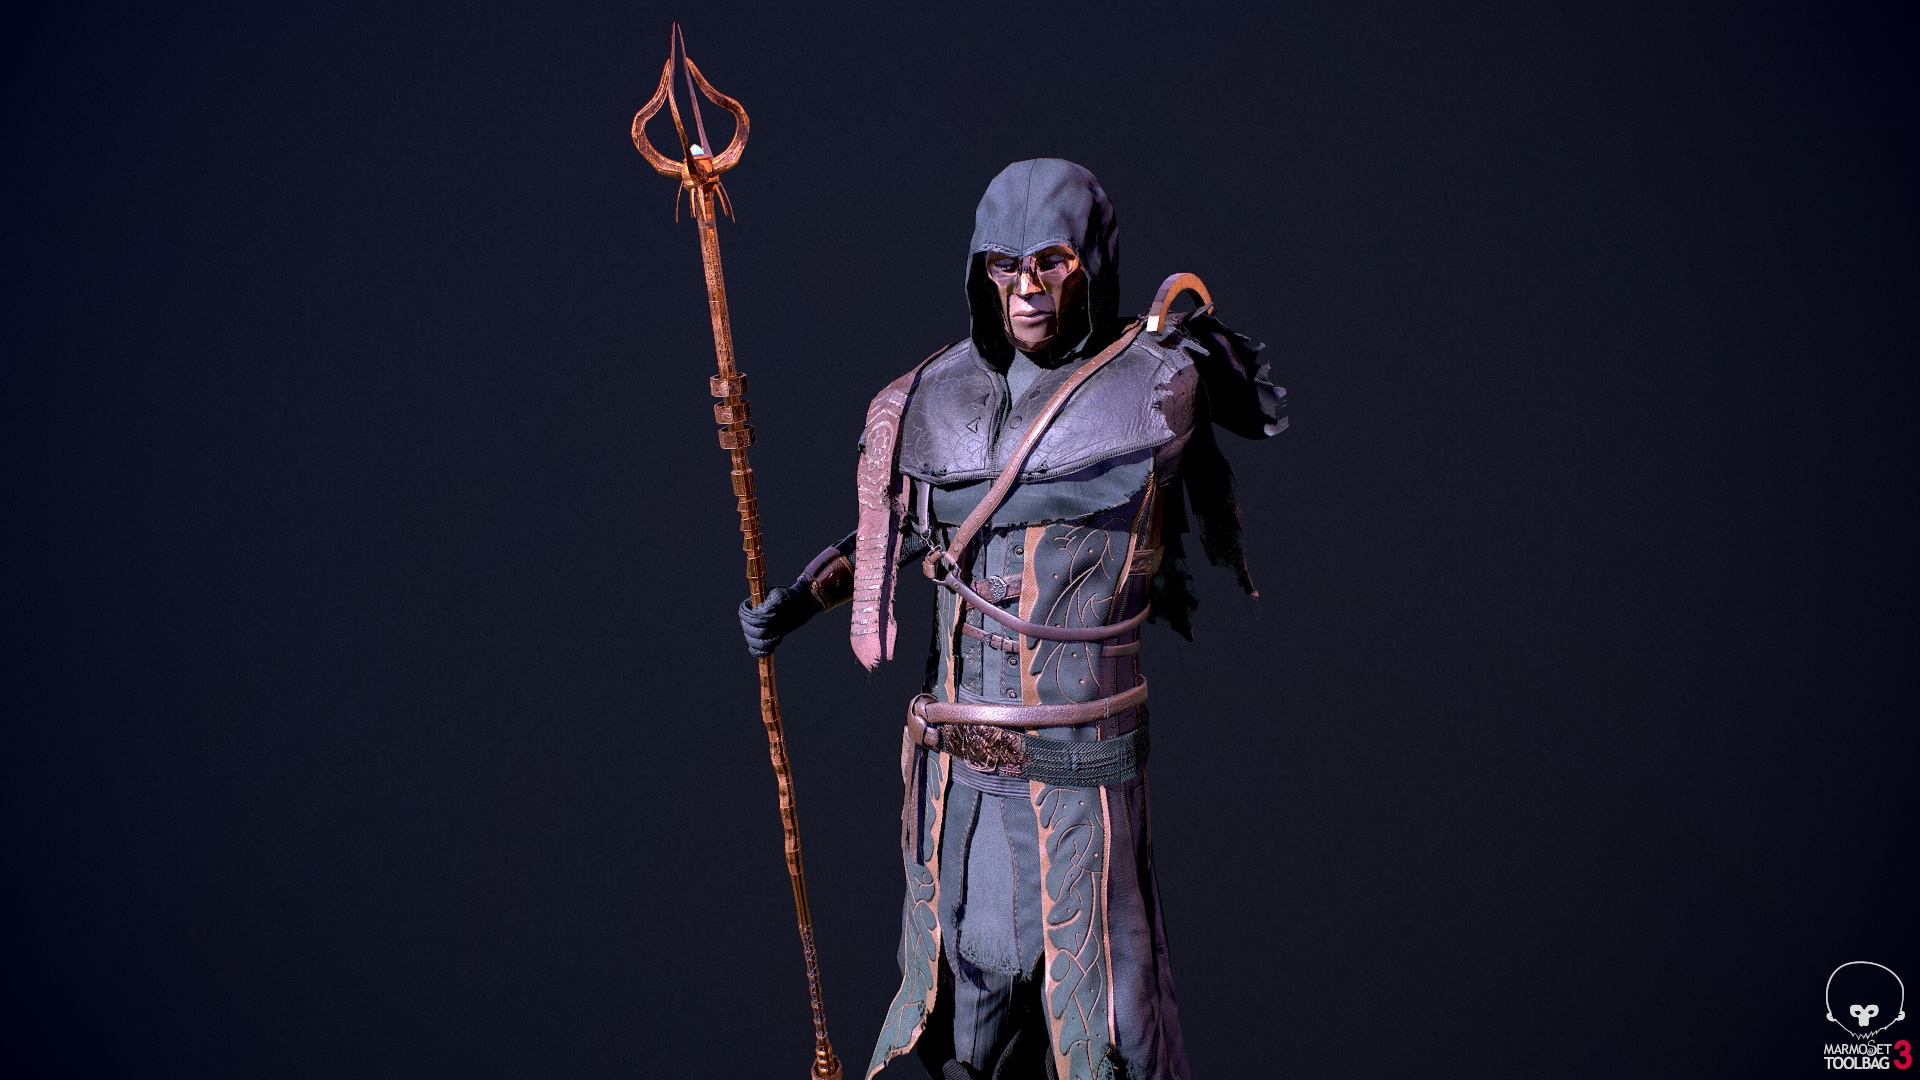
Marmoset Toolbag 2 setup for Esper
Old photo of 3D Print of Chincha
Decided to finally start the post processing.
Sanding + Filler Primer, then more sanding to smoothen it a bit more.
Working on a new creature sculpt to 3D print
Head feels awkward, going to change things up
1 Like
Finished the Sculpt, will merge together and prep for 3D Printing