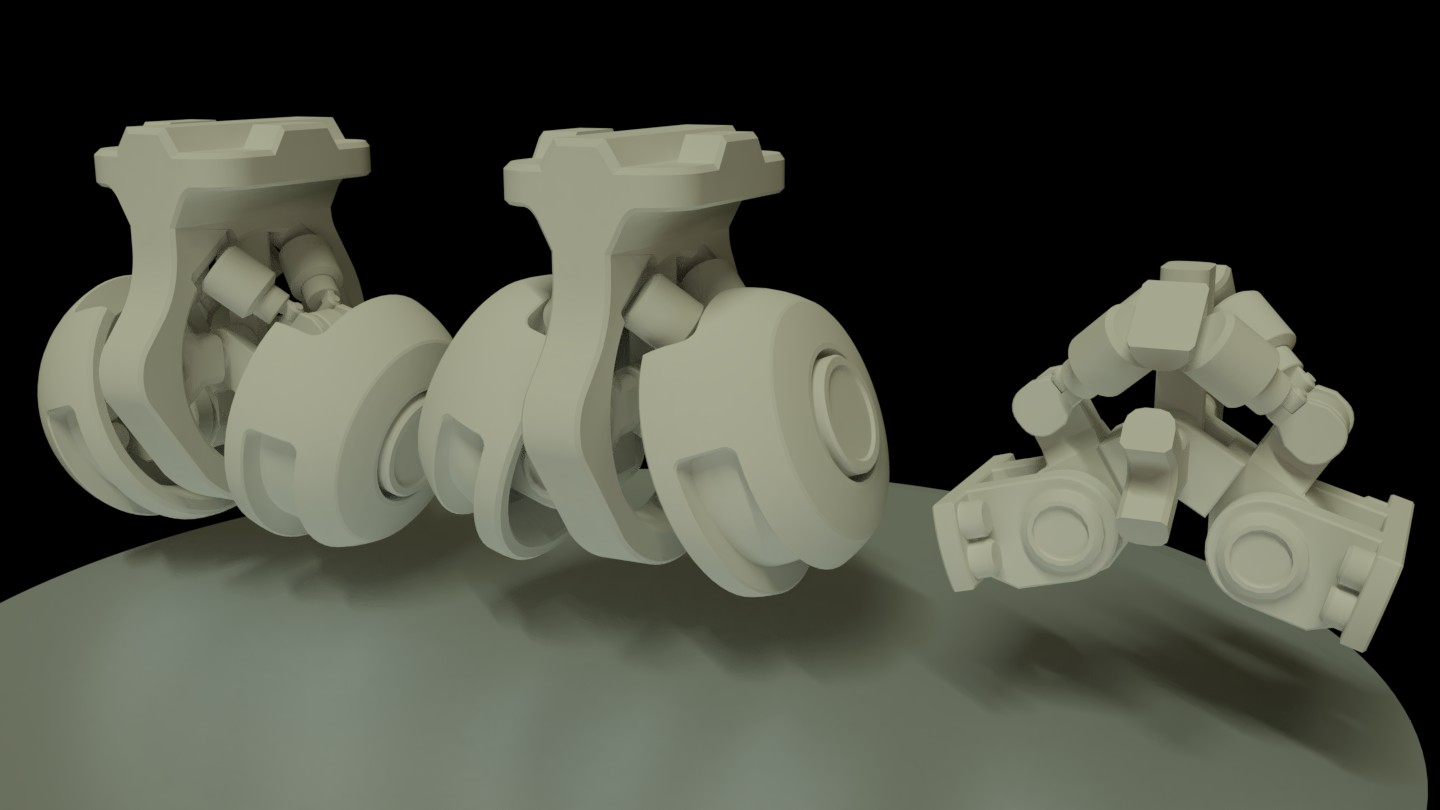
I decided to design a more visible hip joint. Might need some modifications, but it wont really be visible anyway.
I’ve been studying how to better create hard surface objects, and have picked up a few new tools along the way. I’ve been practicing on the below object before I go and give the mech a bit of a facelift with some additional hard surface details.
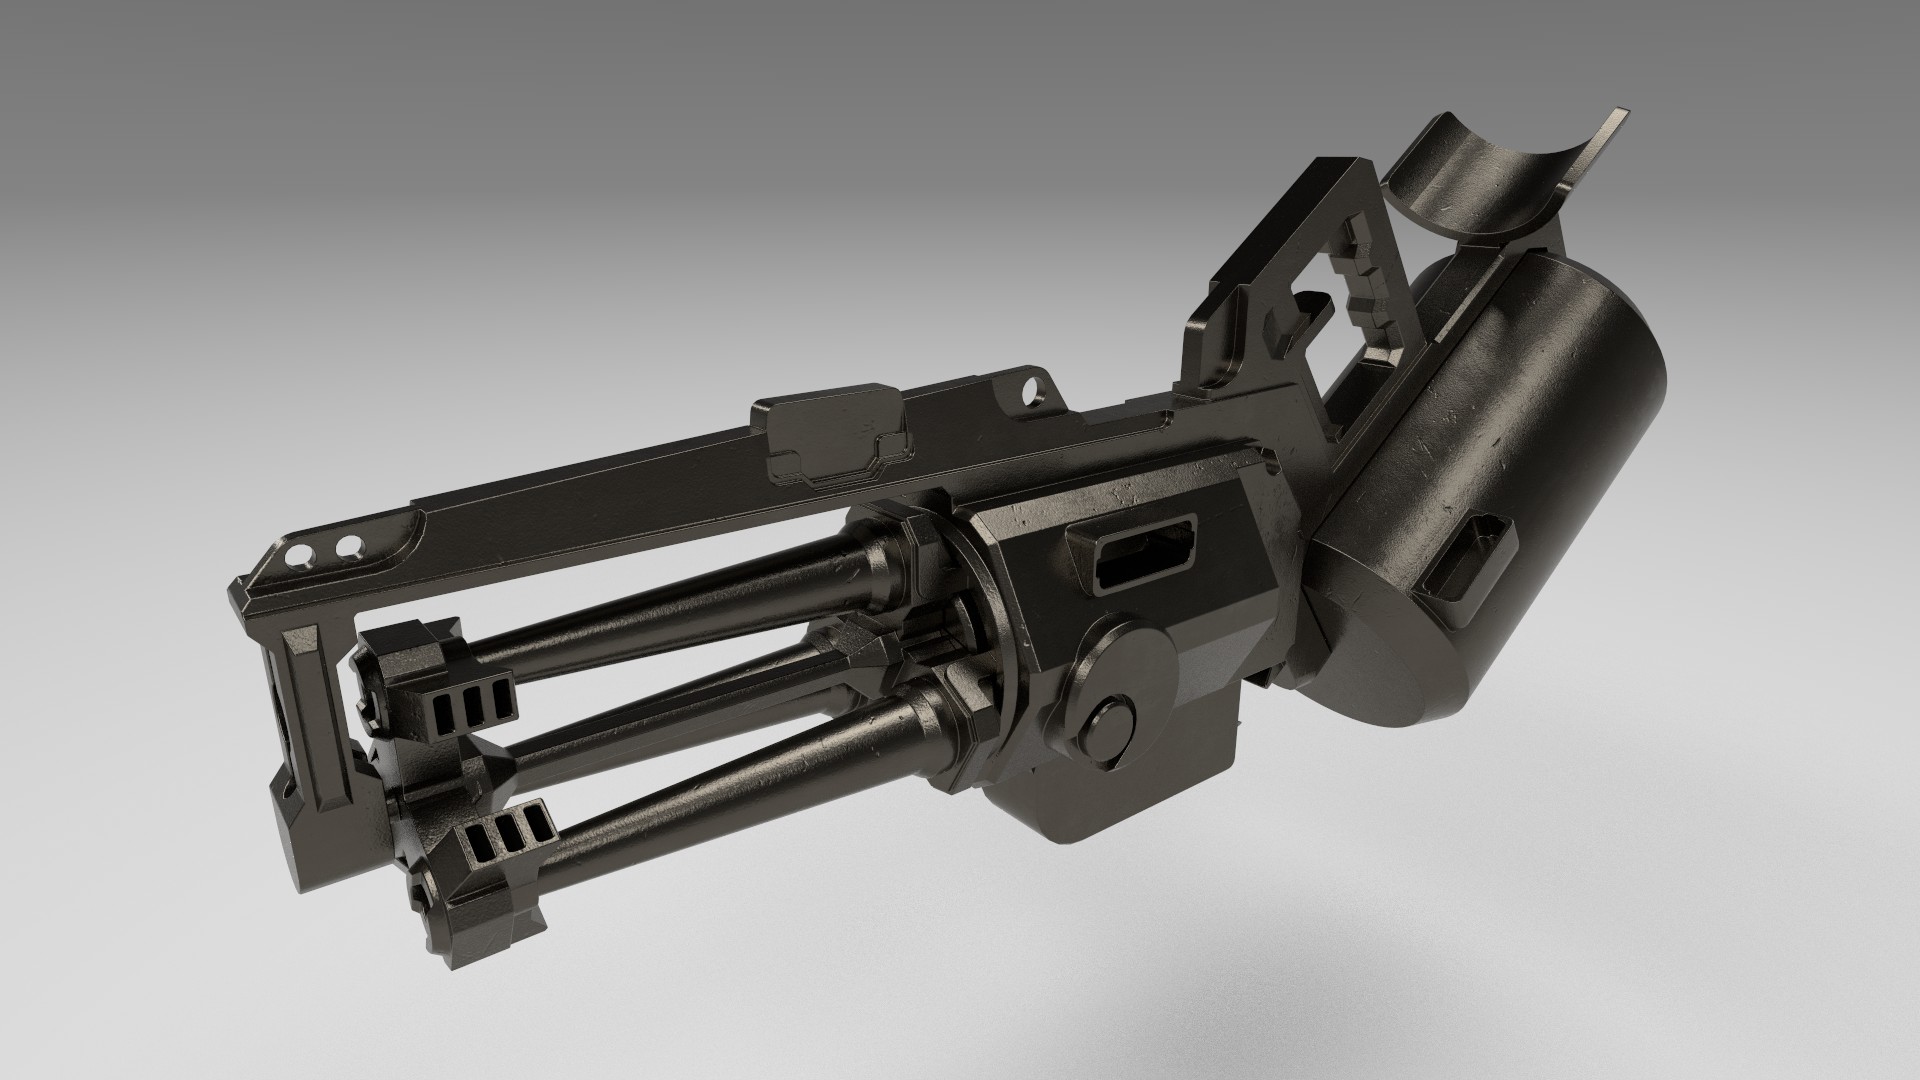
Here is a weapon designed with this project in mind. The modeling is 90 percent finished. Almost prepared to begin texturing:
Here’s my concept drawing for this object:

1 Like
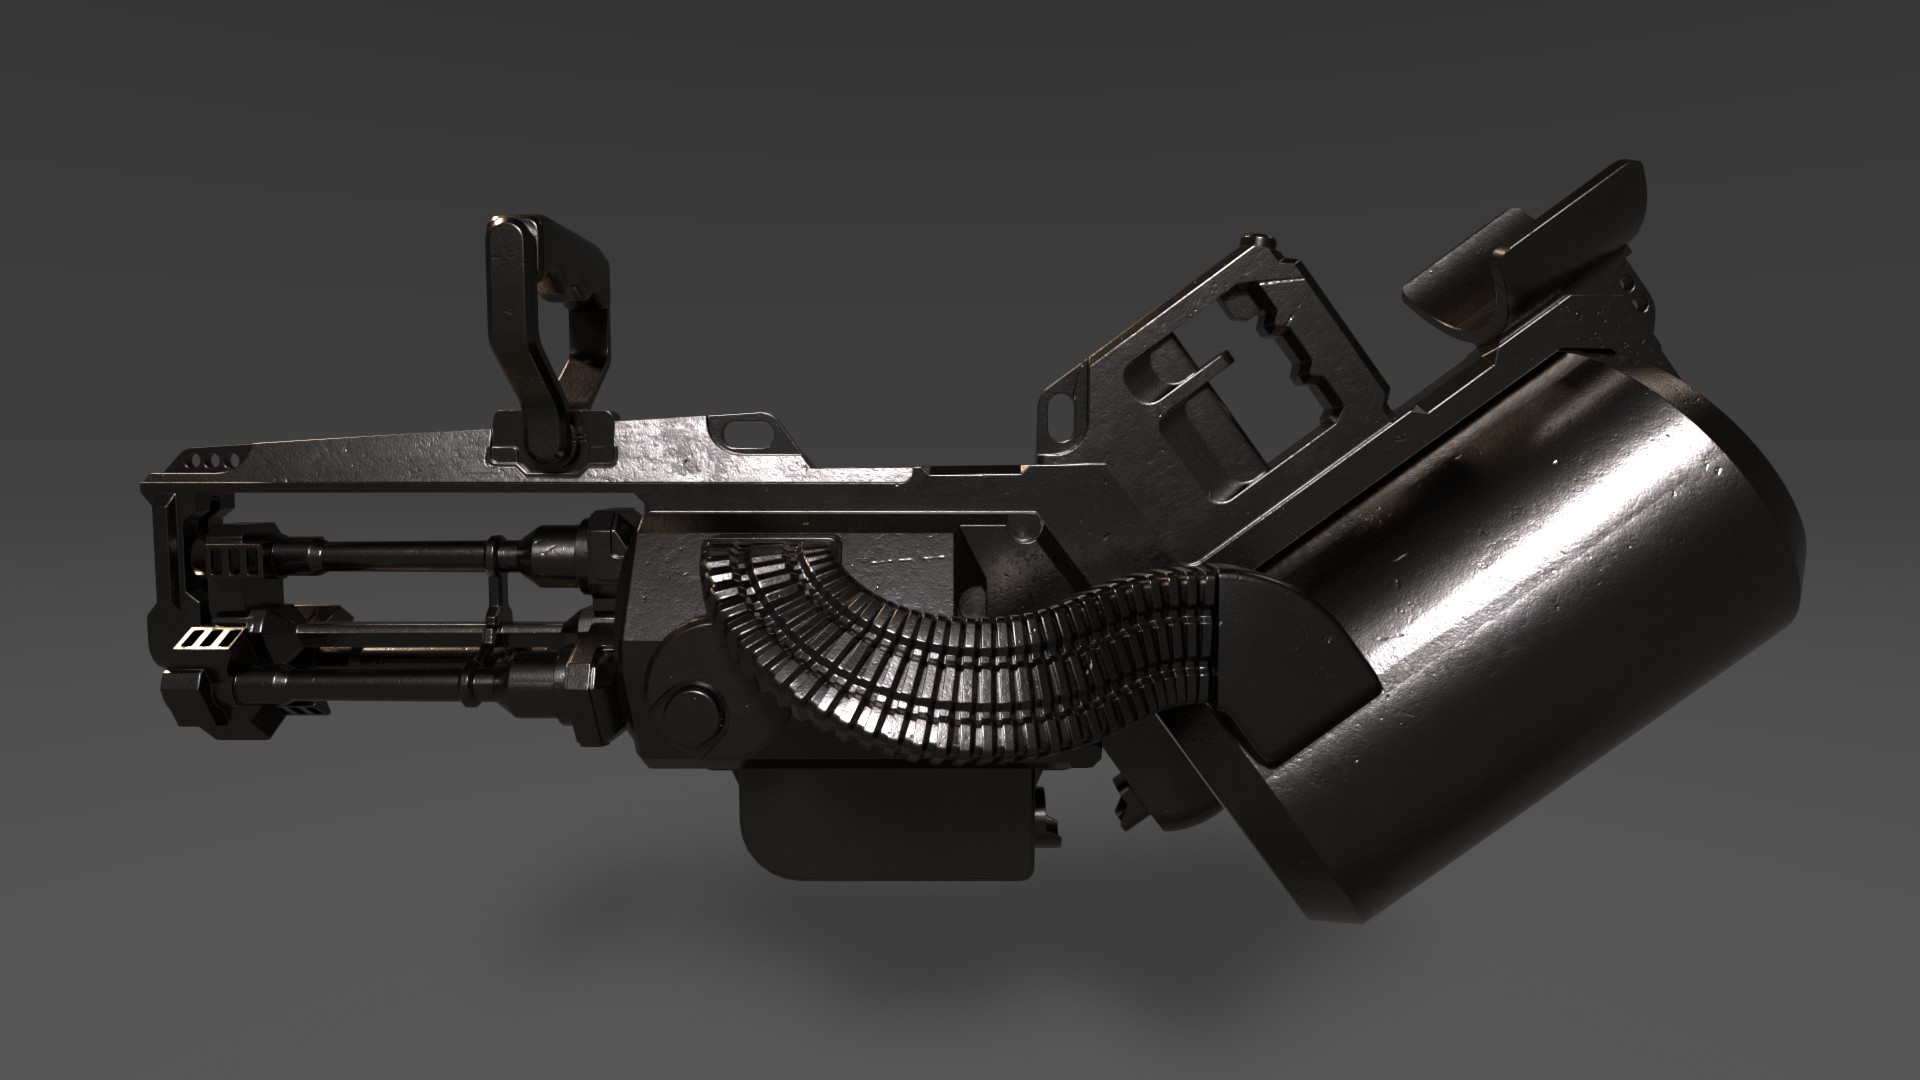
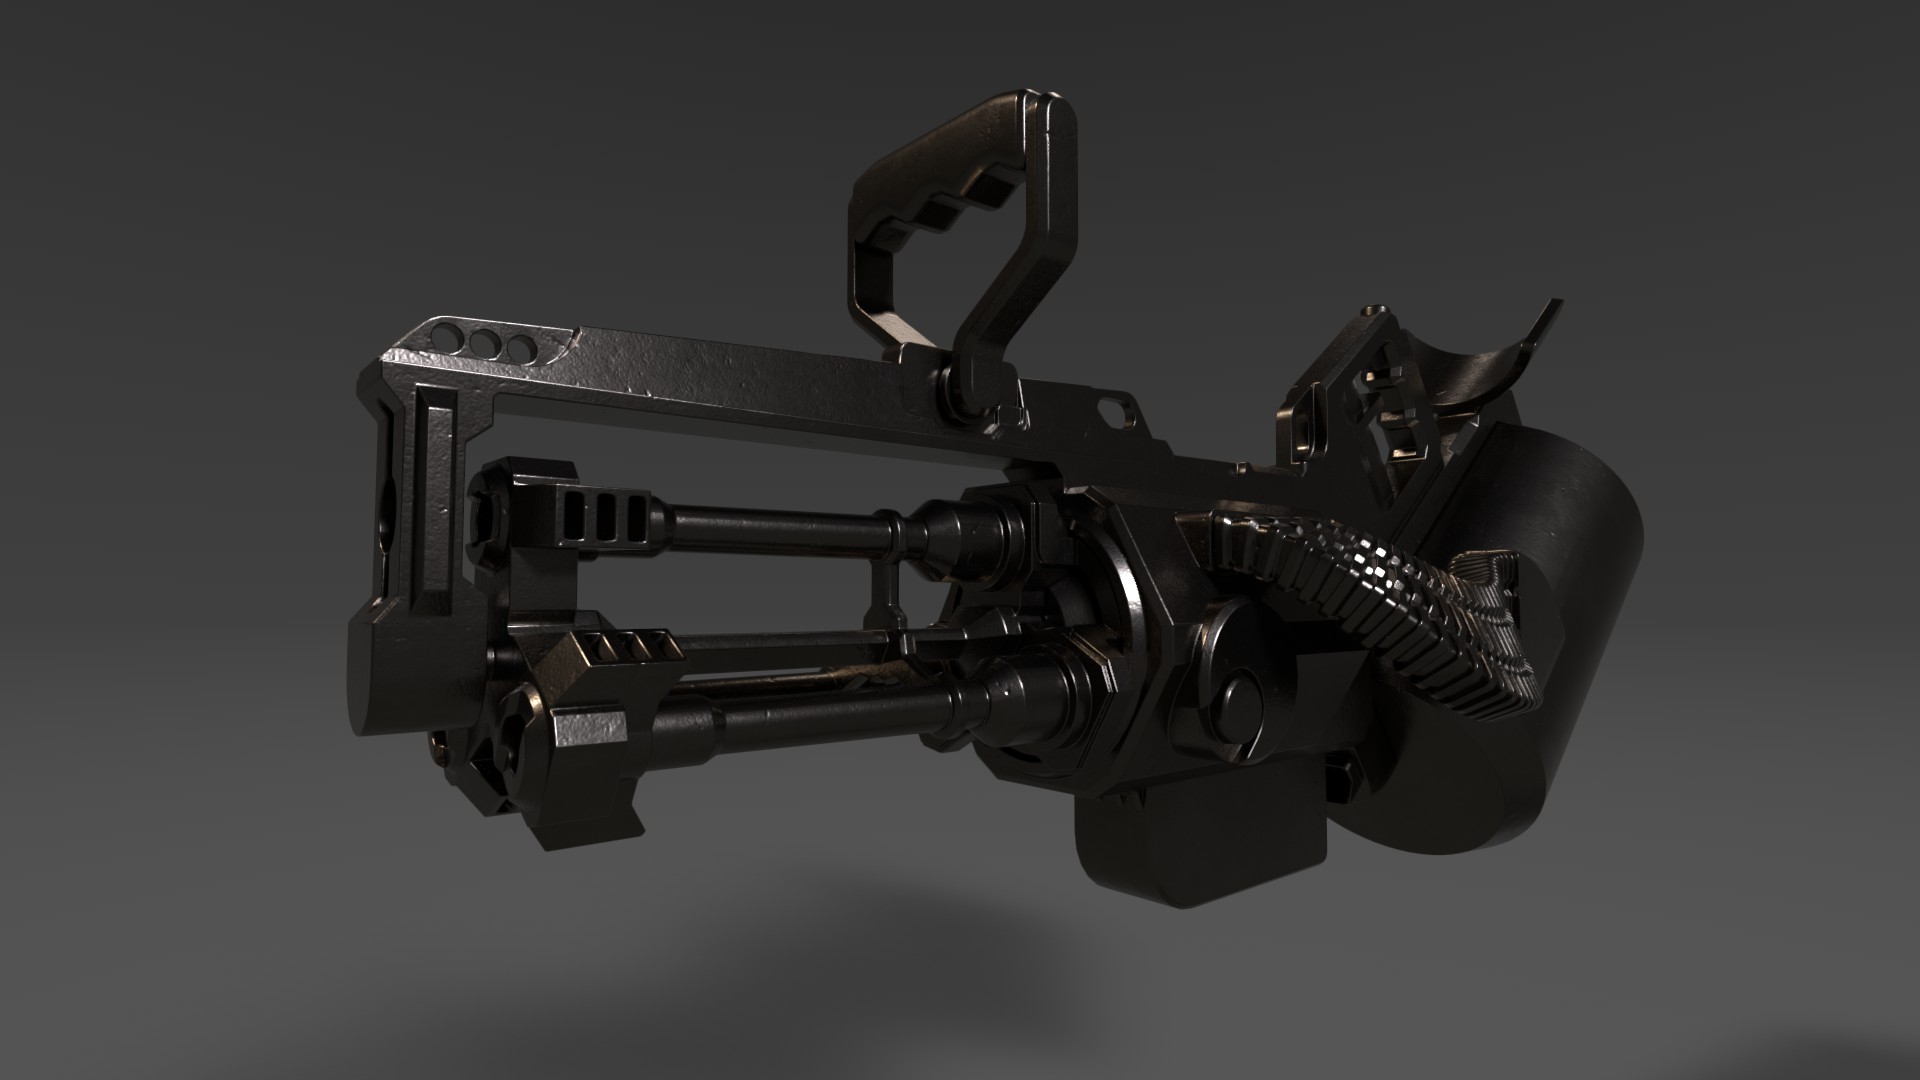
Modeling is complete. Here are just a few IRay renders with a quick texture thrown on.
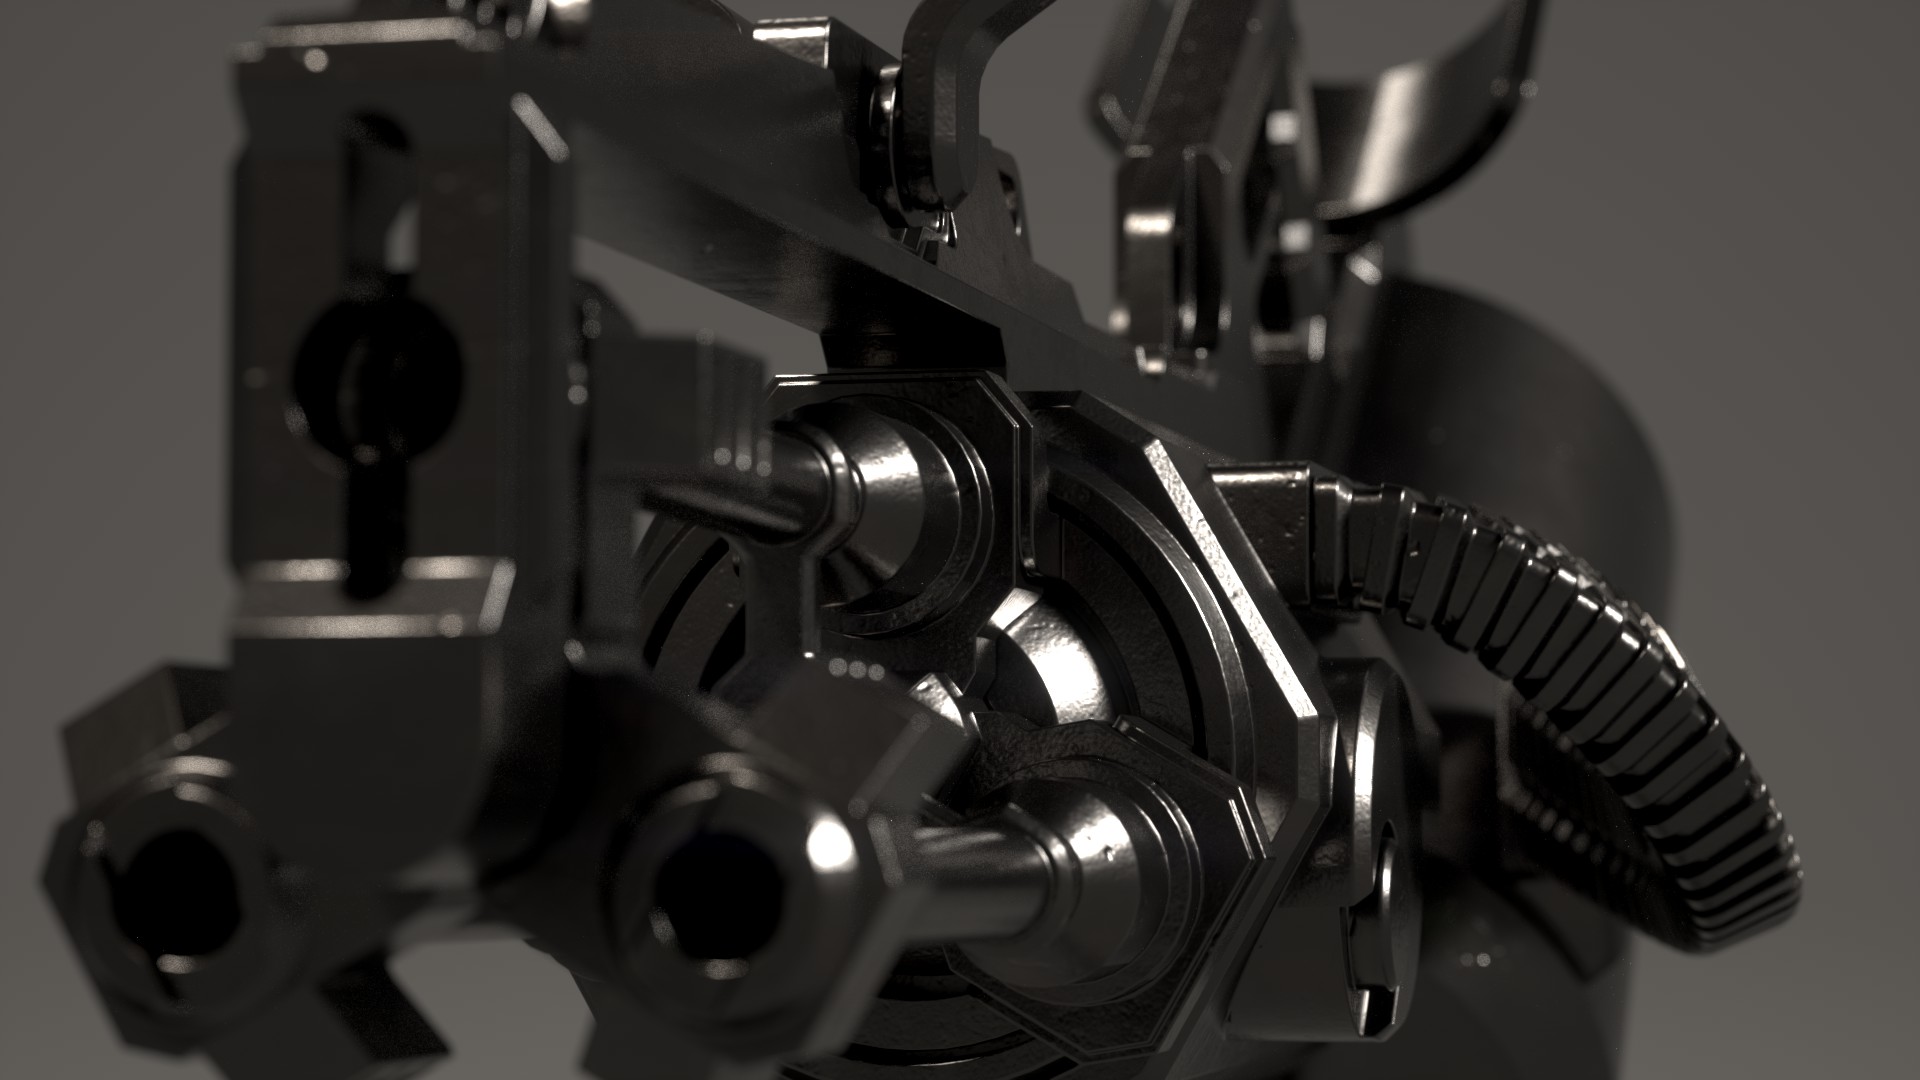
Next I’ll be throwing some details on with Decal Machine and texturing in Substance Painter.
1 Like
This gun is amazing! Good job @Villitz! Any specific tutorials you were following to get better at hard surface modeling?
Thank you! I cant say I followed any specific tutorials, but I did start using the addons Hard Ops, Box Cutter, and will later add details using Decal Machine. Here are links to all three tools:
(https://www.blendermarket.com/products/hardopsofficial)
(https://blendermarket.com/products/boxcutter-6)
(https://blendermarket.com/products/DECALmachine)
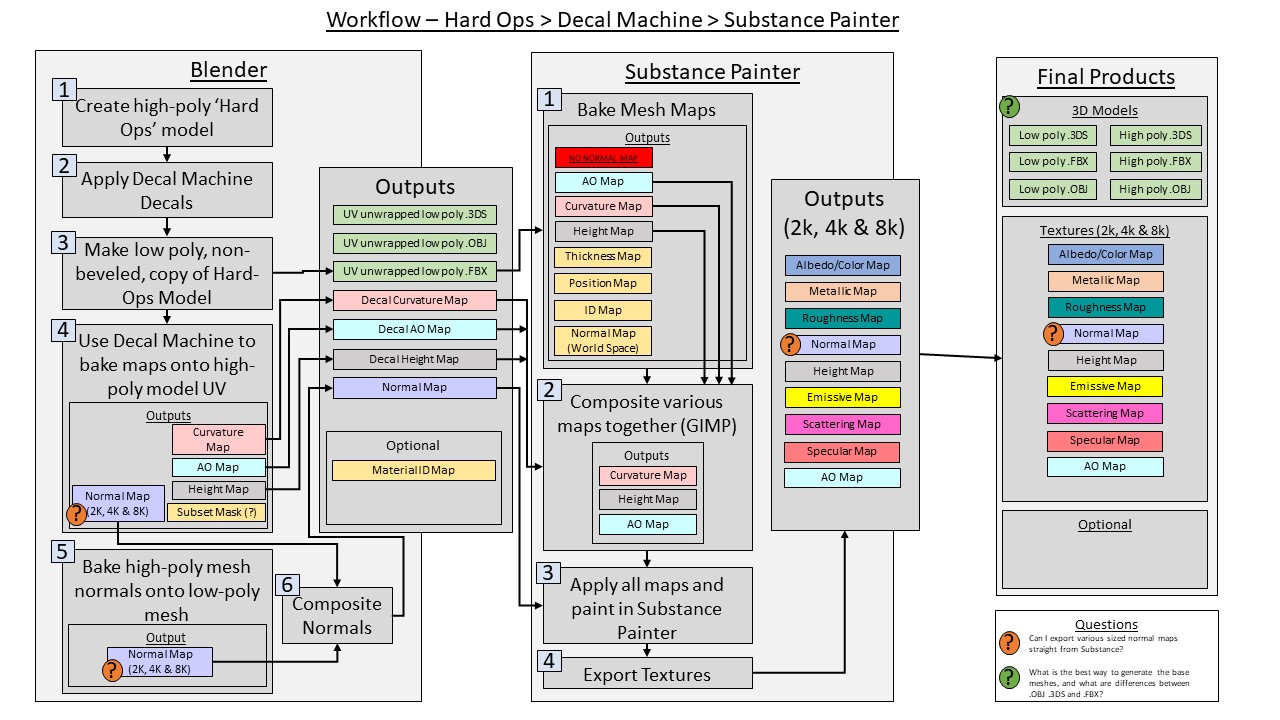
These tools definitely help a ton at creating hard surfaces. Hard Ops and Box Cutter are useful for using booleans and automating bevel/edge modifiers while creating the base mesh, and Decal Machine is excellent at non-destructively applying normal-mapped details. With Decal Machine you can even bake the decals to separate maps (AO, curvature maps, etc) for use in Substance painter (although you’ll have to manually combine the maps to the ones you’ll bake in Substance Painter via photoshop/GIMP, but it works!).
I’ve been slowly working through some of the kinks in getting these various tools working together in an effective workflow with the eventual goal of producing assets I can share with others. In order to help wrap my head around the different things in play here, I’ve created a flowchart with a very basic overview of the workflow. It’s very much a draft so I’m sure some things are incorrect. I also have a cheat sheet on exactly how to perform various steps. Not very interesting, but I thought I would share anyway.
1 Like
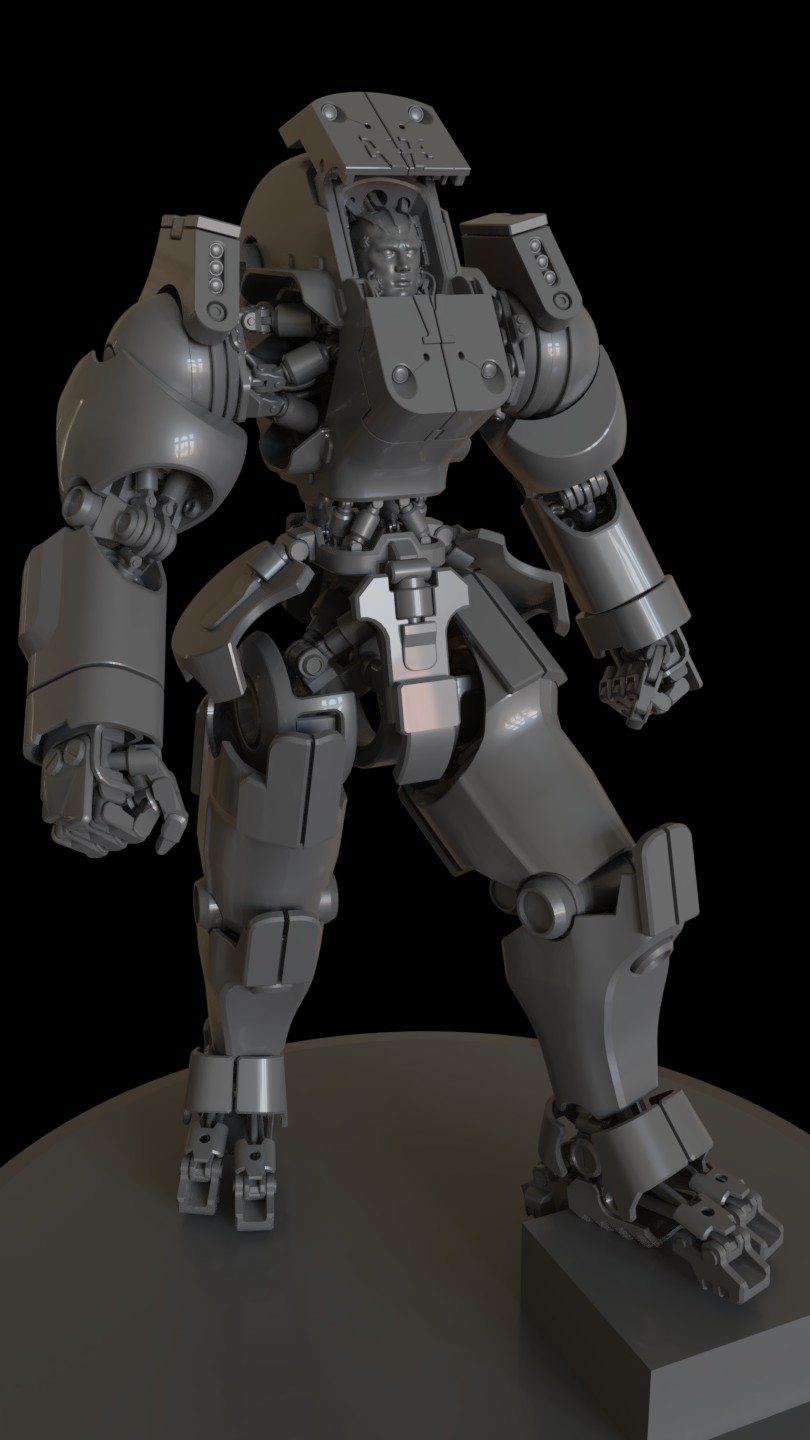
I finally have (just about) all the kinks in the mesh worked out and have exported it to Substance Painter. There are 373 separate objects split into 38 groups (38 texture sets in Substance Painter). I feel like I bit off a bit more than I can chew with this, but It’s getting there.
This a really quick rough draft/test to try some things out with colors/emission.
Unfortunately, I found a very small bit of UV overlap that I’ll have to fix in blender before exporting and baking again in Substance Painter.
Edit:
Bonus shot of me playing around with a pose (No its not rigged yet ![]() ):
):
It’s looking awesome so far!
Thank you aaronh! It’s coming along very slowly, but I can almost see the end in sight.
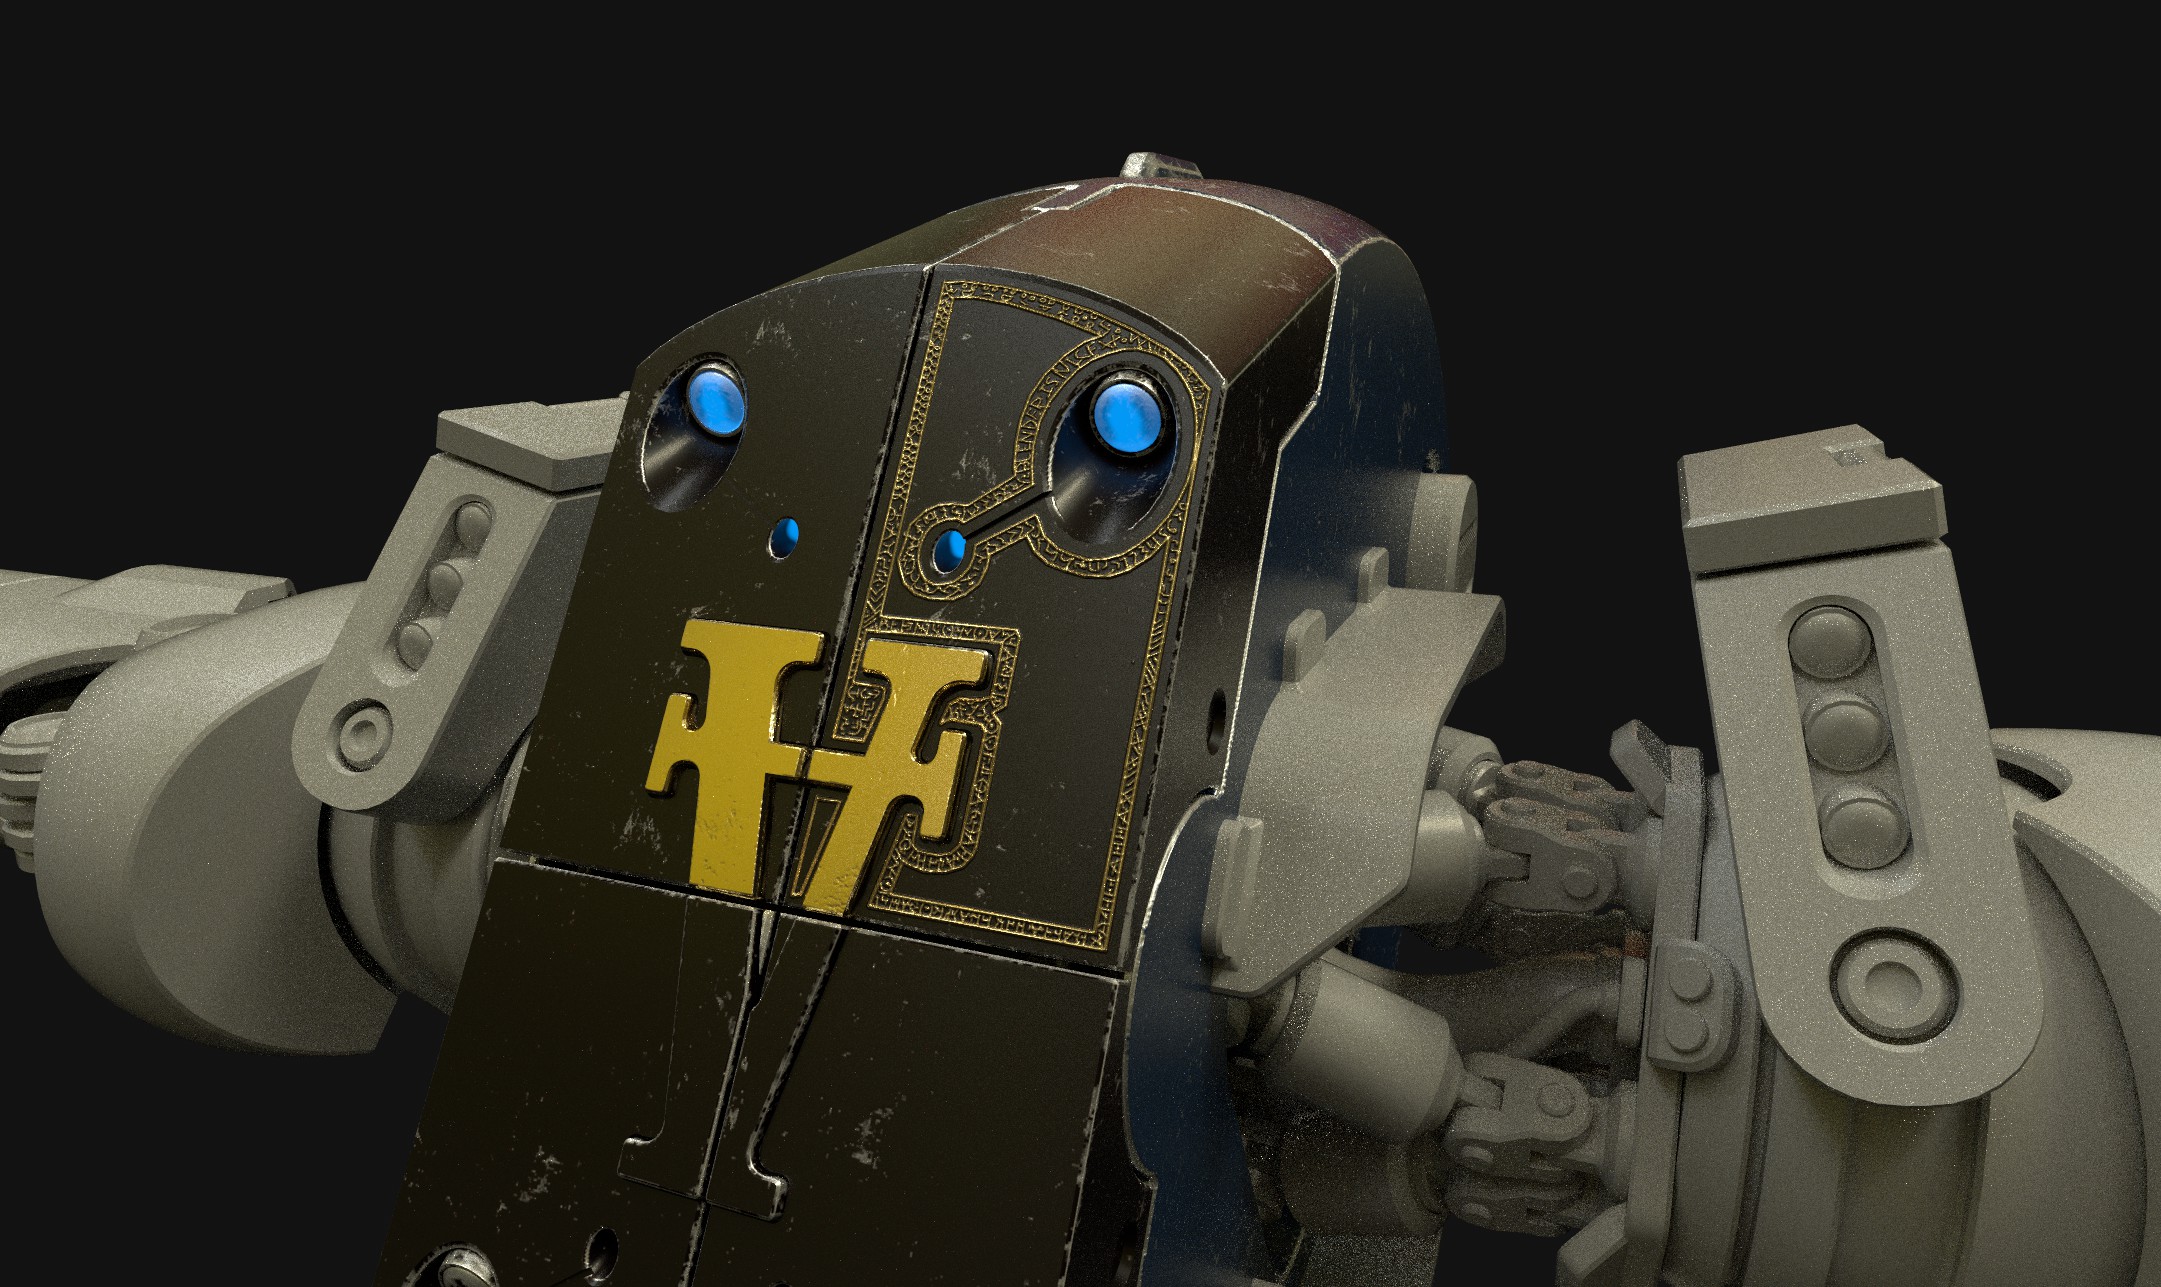
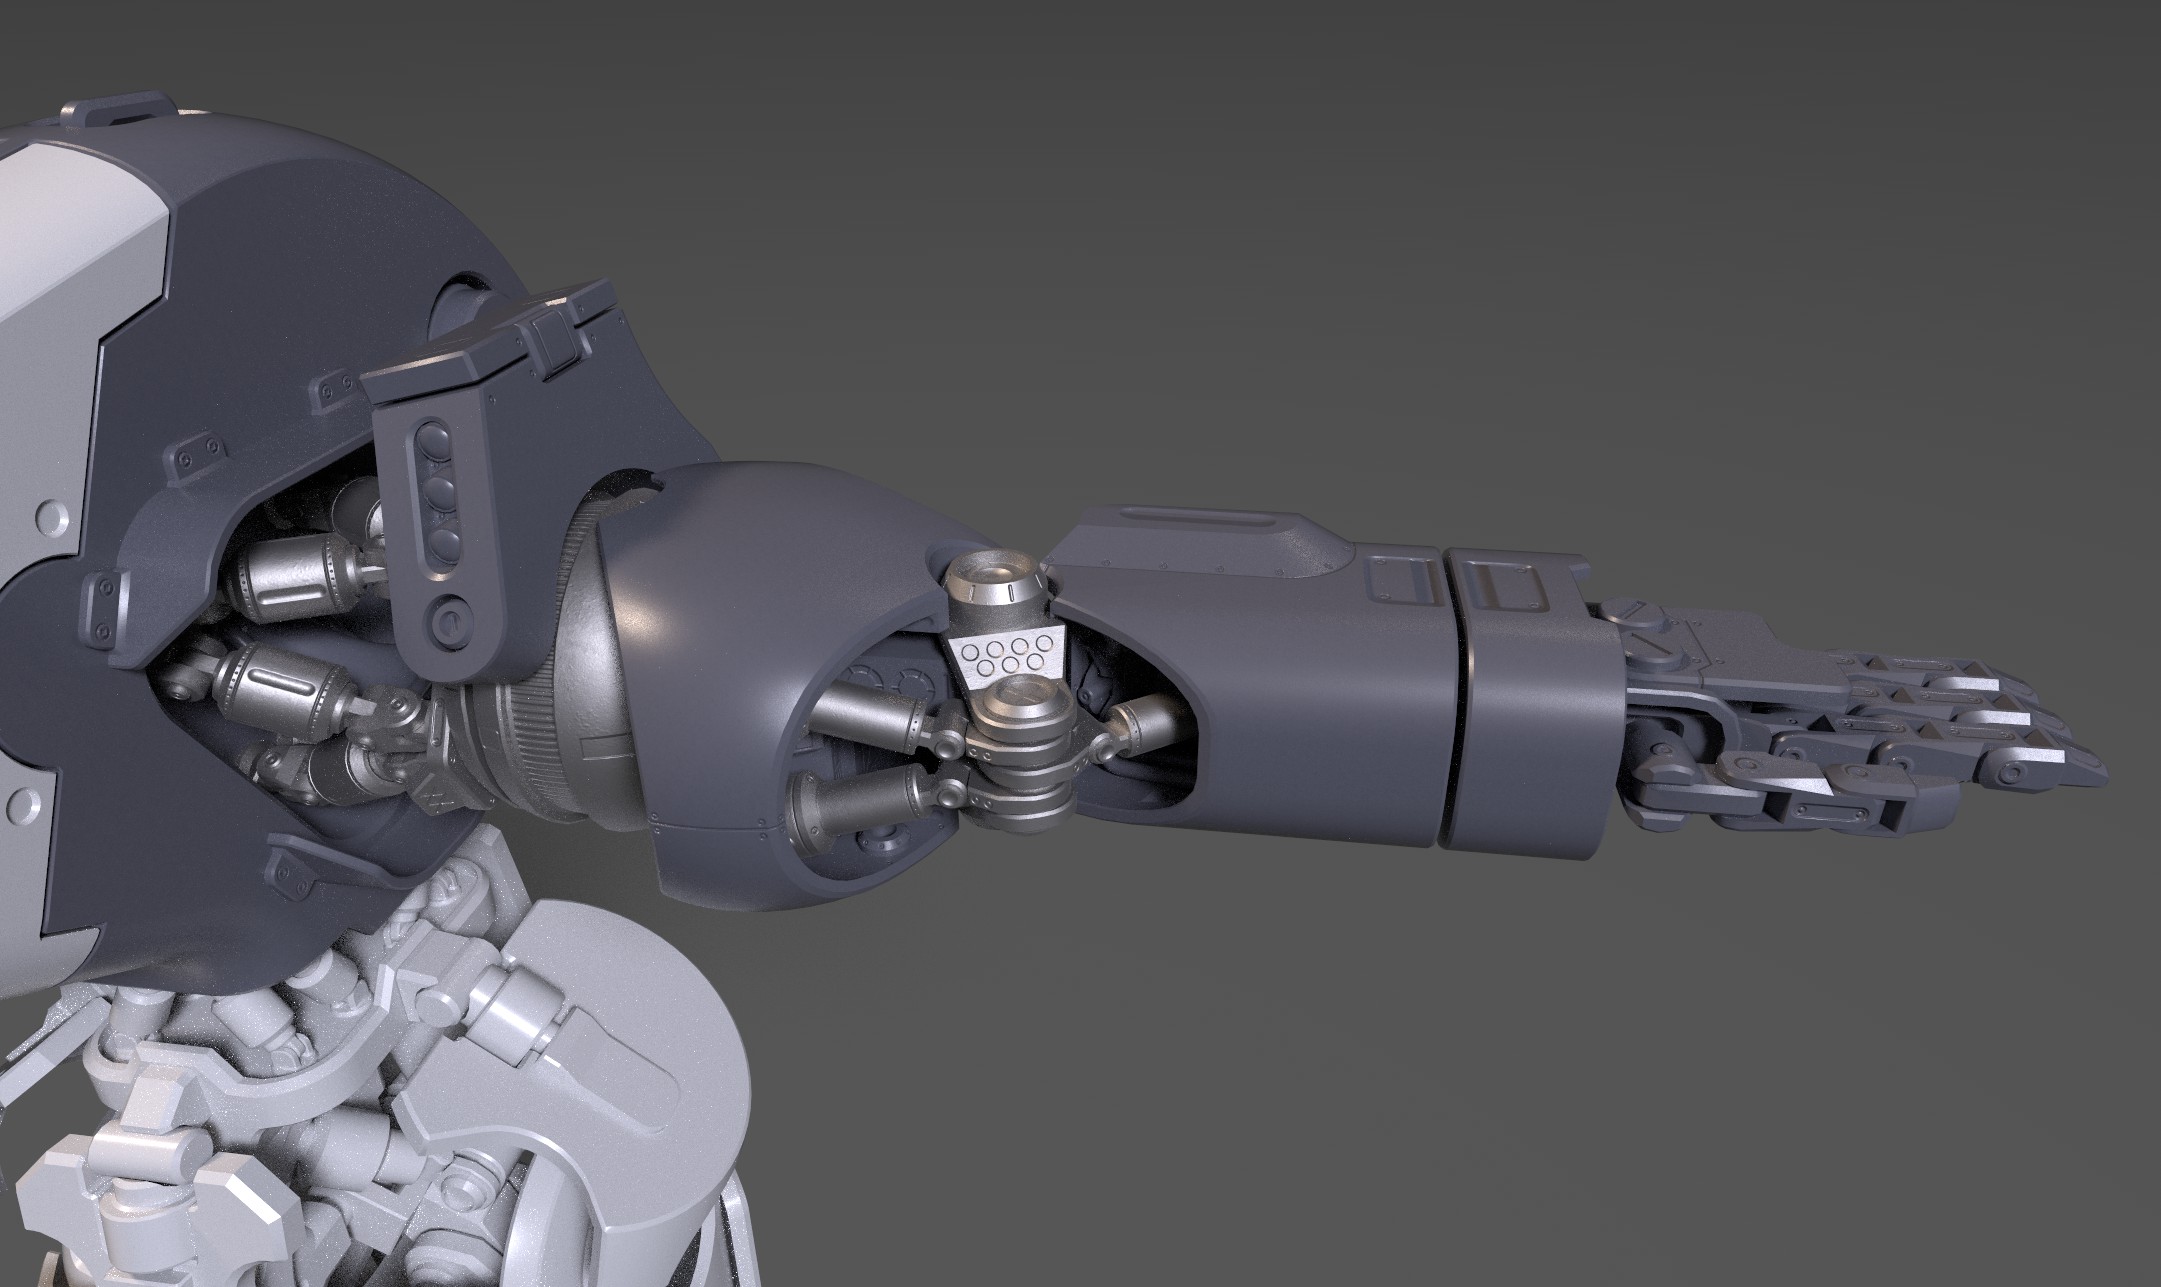
I’ve thrown on some normal/height mapped details in Substance Painter. I’ll paint on some colors/weather after I finish putting the details on the whole object. So far i’ve only finished the arm, but I think it’s looking ok so far.

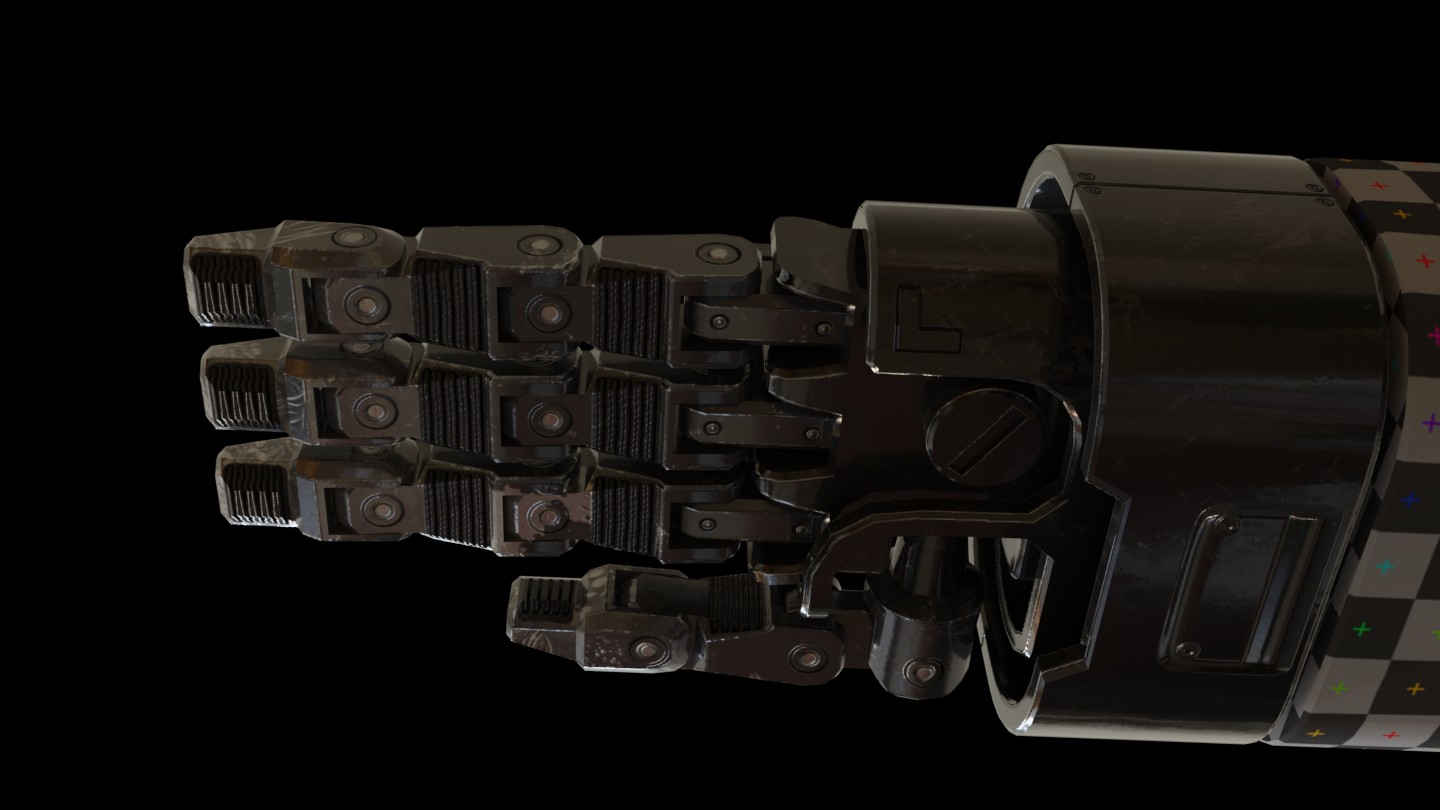
I’ve finished height-mapped details on the model and am now finally moving onto texturing. I’m still not entirely sure what color scheme I want to use so I’ve been some things out in Substance Painter.
Here are a few test renders of the hand from Blender using exported textures from Substance Painter:

1 Like
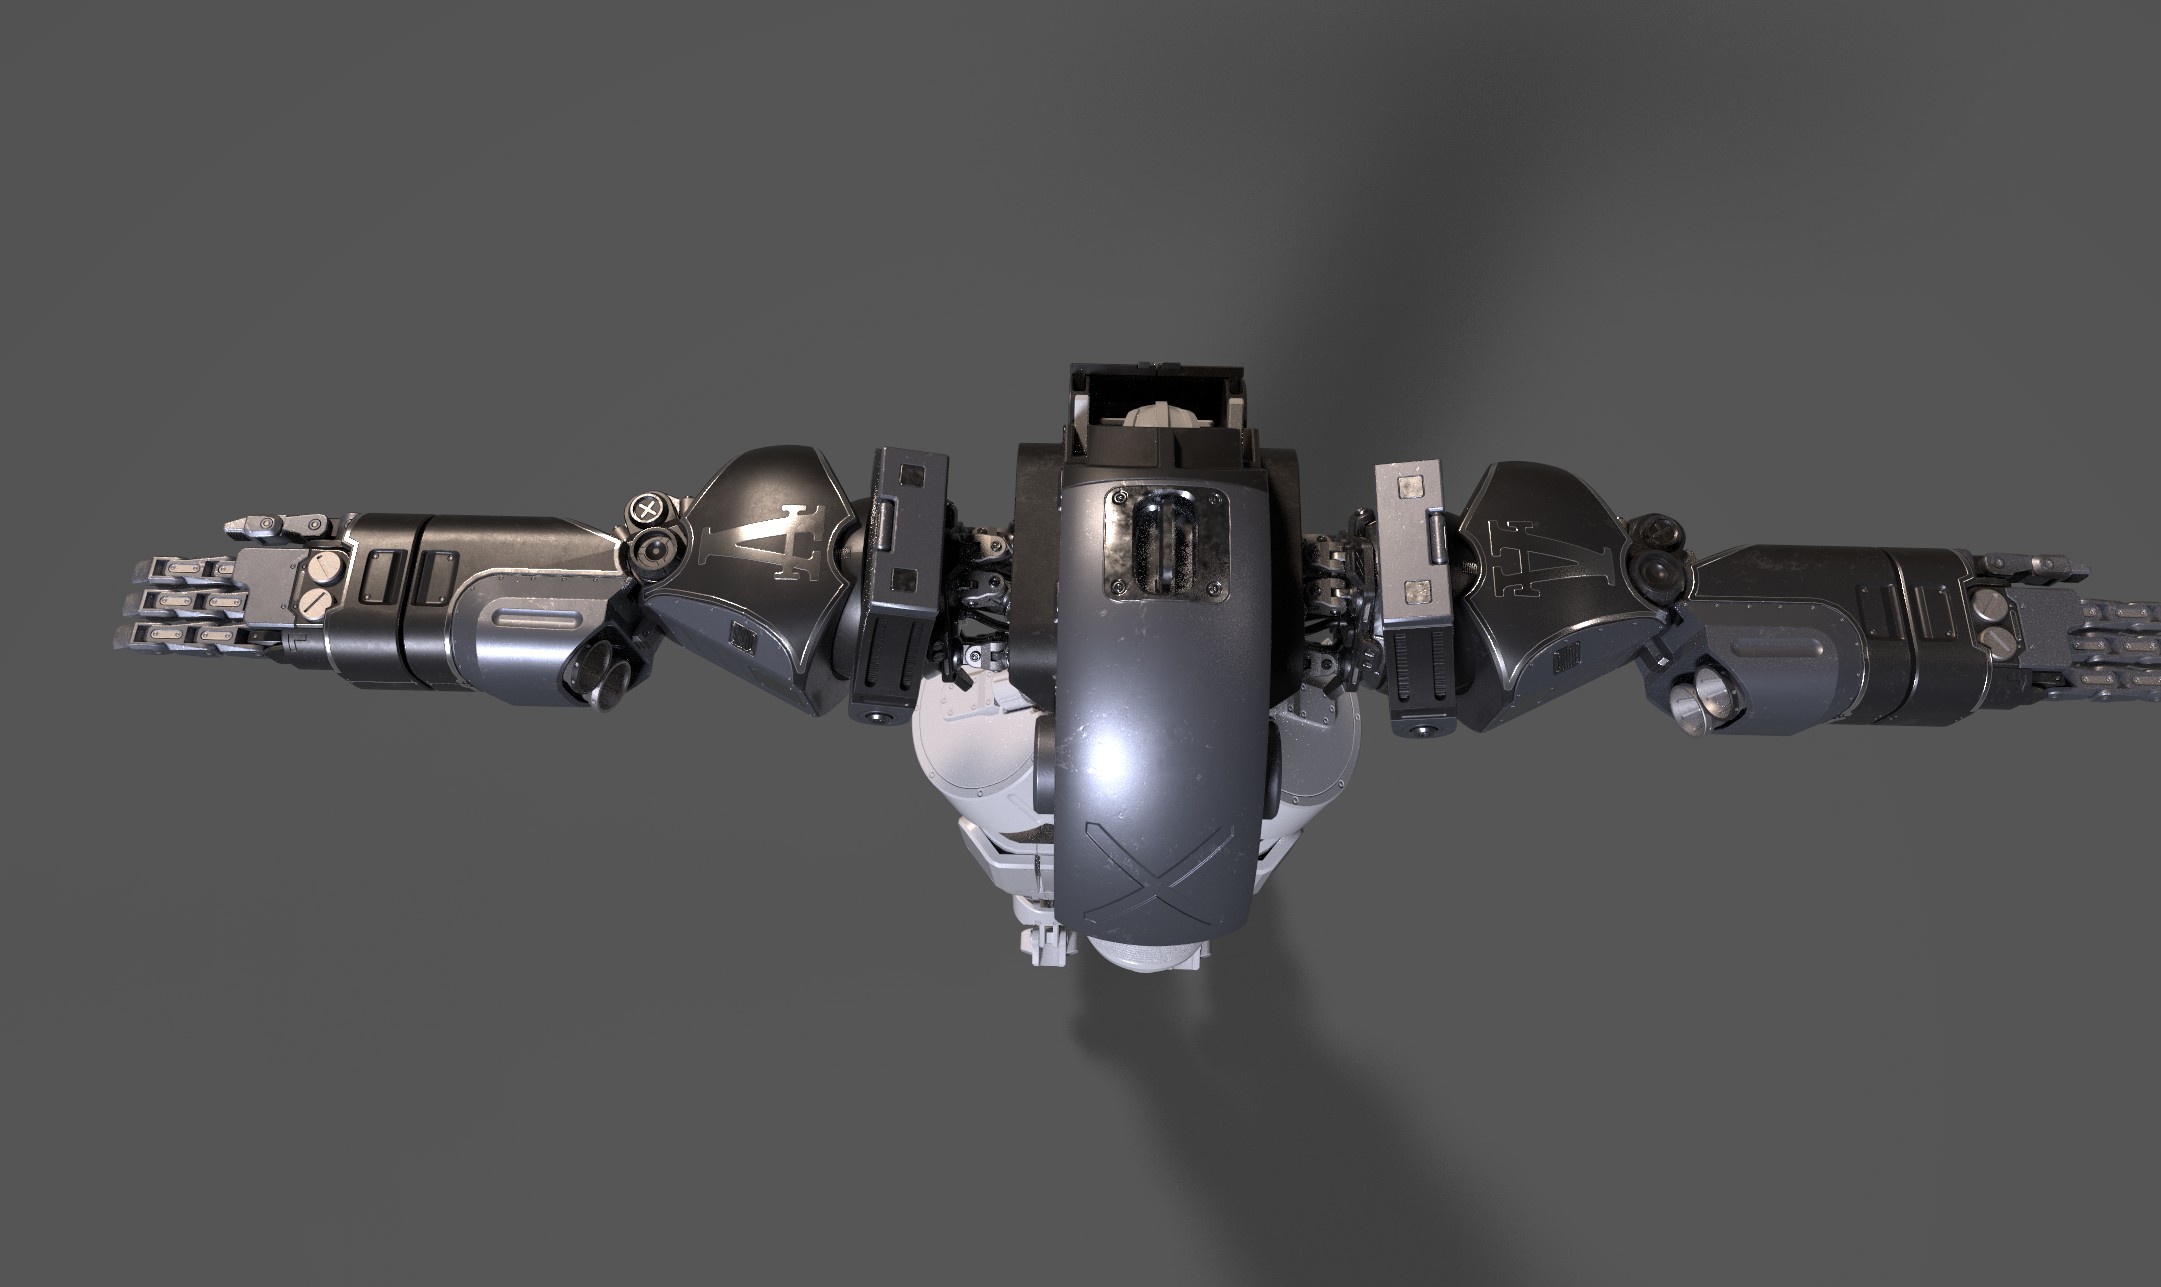
A few renders, trying to get something that looks alright.

Edit:
Just gonna sneak this in here so i’m not making unnecessary replies:
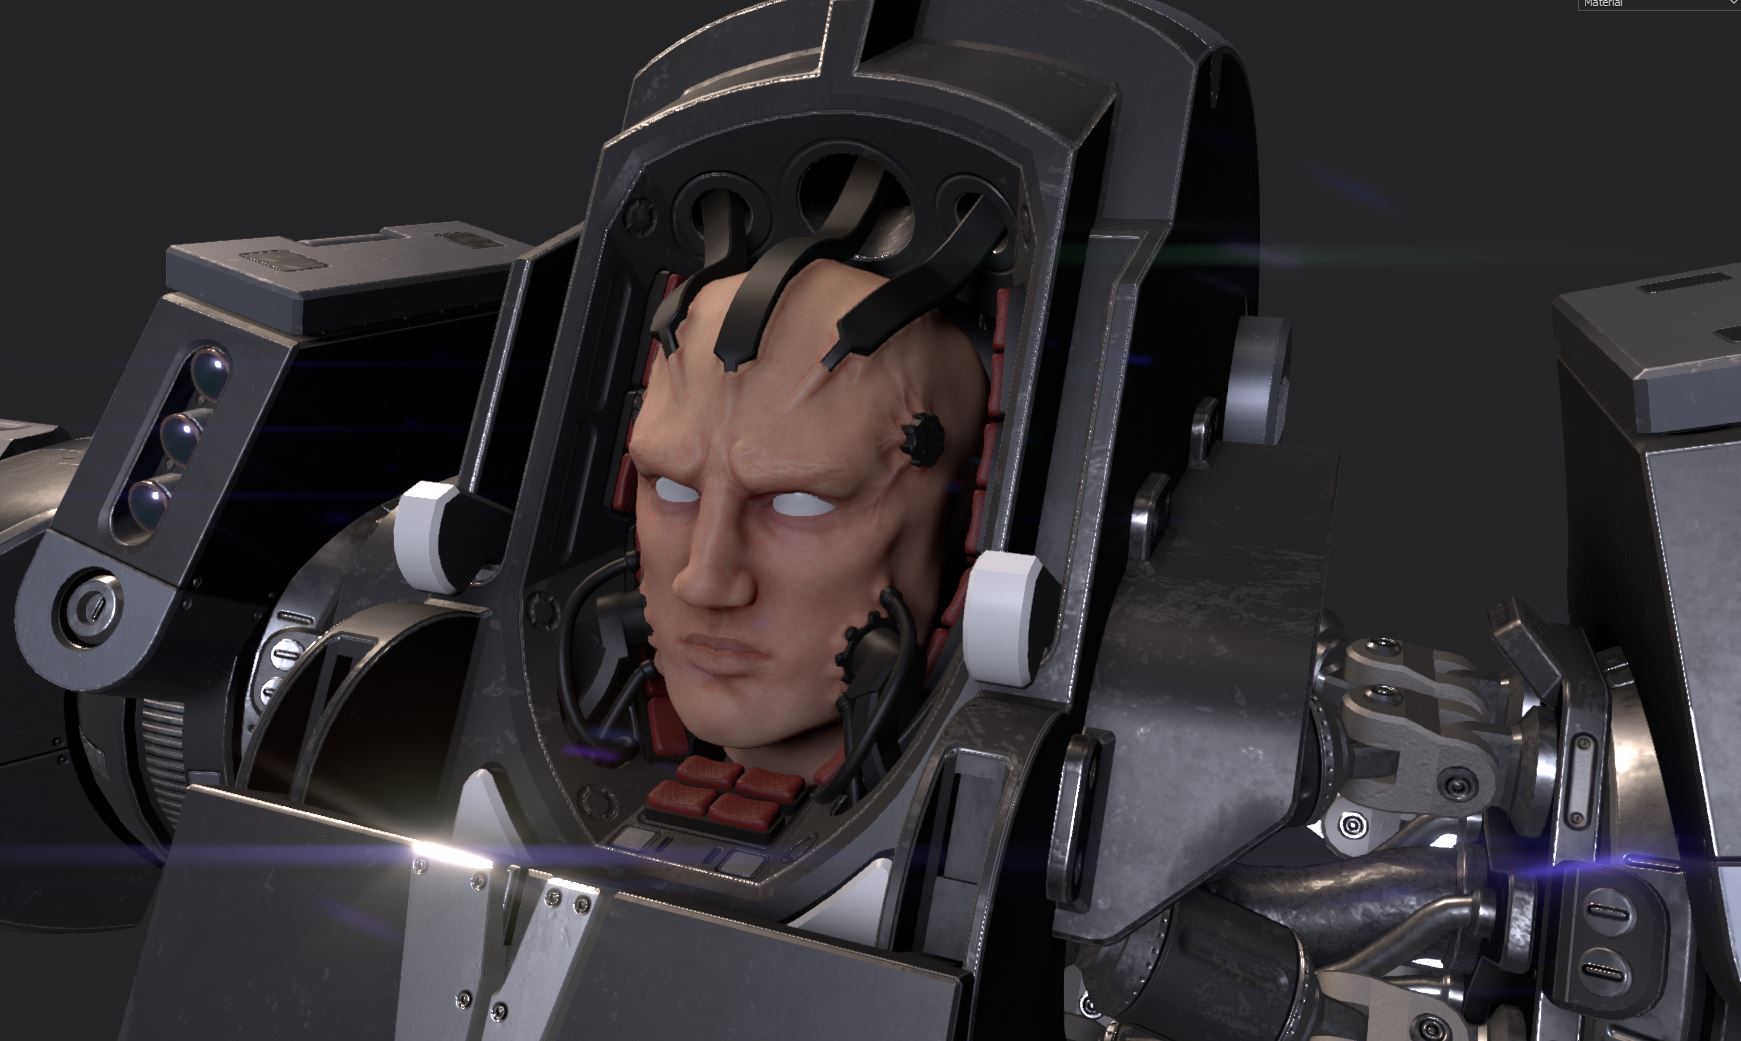
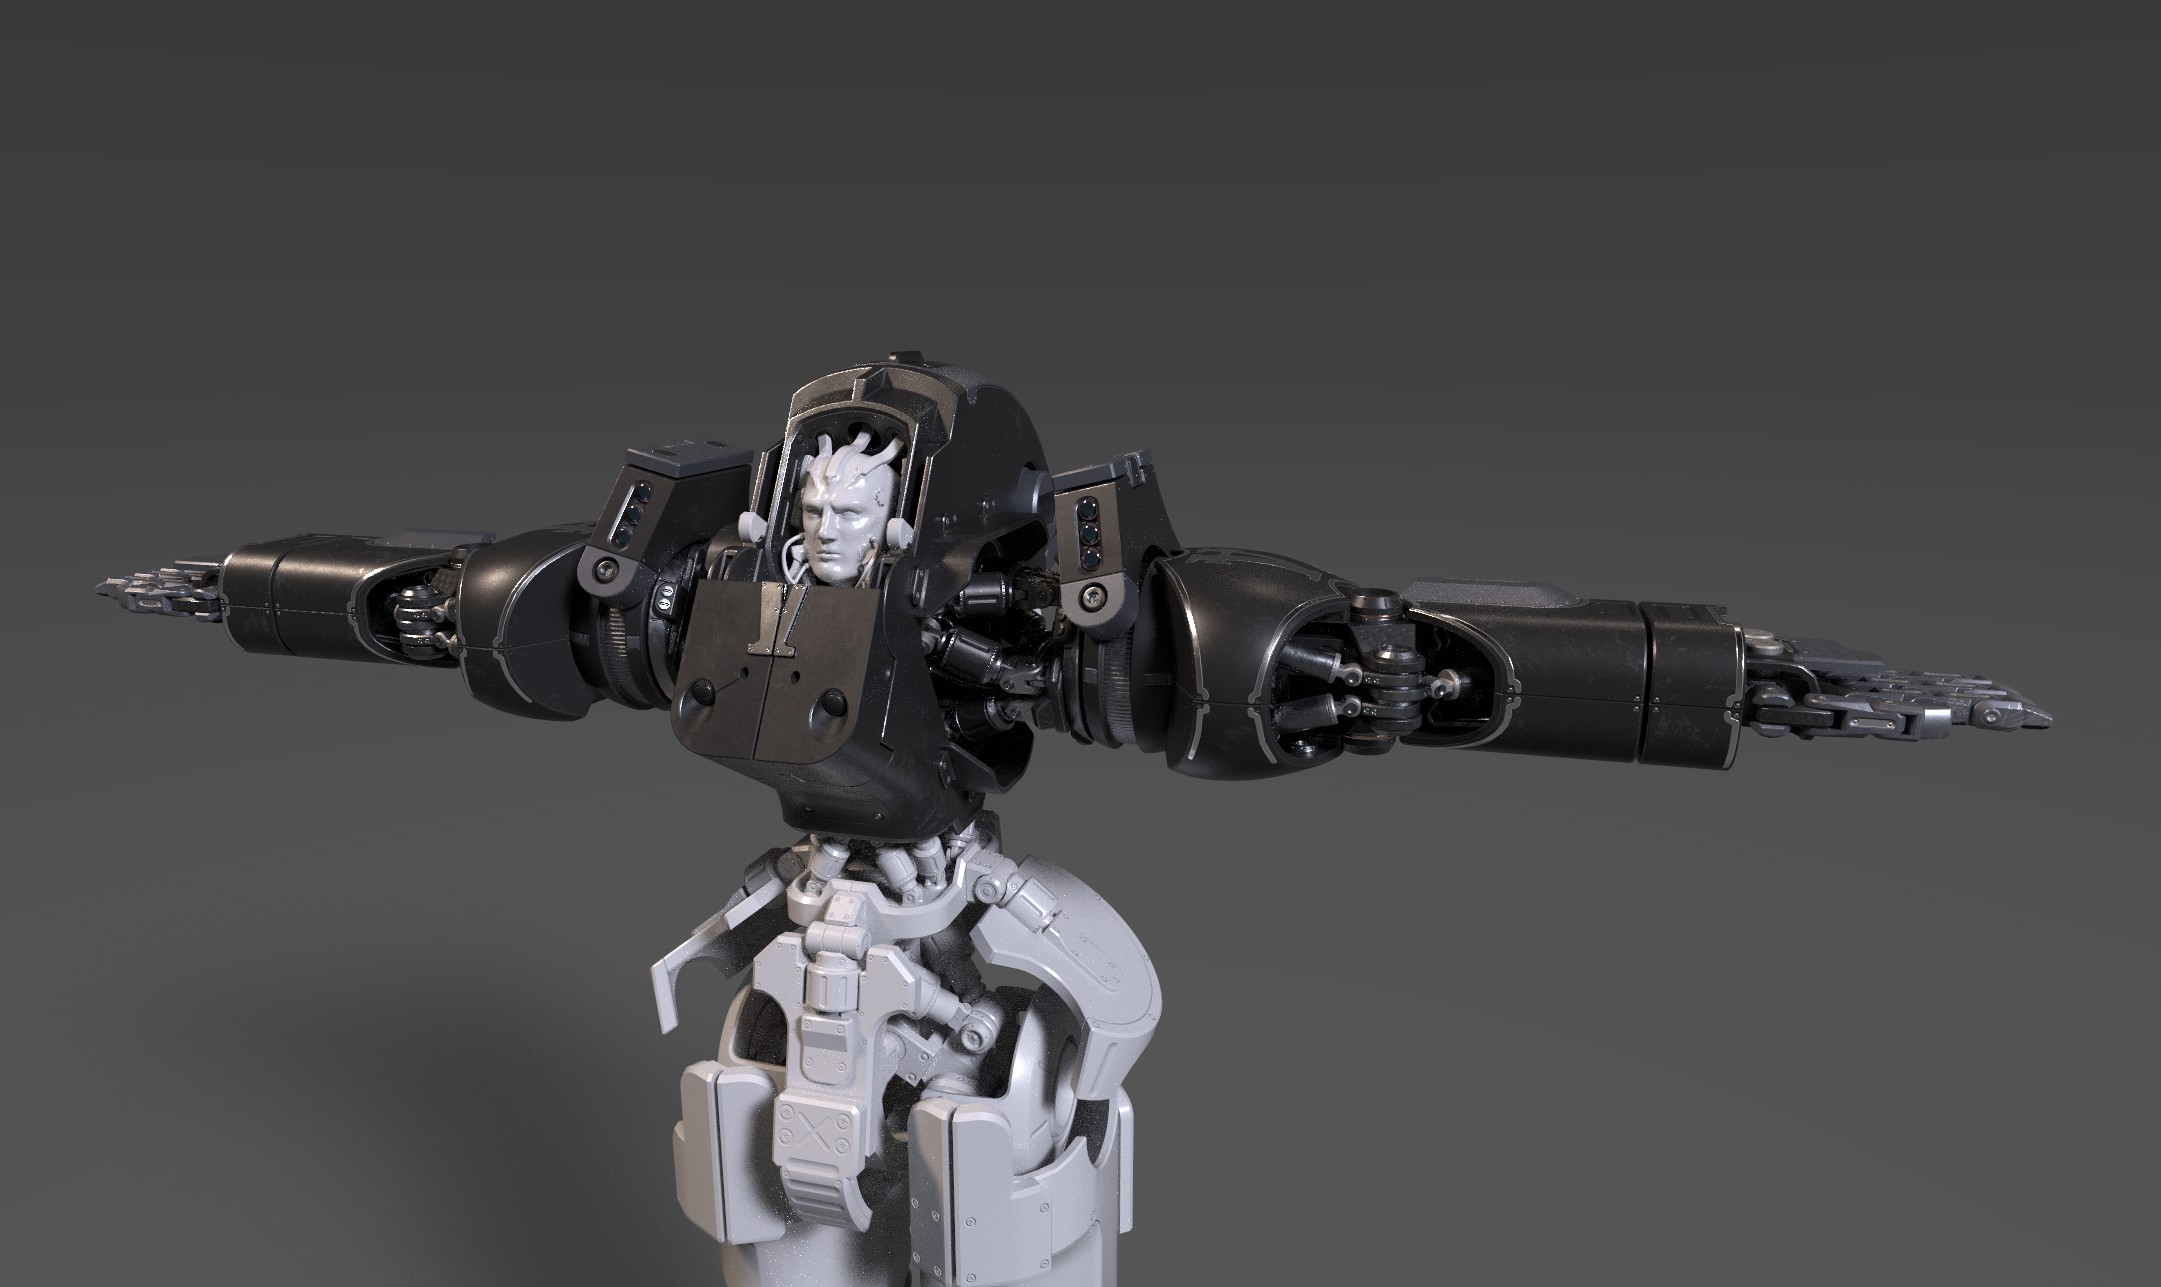
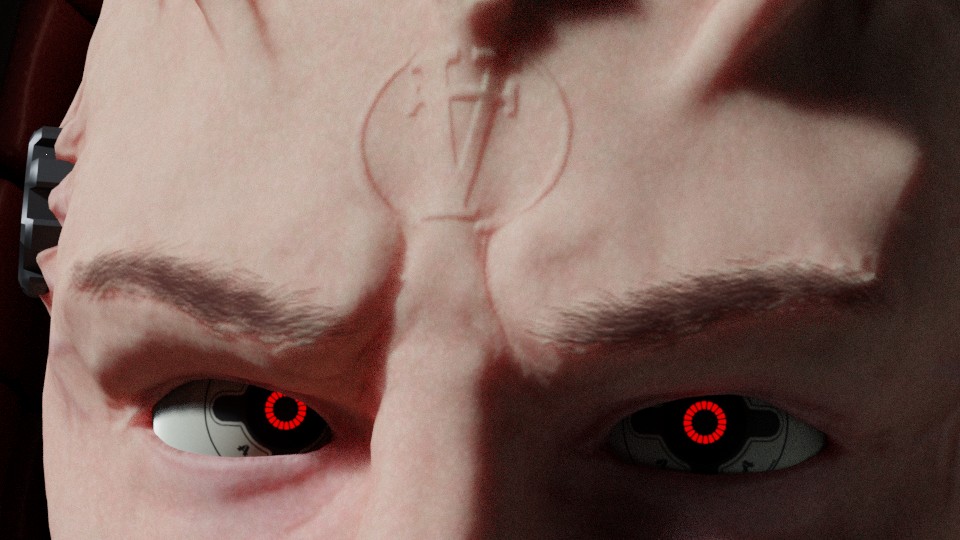
I’m unable to actually render this view in IRay since there’s a mesh/texture set in the way (currently hidden in the viewport) so I just took a screenshot, complete with ridiculous flares, just for you guys. It’s nowhere near finished, but I got excited at the progress and wanted to share. It’s kind of hard to tell, but the head is using the realtime SSS feature in Substance Painter.
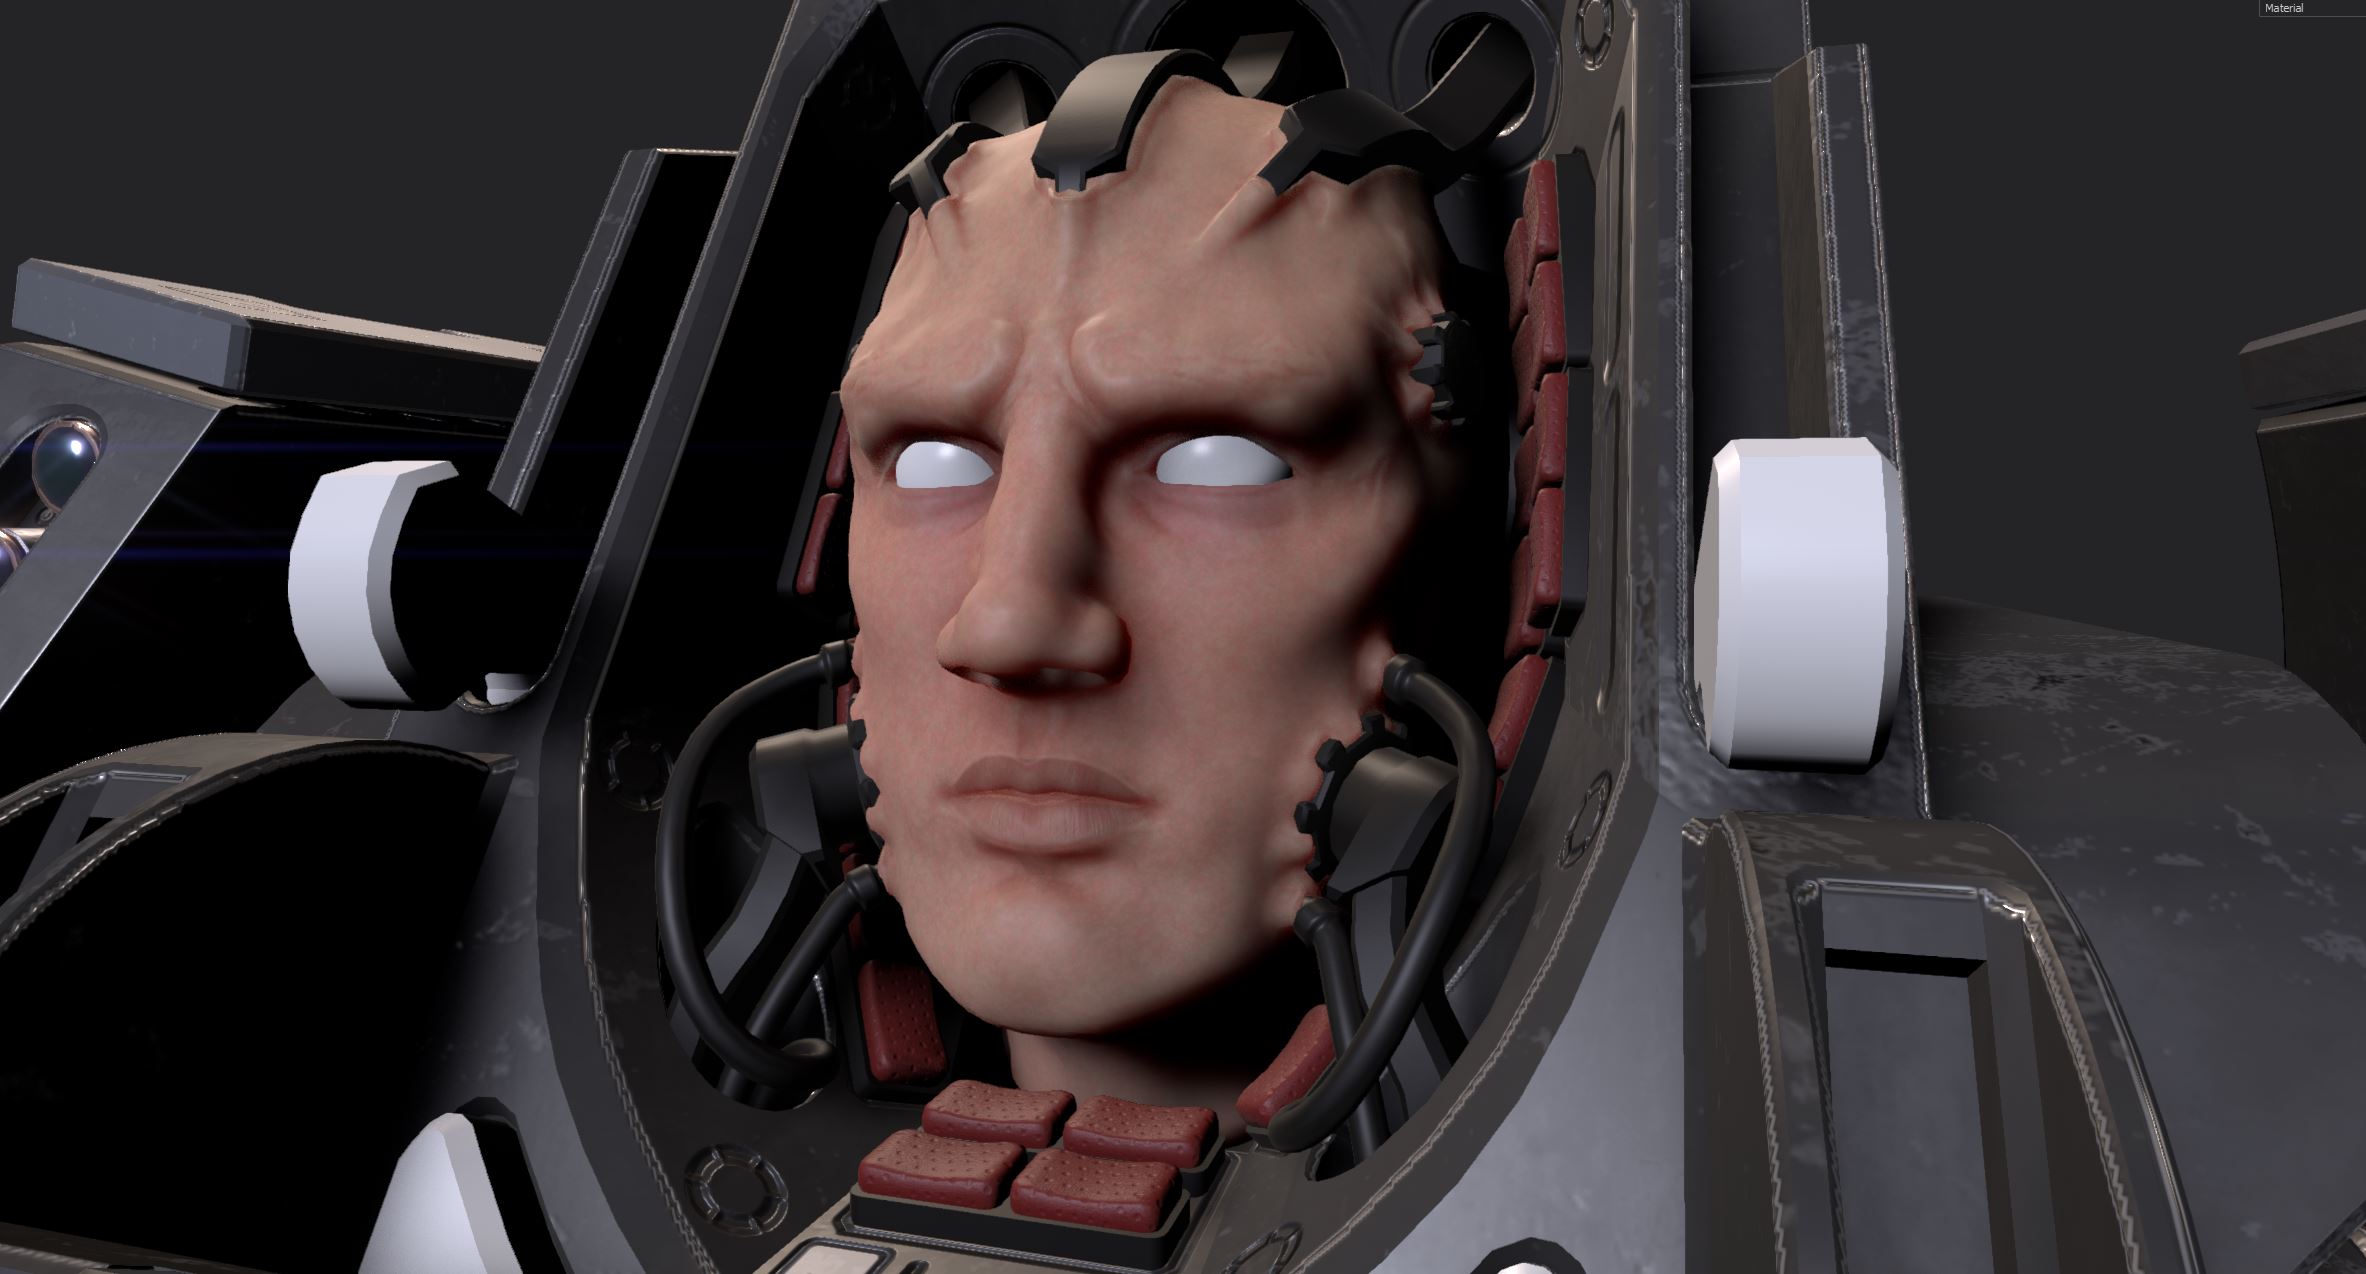
Finally got around to exporting some of the face textures and messing with them in blender in a couple different lighting scenarios. I wanted to see if the face holds up to SSS in Cycles instead of the realtime faked SSS in SP.
I had to enable a bit of specularity in addition to the metallic/rough maps otherwise the face looks too matte and has no highlights. I’ll need to mess with the roughness map to see if I can do this without specularity. I also noticed that the face is in serious need of some micro details like wrinkles, pores, facial hairs etc. I also believe i need to use a map to control the amount of scattering that occurs around the thinner areas (nose/eyelids). If anyone has any actual experience with texturing faces and can provide some guidance/tips here I would be very grateful.
Edit:
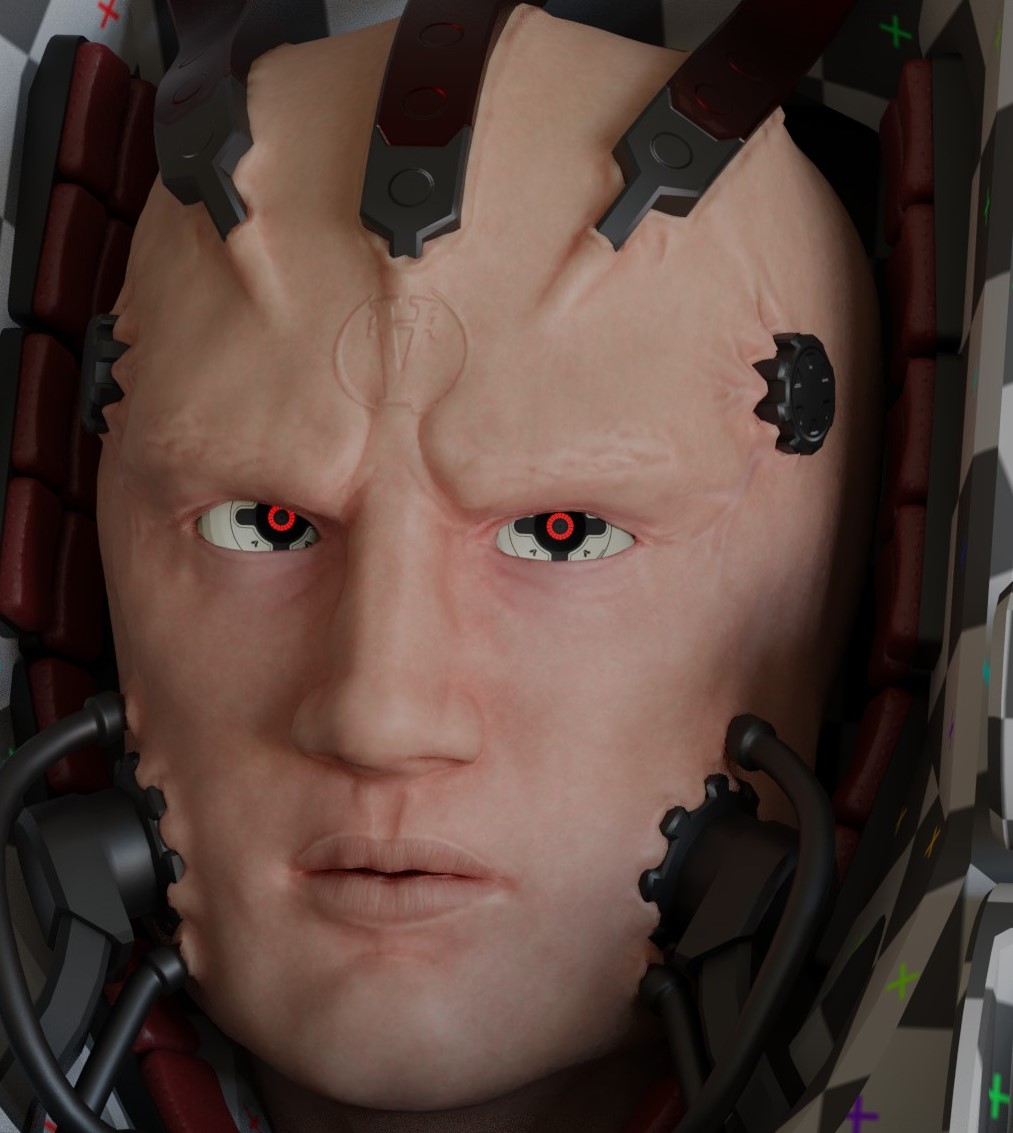
Just wanted to throw this test render in here. I updated the face texture to include a little more variation on the skin and added eyebrows. It still looks a bit too matte, but better overall. Also discovered that SP was outputting my normal maps in Direct X format instead of OpenGL, so I fixed that.
1 Like
Hey, very nice work! I see a lot of dedication here! Have you tried the random walk method in the sss shader? (It’s avaliable in the experimental 2.79 daily builds, I’m currently using the 2.79.6) I find it to be much more believable and helps avoiding some strange lighting issues near the lips and eyelids of my characters.
I’m not sure what you mean by hoping you can make the face look less matte without specularity.
Everything naturally has some specularity to it, and if it doesn’t it will look too matte. Skin has a base roughness that appears fairly matte, but still involves a glossy shader (or Specularity in the Principled BSDF).
Skin also has a natural coating of oils that give it a bit of a sheen in places. Because the amount of oil varies greatly by location, you’ll want to use a texture for it. If you’re using Principled, that texture would go on the clearcoat slider (and maybe an inverted version on clearcoat roughness? I’m not sure, that warrants some experimentation).
I should have clarified a bit more; I am trying to stick with metallic & roughness maps for this project instead of specularity/glossiness. For some reason the textures appear a little more matte in blender vs IRay. I have been modifying my skin texture in Substance Painter to try to get the look of normal ‘oily’ skin using the mat/rough workflow.
RBancone, I will definitely check that out. I’ve been using 2.79b because the last daily build I tried (months ago) gave me some weird artefacts while rendering a scene. I think it’s time to give daily builds a chance again though.
this is bad ass, but I do agree with you about the waist. too much open space or it doesn’t look sturdy enough for the rest of the machine. too much open space i think around the top of the legs. if you just scale the belt area on the Z and scale the penis region on the X to cover the first ring on the hip i think it would look better.
that was nit picking… like i said it’s badass, way better than I can do
Thank you clyde_thompson. I plan to address that by adding in some cables/hydraulic hoses in there if I have time.
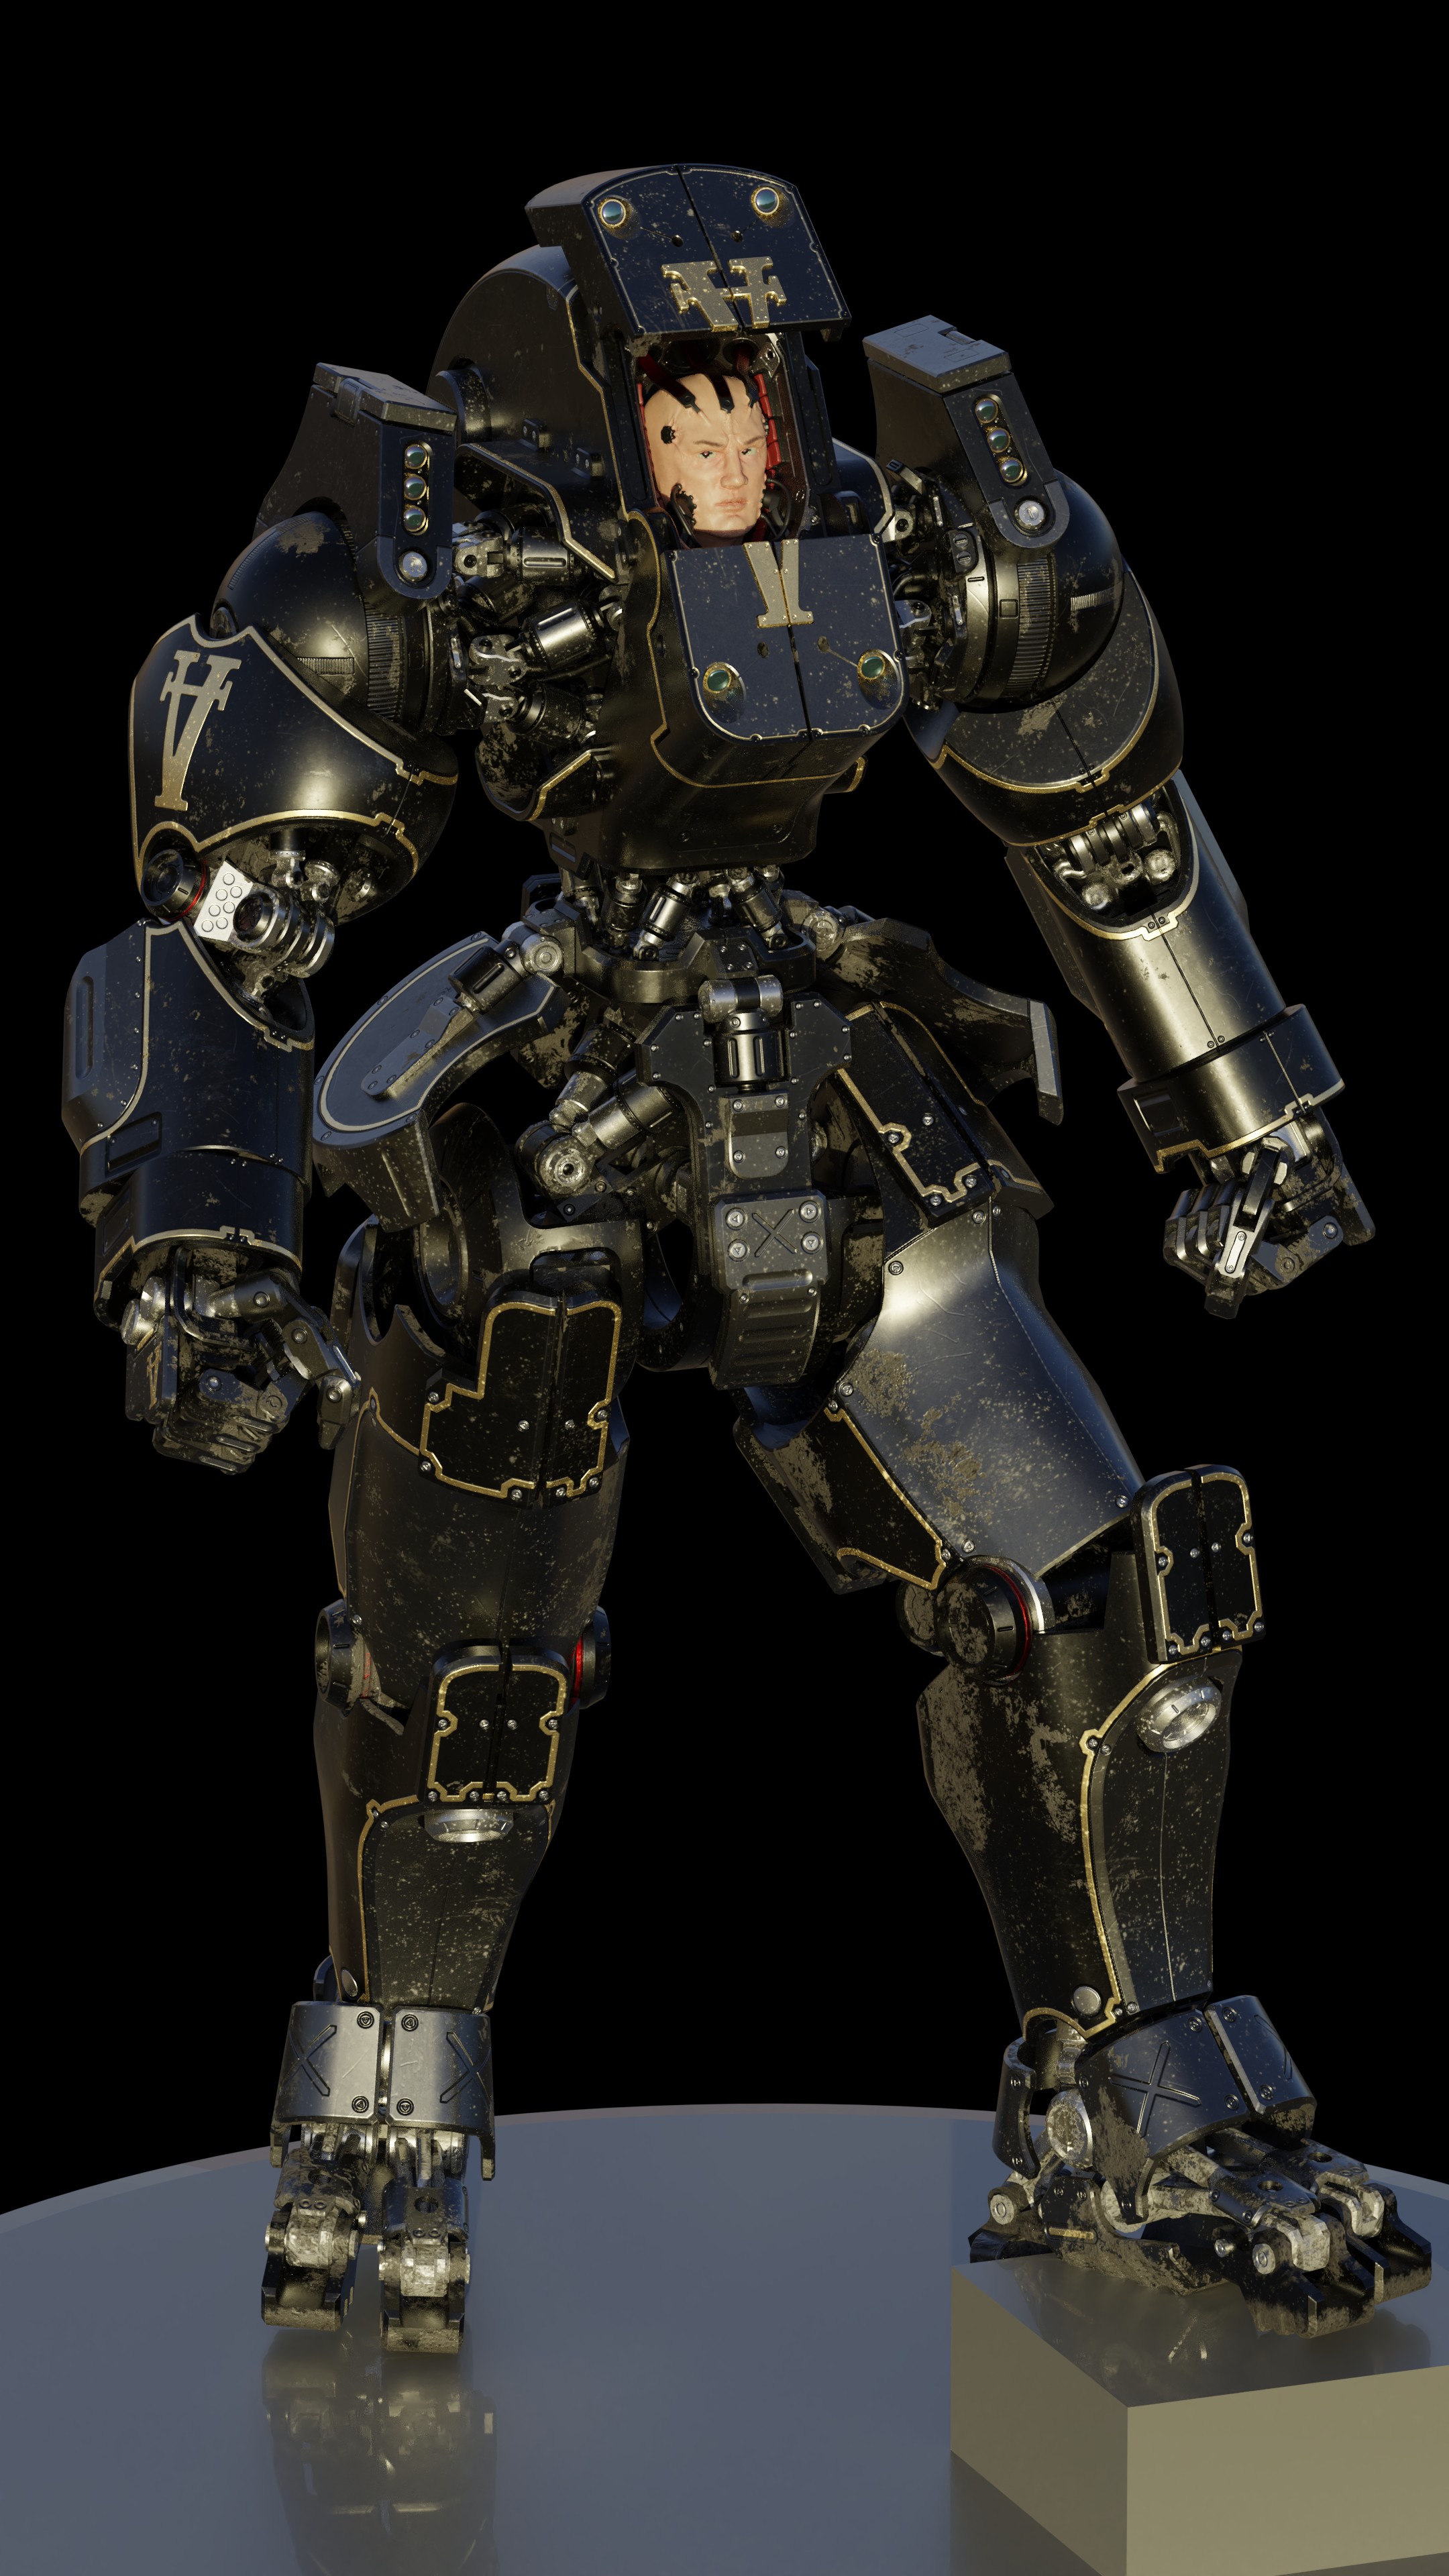
I finally got the texturing to a spot where I feel that it’s close to finished. I may tweak the dirt/grime a bit because it looks a little overdone. For now I’m going to focus on setting this up in a better pose for a final render. Also some of the proportions on the head are bothering me.
I tweaked the pose and lighting a bit. I plan to add some smoke/sparks or something in background, something to replace the placeholder ground, and a banner/flag where the pole placeholder is.

Added a little scenery and tweaked some other things a bit:
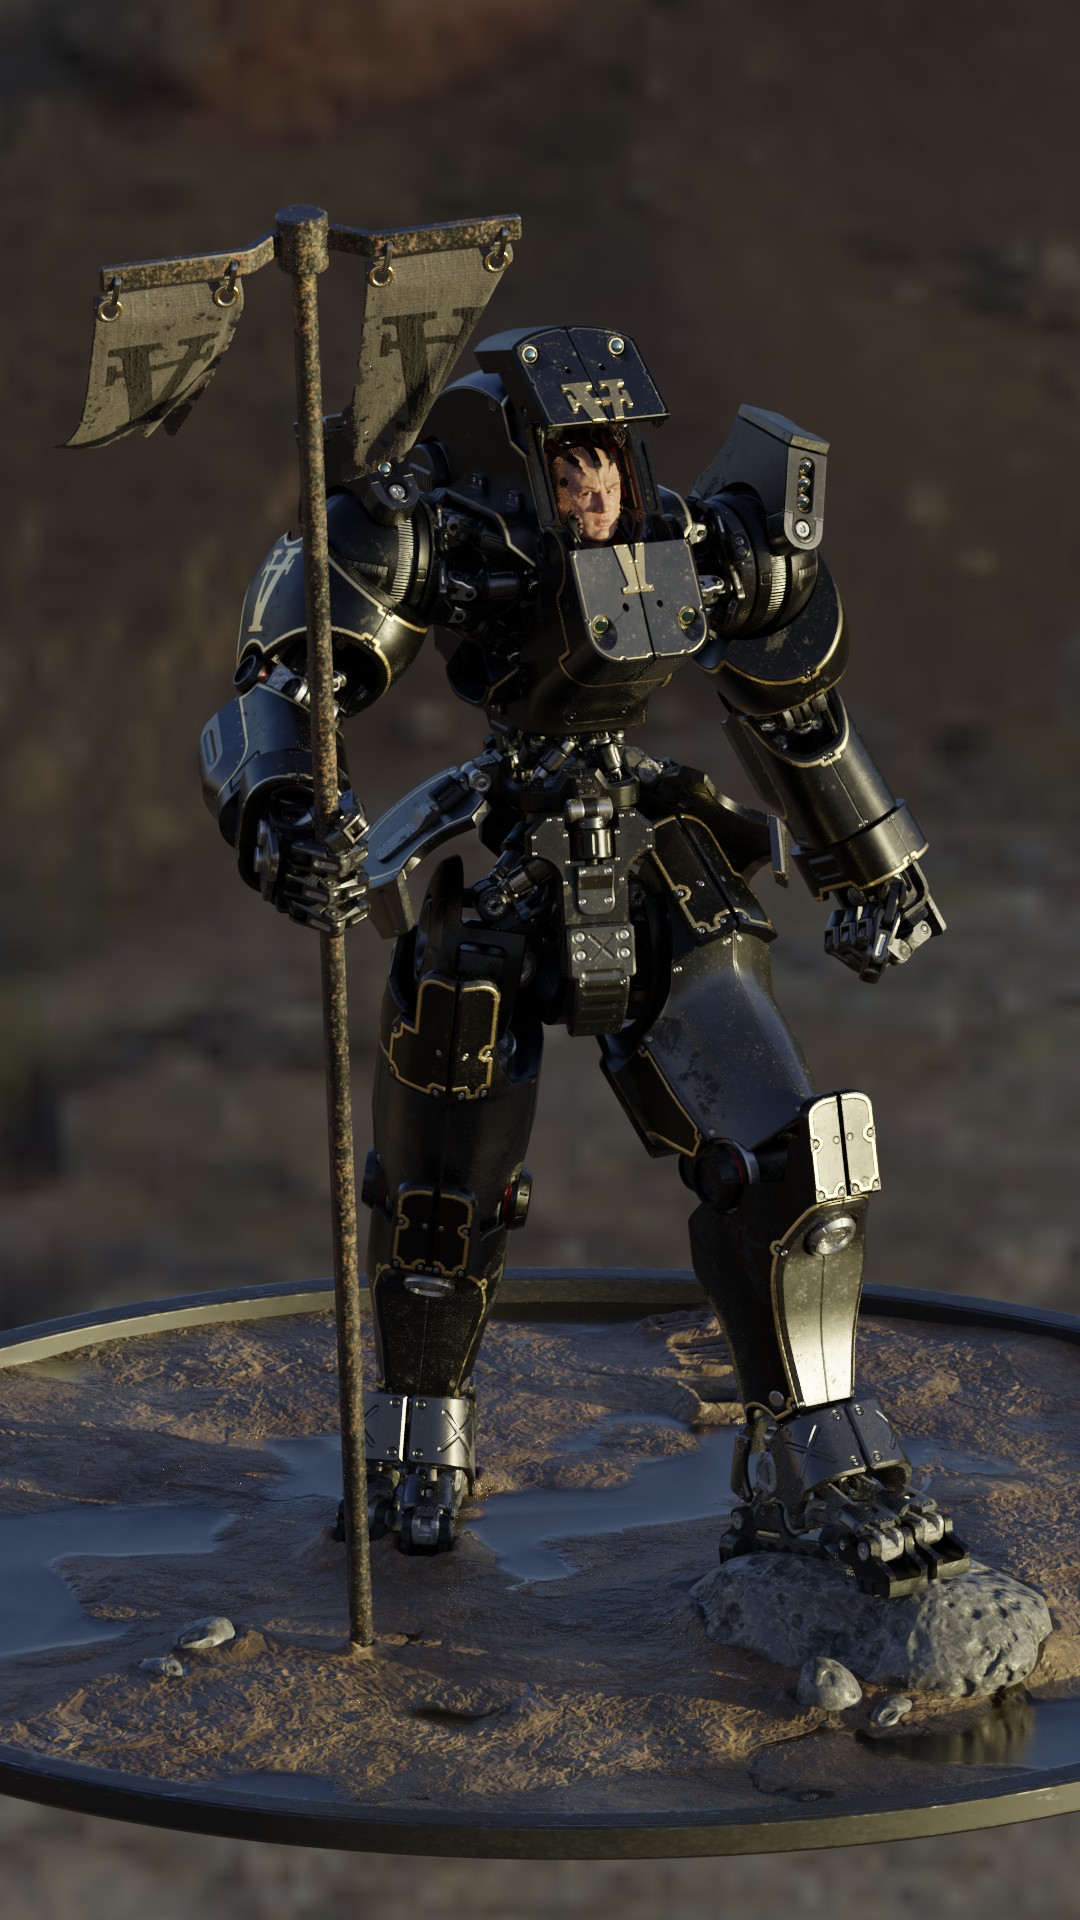
The lighting isn’t final and I need to add a few little things here and there. 95% done finally.
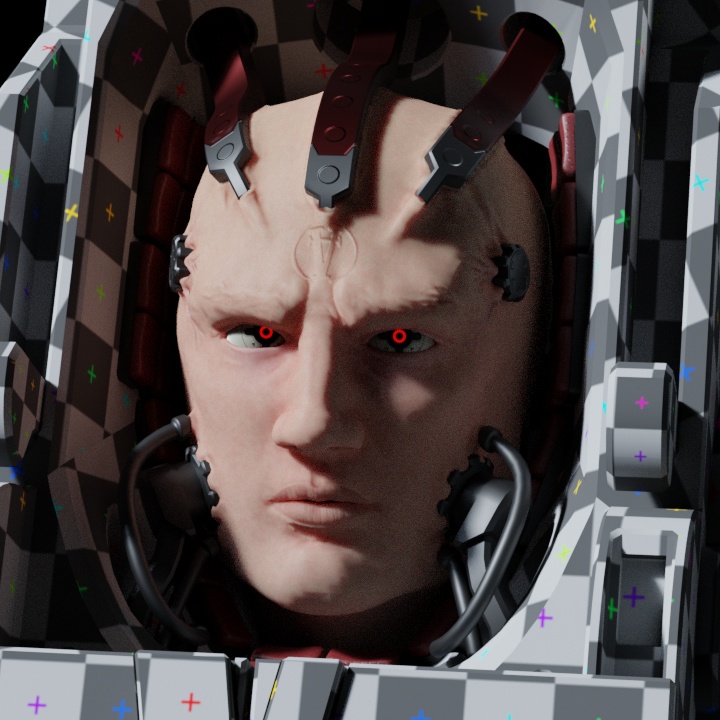
I gave the Random Walk SSS a try and it does look quite a bit better. However I am getting some strange artefacts due to my low poly mesh. If you look at the chin area you’ll see the dark/white lines formed by the acute/obtuse angles where faces meet.
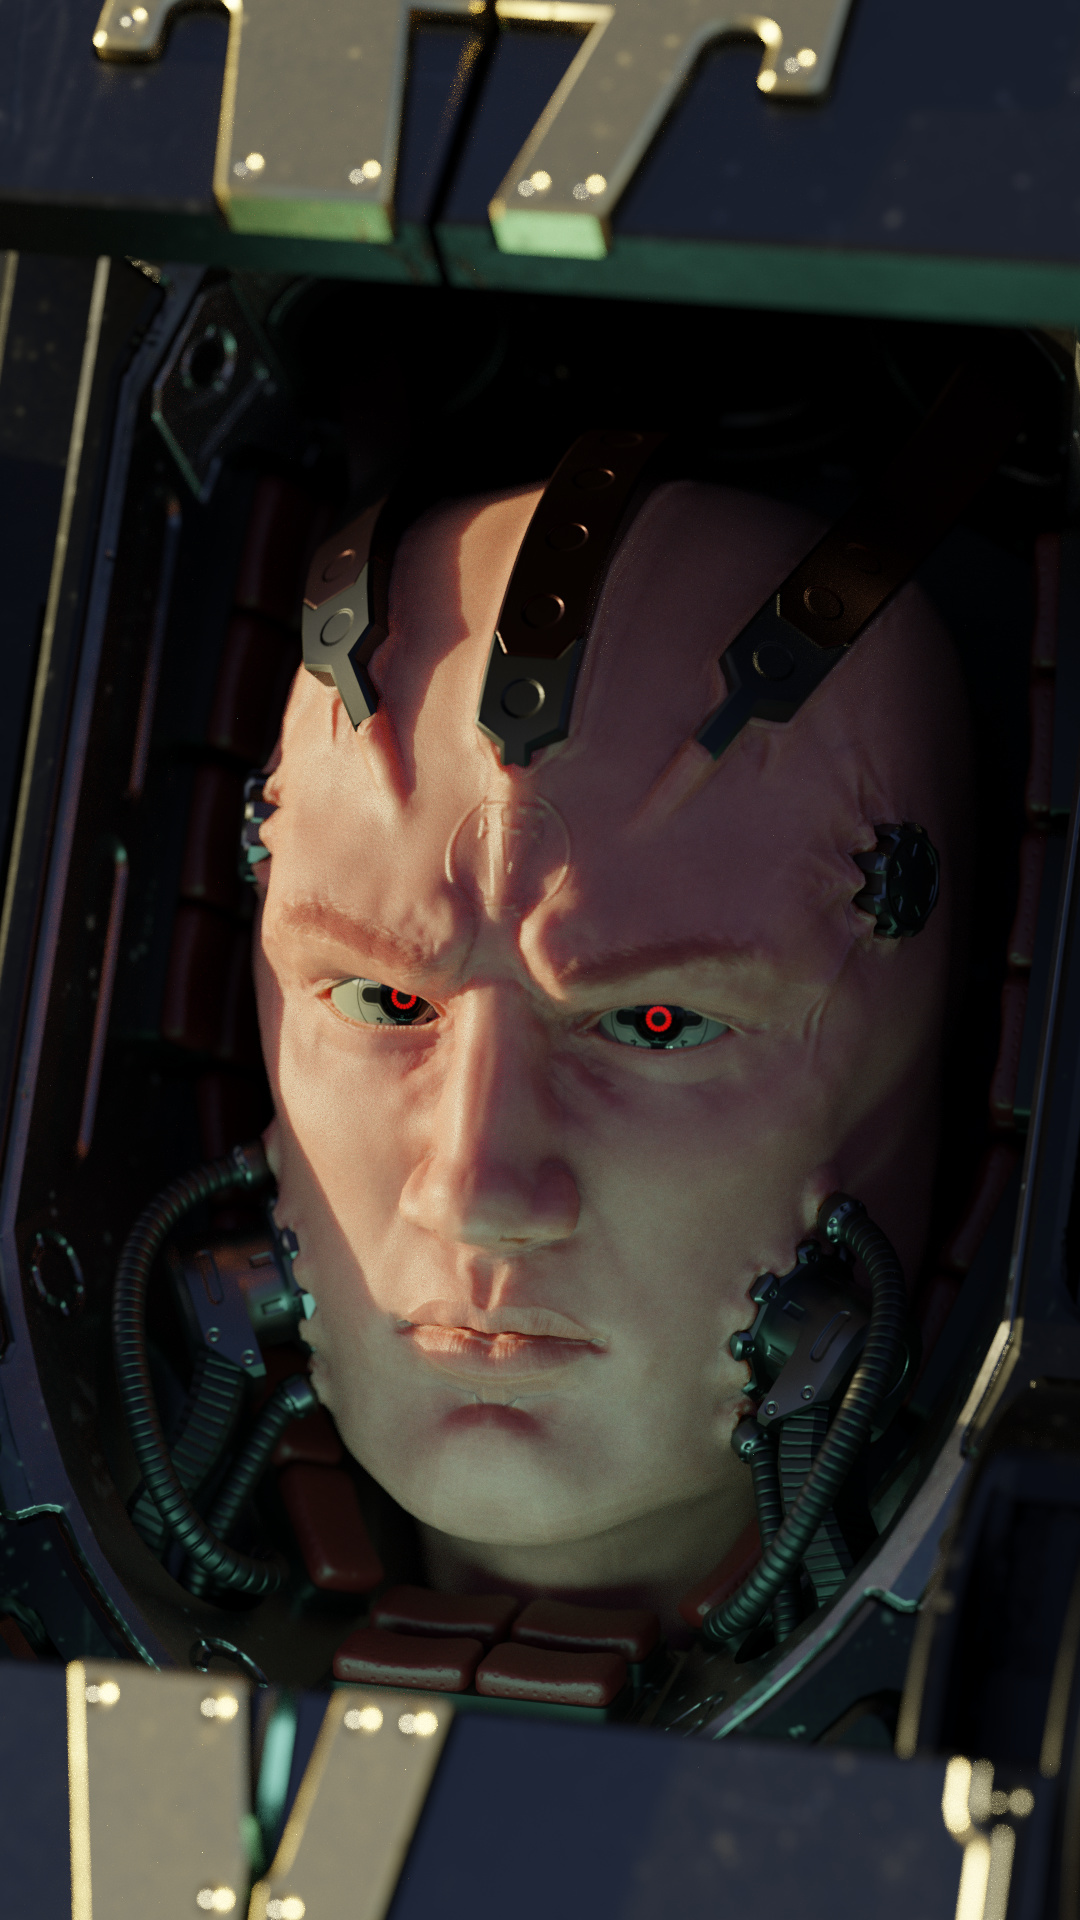
Any ideas how to work around this or get rid of it?