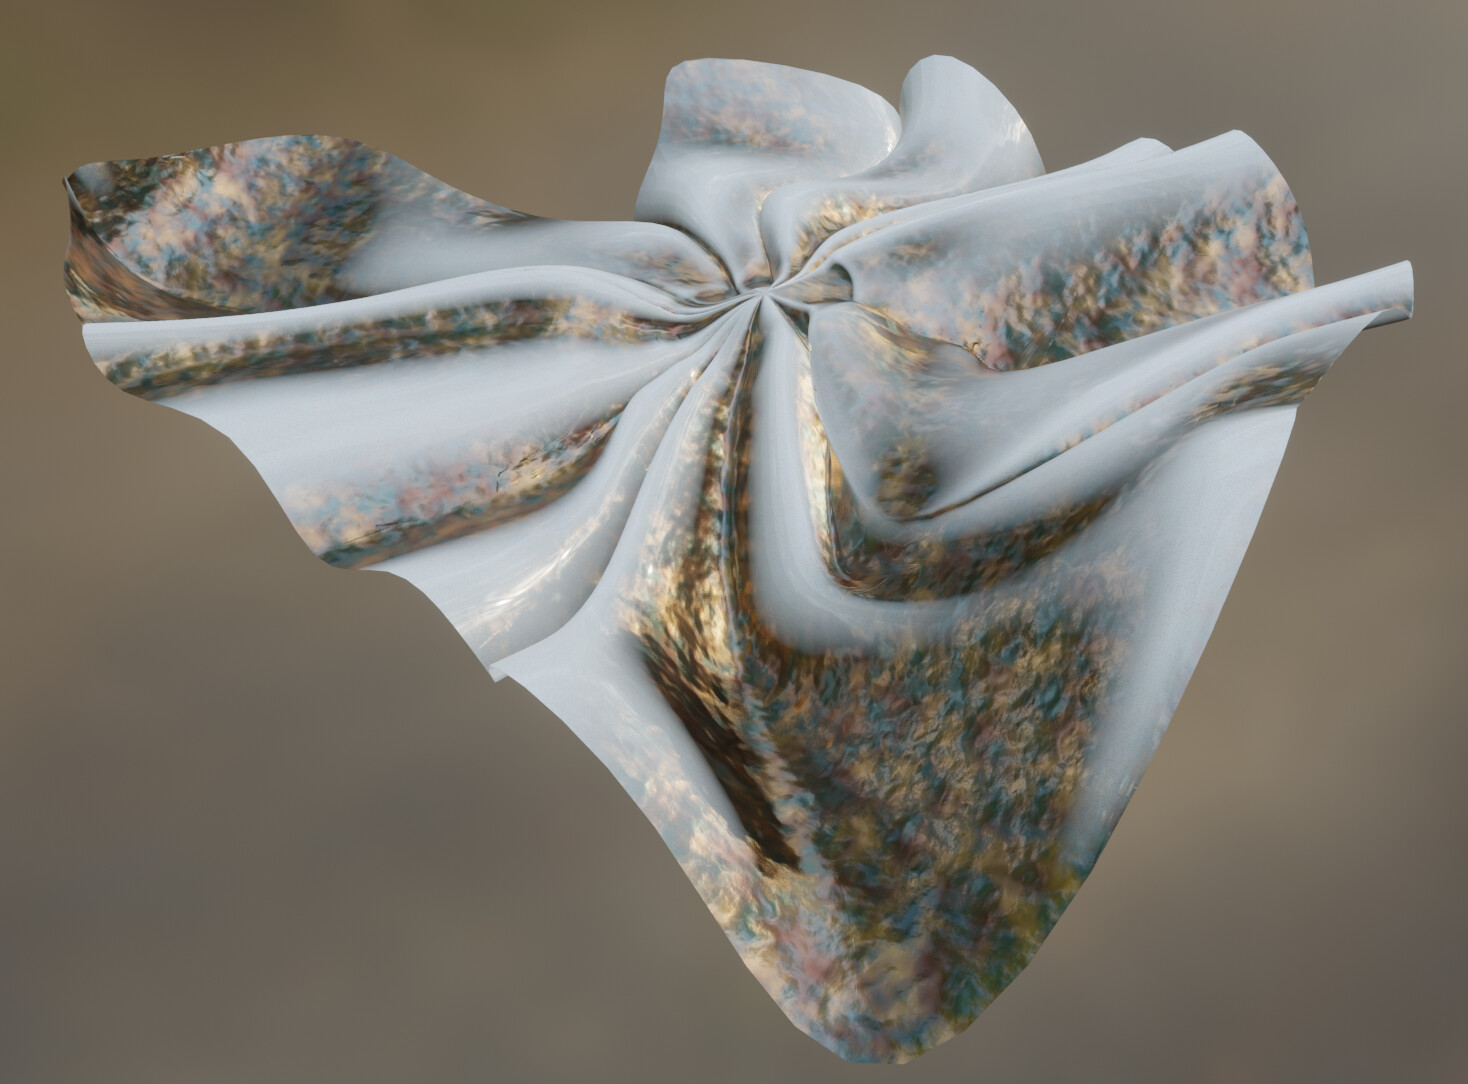
I have made a folded, pleaty shape that I want to texture with two materials mixed together: one soap like for the general surfaces and a rusty copper one which will go into the folds.
I am starting try outs with texture paint but I realize now that I am getting this strange grid / mesh like in the bump map of the copper.
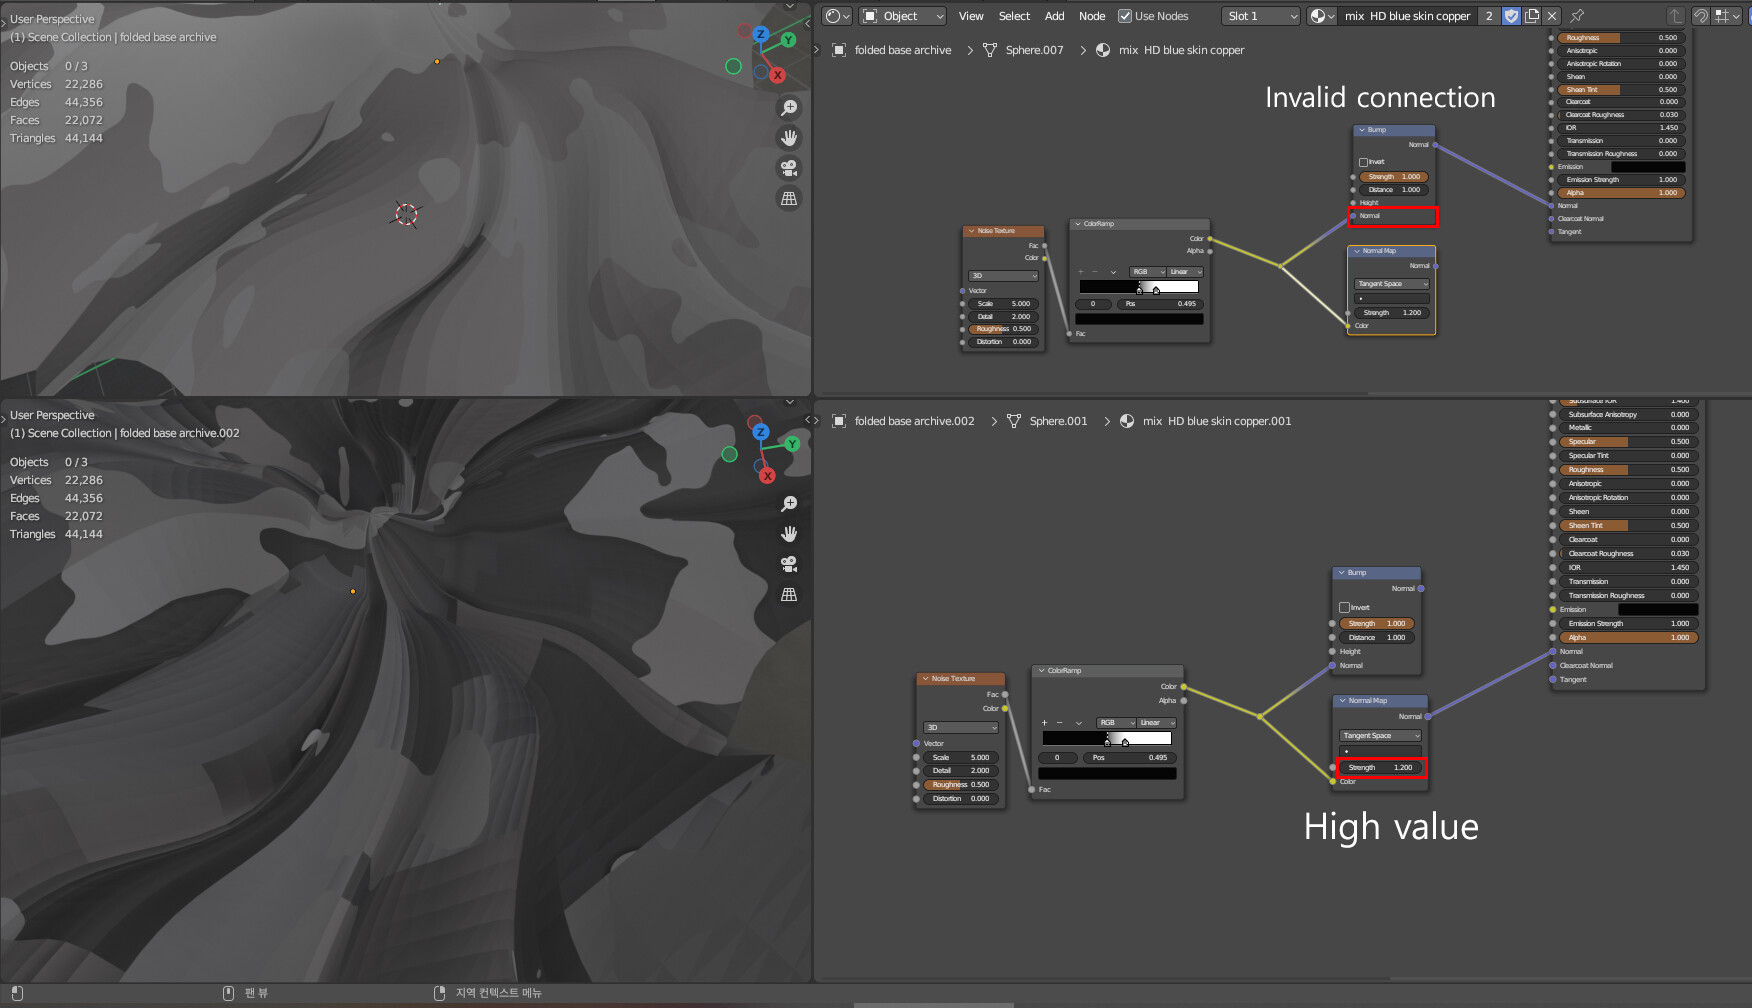
It looks like something is just not quite right with the bump map. If I up the noise scale, I get this grid shape and, if I up the distance of the first bump map, I am getting it too (and quite strong!). Thing is, I would love to have some bumpiness without this strange side effect but for the moment, I can’t go as strong as I would like to without having the disgracious artifact.
I tried to export it as an obj in order to to simplify with a free software called autoremesher. Interestingly, it exports the mesh with the same triangle grid that shows on blender (even though, on blender, the mesh is made out of quads!). The remeshing wasn’t great either
By the way, don’t you think that it would be better to use dirt paint in vertex painting to achieve the effect you want instead of using texture painting? Or maybe pointiness?
From your image, I see you have something plugged into the normal of the bump node. Could this be in cause? Is this a normal map and is it set to non-color like it should?
By the way, it seems I can’t access your file. It says I need permission.
Hi, thanks for your answers. I am going to give it a go now. @Calandro, I don’t know what dirt paint in vertex painting is. As far as my knowledge goes, I understand it as doing a custom brush in texture painting. But I feel like I am wrong am I not? @etn249 Sorry for the file, I have changed the permissions. It should be fine now.
As far as I know, Blender’s bump is imperfect and it’s a known issue. I have seen people complain about bump artifacts between polygons in certain situations.
I think you have created a case that makes those flaws easily visible: you have a low frequency bump, with details that cross the borders between multiple polygons, on a reflective surface, and you are zoomed in close to see it easily.
This seems to be caused by the second bump, the low detail noise plugged into the normal of the first bump node.
I would solve this in one of 3 ways:
Increase the detail level of the noise texture that’s at fault or change its scale so the detail has a finer grain rather than big smooth hills.
use more subdivisions at render time. This makes each polygon smaller and flatter compared with its neighbors, making the artifacts less visible. At 5 or 6 subdivisions, the problem seems hard to see. I know this is a lot of divisions, but if you are going to be focused so closely on this object, it might be worth considering and would be the easiest way.
Instead of bump, use true displacement (at least for the low frequency details at fault). It shouldn’t have shading issues like flat bump does.
No. dirt paint is an automated process in the vertex paint mode that allows you to calculate the areas near corners and intrusions to create a dirt kind of distribution. That would give you the possibility to control the distribution of your materials using an attribute node in your shader to set the distribution of both materials based on the vertex paint you created automatically.
By the way, is this the kind of result you wanted to achieve? In this image I’m using the vertex paint technique I said before. You can also use a colorRamp node to control the mix of the materials based on the vertex colors attribute.
Another problem I found in your file is that your UV distribution is a mess at several points, with overlaps everywhere. That would give you problems working with texture painting, no matter what you do.
I am indeed looking for trouble with this bump map! I will give a go to your suggestions. We are working on a VR application on standalone headset so I can’t really go too high on the subdivision
@Calandro, here is a tutorial I have found on the dirt vertex paint.
Vintage 9 years old Blender Guru one, this tool has been around for a while!
I already have a question, 9 years ago, Andrew Price would just press T and access all the options in the dirt paint brush (see beginning of tutorial) but this has apparently been changed since then!
Do you know where to access these options?
Thanks @Calandro, sorry for the slow response, I have been unfortunately a bit swamped with other things.
I take good note of the compression for transferring the files. Thanks!