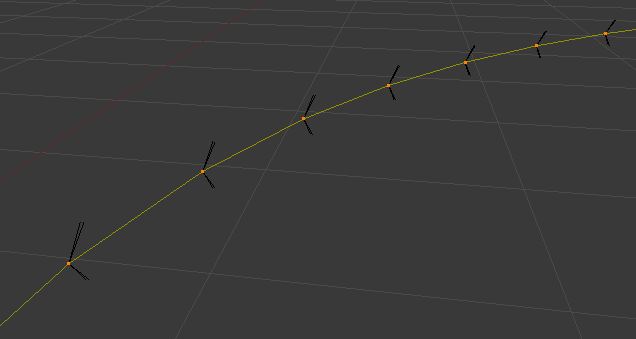
The problem that I’m facing is that when I select the edges, and use the ‘Convert to Curve from Mesh’ tool, the tool follows the edges too tightly, and creates two nodes at every point to simulate the straight edges of the mesh. Here’s a picture:
Is there a setting somewhere to tone down the tolerance on this tool, so that I get a smooth bezier with the only nodes at each end?
I tried out the curve simplify addon, but no matter what I set the maximum error to, the number of points doesn’t change. The resolution setting doesn’t seem to affect it either.
I made it by using the mesh to curve option on geometry that isn’t included in the file I attached. I could make the bezier by hand and adjust the handles manually, but I plan to make more complex things in this manner in the future and would like a easy way of doing this.
Well there is no reason why you couldn’t have made the same shape with a curve from the beginning. There are 2 points that are away from the over all shape select one and then a point on the main shape and Alt-M to merge the points together. Do this for the remaining point left over. Then remove doubles by selecting everything and pressing W and then selecting remove doubles and 12 points should be eliminated. Back in object mode convert the mesh to curve. You should no longer have any problems.
The reason there were 2 control points at each point was that each segment was converted to a curve element. All you had to do was remove doubles before converting.
Thanks for the remove doubles tip, I was looking for a comand like that. Now I have only 16 verts like I should, but I’m still stuck on converting that to a two node bezier curve. The simplify edges script isn’t working properly.