Just done a test with MartinZ’s, node (plus my mods) on the hall scene. Looks really good. I particularly like the reflection that the stair wall light is giving in the foreground. This is almost completely absent from the scene without micro roughness enabled and the reflection from the doorway and glass panel are much cleaner.
Just done a test with MartinZ’s, node (with my mods) on the hall scene. Looks really good. I particularly like the reflection from the wall light on the stairs in the foreground - at the same roughness level - this almost invisible without micro roughness.
Oh, was it my node setup that had the values inverted? Might be. I thought with curves you can adjust the softness by moving the black point up so the effect does not go to 0, but since low values are often needed for roughness in general it would not be that practical to do with the curves for the upper end that’s why I would use multiply. The idea would be to create the curve looking at sample photographs. I think to simplify this gamma could be used. Gamma should calculate values for RGB, so that’s not necessary, one could use Math node with power to get same results with one value - I am not sure if this makes any difference though. I guess that’s OK either way. Anyway, I think we have plenty of ways to control the effect. It could be worth observing it in reality a bit more. I still did not get the time to do that yet.
Weird. My posts disappear. I put the bump and normal map nodes there just so it’s apparent that the material using this can take bump and normal maps also bump node is the only way to have vector input that uses normals if not connected to anything if this whole thing is used as a node group. I think gamma can be used, but it’s meant for R,G and B and in this case 3 times the calculations are not needed, math node set to power will have the same effect with only one value - I have no idea if this makes any difference in practice. Anyway, I think we have plenty of ways to control the effect. It might be worth observing it in reality a bit more.
Weird. My posts disappear. I put the bump and normal map nodes there just so it’s apparent that the material using this can take bump and normal maps also bump node is the only way to have vector input that uses normals if not connected to anything if this whole thing is used as a node group. I think gamma can be used, but it’s meant for R,G and B and in this case 3 times the calculations are not needed, math node set to power will have the same effect with only one value - I have no idea if this makes any difference in practice. Anyway, I think we have plenty of ways to control the effect. It might be worth observing it in reality a bit more.
I guess you are correct about the gamma node - i’ll try the power node out and see how it compares.
Are the bump and normal maps needed within this node group though? The Glossy node has it’s own normal input which can be used to apply a normal map if required. You wouldn’t normally pass a normal map through the roughness slot. At most you may pass a greyscale texture to simulate roughness variation (what Andrew Price calls ‘Overlays’ in his Poliigon texture pack)
Personally i’d just take the dot product of the incoming and normal vectors - and leave bump/normal mapping to the glossy - keep things as simple as possible.
Something really screwy was going on with this thread last night - multiple posts and disappearing replies…really odd.
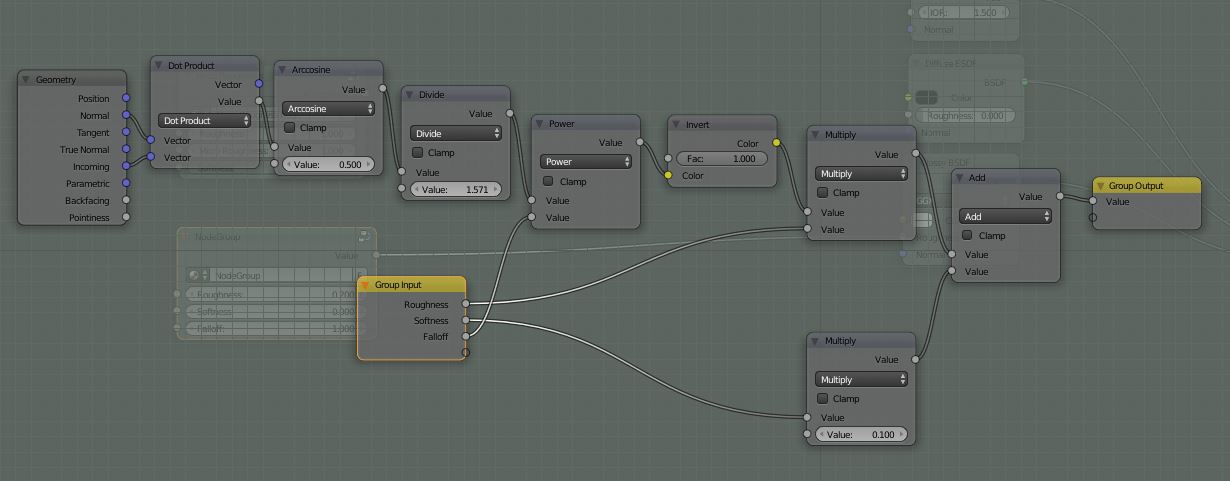
This is the nodegroup i’m currently working with - and IMO it works really well. Almost zero Fresnel halo even at high roughness and very flexible in terms of falloff and softness.
I think bump and normal maps are needed because surface facing direction depend on them, so if a material had large bumps the effect could be visible across the bumps. It can be simplified of course.
moony the reflections from post #28 looks realy good.
just a idea : the disney papers using power ² in between the roughness value and input ,to make the roughness at 50% area more looking as 50% and not 75% or so.
martinz ,just collection ideas.if the artifacts woulnd appear in moonys testrender with bump displacment,then the desired effect was allready there.i dont know all shortcomings from the cycles render engine.
with different bumpmaps you can simulating a wet wall for example ,with a bumpmap off a rainy window …
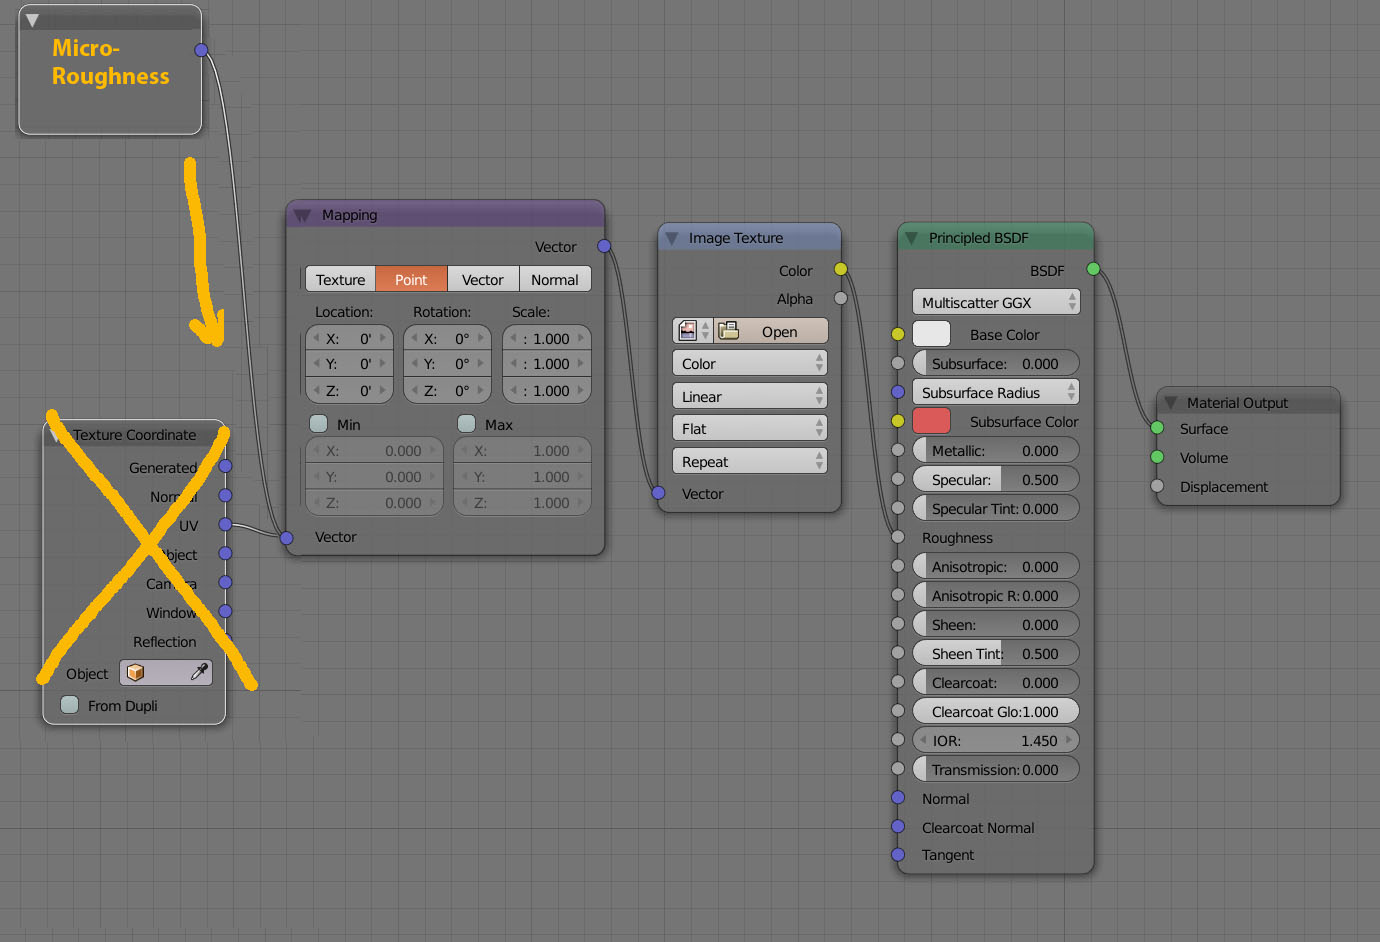
Okay, so this micro-roughness node group (MR) plugs into the Roughness input of a PBR shader node? What happens if I use a roughness map? Would I then plug the MR into the Vector input of a Mapping node in place of an output of a Texture Coordinate node? Like this:
No - the microroughness node group goes between the image texture node and the glossy node.
Plug the image texture into the roughness input of the microroughness node group - then the output of the microroughness node group into the roughness input on the glossy node.
You can just multiply the micro roughness by the roughness map. Math or MixRGB nodes would work. I would recommend to experiment a bit as well to get visual look you are after. You should see how actual material behaves in reality. The roughness map might get less visible at an angle, so maybe it would be logical to use MixRGB in ‘darken’ mode.
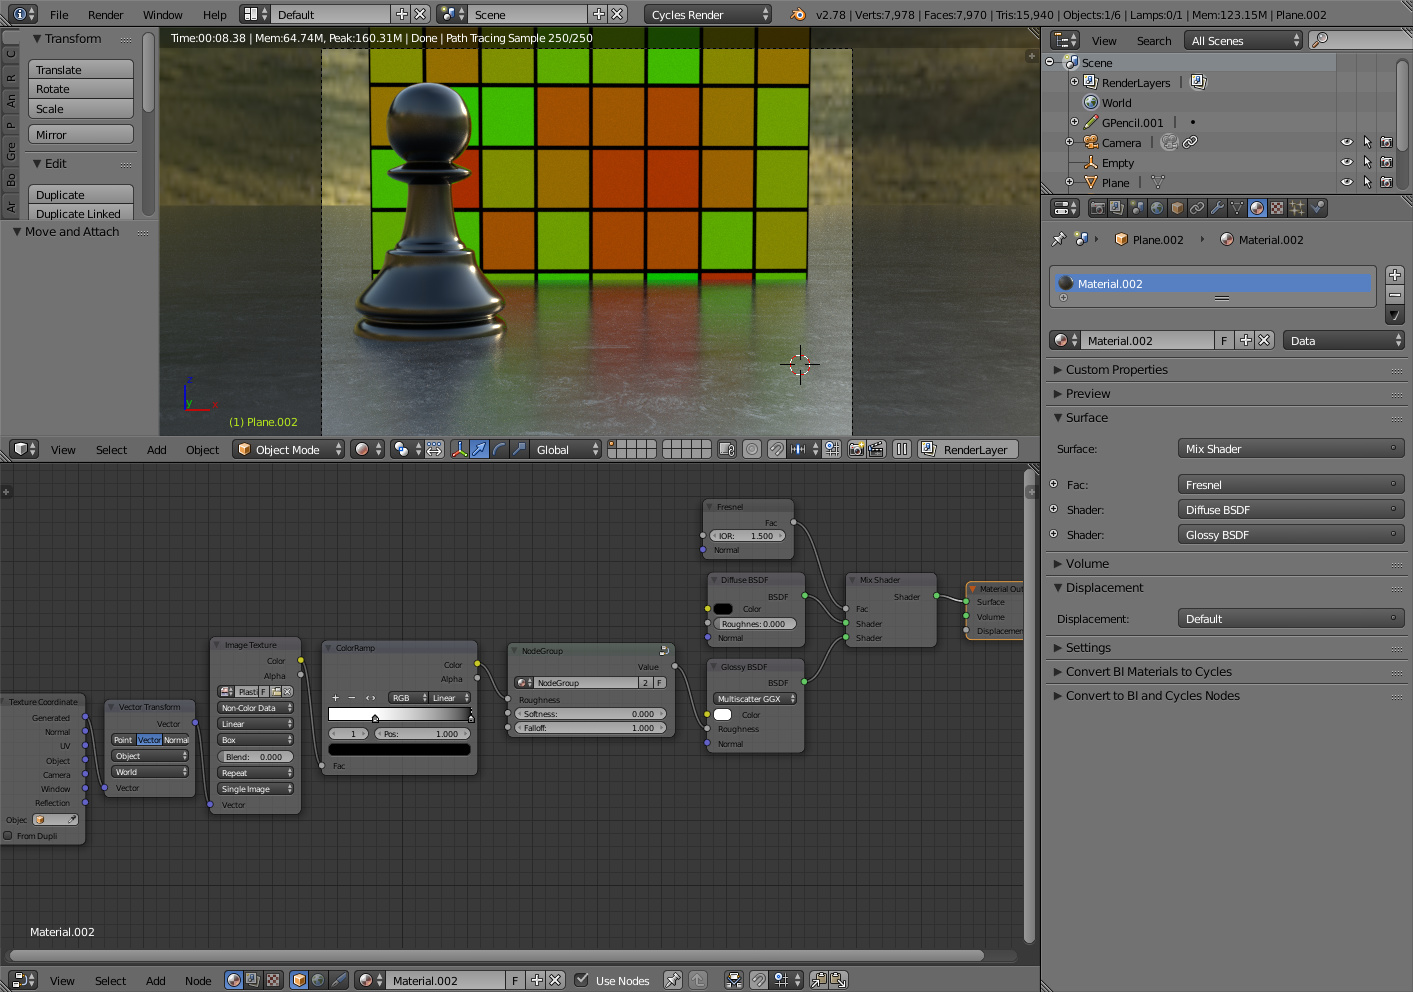
Another test - with and without microroughness (to try and equalise the reflection sharpness - I have given the materials without micro roughness half the roughness values).
Still a dramatic difference - especially in the floor area. Micro roughness also seems to add a lot of vibrancy to the image - the colours look less washed out and the image pops.
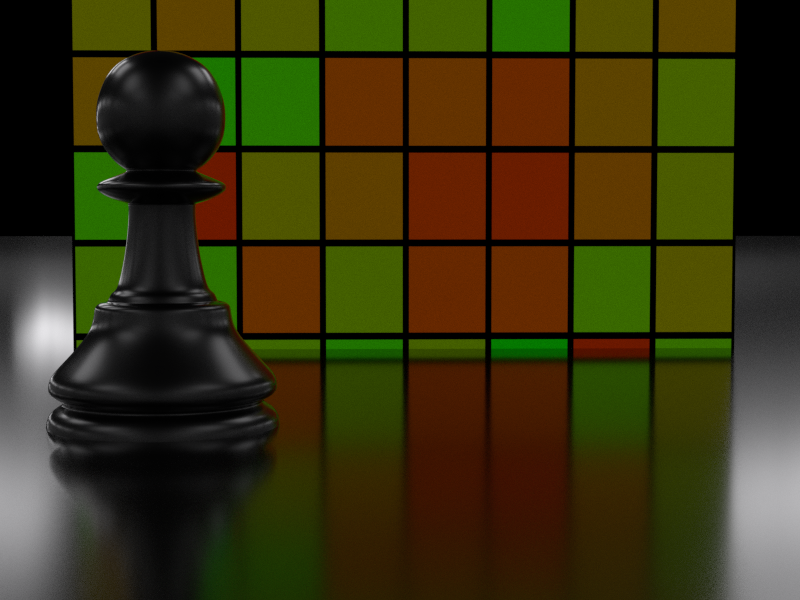
can you please test the microroughness node with a Principled BSDF?
Because afaik your current shader setup doesn’t take care of the half-vector issue, i.e. it deals with uncorrect roughness strenght at grazing angles