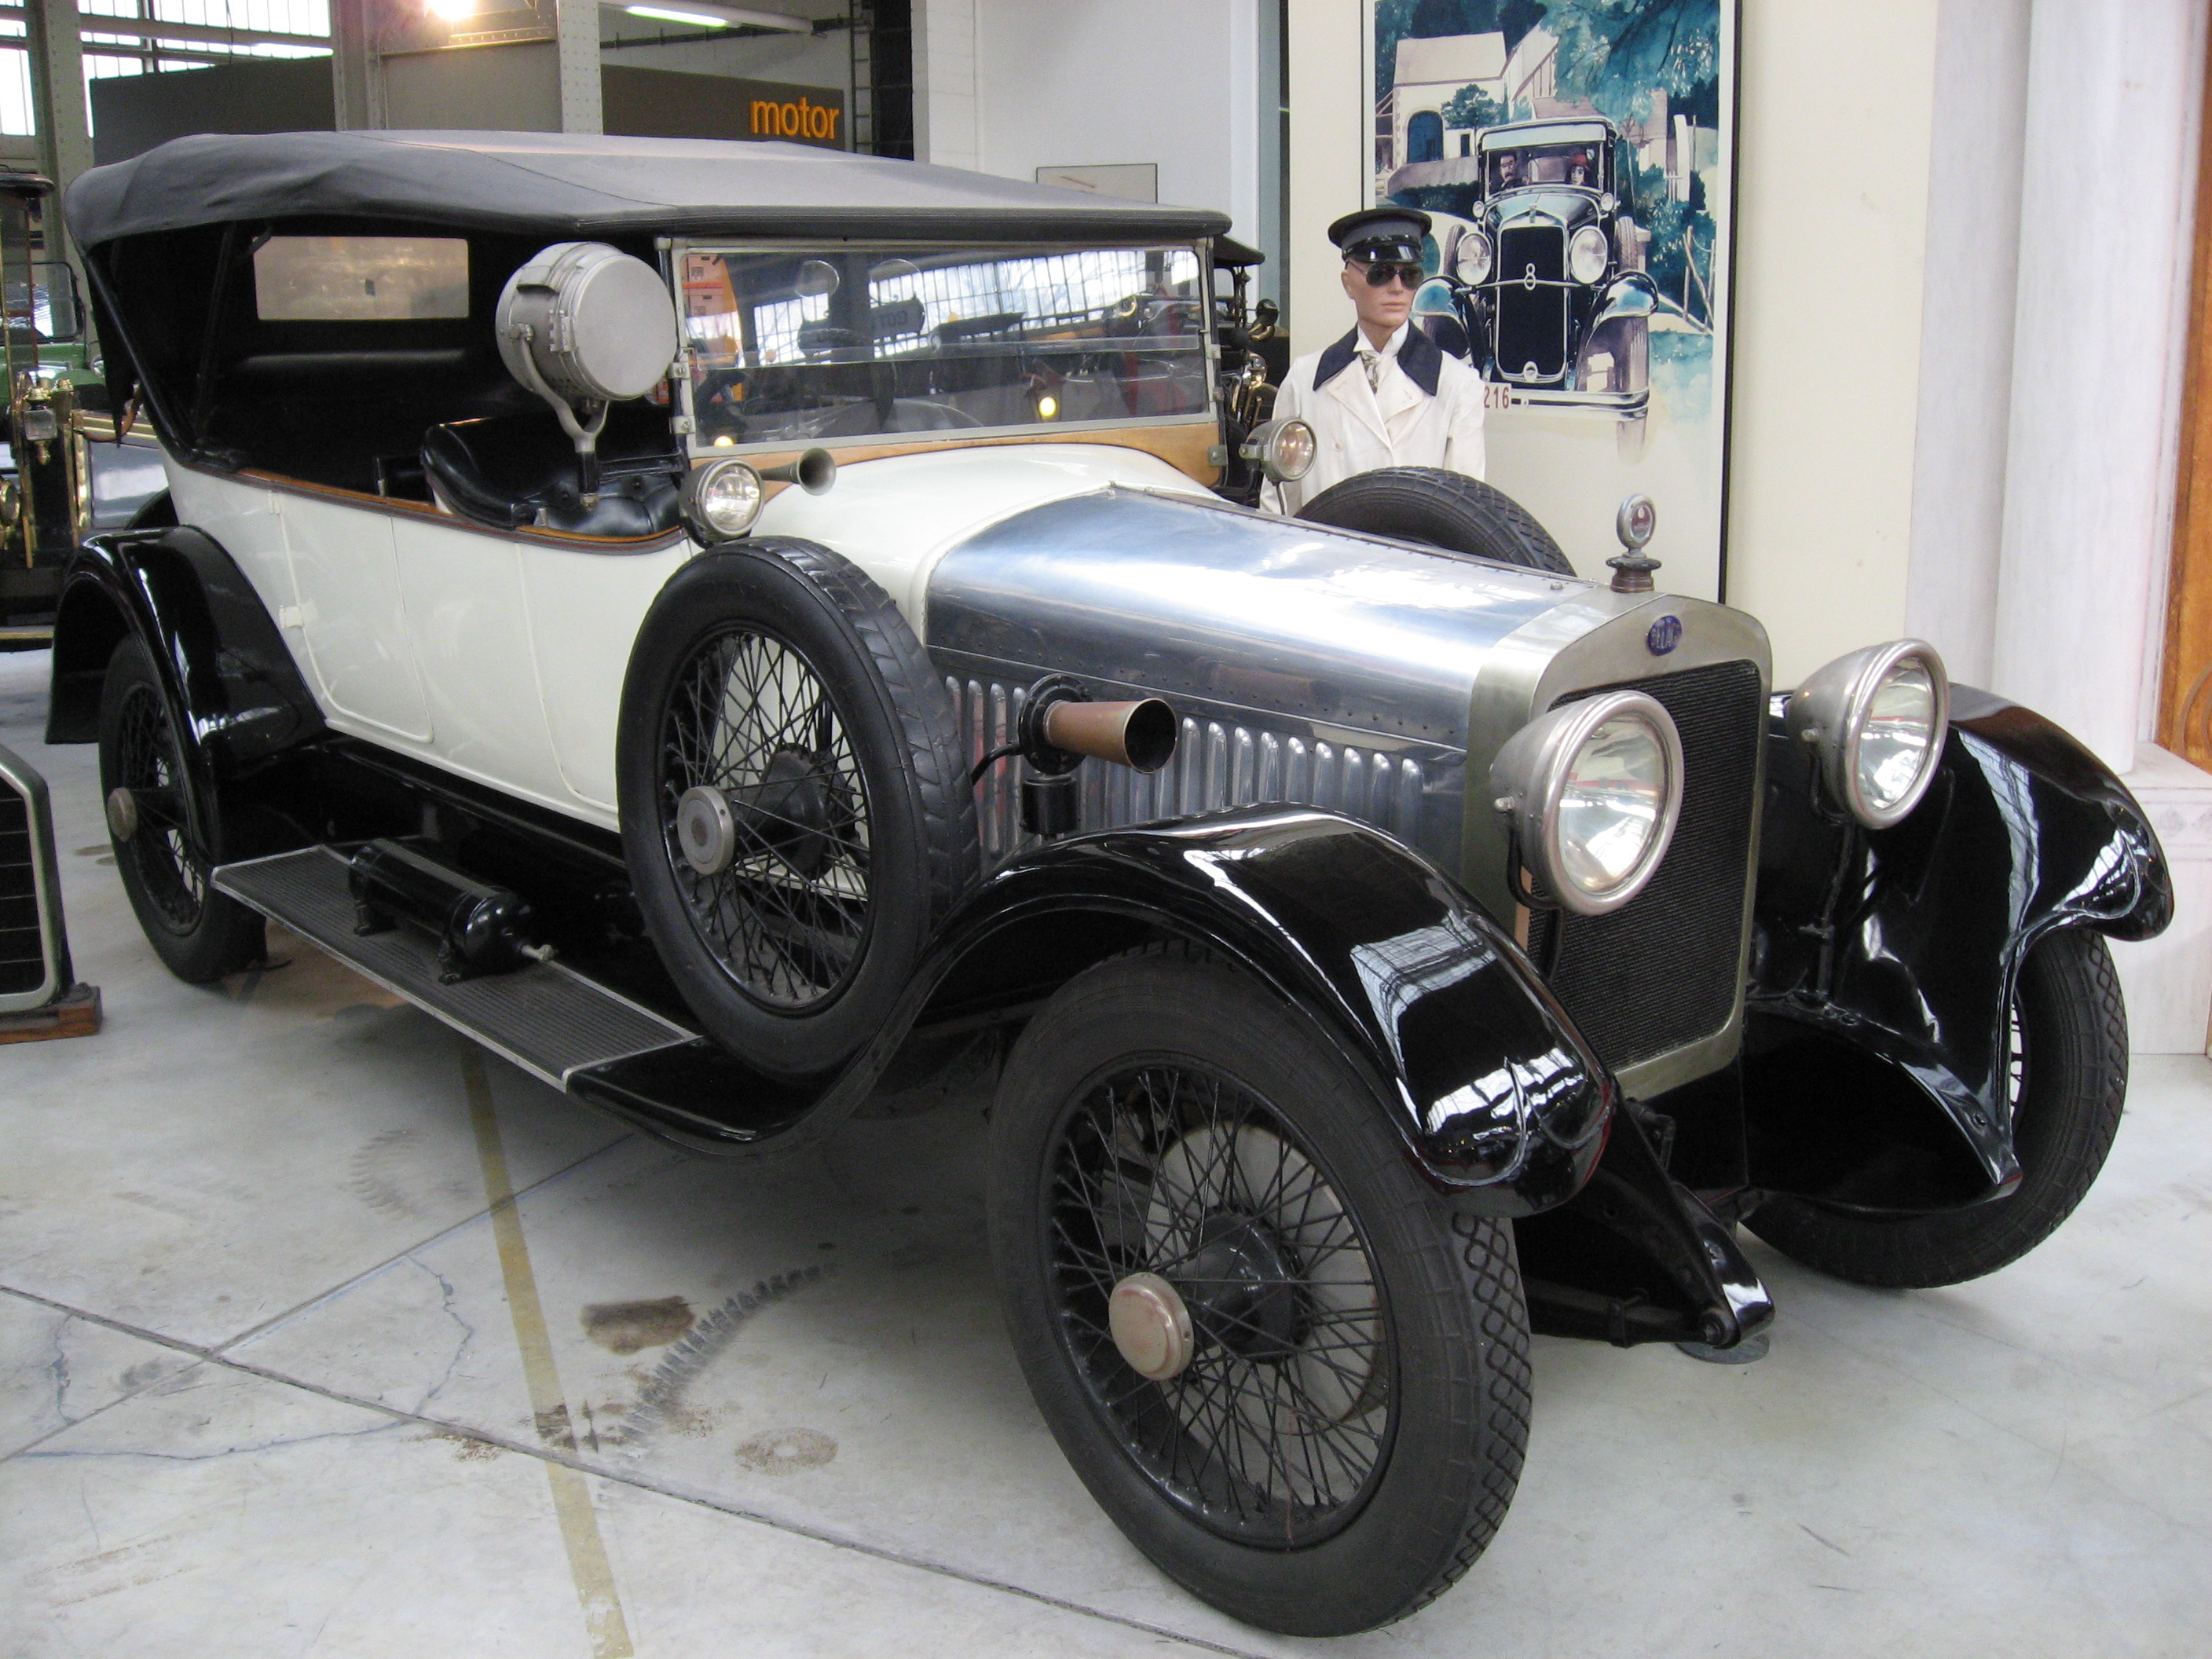
I want to model a tire that looks like this.
I don’t know the best way to tackle tires.
I would model one segment - flat.
Then add an array modifier, curve modifier, and maybe even a mirror modifier, applied on the x,y, and z axis.
Here’s a nice tutorial about how to use all these modifiers.
http://wiki.blender.org/index.php/Template:Tutorials/A_Double_Helix
I wanted to take a shot at this, but I’ve run into some problems myself xD
How do you get a complete circle with a curve? I remember an option to close the curve but can’t find any button.
Second, somehow the tire got flipped ?
Well here’s the file, and a screen shot of the modeled segment, and the flip problem.
Attachments
TireTest.blend (127 KB)


Hi Guys,
I think the array modifier is your friend here. Head over to Rogper’s thread here:
http://blenderartists.org/forum/showthread.php?t=113427&highlight=tyre&page=6
If you search the page for the following text “I first made circles to use as guide”
you will get a brief overview of his technique.
Using an Object Offset with an Empty to control the rotation is the hardest part
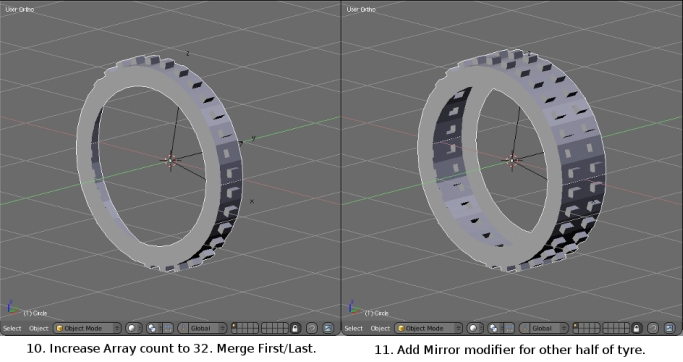
to get your head around. Then simply add a Mirror Modifier to generate the other
half of your tyre.
Have attached my very quick example to illustrate the process. With further
modelling work you would be able to add a Subsurf to finish it off.
The other great thing is you only need to model a small part to get the whole
model updated.
Hope this helps?
Kindest Regards,
Pixeltwister
Attachments
Quick Tyre Example 001.blend (138 KB)
I must say I can’t get mine to work out the way you did yours, pixeltwist. I opened up your file and it looked great, but when I tried it myself I got this weird effect shown in the included jpeg. It’s as if the Array is making each progressive duplicate scaled way up.
EDIT: I found a tutorial on a different way to do it (thanks Andrew Price!):
Attachments

Hi,
Glad you got your result. As always there are many ways to skin a cat.
Blender is very flexible. If you were working to exact sizes Andrew’s
method might fall down. But you are not so whatever works.
Your problem may have been due to scaling/rotating your empty prior to using
it as an object offset. Aswell rotating/scaling your mesh in Object mode not
Edit mode might cause problems.
Anyway Rgds,
P.
I didn’t mean to imply that I had no use for the more exact method, I was just giving more solutions for the OP. I’ll try what you have suggested for making the empty method work.
How much do you rotate the empty? Just enough so that it appears to line up? And I saw that your Empty was scaled to 3.1, how did you come up with that number?
EDIT: Wow, I really need to just try different things out before I go asking. I now have a crude tire, see attached image.
I still don’t really understand how you get the rotation exact, and I haven’t found any use at all for scaling the Empty. I had to edit the original object to avoid the ugly overlap, and is there a more elegant way of doing this then just eyeballing it?
Attachments

Hi,
My fault poor description. Let me clarify.:o
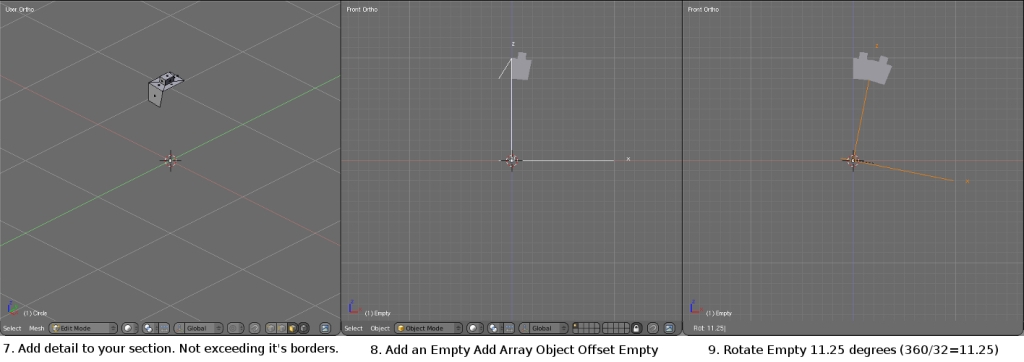
I first created Mesh circle with 32 parts.
360 degrees divided by 32 = 11.25 (look at the blend and notice Y rotation of
empty = 11.25)
Deleted all but one section of circle keeping centre the same, then model
the section of the tyre.
The initial and final scale of Tyre part and Empty MUST be the same. (Reason
for 3.1 is I changed the scale of both objects before rendering Sorry:o, look at
both and they are 3.1)
Upshot is if you scale the empty or change it’s rotation prior to making it the Object
Offset problem’s arise. Also changing the scale or rotation of tyre part in anything but Edit mode causes problems.
Hope this makes sense???
Rgds,
P.
That makes sense, thanks for putting the time into explaining it. I saw on Rogper’s thread that he mentioned a circle, but now I know what he did with it.
My only question is how you were able to model the tire section without causing overlap. As in, when you extrude to get thickness, how wide is the top face. Hopefully that makes sense, I don’t really know how to say it.
HI,
Will have to look at Rogper’s thread again.
Very tired Friday night 00:34 had beer. Pillow. 
Will answer fully tomorrow. :yes:
Rgds,
P.
Hi,
I think Rogper was adding circles much like I am for reference.
Have added a mini tut to help with your tyre modelling see attached
images. Hope this clarifies the method I propose?
Kindest Regards,
Pixeltwister
Attachments


Thanks for taking the time to explain all of this! It makes perfect sense now, thanks a lot.
Hi,
So glad. Took me ages to do that.
Glad to be of help.
Rgds,
P.