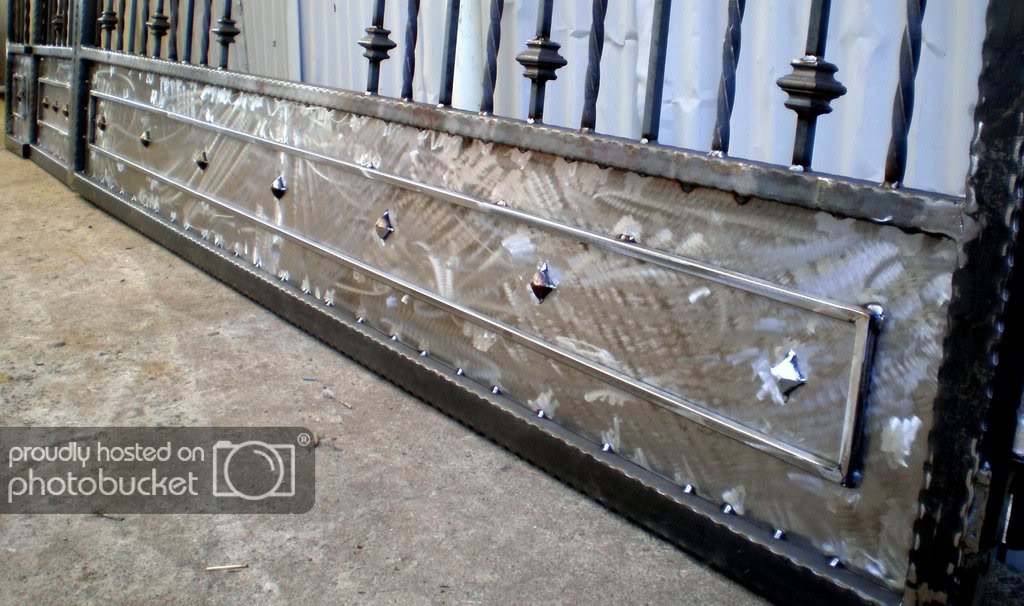
I have been trying to model a square tube that resembles the look of some wrought iron fences as seen in this image below. Can someone give me a simple step by step example that will help me achieve this look (without the texturing)?
Thanks,
John
I have been trying to model a square tube that resembles the look of some wrought iron fences as seen in this image below. Can someone give me a simple step by step example that will help me achieve this look (without the texturing)?
Thanks,
John
How about using the screw tool. In top view add a plane (bevel it if you want to round the corners), then in front view add a very long edge that runs directly up and down on the Z axis line. Then Select All and click Screw in the mesh tools panel. You can tweak the shape by Scaling on the Z axis (S the Z).
This sounds simple but for a beginner like me, I can’t figure out how to add an “Edge” since there is no option for it in the Add menu.
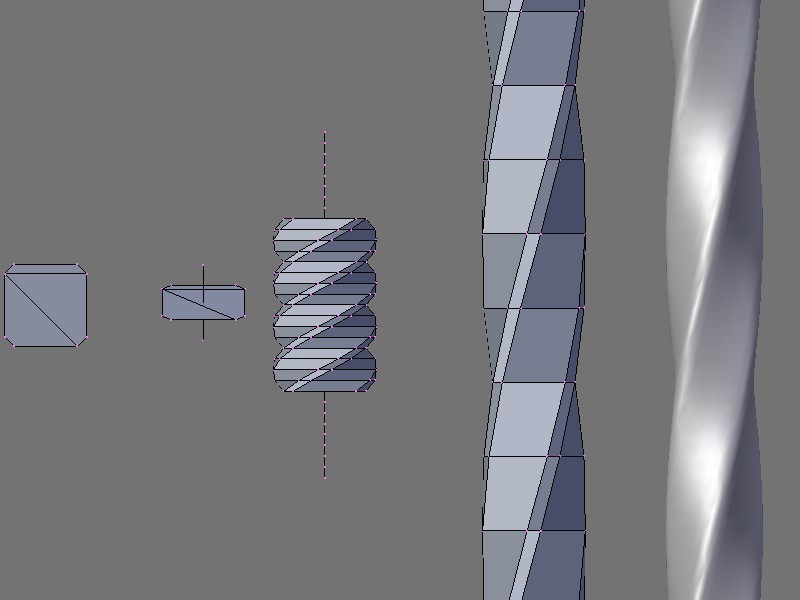
The best way I have found to do this, is to first make sure your 3D cursor is center (Shit-C) then Add a new Plane and press S , X, and 0. This will the plane in toward the Z axis line. Press W / Remove Doubles to weld the vertices together. Now, you can Scale this new edge on the Z axis to adjust the length of each screw turn. Also, as I said earlier you can scale the final result on the Z axis to stretch it more if needed. Here is a 3D view render of the steps. first is the beveled plane then I added the Edge at the Z axis, then Screw, and finally scale on Z and on the far right what the thing looks like with sub-surf.
Another way of doing this:
In Front view.
1 Create a bezier curve (BC)
2.Create a bezier circle (CC)
3. In edit mode select al control points of CC and press V to set them as Vector type.
4. In edit mode move the control points of BC so they are placed along Z axis.
Select the two control points and press Shift H to set them as Automatic type.
Press the 3D button in the Curve and Surface panel. Also there type the name of CC as BevOb value.
5. Select the top control point of BC and press T for tilt. Move the mouse and watch the bar twisting. When satisfied exit edit mode (if you think there is no much polygon resolution of the bar use DefResolU in Curve and Surface panel to increase it). Convert the object to mesh - Alt C.
6. Enter edit mode and select the long edges of the bar (use Edge Loop selection). Press W -> Bevel to bevel the edges.
7. As final touch give the bar a Subsurf modifier and SetSmooth.
That’s the fastest way possible 
I like both these methods — I would have to say my first thought is the spin tool but I like both approaches. Here is another that is more … fun?
Yet another method! Just to prove that Blender modeling tools are so versatile 
Thank you for all the awesome suggestions. However, I am still not able to achieve the effect that I am really looking for. When I render the models, sawtooth or shark gill like shadows are present. My goal here is to create a square glass tube with a light object at the base and the rays projecting through it causing a slight glow. I believe the surface of the tube should be a single face and not a collection of sections. Again, any help here is greatly appreciated.
John
this could be of smooth function or may be the normals!
but a picture would be easier to analyse it or may be a file!
but there are ways around it to get rid of the dark stripes
Salutations
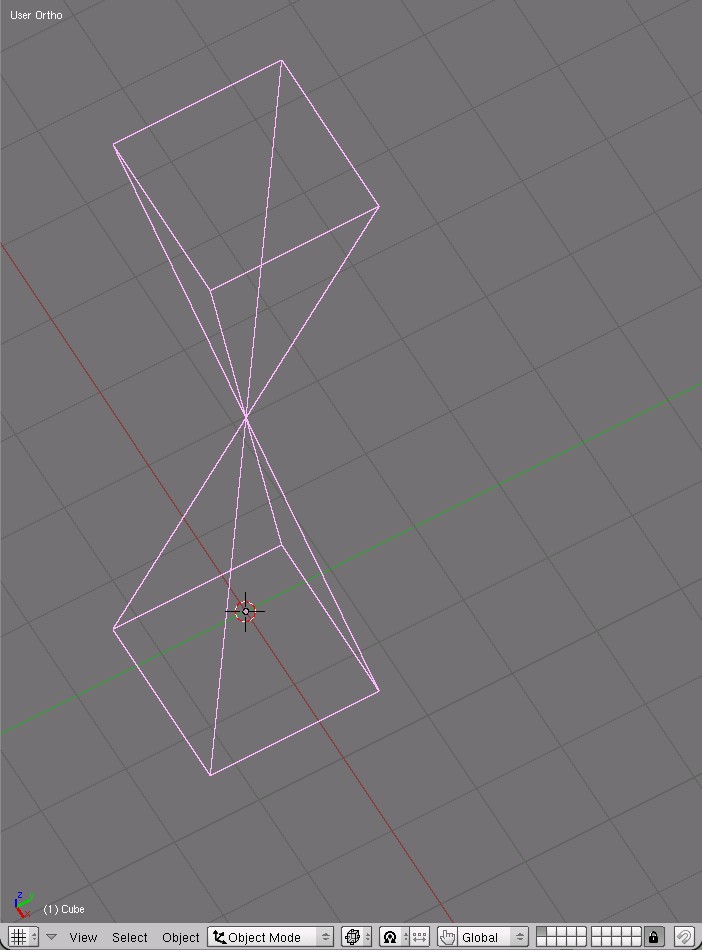
Sorry John, you won’t be able to get where you’re going with a single face sided tube.
When Blender connects verts, it uses straight edges. In the above image, the top face was rotated 180 degrees. Notice how the edges all meet at a single point in the center? That’s the problem with using a single face on each side.
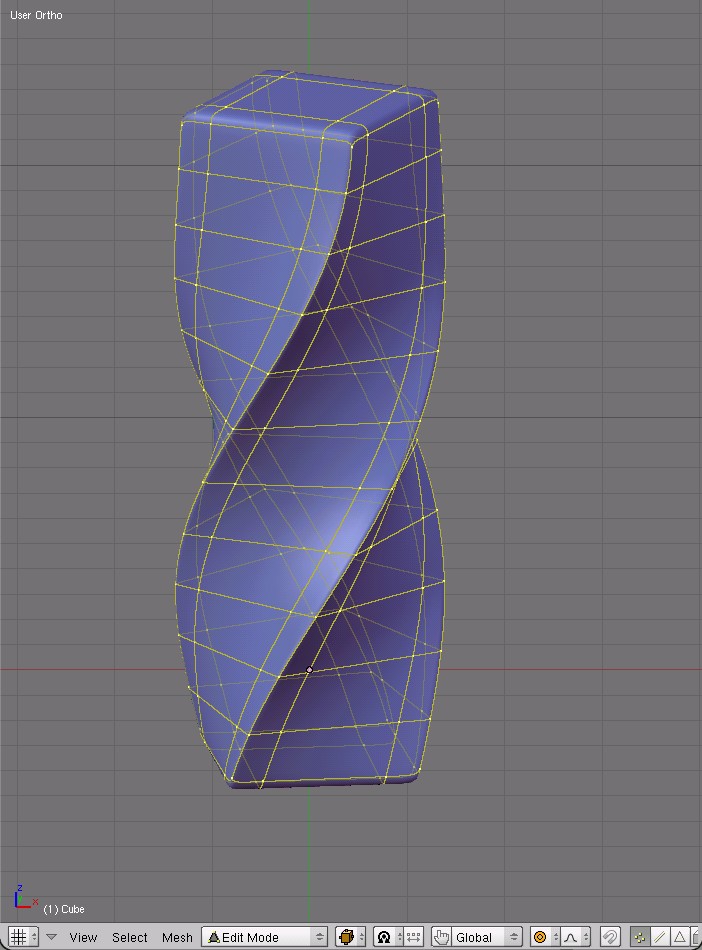
What you want to do is doable. To avoid artifacting at the corners, add extra edges nearby on both sides.
You’ll probably need to look into nodes to get the glow effect you want. Keep at it. Sounds like a good project.
can you explain a little more you way of doing it
i’m having some diffiuclties with your method
the good news is that there is another way way to do it which has not been mention yet
the Script " Threads at wiki script site
you simply have to set the number of segment to 4 and the indent to about 1/3 the height of the threads and this will give a nice twisted bar!
another way to do it and probably the fastest and easier - with a script
Salutations