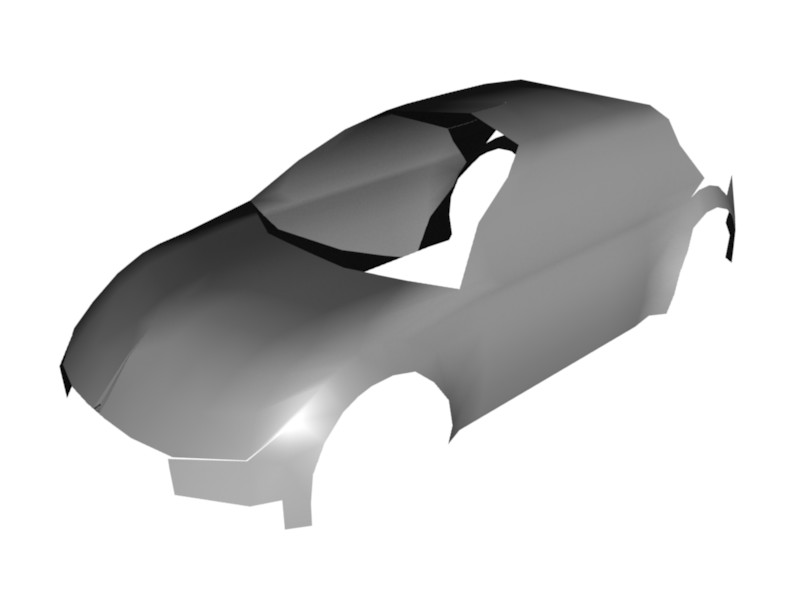
Well, this really doesn’t make me happy. I read everywhere this is a great and easy tutorial, but I just don’t seem to make it:( Could someone please explain how I do it right?
Because now, I just don’t seem to be abled to do the (motorkap in dutch) thing above the engine, which covers it, right. It doesn’t look at all like the picture in the tutorial. Who can help me?
Dutch = motorkap
English UK = Bonnet
English US = Hood
I belive you need to select the first few lines of verts in your hood, move them out and then smooth them before slideing them into place again. If you wish I can find a way to re-send you this blend file.
Your welcome. Yeh, the smooth button is how I did it. As for the 4th set of verts, they were stuck alongside the wheel well / side of the car. So I simply moved them out and smoothed them. Other then that the overal construction of the car looked prety good. Looking forward to seeing pictures of your final renders.
Thanks, I think I understand .Meanwhile, I already changed some things. Gonna render & post it now.
EDIT: Here they are:
Front looks ok to me, although the motorkap/hood/ and, eh, bonnet? looks a bit like an a$$
And the back still needs a lot of work.
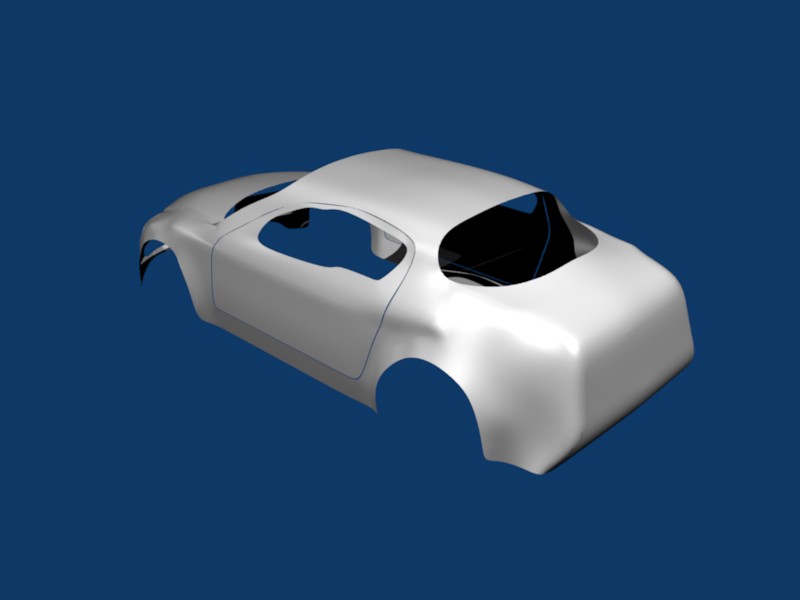
I could be of abit more help if you posted a wire frame of it. Looking good so far. Keep in mind, for your first car this is going very well. A few areas to touch up:
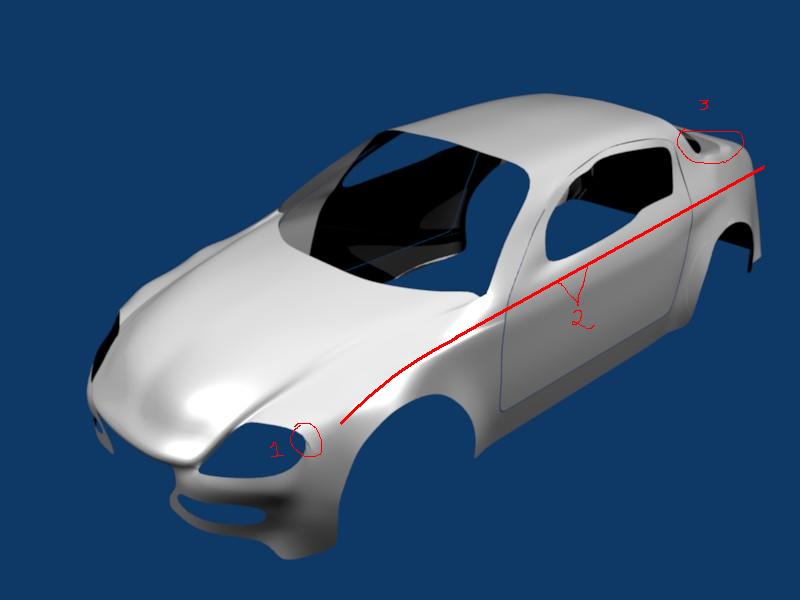
From the front: Area 1 looks like a face has collapsed over another causing this distortion. I’ll need to see the wire before I can confirm that’s what happening. Area 2 you’ll want to line up / strengthen the line in this area so your wire looks like the red line. Area 3 is a little bumpy, possibly because the verts are connected vertically rather then horizontally. Could be some verts out of place too?
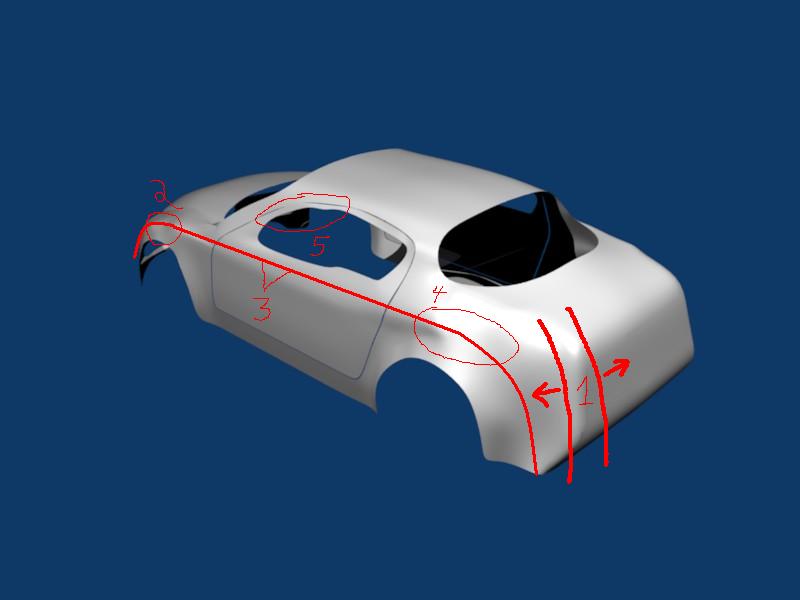
From the rear: Area 1 by putting a loop cut or knife cut, you can smooth out the rear end. Area 2 is looking a little bumpy, you will want to manually smooth it out by getting the verts in line. (Though this could be caused by a face going over the area vertically rather then horizontally.) Area 3 same as from the front, strengthen the line by moving the verts so they line up. Area 4 little dent, ling up verts / add one in the middle of the dent if necessary. (Possibly a vertical face happening here too.) Area 5 from the side view line up the verts from the inside of the window.
Never the less this project is advancing quickly. Keep up the good work.
Looking forward to the next renders / wires.
And I realise this is my first car, I’m really happy I got so far with this one
1 Question though, how do I post a wire?
But be warned, the faces won’t be divided equally over the car, like a pro, so you might need to search a bit which edge goes where. But if you want I can upload the file too.
Well this is still WIP so you’re comeing along bit by bit, rember rome wasn’t built in a day. To take wires: In blender go into the side, front and top views, hit print screen and paste with CTRl V into paint.
hey there I’m also trying to follow that tutorial, but I wanted to know how do you cut the door out? In the tutorial they used the “cut” tool and then “detach.”
For blender, what tools do you use to cut the doors like that?
Welcome. To cut a door:
Step 1 use edge select to select the edges where you want to cut your door.
Step 2 Hit K and select knife tool (exact) and make your first vertical cut.
Step 3 Reselect the edges and using the knife tool make your second vertical cut.
Step 4 Select the new door and make your horizontal cuts.
Step 5 Select the newly cut door and hit P
Now your door should be separated from your car. If you want to put the door back into the same object as the car mesh, just select the car and door in object mode and hit Ctrl - J.
I see you dont do much with the subsurf. here is a sub-surfing tip
Now, if you dislike how the faces near a crease are not tight to the mesh, there is a way to fix that. its called Shift-E. useful tool. another way to fix the crease problem is to add more verticies. You use it in placed like around the weel wells (i cant spell), edges of hoods and bumper sections.