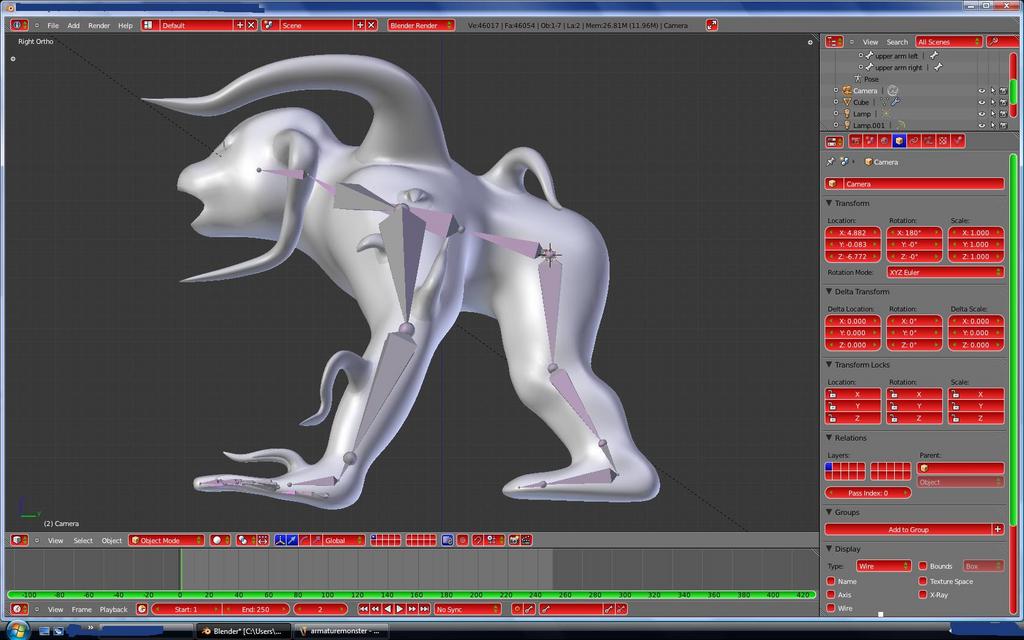
Hey, I’m fairly new to blender and i was wondering if i had these armatures in the right places and also if i can get some tips on armatures it wud be much appreciated

Looks pretty good to me. As far as tips go, I would check out David Ward’s tutorials on YouTube. He should be very easy to find, and he does a great job on teaching about rigging and animating.
oh David Ward, i followed his face rigging technique vid on blendercookie to understand how armatures work, i used what i learned from that to make this : ). i’ve just been looking at the ankles, and wrists and im not sure whether i should make them into segmented bendy bones like the neck or not.
be sure to align the rolls before you attach to your creatures (select all bones in edit mode, CTL-N, choose Y or Z axis )
ah thanks, i was looking for that but it didnt come up on the search option and i couldnt remember the shortcut.
a little problems come up, i’ve completely forgotten how to apply the armature to the mesh : ( i tried parenting the mesh to the armature and vice versa but nothin happens when i move the different parts of the armature, i mean, the armature moves but the mesh doesnt. this is the first time ive done an armature by myself so any help would be incredibly useful.
parent with empty groups or with automatic groups, then do weight painting…
wow, that helped more than i thought, the monster has a pretty high vertex count even tho theres not an amazing amount of detail so the “cage” mesh in the vid will be a great help with it
also, if i add the mesh to the armature now but add the face rig later, parenting it to the other armature, will i be getting alot of problems? if so id better add the face rig beforehand
Can’t tell you for sure… There are two possibilities. First, you take the vertices that will be controlled by the face rig, and put them in a vertex group called NoDeform or something, and when you bind the mesh to the cage, there is an option to exclude a vertex group - put NoDeform there. Then , you have to rig that vertex group to the face rig manually…
!!! OOOOORRRRRRR !!!
assuming the face is within a large box inthe cage, you may be able to just add the face rig and it will work in addition to the cage deform.
I would save (at least) two copies of your creature, and try the second option (becuase it’s easier) then if that doesnt work, go for the first option.
ok, the head was a little awkward to get into the box since i had to go back from the neck a bit, theres considerably more vertices than in the video because of the awkward shape but i managed it and theres also about 1/20 the amount of vertices less than the original mesh. phew took a qhile to do it. just adding the weighted paint now but ive come across a bit of a problem with the fingers, at the base of each they share a single edge as one side of their base, so the weighted paint overlaps at 100%, should i lower it to 50 or 20% or will it be fine onces its bound?
If I am understanding you correctly, you created a mesh deform cage and now are trying to rig the fingers of the cage. For hinged jionts like (fingers, elbows, knees, ankles, etc) it is usually best to have two loops fairly close to the hinge, with one ring completely to the finger, the other loop completely to the hand,palm whatever you call it.
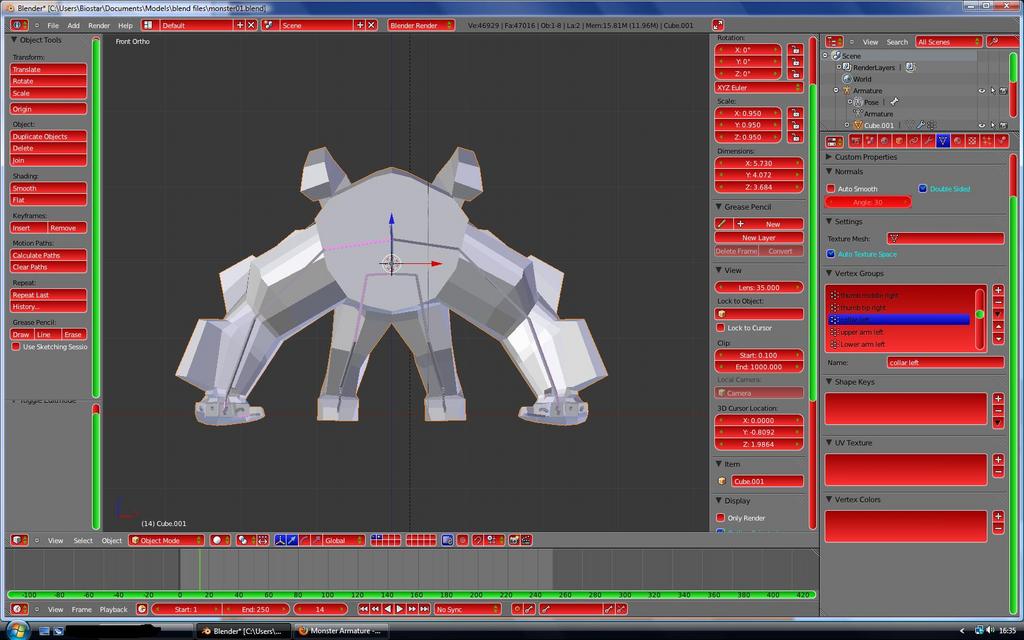
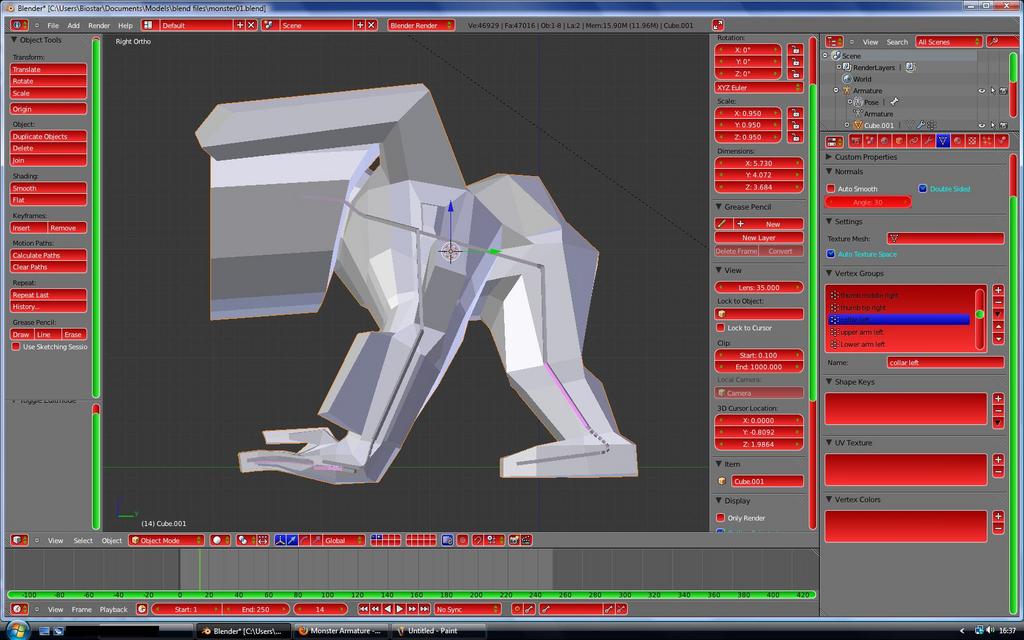
ok heres the box, im up to the shoulderon the arms, the head is done and seems to work fine. im just wondering if the collar bones should be allowed right up to the centre of the chest or only half way to it from the top of the arm. also thanks for the loop cut method on the fingers, it worked like a dream
Usually,it’s best for the armature to mimic the bones they are intended to. If the collar bones go to the center of the chest, probably best for the armature bones too.
: ) ok ill go for the center. i just finished doing the hips so once i do the collar bones ill just have the lumbar and back to do. also, in the video there was a bone going vertically up from the mid section, i cant help but wonder if this was the center of gravity armature? i added one on mine but im unsure how to apply it, do i just allow it control all the other bones or do i make it the controller for all the verticies?
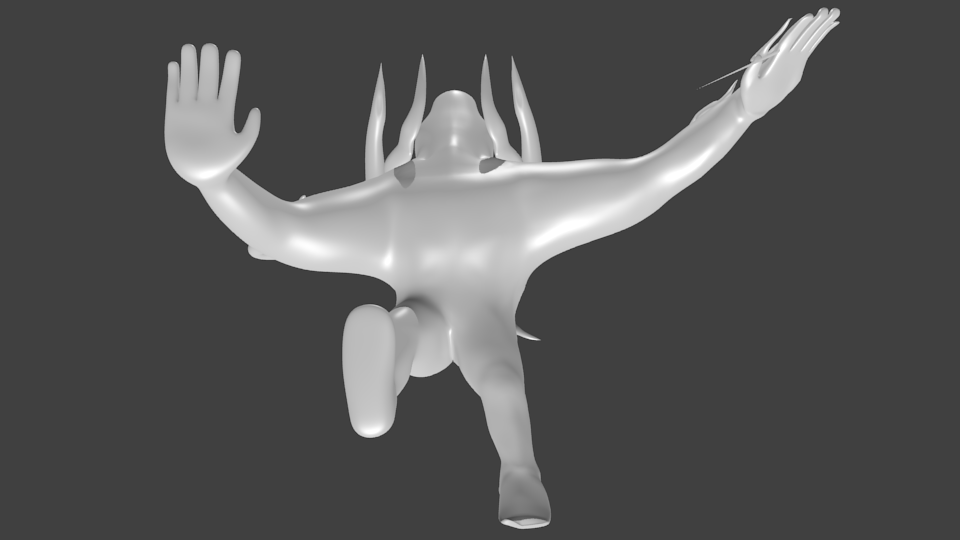
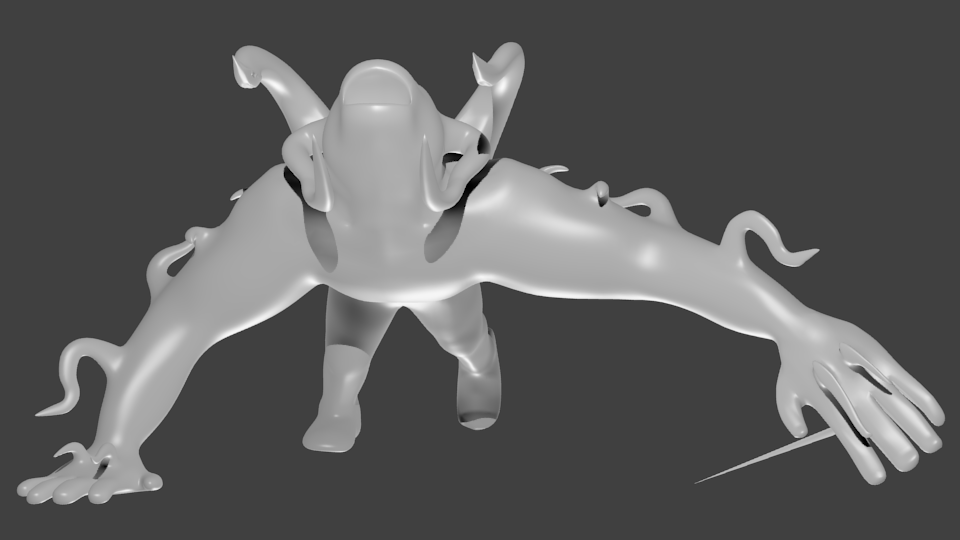
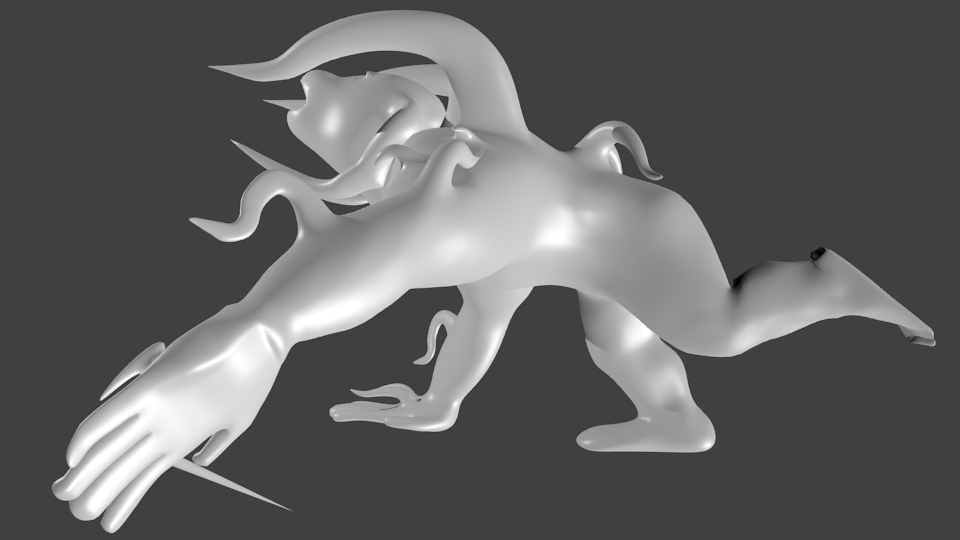
ok so ive finished the box armature and its on to the final tweaks, apart from the obvious vertex outside the box theres a few things i need some help on. ive adjusted half of the model excluding the head into a pose then shot it from 5 different angles (3 in this post two in the next sorry for the triple post in advance) to show the problems which ill outline in the next post.
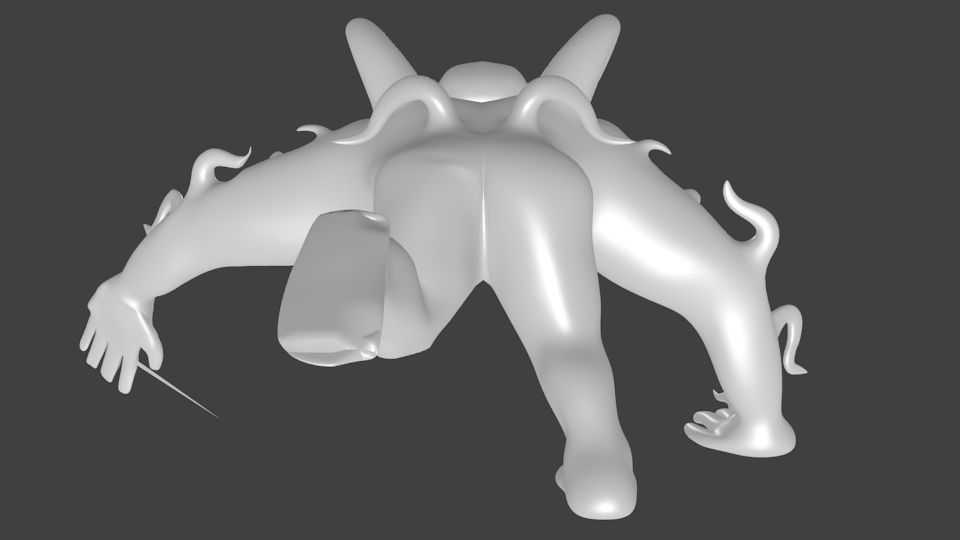
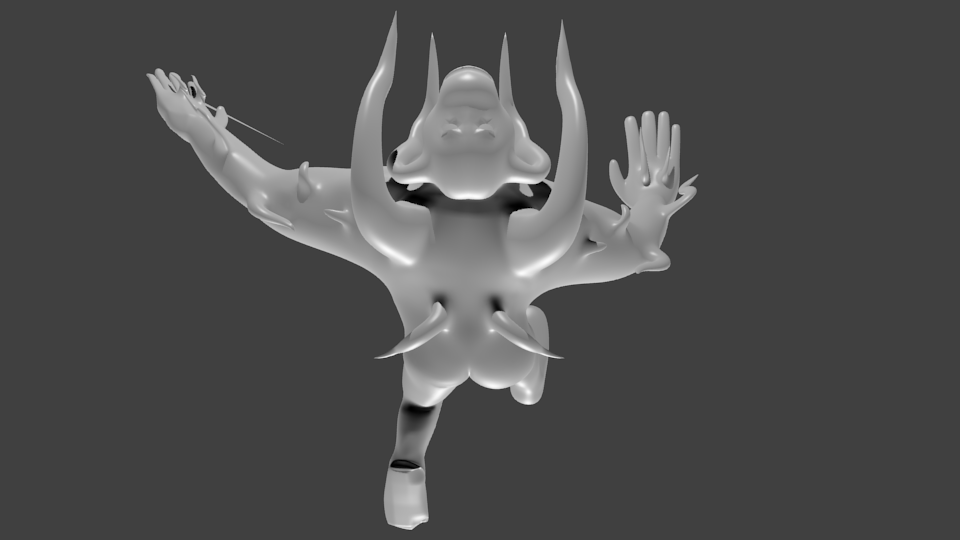
the problems ive noticed aside from the stray vertex:
-on the hand and the foot when the main part is rotated, the further it gets the flatter the extremety gets,
-when the head moves, the final dip in the shoulder spikes distorts along with it (the flattening of the hands and feet doesnt happen in the head so the problem is to do with the fingers and the toe)
-the left spike on the hip has distorted slighly when only the hip joint, which has no control over any vertices connected to the spike, is moved
-the calf is unusually solid and square when the knee is bent and the heel is inverting when the foot is bent,
-as well as the fingers flattening on the hand the spikes on the hand begin to invert when it is rotated more than it is there
any other problems or any solutions are more than welcome and will be much appreciated : )