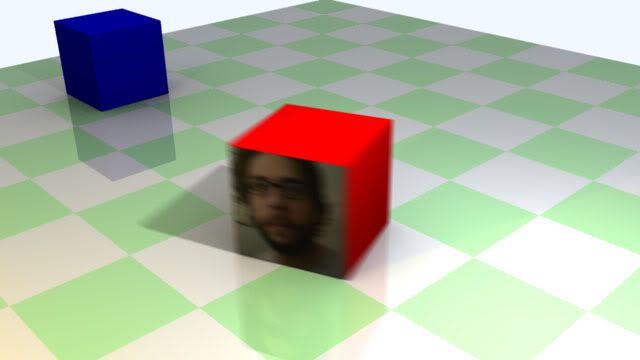
well, if you’ve got the cpu cycles to spare, that is. i’m new to blender and this was my first attempt at a script, so any suggestions/comments are much appreciated. basically this script renders a set of “in-between” frames using an oject’s time-offset and then composits them together. this has 2 consequences: first, you must make sure every object (including the camera) who’s motion you want included in the effect has the “offs ob” button selected in its animation settings panel. the second, and perhaps more annoying caveat is that since the bpython api provides no direct link to the rendered image, i have chosen to access it through the “python image library” which can be downloaded from http://www.pythonware.com/products/pil/
i hope some people give my script a shot, because i’d really like to give back to the community that brought about such an amazing program in the first place. 
here she be:
#!BPY
"""
Name: 'MotionBlur'
Blender: 234
Group: 'Render'
Tooltip: 'Extended motion blur.'
"""

######################################################################
# motionblur.py														 #
#																	 #
# author: steve miller												 #
# email: [email protected]											 #
#																	 #
# this script simulates motion blur by rendering intermediate frames #
# and compositing them together.  its benefits are the ability to	 #
# use an arbitrary number of samples to achieve the desired quality	 #
# and the ability to add motion blur to yafray.						 #
#																	 #
# note that while this approach is fully automated, its efficiency	 #
# suffers from an inability to directly access the render buffer.	 #
# if anyone knows how to do this, feel free to contact me or		 #
# modify the code.													 #
######################################################################

import os
from Blender import *
from Blender.Scene import Render
import PIL
from PIL import Image
import random
#
# initialize default variables
#
duration = 0.5
samples = 2
jitter = 0.003
fileName = "output"
imageType = 1
save = 0
show = 1

def event(evt, val):
	if evt == Draw.ESCKEY:
		Draw.Exit()
		return

def button_event(evt):
	global duration, samples, jitter, fileName, imageType, save, show
	#
	# update variables as modified by the script
	#
	if evt == 1:
		duration = B1.val
	elif evt == 2:
		samples = B2.val
	elif evt == 3:
		jitter = B3.val
	elif evt == 4:
		fileName = B4.val
		pos = fileName.find(".")
		if pos != -1:
			fileName = fileName[:pos]
	elif evt == 5:
		imageType = B5.val
	elif evt == 6:
		save = B6.val
	elif evt == 7:
		show = B7.val
	elif evt == 88 or evt == 9:
		#
		# sync relevant information with blender before performing the render
		#
		objects = Object.Get()
		scene = Scene.GetCurrent()
		camera = scene.getCurrentCamera()
		renderingContext = scene.getRenderingContext()
		animStart = renderingContext.startFrame()
		animEnd = renderingContext.endFrame()
		renderingContext.enableExtensions(0)
		renderingContext.enableMotionBlur(0)
		renderPath = renderingContext.getRenderPath()
		renderingContext.setRenderWinSize(100)
		sizeX = renderingContext.imageSizeX()
		sizeY = renderingContext.imageSizeY()
		if evt == 88:
			startFrame = endFrame = Get('curframe')
		else:
			startFrame = animStart
			endFrame = animEnd
		timeOffset = range(samples)
		if imageType == 1:
			renderingContext.setImageType(Render.BMP)
			renderingContext.enableRGBColor()
			format = "BMP"
			mode = "RGB"
		elif imageType == 2:
			renderingContext.setImageType(Render.PNG)
			renderingContext.enableRGBAColor()
			format = "PNG"
			mode = "RGBA"
		elif imageType == 3:
			renderingContext.setImageType(Render.JPEG)
			renderingContext.enableRGBColor()
			format = "JPG"
			mode = "RGB"
		#
		# loop calculate the time offset for each subsample
		#
		for sampleNum in range(samples):
			timeOffset[sampleNum] = duration/2 - sampleNum*duration/(samples-1)
		#
		# outer loop sets frame to be rendered
		#
		for frame in range(startFrame, endFrame + 1):
			output = Image.new(mode, [sizeX, sizeY])
			#
			# inner loop sets subsample to be rendered
		    #
			for sampleNum in range(samples):
				for objNum in range(len(objects)):
					object = objects[objNum]
					object.setTimeOffset(timeOffset[sampleNum])
				renderingContext.startFrame(frame)
				renderingContext.endFrame(frame)
				camera.dRotX = jitter*random.random()
				camera.dRotZ = jitter*random.random()
				renderingContext.renderAnim()
				camera.dRotX = 0
				os.rename(renderPath + str(frame).zfill(4), renderPath + "f" + str(frame) + "s" + str(sampleNum))
				blend = 1.0/(sampleNum+1)
				file = Image.open(renderPath + "f" + str(frame) + "s" + str(sampleNum))

				output = Image.blend(output, file, blend)
				os.remove(renderPath + "f" + str(frame) + "s" + str(sampleNum))
			if show:
				output.show()
				Render.CloseRenderWindow()
			if save:
				output.save(renderPath + fileName + str(frame).zfill(4) + "." + format)
			renderingContext.startFrame(animStart)
			renderingContext.endFrame(animEnd)
	elif evt == 10:
		Draw.Exit()
		return
	Draw.Redraw()

#
# this defines the appearance of the script to the end user
#
def gui():
	global B1, B2, B3, B4, B5, B6, B7, B8, B9, B10
	BGL.glClearColor(0.7,0.7,0.7,1)
	BGL.glClear(BGL.GL_COLOR_BUFFER_BIT)

	#Boxes
	BGL.glColor3f(0.75, 0.75, 0.75)
	BGL.glRecti(5, 5, 195, 55)
	BGL.glRecti(5, 60, 195, 115)
	BGL.glRecti(5, 140, 195, 220)

	BGL.glColor3f(0.65, 0.65, 0.65)
	BGL.glRecti(5, 115, 195, 135)
	BGL.glRecti(5, 220, 195, 240)

	#Text
	BGL.glColor3f(1,1,1)
	BGL.glRasterPos2i(10, 250)
	Draw.Text("MOTIONBLUR by shteeve")
	BGL.glRasterPos2i(10, 120)
	Draw.Text("Output Options")
	BGL.glRasterPos2i(10, 225)
	Draw.Text("Effect Options")

	#Buttons
	B1 = Draw.Number("Shutter: ", 1, 10, 195, 180, 20, duration, 0.01, 100.0, "Sets the duration of the blur in frames.")
	B2 = Draw.Number("Samples: ", 2, 10, 170, 180, 20, samples, 2, 200, "Sets the number of samples to render between frames.")
	B3 = Draw.Number("Jitter: ", 3, 10, 145, 180, 20, jitter, 0.0, 0.1, "Non-zero values create an antialiasing effect.")
	B4 = Draw.String("Name: ", 4, 10, 90, 180, 20, fileName, 25, "Sets the file name prefix.")
	B5 = Draw.Menu("Format%t|BMP%x1|PNG%x2|JPG%x3", 5, 10, 65, 60, 20, imageType, "Sets the file type of the output.")
	B6 = Draw.Toggle("Save", 6, 135, 65, 55, 20, save, "Sets whether the output should be saved")
	B7 = Draw.Toggle("Show", 7, 80, 65, 50, 20, show, "Sets whether to view composited frames.")
	B8 = Draw.PushButton("Render Current", 88, 10, 30, 115, 20, "Renders current frame.")
	B9 = Draw.PushButton("Render Animation", 9, 10, 10, 115, 20, "Renders the sequence as set in the Render panel.")
	B10 = Draw.PushButton("Exit", 10, 135, 10, 55, 40, "Exits the script.")

Draw.Register(gui, event, button_event)


print "all is well!
"


