Mouth, jaw and teeth: can you help me?

Hello everyone , after he managed to get in a decent way to move my character , now I need help to do this talk. Can you help me?
I set my teeth and jaw and the bone of the chin. Moving it , chin moves in the right way ( more or less , I have problems with the weight … ) , but not the jaw.
Following a few tutorials , I think the upper jaw should remain firm , while the lower jaw must rotate with the chin . How to do it correctly ? If work on the lower jaw weight , moves with his chin but it ends much under the chin with respect to the location where it should be …
Can you help me? Thank you!

Here the file: https://db.tt/6w2a1r7a

So, I took a look at your file and noted the following:

You have unapplied scales all over the place! You should do ALL edits in Edit Mode, including scaling/rotating the whole mesh/armature/whatever. If you do scale or rotate in Object mode, apply these afterwards by selecting the armature/mesh in Object mode and keying CTRL+A => “Rotation and Scale”. These will cause major issues down the line, as you have found out! See below for how these should be - Rotations at 0, scales at 1:


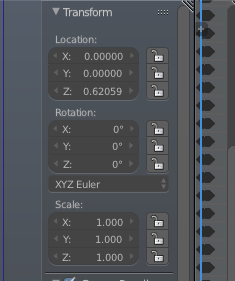
Location should ideally be at 0,0,0 for armature and mesh, it’s not vital, but it sure helps!

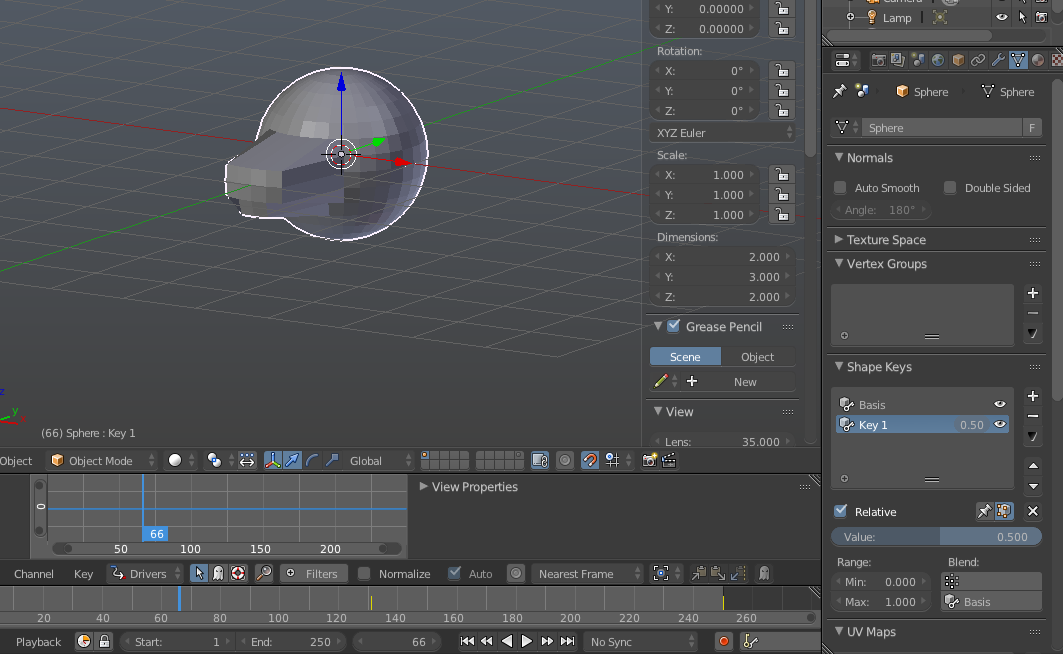
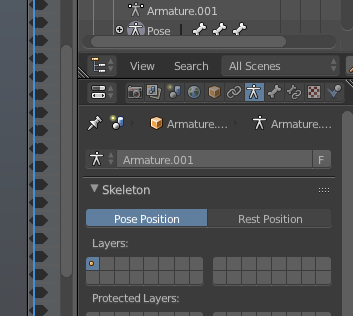
You made the teeth with the armature in a posed position, so they were out of place when you assigned the vertices to the armature, that’s why the lower teeth jumped down. Always set the armature to “Rest Position” before adding new meshes to the overall model or you will build them in the wrong place, see below to set Pose or Rest positions:


The Chin (Mento) bone is parented to the Neck, so when you move the head it does not move, parent the chin to the head for correct skeletal setup.

You have no “Root” bone - this should be between the feet on the ground and major bones, like the spine and IK targets/control bones should be parented to it to inherit scale and rotation but not be connected. Use this bone to move/rotate/scale the whole model.

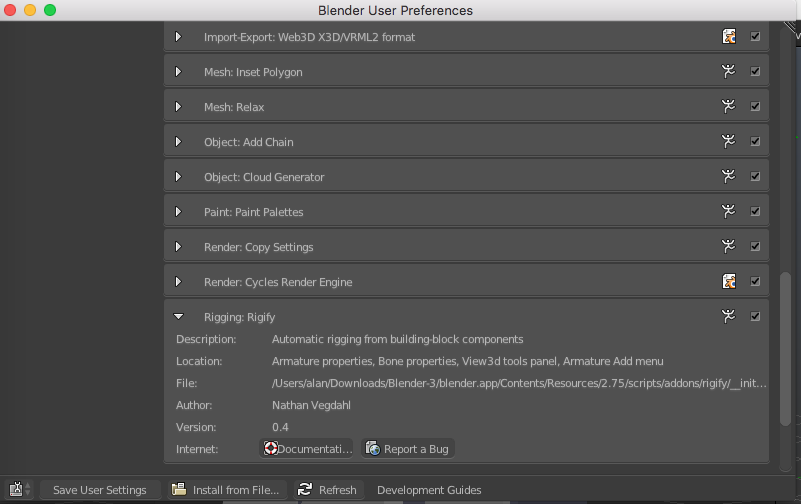
You have no connection between the spine and legs, or the spine and the arms - this will cause issues later on, in fact your shoulders are way back from where they should be in Pose Position. Look at the Rigify add-on armature to see how you should build a biped armature or search out the Humane Rigging tutorials - they contain very good advice.

The weight painting for the lower jaw part of the head is way off, can I suggest you do an Automatic Weights parent first then tweak with Weight Paint or you may be in for a long weight paint job to correct things. If you start over with the “Automatic Weights” parent, you should delete the Armature Modifier from the mesh, delete all vertex groups and remove the parent in the mesh object panel before you redo the parent process.

Here’s your blend file with a lot of the errors put right, but you still need to work on the armature, particularly put in the “hip” and “Shoulder” bones to connect the limbs to the spine as they are in real life.

http://www.pasteall.org/blend/43219

I have corrected a lot of things, but by no means all of them, have a further go yourself and report progress, we can then help further if you need it. Just remember about editing in Edit mode, not Object mode for the future.

BTW you have made a good job of the modelling - keep up the good work.

Cheers, Clock.

Thanks a lot!
So, the best way is to drop the armature and use the Rigify addon (http://blog.digitaltutors.com/rigging-minutes-blenders-rigify-addon/)?

Maybe - but do some reading first. I still think you can put your armature right fairly easily. It is is big step from what you have to a Rigify armature. If you are happy going to Rigify - go for it and we will help you.

I used “own-built” armatures to start with and gradually increased the complexity with help from members here, then went on to Rigify. That’s what suited my methods better, after all I am well past my best learning years!

Cheers, Clock.

Here’s where to enable Rigify:


EDIT:

This is a VERY useful link if you go to Rigify:

http://docs.unity3d.com/Manual/BlenderAndRigify.html

As is this:

http://blog.digitaltutors.com/rigging-minutes-blenders-rigify-addon/

Ok, starting from my original file. Rigify is very useful but I have no time to learn how it works.
So, I have added the shoulder, spine and hips bones. Right?
Now: 1) Mouth and teeth are in the correct position?
2) Moving the Chin bone is enough to make the mesh “speaking”?
3) How I can change the face expression? For example, how make the face smiling? I have to create an armature for the face?

File: https://db.tt/NNrgqyBz

Thanks a lot! It’s my first blender works, so I still have a lot to learn!

The most common method for mouth expressions is to use shapekeys - a set of keys that when you alter the effect ratio from 0 to 1 will pull a mesh out of shape. It is worth experimenting with a simple mesh to get your head around this. The alternative, and why Rigify has an extended version with a full head armature, is to add bones to the head that when moved, scaled or rotated will deform the face in such a way as to provide expressions. You can then store these expressions in a Pose Library and simply recall them during an animation. If you use bones, just add more to the same armature, then redo the parenting and they should take effect.

Much more reading for you I am afraid! But it is worth it if you want to get your head around facial rigging.

I will look at your file later, Mrs. Clockmender has some jobs for me to do now…

Cheers, Clock.

To help you with shapekeys, here’s a simple example:


and the blend file:

simple-shapekey.blend (503 KB)

Just press play to see it working, or drag the “Value” box on the shapekey. :slight_smile:

Cheers, Clock.

Like this? https://www.youtube.com/watch?v=f5XwaPq25fM

Yes, just like that!

or this:


which changes into this:


all done with shapekeys! - just press Play again.

simple-shapekey.blend (579 KB)

Cheers, Clock. :stuck_out_tongue:

Ok, I have added all the bones like the tutorial and I can modify the face expression! Good!
I have some problems with the weights… Can you help me? Have you other suggestions?

Here the file: https://db.tt/NNrgqyBz

Thanks a lot!

I’ll take a look later, but I have to confess I am not a Weight Painting expert! I normally rely on Automatics Weights and a little tweaking afterwards. I should have some time later today or tomorrow.

Cheers, Clock.

Hi CLockmender, you managed to have a look at my file?

Thanks, Roberto.

I’m looking now, will report back tomorrow, sorry I have been out all day flying.

Cheers, Clock

I cannot open your file - I cannot establish a secure connection to the dropbox server, can you load it to pasteall.org/blend then post the link here, I only have an old version…

Cheers, Clock.

http://pasteall.org/blend/index.php?id=43240

Thanks!

OK so I took a look at this, I have made some corrections to the skeleton armature, like making connections where they should be and changing some of the parenting. I have done some weight painting, but not a lot, you should tweak this yourself. It is better but not perfect yet…

So here is your blend file with the alterations:

http://pasteall.org/blend/index.php?id=43274

Cheers, Clock.