I have literally spent weeks trying to make realistic (long!) hair with multiple layered particle systems, many parents, few parents, physics, forcefields and whatnot and I have yet to find an effective workflow for that. Especially since you can never tell how the hair actually looks until you give it a few hundred samples of precious cycles rendering.
eyelashes and eyebrows are actually the least of my hairy problems, but i just thought if there was any way to avoid particle editing, I should try and make use of it.
Anyway, I found out what the problem was.
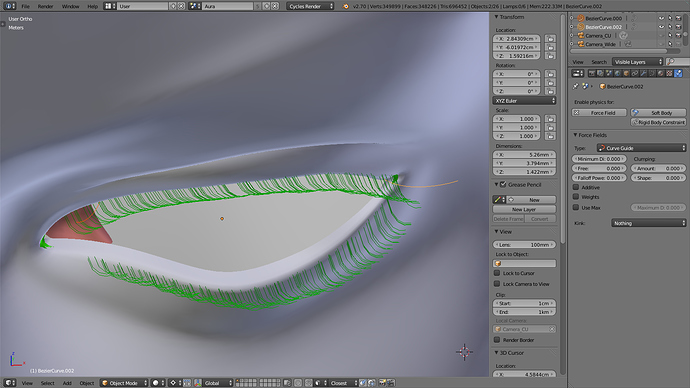
As usual I didn’t bother to type in values for the curve guide parameters and instead just used the sliders. Unfortunately, blender defaults to 0.1 increments when you use this method and that turned out to be way too much!
Maybe it’s because I’m using the metric system instead of blender units, since I like to give the models realistic proportions.
Anyway, here’s how I got the multiple curves to work:
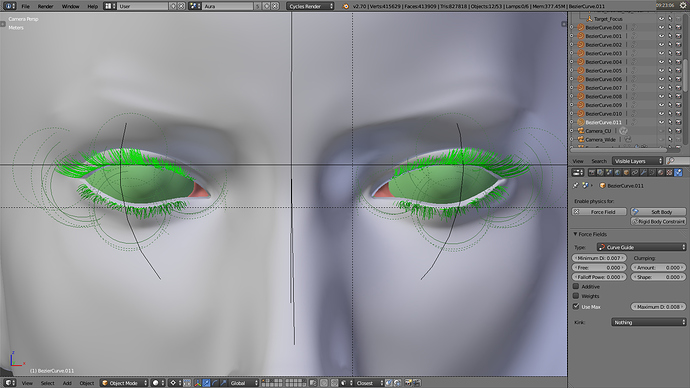
Just a rough sketch. Obviously this can be refined. But now I can do that without ever touching the dreaded combing tools 
Those are actually two particle systems. One for the top lashes and one for the bottom ones. There are twelve bezier curves in total, consisting of three curves each for top and bottom on the left side, which are then link-duplicated (alt+D) and mirrored to the right side (global X, with cursor at center via ctrl+M X).
The curves - i.e. the ones on the left and their linked and mirrored copies on the right - are then grouped into two seperate groups (top/bottom), to seperate the curve guide influences of the top lashes from those of the bottom ones. The two particle systems are then each given their own effector group (top/bottom) in the force-field settings.
This way I only need to make changes to the curves in edit mode on one side and those on the other side will be updated accordingly since they are linked copies with size x =-1.
To avoid too much symetry, I can just fiddle around with the particle parameters (e.g. uniform rough, random length, clump).
Saves a lot of work on particle editing, in my opinion.
Now, I guess I’ll have to try and apply that method to long hair on the character’s head. I have a feeling this will not be so easy…


