Near-Finished Character Sculpt for 3D Printing - How can I make it manifold while staying sane?

Hey everybody!

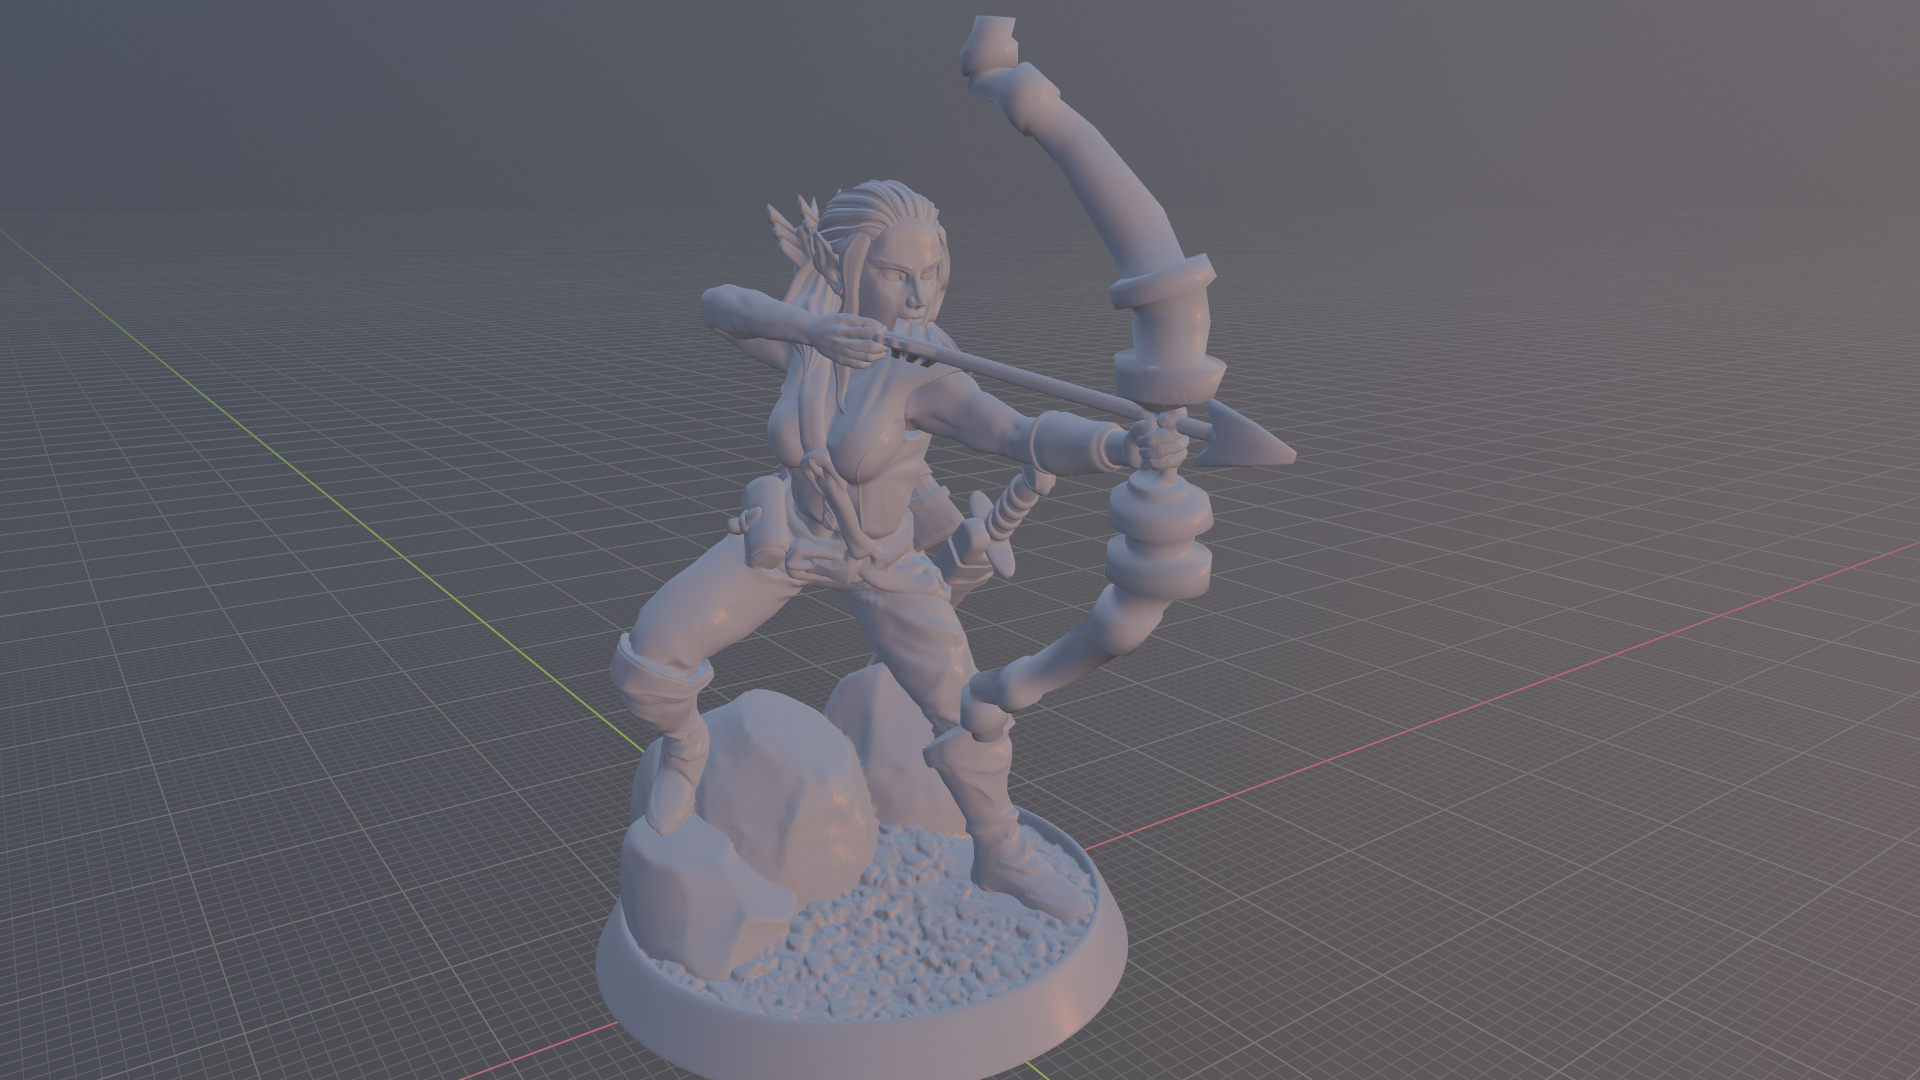
I’ve been working on this character that I intend to 3D print as a roleplaying game miniature, and I’ve hit a bit of a wall during the very last parts of the process:

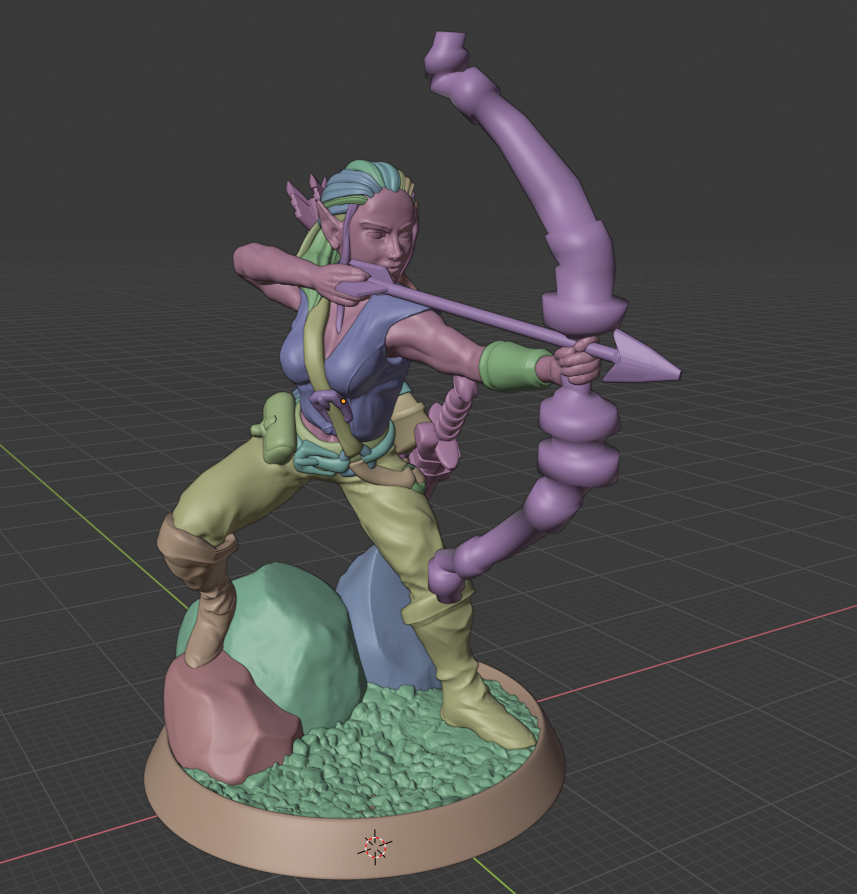
I’ve followed various tutorials for character creation, where I modeled / sculpted all her components in-pose separately, so that I kept things flexible throughout the process. Finally, I attempt to boolean everything into a final mesh at the end.

I’ve seen multiple sculptors use the boolean modifier to merge all their separate parts, and I did this, working from the “core” body to the clothes, to the accessories, but I found that this made a TON of “non-manifold” errors (particularly with accessories like the belts, the hair was a fight too!)

Dropping it into Cura, the slicer wanted to skip certain parts, like printing her without armpits, for example.

What I’ve tried so far:

  1. I’ve tried to boolean everything into a single mesh and then “voxel re-mesh.” Sadly, this kills Blender or creates a crazy hole-filled mess whether or not I decimate it.

(Running an i5-6600K, GTX 970, 16GB DDR4 RAM)

Quad re-mesh doesn’t even attempt, because it doesn’t like the normals / non-manifold bits.

  1. The other way I thought I could do it would be retopology…I made it up the left leg before I looked at it and thought “I must be insane.” Even subsurfing the result, I don’t get the detail I originally had, and getting all the equipment props too seems like it’d be immensely challenging for little payoff.

So…

As far as a “pro workflow” goes, am I correct in trying to boolean all the parts, but I just need to do it “more carefully” or keep tweaking it until I don’t get manifold errors? Since the clothes are multi-res’d and I need to apply it to use boolean, manual fixing of hundreds of vertices and edges seems like a torturous exercise.

Or…do sculptors retopologize things like this after all, even things that aren’t intended to be animated?

Surely, digital print sculptors don’t just sculpt all their details using one mesh the entire time, right?

Asking elsewhere, I got “You could try Zbrush,” but…no way. XD

I know there’s gotta be a way Blender is perfectly capable of this.

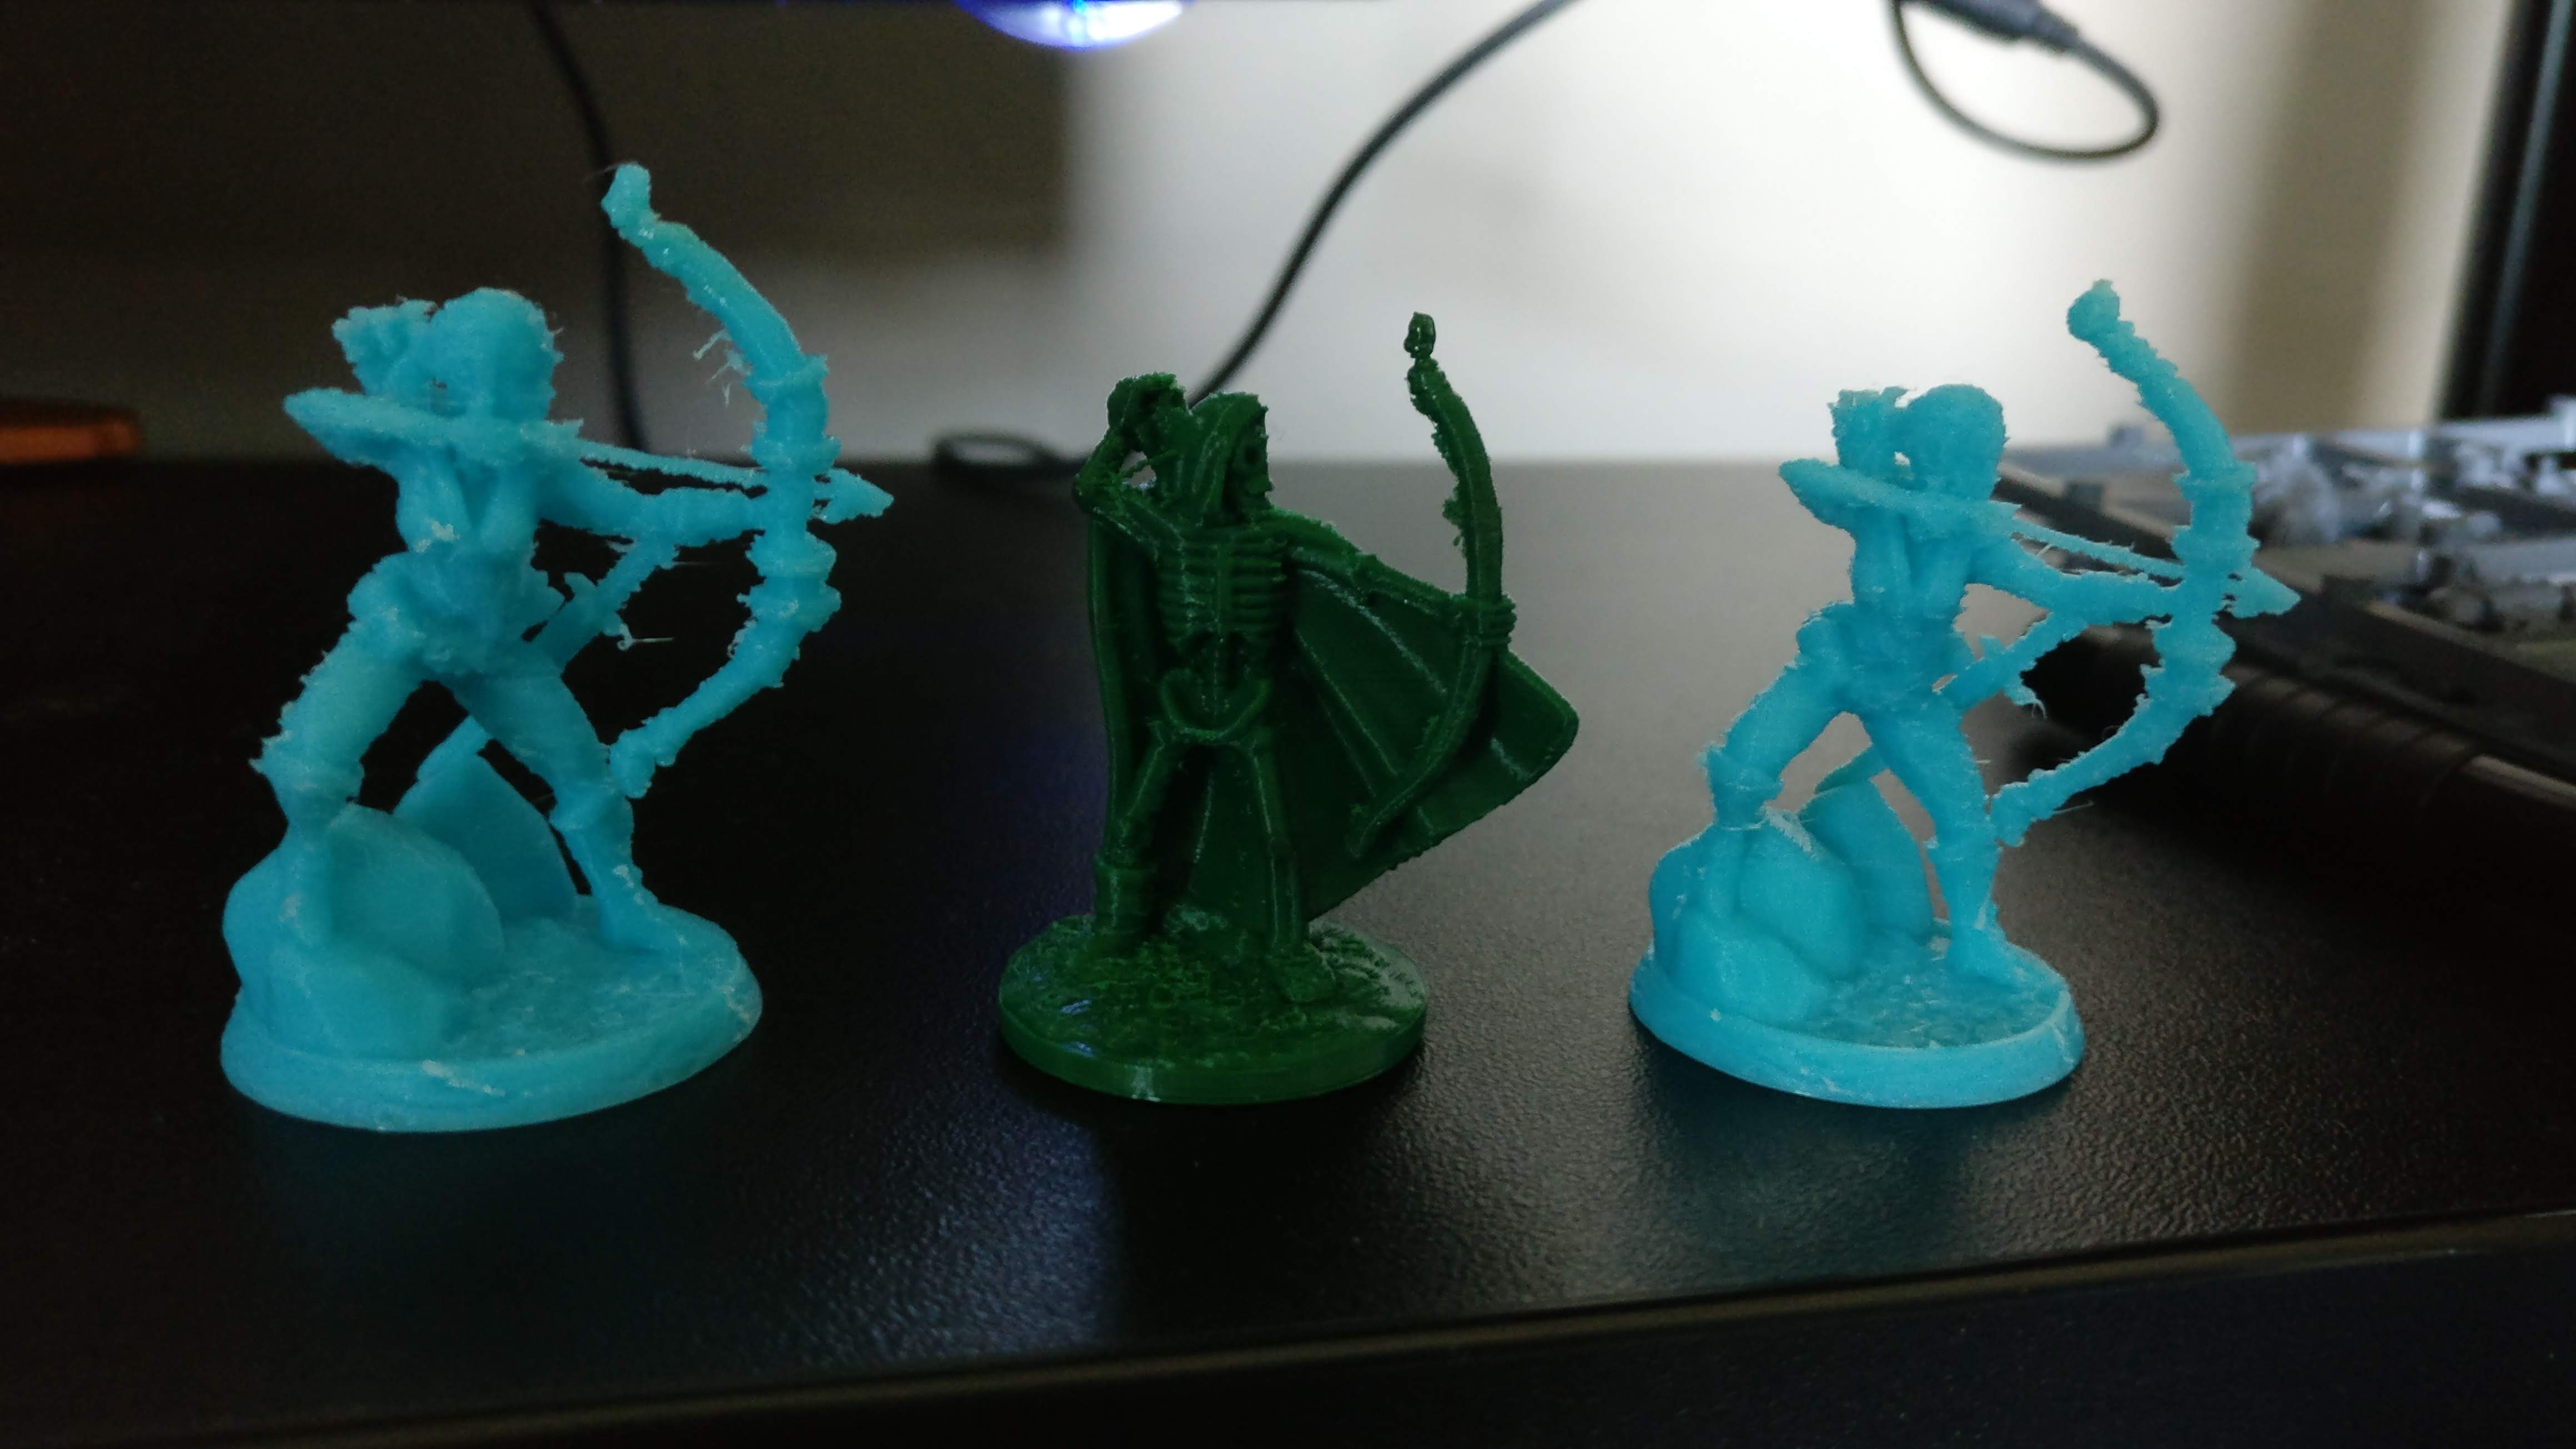
Apologies for the long post, I greatly appreciate any advice as to how I can finally get this one printable and move on after so long. :slight_smile:

Thanks so much!

1 Like

@ Arcangel_Zero7 Have you tried the modifier “solidify” on each separate part? That can resolve the non-manifold state…

Thanks for the suggestion!

I don’t think solidify would really be the solution in this particular case though, because it creates the mesh a hollow two-sided shell instead of a solid object, which would be fantastic for “SLS printing” (like Shapeways), but not so much for FDM home printing.

I THINK I might have figured out where my boolean issues were coming from though, and I’ll report back here on my findings in case it helps anybody else! :slight_smile:

Ok, somehow I managed to unify the entire model! It was quite a learning experience, and I’ll try to share how I managed…

First off, I dug through a few CG Boost videos, namely this one https://www.youtube.com/watch?v=j9LsMosCnZE , where he designs a dragon specifically for 3D printing. Found a lot of good tips in there.

A few things I learned:

  1. Some of my objects had wonky bits that boolean did not like. Example: The belts were a major point of non-uniform errors all along where they merged with the torso. Why? Well, upon looking all over them in local view ( the numpad / key ) I found that they had some odd protrusions or ngons or holes or other weirdness I didn’t catch before. Grid-fill came in REALLY handy here.

Important takeaway: Boolean doesn’t like dealing with strange concave shapes. Something I did that ensured the waist belt would boolean properly was I actually filled it in so it was more like a solid “cylinder” intersecting the torso. The boolean worked fine after that! Basically, if both your shapes are not manifold or solid in some way, you’re gonna have a bad time. (The hair was TROUBLE because of this.)

  1. My scale was TOO SMALL. I was trying to design my character to scale within Blender, only about 28mm tall. Tools worked funny, I had to zoom in like crazy, gizmos were enormous, but I stuck with it because I thought I wouldn’t have scaling issues later when I imported it into Cura. I don’t think boolean works properly at such tiny scales either!

Solution: I scaled it up…1000% I think? Here’s my world and export settings, respectively.
Metric_Blender ExportSTL

Even better? When I export like this and slice it with Cura? It’s the perfect size. Wow.

Also, tools like boolean worked a lot more like I’d expect, which helped a lot, and I didn’t have to massively down-scale every new object I added.

  1. Another really good tip I have is to append / link an .STL you like within Blender, so you can compare the size and scale. This way you don’t end up with a wonky-sized base that looks odd on your tabletop. My previous base was WAY larger, and looked more like a small diorama set-piece. I really liked it for showing off, but it wouldn’t be as much fun to play with next to other models.

I believe FatDragon Games has a free sample skeleton .STL, which I used to compare my scaling, and I’m happy with how it turned out.

I need to start another thread somewhere with pictures of my process and how it printed and all. But as for this topic, I think I covered the solution and I hope it helps somebody else who runs into this! :slight_smile:

Speaking of scale: Here’s how my second print turned out to be scaled for some reason on the left, then, using the archer skeleton to compare, I properly scaled her for the next iteration on the right. :slight_smile:

Sorry if this was a lot to read. Thanks again!