What size HDRI is common then?
Really? Cause when I set the sun to 5, (environment texture strength to 0.3) it seems far too bright:
Somehow mine is looking quite unnatural…
Where is the sun in your picture? Top left, I think?
What size HDRI is common then?
Really? Cause when I set the sun to 5, (environment texture strength to 0.3) it seems far too bright:
Somehow mine is looking quite unnatural…
Where is the sun in your picture? Top left, I think?
Environment maps are supposed to span around the entire “world”, so they can actually be quite gargantuan in size. This depends of course on the intended use: If they are not seen, but just for lighting, they can be smaller. If they are also to be used as a background image, they will need to be much larger in order to stay crisp.
I’d say that for equirectangular maps 6.000 x 3.000 or 4.000 x 2.000 are pretty common, but I’ve also seen 10.000 x 5.000 pixels or even larger. Because of the high dynamic range and the color depth those maps can easily be several dozen or even hundred MB in size. Yours is 360 x 180 at 170 KB…
Yes, sun in my render is upper left hand side, size 0.1, strength 5, MIS (multiple importance sampling) checked.
EDIT
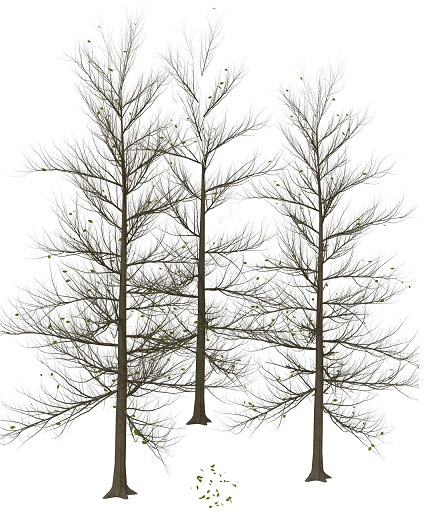
The longer I look at your last render, the more I’m starting to suspect that the tree model itself might be the issue. Perhaps you have just too many leaves bunched together (maybe even overlapping?), spoiling the translucent effect. My scene with the 10 trees is not even 50 MB in size - if your single tree is 1.3 GB, perhaps you just overdid it?
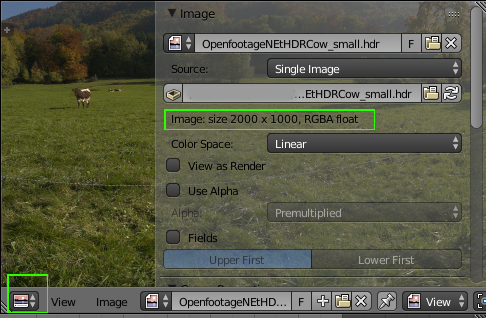
How do you see how many pixels a .hdr has? I can’t open them in paint.
The HDRI came in a zip along with other files like a smaller .hdr and a thumbnail, and one .jpg that’s 8000 x 4000 pixels, so I assumed the .hdr was around that size too. Given that, would it be better if I use the .jpg after all? Also, at what strength do you put it?
Well I created the leaves via a particle system (cause I tried to make them more horizontal), so I doubt the high number of leaves increased the file size.
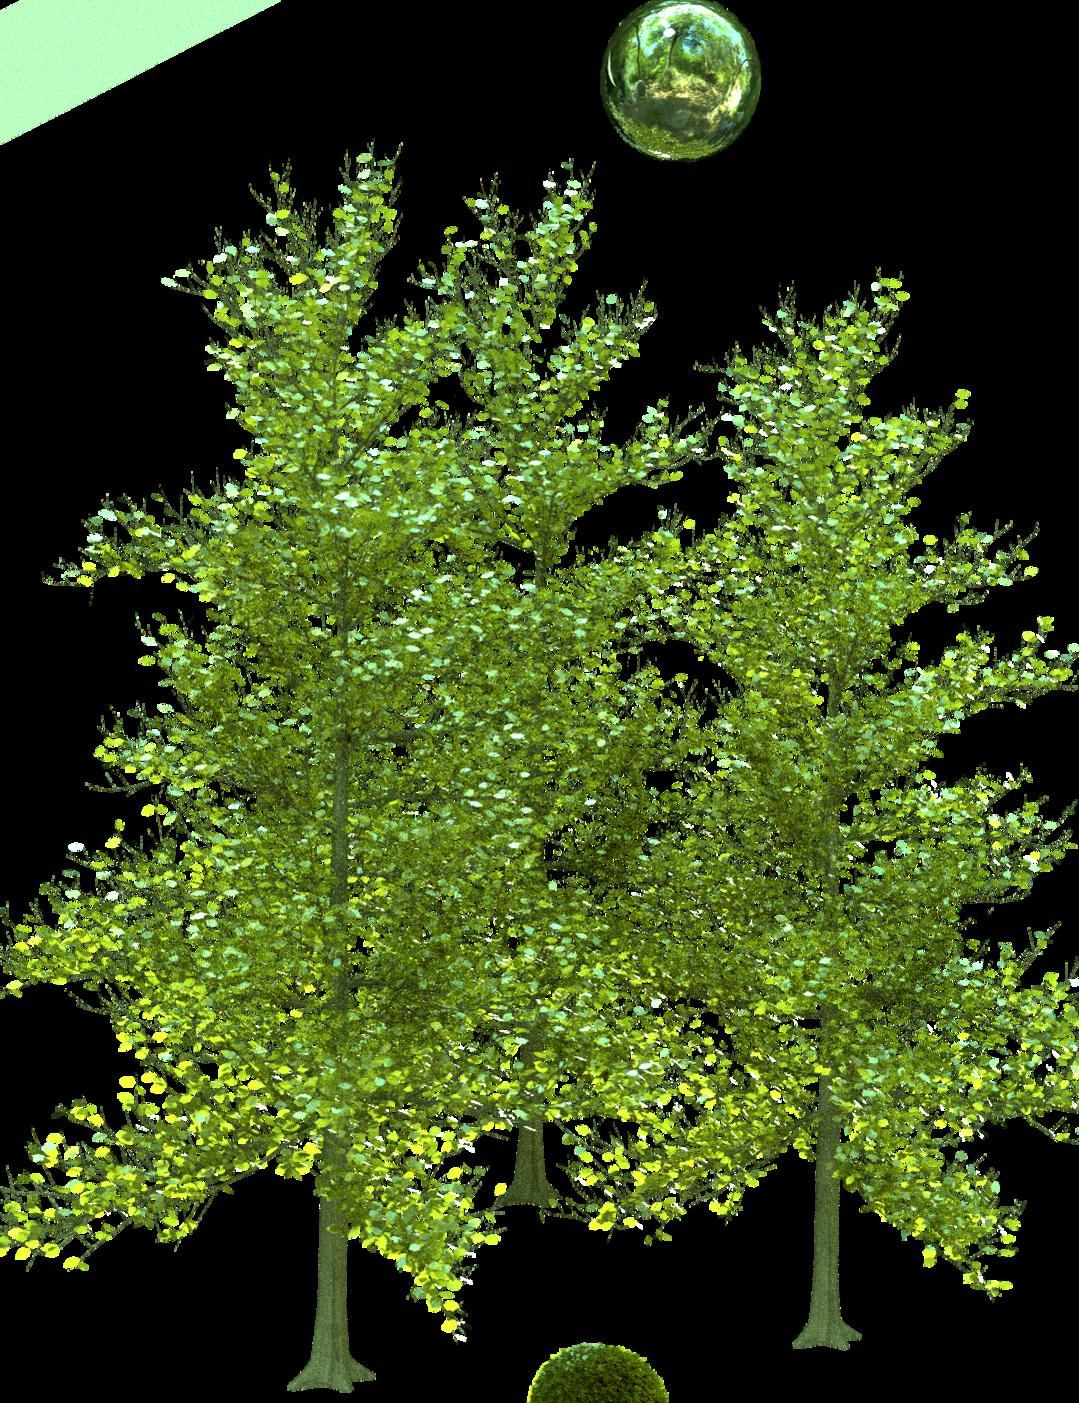
I’m trying around with the leaves, but I just don’t get that photorealistic effect you had. Maybe it really is just the HDRI, if my lighting is still not as complex as it should be.
In Photoshop (or Bridge, respectively).
But my last render was made with the scene file you provided - including your world settings and the low res HDRI. I only made slight changes to the materials and adapted the sun’s intensity and position. So, the only major difference between your render and mine is the tree…
I’m intrigued by the particle system for the leaves you mentioned: What exactly did you do?
How do you see how many pixels a .hdr has?
Blender can tell you.
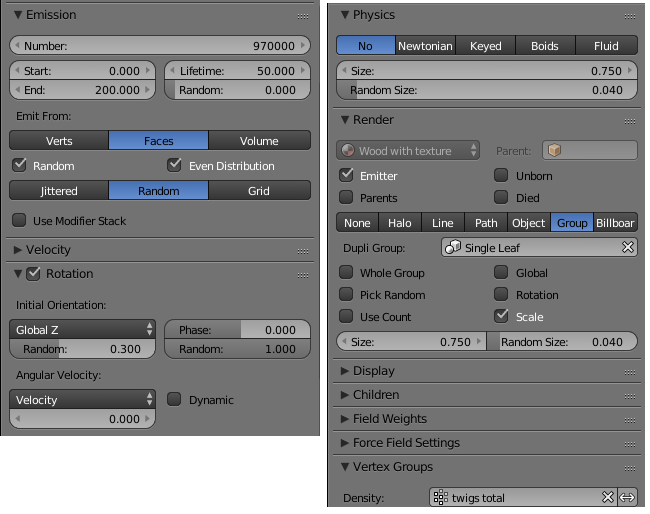
Okay, weird. So, what strength is your HDRI at? Maybe I haven’t got the right size or number of leaves. How many branch levels do your trees have, and what number of leaves did you give it?
What I did with the particle system was:
A million leaves are probably just slightly too many, I used 10,000 for my trees. :spin:
If I set the particles to 10’000, it looks like this:
If you’re using the sapling generator for the leaves, how do you know how many there will end up being, since that only allows you to set the maximum number of leaves per branch? Or did you just count them afterwards?
I don’t use the leaves that the sapling addon generates, but I have no idea why using 10,000 particles results in only 50 or so leaves on your tree so I don’t have any useful input for you on that matter. If you’re still having problems with lighting I would recommend this HDRI as it’s the one I used for the images I posted before. http://adaptivesamples.com/2015/11/09/hdri-mpumalanga-veld/
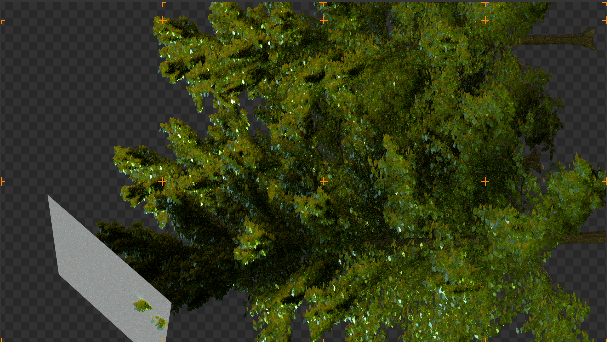
Thanks. Well I think it doesn’t make too much of a difference which HDRI I use. For some reason, when I use my background, there’s some more gloss on some of the leaves. I don’t know why, maybe it’s cause of that really bright spot on the sandbank in my pic.
Either way I’m beginning to like the lighting, so thanks for the input everyone. The problem I still have now is it’s a bit too yellow, and I’d like it to be more green. One thing I can do is move the whole picture towards green in the color management (white level 0.5 for green), which looks great for the leaves.
The glossiness issues are a result of having one sided leaves, fresnel requires that the normals are facing outwards for both sides of a flat face otherwise you get strange artifacts, you can use a solidify modifier with a low thickness value to solve that issue, I would highly recommend always setting the glossy color to pure white as only metals have colored reflections (or you can cheat and use Input>Layer Weight>Facing, doesn’t look as good though)
As for the colors of the leaves, ultimately if you want something to look a certain way you can make that happen however you want, if you want to use a blue diffuse shader and a yellow glossy shader and it looks good then it’s on you do make that decision, I personally prefer to keep things close to the real world and make use of other tools to get the look I want (color grading+compositing) however that doesn’t mean that my way is the right way or the only way to do what you’re trying to do.
Or you can use the ‘Backfacing’ from the Geometry node to switch between the frontside IOR and the backside IOR (1/IOR)
![]()
Hey guys. Here’s a new approach: I saw on this page here that there does seem to be a way to make differently lit areas have different colors, so I would like to try it out. But the instructions are pretty vague for a noob, so can someone help me with that?
For example, they say to set up compositing nodes. Nodes of what, materials? And I can’t find a node called “Render Layers” anywhere. Is that a different Blender version?
Render Layers let you decompose your scene into different elements, render them and later composite into your final image.
check the manual here: https://www.blender.org/manual/render/post_process/layers.html
There are some tutorials in the net… just google it
I think I’ve got the grip of the Render layer basics. My question is with the nodes in step 2. I don’t see a button “use nodes” for render layers. Am I supposed to make layer nodes for materials? And I can’t find an input node named “Render Layers”.
Those are compositing nodes, not materials. In the node editor, you need to choose ‘Compositing’ in the ‘node tree type’ icons (right to the ‘node’ menu)
Here you compose all the render layers, with effects, backgrounds etc.
Hm, okay…I’ve followed the instructions, but I don’t seem to get this sphere to show two different colors.
(On a side note: I didn’t quite understand what they mean by “create two layers which exclude each other”, maybe I got that wrong.)
I’m getting RenderLayer1 (the influence layer) to render to the file fine. But when I render RenderLayer2, pinned or not, the result appears briefly in the viewport before disappearing, and then it’s neither visible in Blender nor in a file. Also, the result that briefly appears is wrong: it doesn’t have the green material it should be having.
I attached it. Can someone see what I did wrong?
cycles duochrome.zip (264 KB)
First: both renderlayers are still there. you can see them in the UV/Image_Editor. Next to ‘Slot1’, you have ‘Composite’, which should show you the result from the output of the composite nodes. If you click in that button, you can choose to see each render layer.
Since in your compositing nodes, you’re using RenderLayer2 for the composite node, that’s the only thing you get in the final rendering.
Right now, your RenderLayer1 is rendering only the sphere (on layer 1), with it’s own material assigned (myTestMaterial). Layer 3 (with the cylinder) is not selected for rendering, and you have excluded Layer 2 (that is empty).
RenderLayer2, is rendering Layer 3, and excluding Layer 1. This renders only the cylinder. And because you have your renderlayer material set to myTestMaterial, your cylinder is rendered green (instead of default white diffuse)
Okay, I removed the “Exclude” part from the render layers. I didn’t understand what the point of those was anyway.
Well RenderLayer1 is rendering the sphere in grey tones, since RenderLayer1 overrides all Materials with the Plain Material.
And RenderLayer2 is showing the same in green. Lighter green at one end of the sphere, darker at the other. But why isn’t the lighter end yellow, like I specified it in the nodes of myTestMaterial?
So, still looking for a solution to this.
Can someone tell me why rendering layer2 gives me only a green ball, not a green-and-yellow one as the material node for myTestMaterial should cause?
Thanks.
cycles duochrome.zip (246 KB)