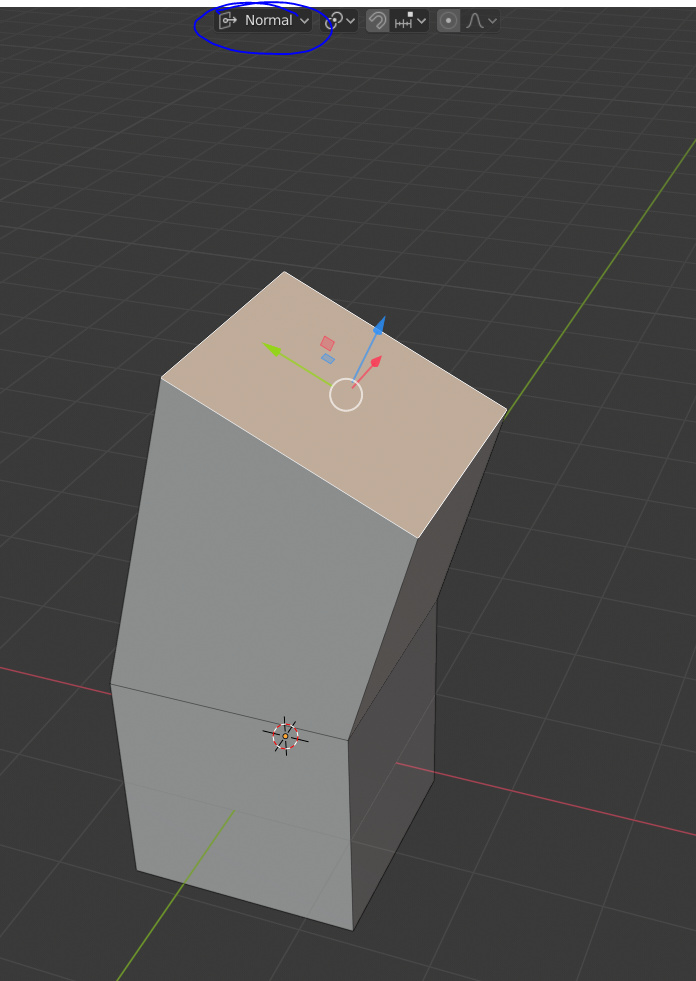
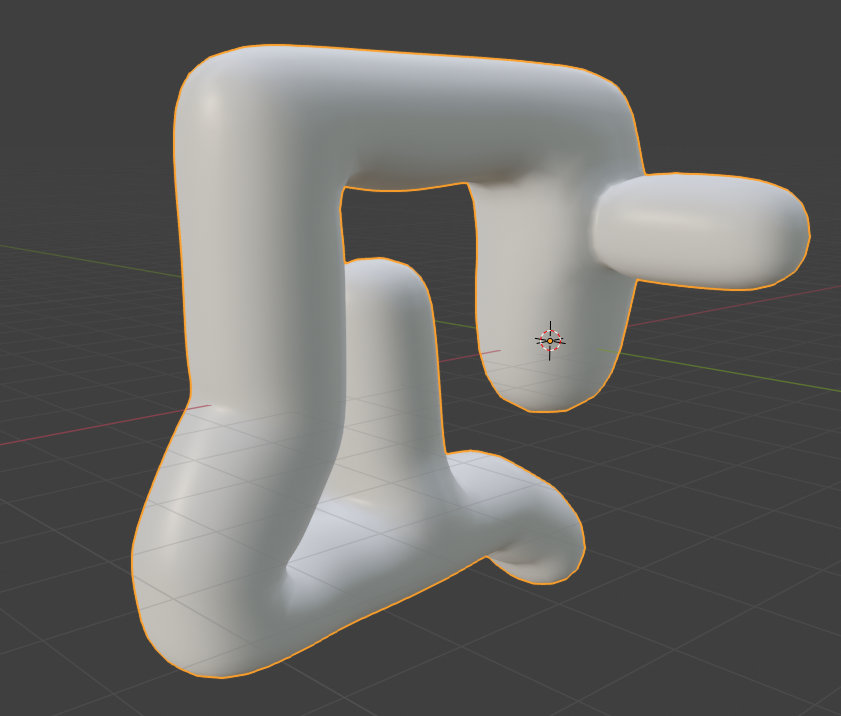
A standard method in 3d modeling of “fattening up” a convoluted pipe or hose, esp one that curves back on itself so no one global direction equals “fatter”, is to select the polys in question and do a “Move Normal” on them.
I don’t see such a facility in 2.81. Am I missing it?
I can sort of get it to sorta work (not really), but it’s certainly not what I expect from a straightforward “Normal Move” or “Move Normal”.
Specifically, I expect polys to move ALONG their normals, and no other direction. Like, if you wanted to skinny/fatten this pipe (attached) up , entirely simultaneously, what Blender tool settings would you use? In C4D, I’d just use “Normal Move” and done. That’s what I’m trying to find, but there seems to be an excess of hoops to jump thru.
Sorry, maybe there is some difference between blender’s shrink/fatten command and the c4d normal move command that I’m not aware of. I haven’t used c4d before, so I have no way to compare the two operations.
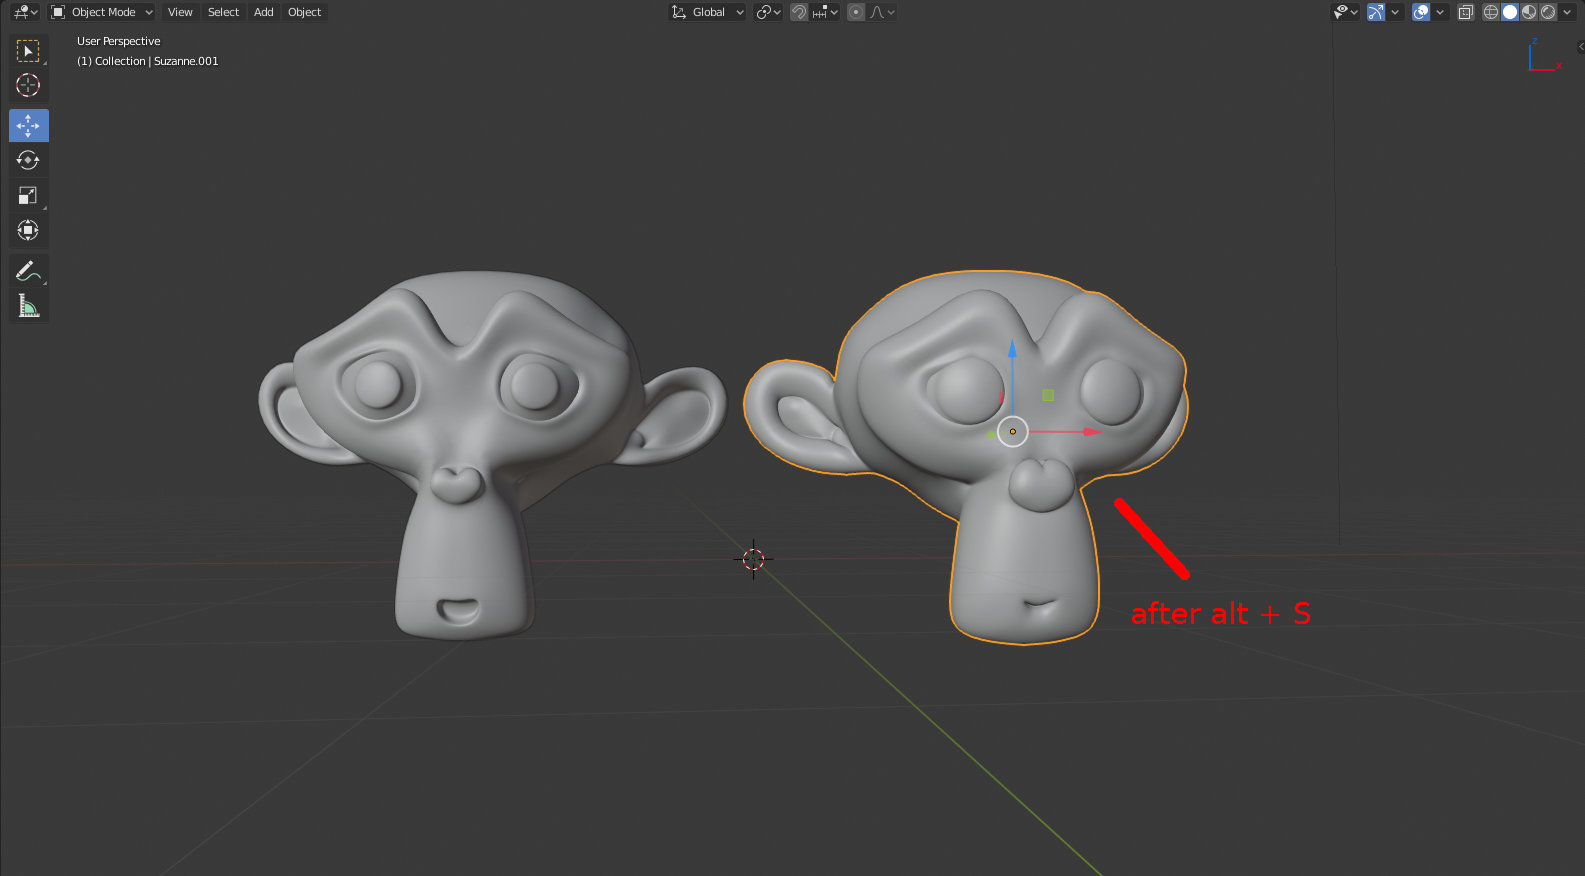
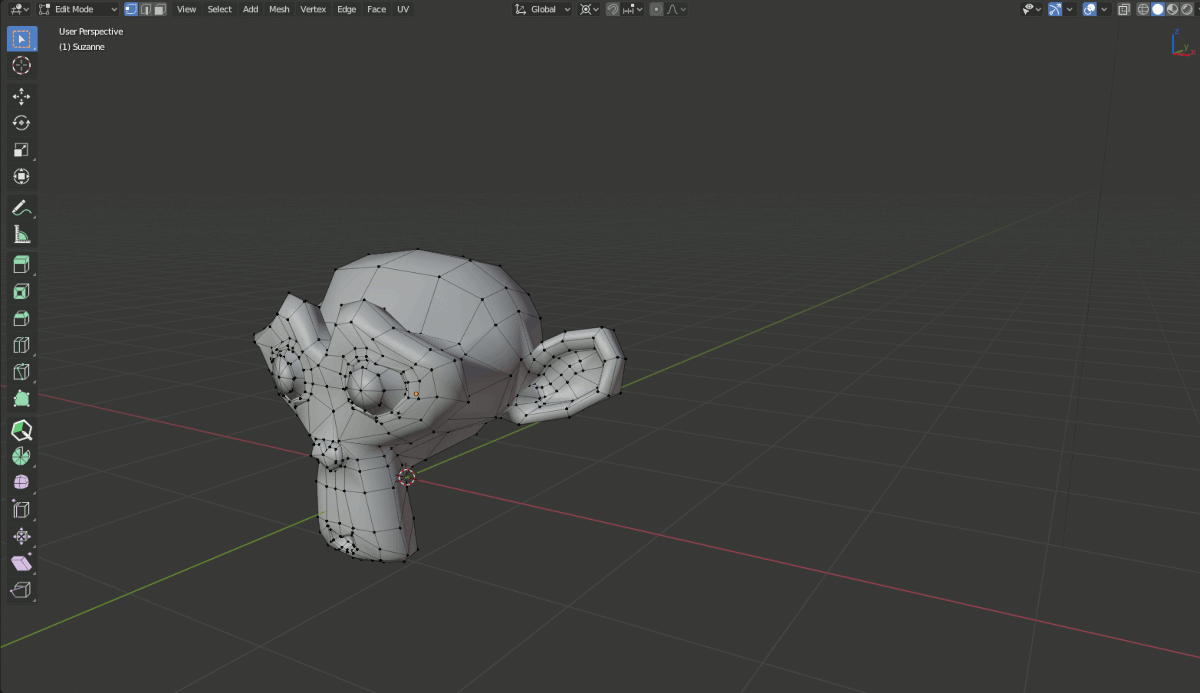
When I want to make something “fatter” I select all of the vertices in that object and use the alt + s command which gives results like this:
And the active tool version of this command has this icon:
Now, lets say I wanted to make the ear in this monkey head larger. In that case, instead of using alt + s on the ear portion, I’d snap the cursor to the selection for the ear, then adjust it’s position along the x axis by holding shift and dragging that property slider in the sidebar. Then I’d use the cursor as a pivot point and use a regular scale command (S key):
Edit: I have a hard time visualizing how moving each face out in the direction of their normal could work differently from the alt + s command. Could you share a link to a video that shows this tool in use, or a screenshot of that handle after using the move along normal command in c4d?