Welcome to Blender Artists!
So first off, the sane answer to your question would be to just use a texture. That said, I created a mesh weave not too long ago myself, having needed high fidelity for close ups. If that’s the boat you’re in, here are the steps I took. Starting out, I thought this would be easy to explain in a few sentences, but it turned out to be too convoluted without actually walking through the steps. So not knowing what your skill level is, hopefully this is clear enough. And I’m using the 2.80 beta, which is much different looking than the current 2.79. Feel free to ask questions! 
Start off with a base mesh (I started with a cylinder with the sides pinched in), taking care to keep the polys as square as possible. Subdivide as needed to get the desired netting density (The polygons will be roughly the size of the gaps in the netting, minus the thickness of the wires)
It also helps vastly from here on out, if you delete half of the mesh on the x and y plane, then add a mirror modifier. This way you only have to do one quarter of the work.
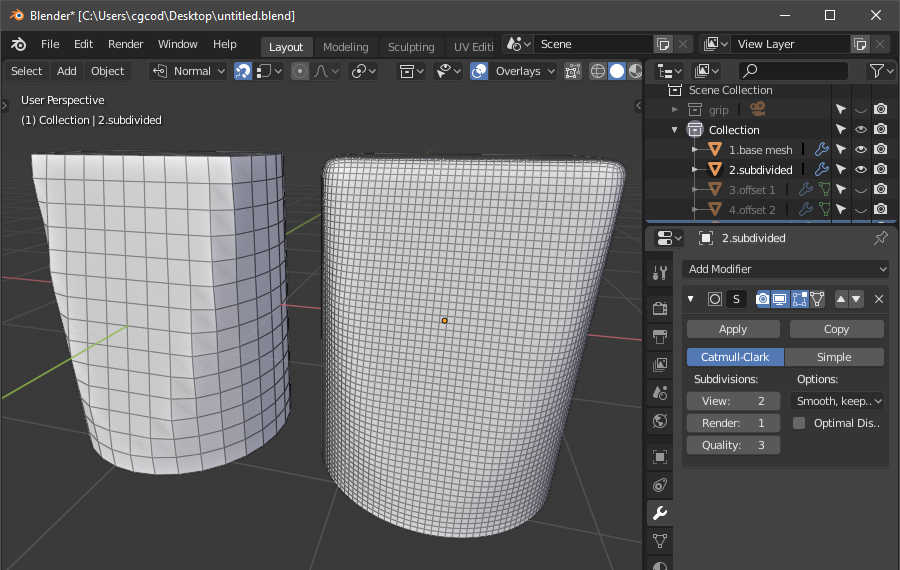
Once you have the desired density, apply the subdivision modifier and create a duplicate of the mesh. Go into edit mode on one of the meshes, select all vertices, then perform a checker deselect (First image below.) Using the Shrink/Flatten tool, expand the selected vertices away from the mesh so as to create a sort of zigzag pattern (Second image below.)
Now do the same thing on the duplicate, but when you perform the checker deselect, increase the offset by 1 (See the bottom left of the first picture below.)

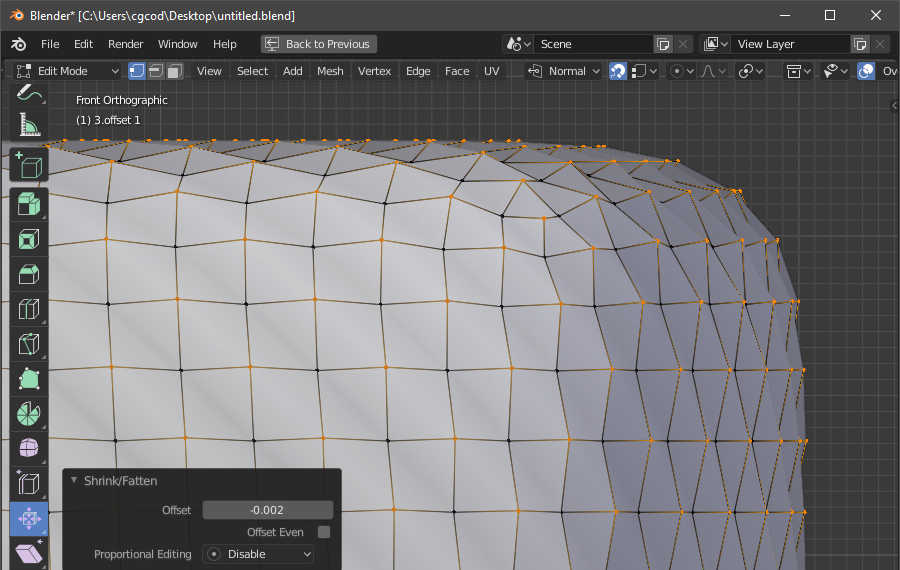
Now you have two meshes with every other vertex poking outward. You might see where this is going. This part is a bit harder to explain, but essentially, you want to select all edge loops from either mesh, such that you are not selecting any CROSSING edges from the same mesh. Remember the patterns of the two meshes are alternating, so edge loops from mesh 1 and their perpendicular counterparts from mesh 2 will weave around each other (See the first image below as an example).
With the edge loops selected, press shift+D to duplicate (but don’t move) them, followed by p > selection to separate the edges. Once you have all of your edge loops separated out, join them together (Select them all and press ctrl+J), then convert the new mesh into a curve object (Second image below)
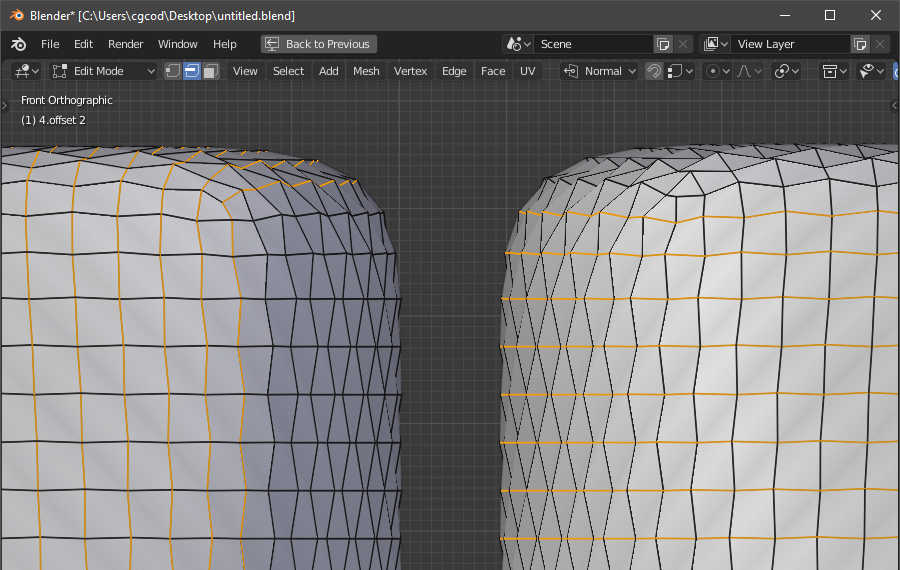

Now go into the curve settings panel, and make a few adjustments. In the Shape section, you’ll probably want to set the fill mode to Full, and in the Geometry > Bevel section, set the depth to something appropriate (My example is not to correct scale.) From here, you can either set the resolution to something higher, or as I did, add a subdivision modifier.

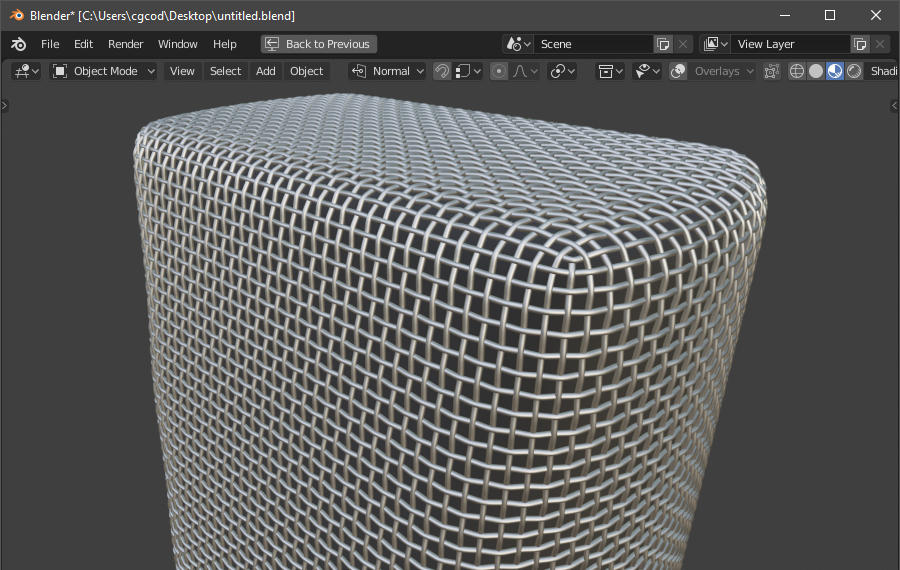
…Or like I said, you could just use an image texture. 
Here’s the .blend (Again, it’s 2.80)
mesh_weave.blend (1.5 MB)