

Lots of subtle updates here. I do use a few triangles, I hope that doesn’t give zbrush too much problems. I used a new reference (actually its pretty old) and worked on the silloutes by viewing the alpha channel. I want to unwrap this soon, and get some uv test up soon than take it into zbrush hopefully by Monday. I tried to follow all of your suggestions.
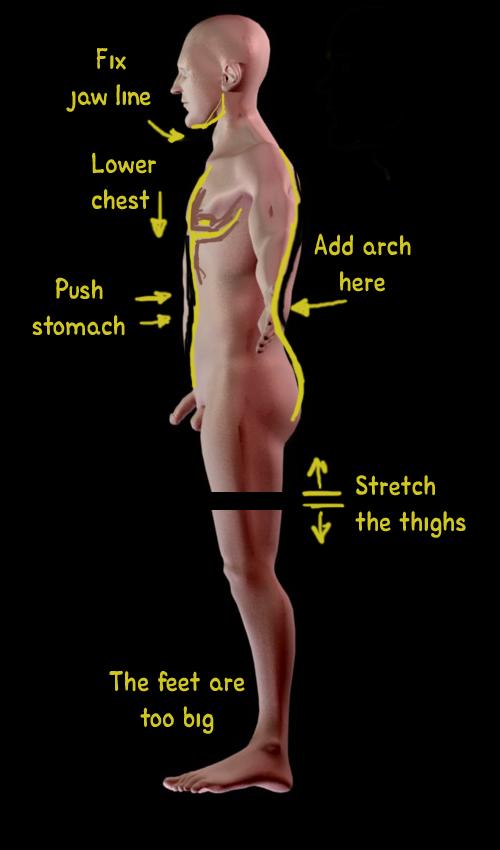
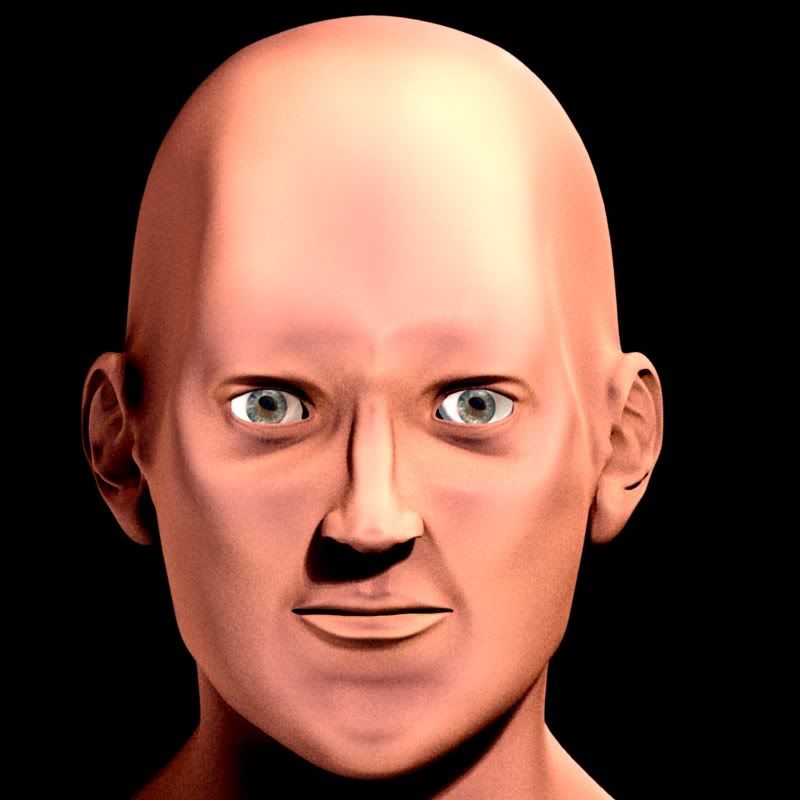
Wombal, in my opinion the guy’s temples are far too inset on the side of his head
and the chin is sticking out too much
Thanks toloban!
Here’s a new update. Played with lighting and AO this time too.

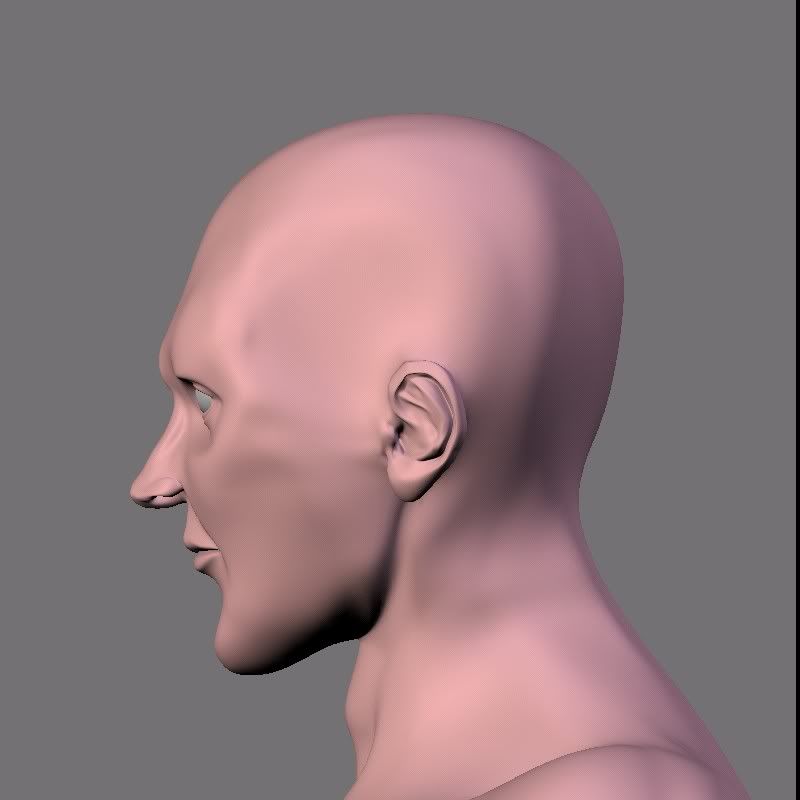
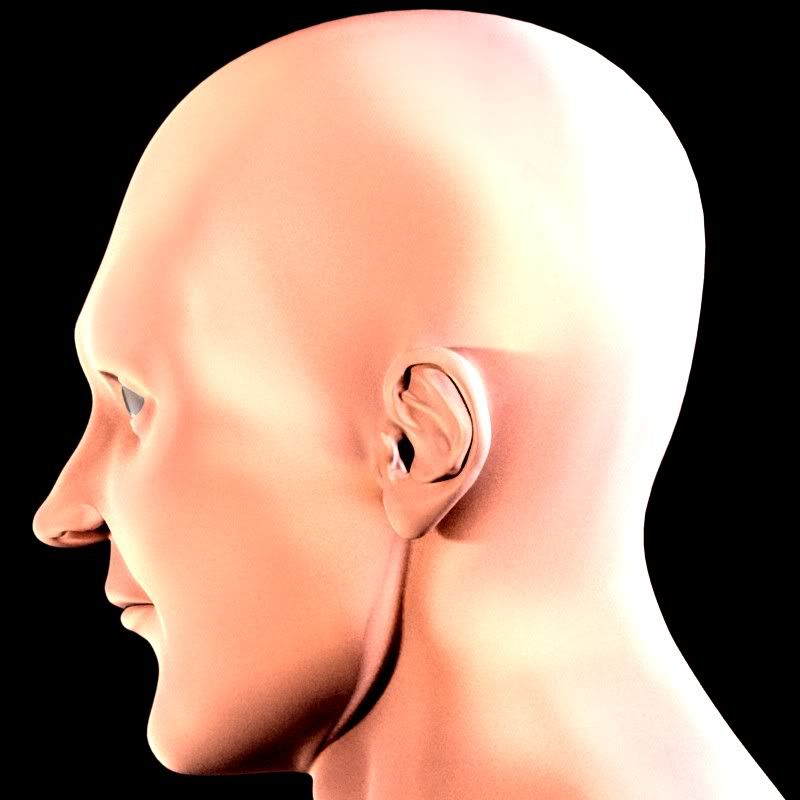
The opengl side view is there so you can see the chin adjustments.
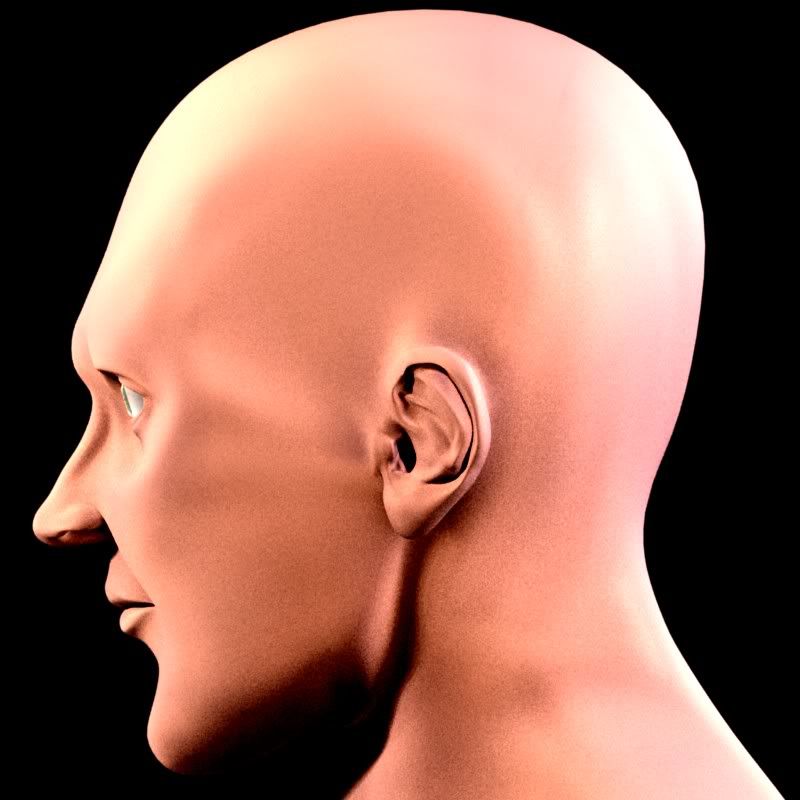
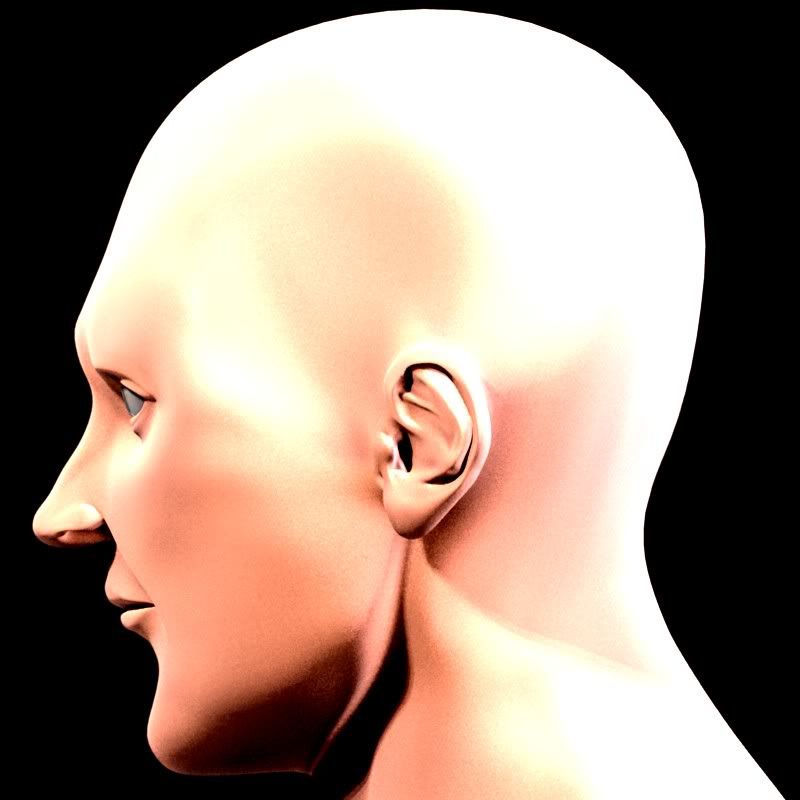
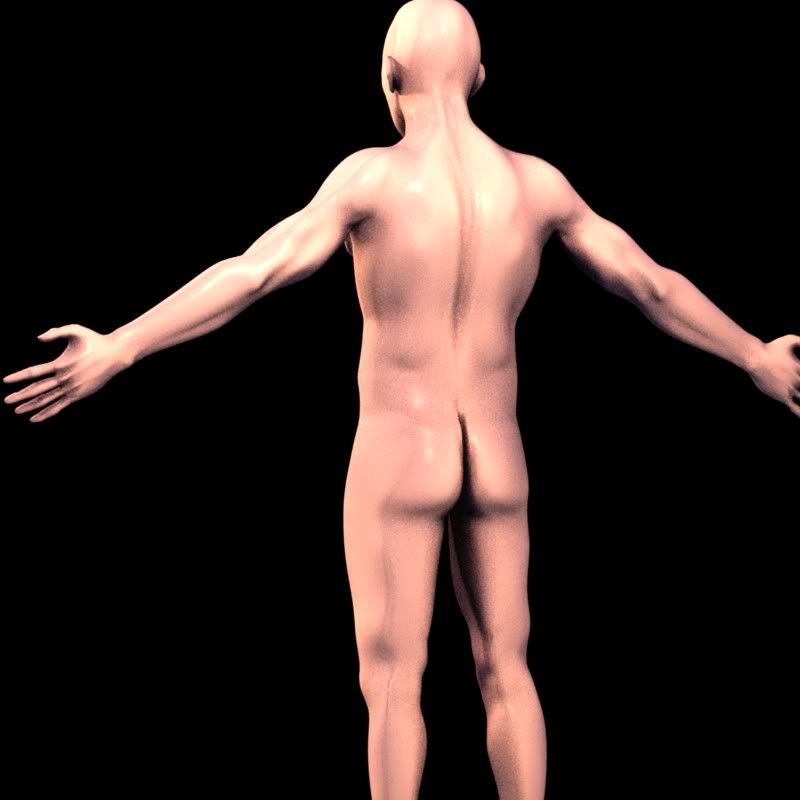
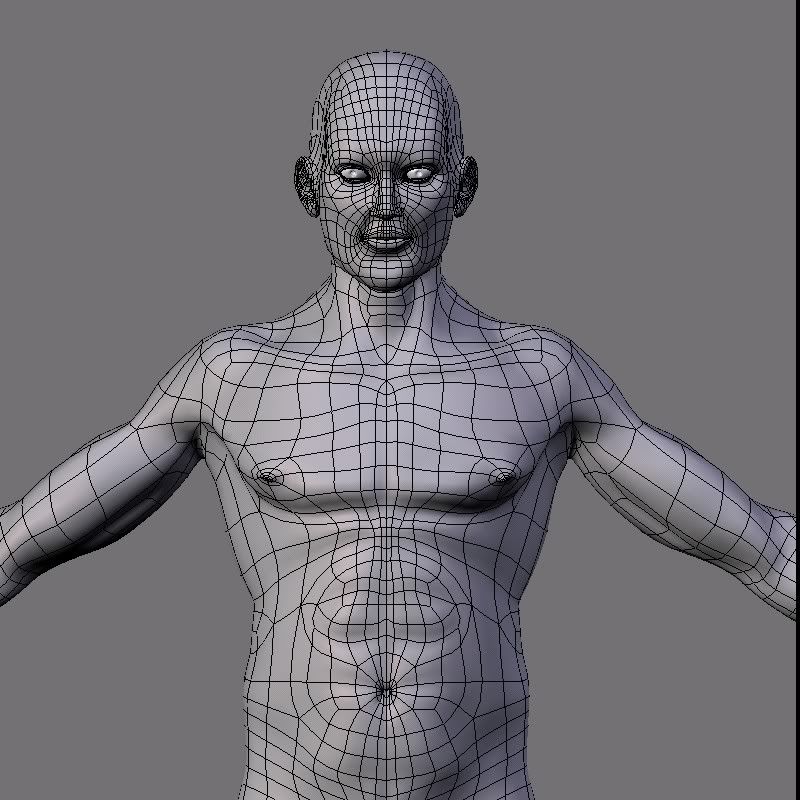
Some updates to the head. I think he’s ready for unwrapping! May a few updates to the back topology. I have several side views since the fake skin shader isn’t quite working right. Its based on vertice paint light areas after all. There needs to be a really strong light for it to work correctly, which often either flattens the face like last render or has parts of skin glowing too much that are in shadow. Dark areas glow too which create shaded areas. The wind channel can be pulled out more in zbrush I think, I don’t have that much topology there yet. And areas near the seams of the instances tend to be very sensitive to changes on the x-axis.

Verry well done!
Love the shaders/materials you used 
some of the shadows look a bit mottled… think you need to increse the AO or render doublesized, and then reduce it by 50% in gimp (cool trick I learned from Zbrush)
love it! great work!
I may have to find some other way around the ao thing. The render double without OSA might work. I’m at sub AO 8 and my renders are taking like 5 minutes because of it. I don’t have a fast computer :(. The shadows are on level 3, level 5 would probably look nicer, but I think I should save that for say a final render in blender. Definetly not in an orthographic view though. You have to admit these are boring angles! I think I’m going to try to rework the upper back topology. It looks really cool on tolobans and it may help with pulling out those muscles. Thanks for the support! Maybe I may do more in blender with the character.  Have to see if I can get cool effect with material nodes.
Last tweaks I think. I changed the back topology slightly and the face as well. The eyelid has an extra vertice at the corner. This edge loops travels to the side of the lips. So I have more room for detailing I think there. I also pulled out more details in the leg and back and genital region. Also notice the feet changes, no toe nails, but afterall nails aren’t imbedded in the muscle. Time for unwrapping.
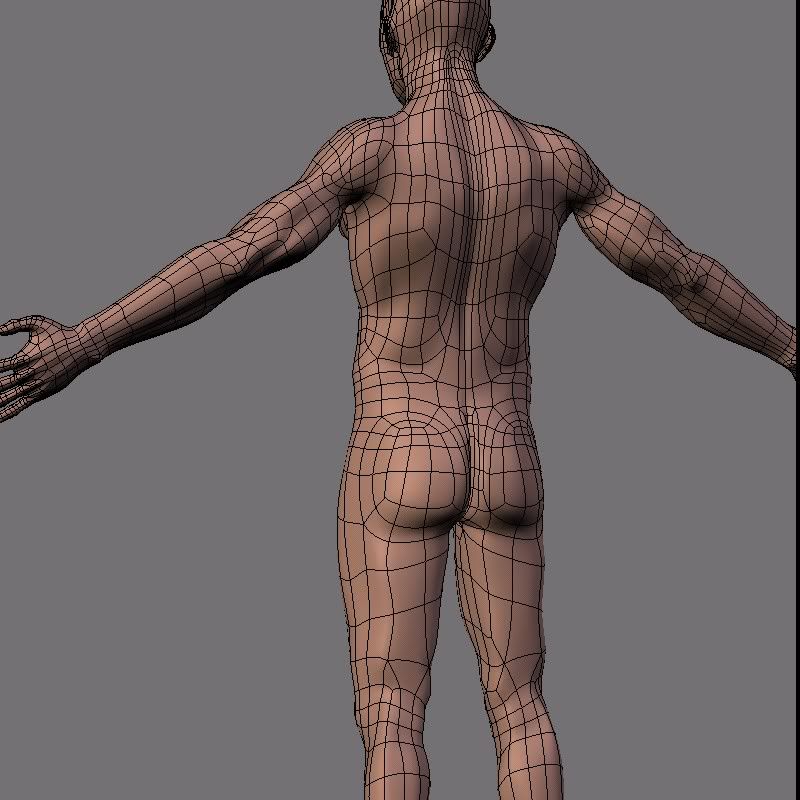
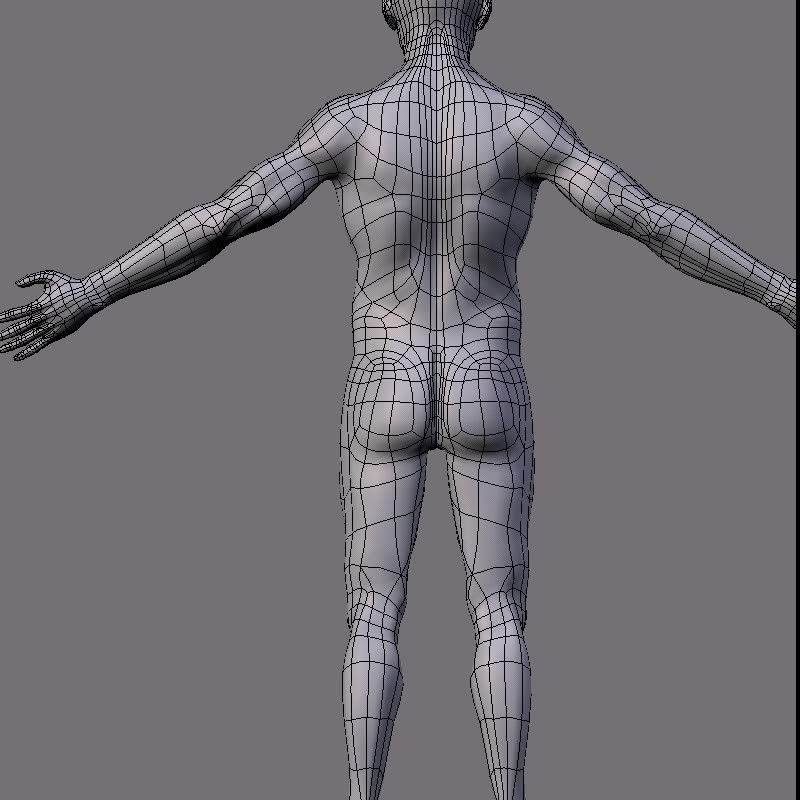
2 hour unwrap due to abf unwrapping . I think the stretching isn’t that bad. I have been spending quite a bit of the 2 hours trying to control it and make sure there is no overlaps. The final poly count of the cage mesh is 6180 polygons! This is the polygonal view of the mesh. So it has some rough edges.


Your model has improved a lot in a short time!
Sorry I post all this after you have already started UV mapping:
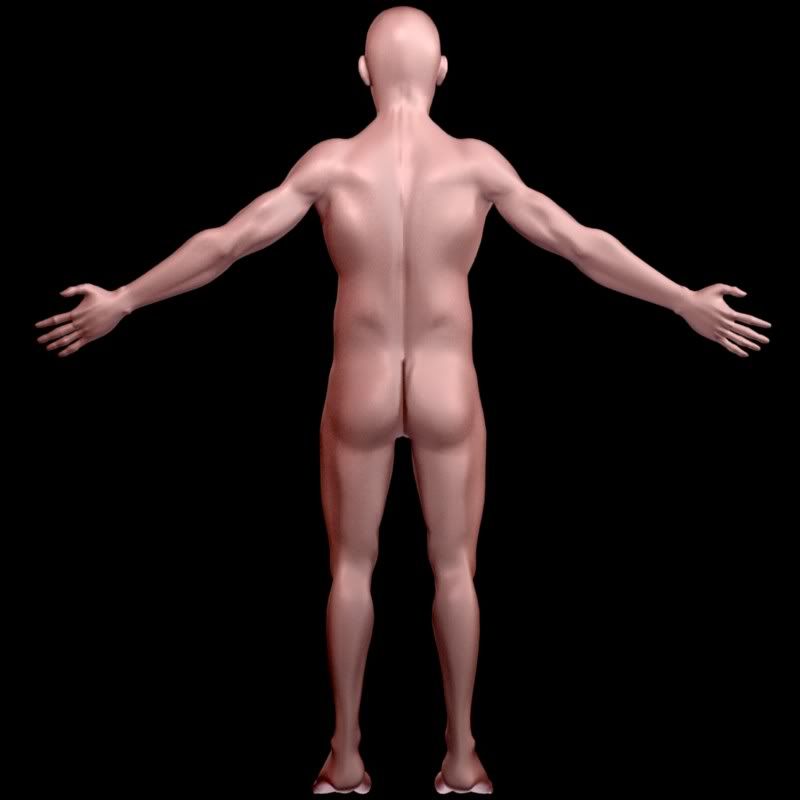
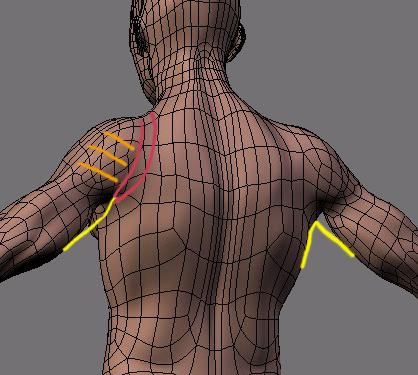
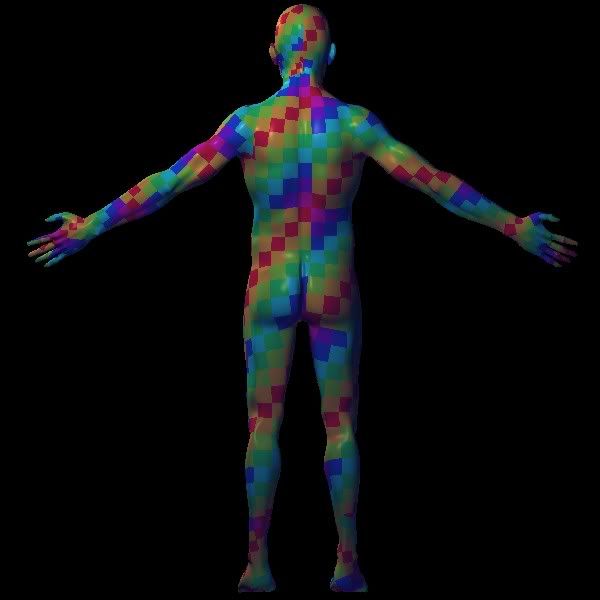
The shoulders bug me somewhat. Looking from behind, there is like this knot of loops. You already have the loops which go with the fibers of the muscle, the orange lines are the perpendicular loops which I think shoud be connecting them.
The red lines make a face ring which goes under the armpit and is thought for animation, it will of course get very stretched and twisted, but will remain basically a ring. This ring has given me great results because it keeps things simple and logical. It doesn’t matter much if polygons next to it don’t make any more rings.
The yellow lines just say “this part is too narrow”. Looks like the poor guy’s arms are tightly tied.
Attachments
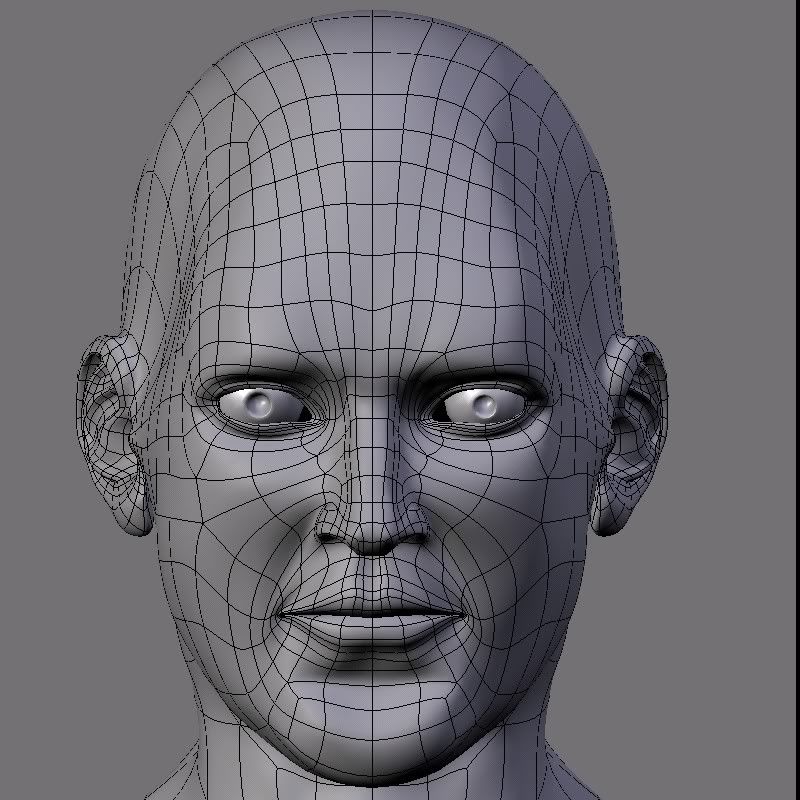
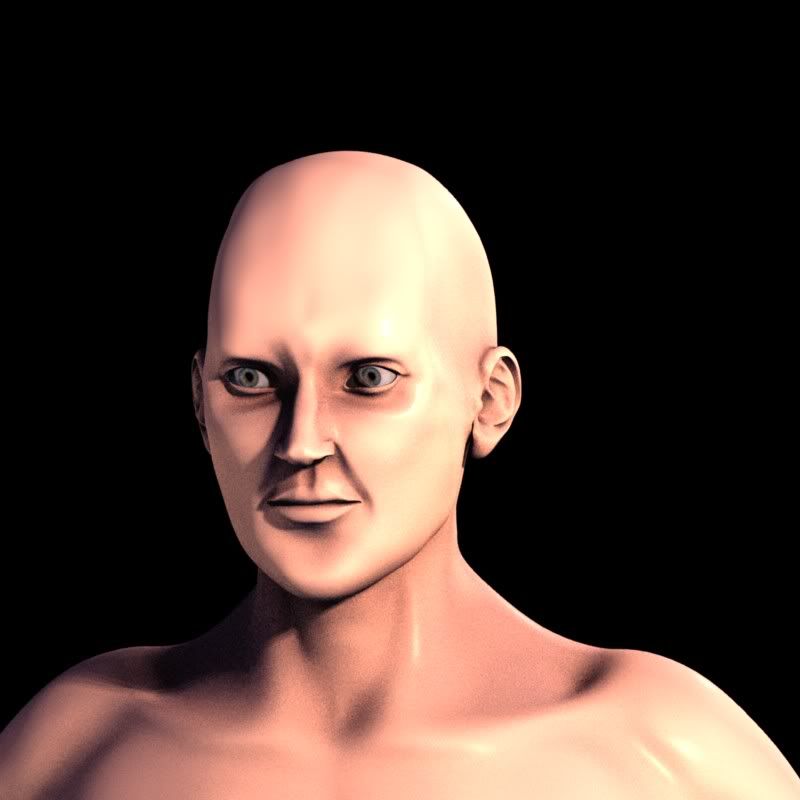
Make you model smile a little bit, but very subtle.
Right now the lips are one straight line.
The nostrills on the nose should become more smooth.
Hope this helps
Does that involve using a triangle there? Also Should I put the seam that goes around the the genital area and on top of the arse somewhere else? I know right about it there isn’t that much muscles that are visible. I’m going to have to split the mesh though so I can update this quickly with the mirror modifier.  Unless there is a new tool in blender cvs or a way to do it in wings3d.
man you dude looks like he bough one of those male enlargement things because the area his genital is connected to stick out far to much.
from the side only your belly (fat) can move sofar forward, or he is suffering from some serious gas production.
concerning critiques, there are no harsh ones, there are only constructive/helpful or useless ones.
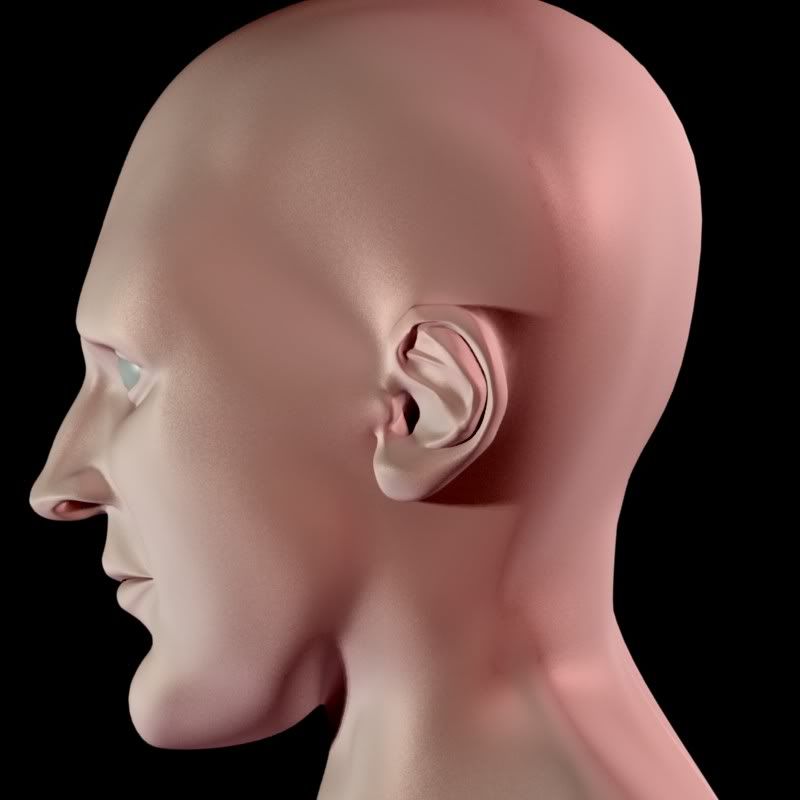
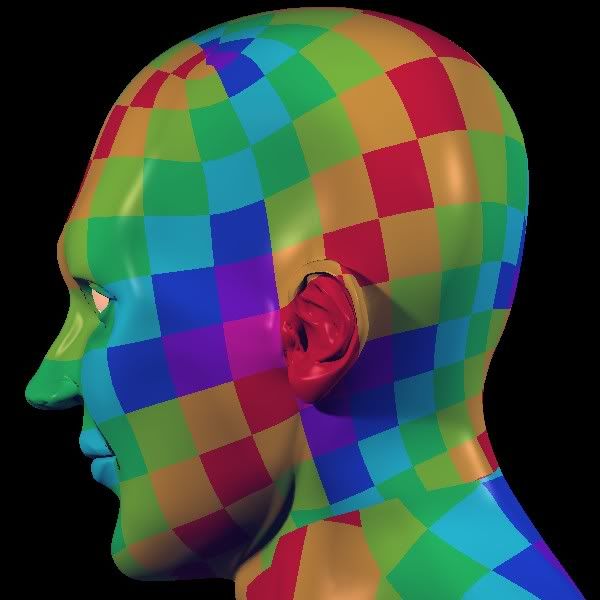
your head side profile looks good, while the front view makes him look he stares. also your ears seem to be a bit to fleshy. also the seem to be connected to the head in an anatomical incorrect way.
your lip corners (those are hard) show to hard edges. loosen the geometry there a bit.
your nostrils and the nose trip seem to be a bit out of proportion. there in contrast to your ears the volume seems to be to thin.
i hope that helps.
claas
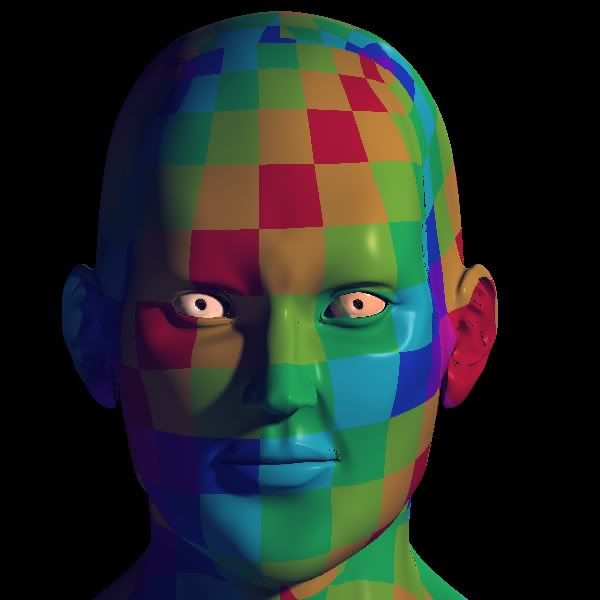
I redid the topology and the UV’s. I think this has a lot less stretching. Its now in zbrush so I will not redo the UV’s or topology anymore.

UV mapping looks nice and consistant… I think i would give the ear a bit more “meat” otherwise it looks totaly nice and uniform to me
the ear will probably be covered with hair anyways
the way you left things in nice big pieces will help while you are Zbrushing too. Texturemaster seems to like UV maps with few seams… I add AUV or GUV tiles to a UV mapped object, and I always get really slow “pickup” times useing texturemaster.
anyways, this looks great, Happy Zbrushing!
I give this a 4.95/5 rating on perfect UV mapping 
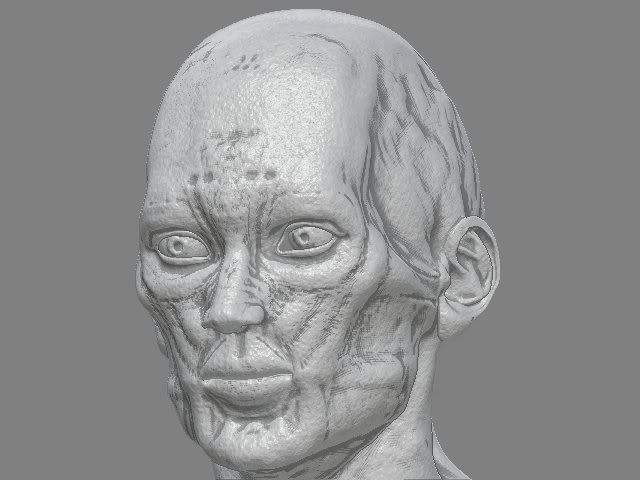
No hair. Everything will be visible. Except for the skin. I will post an update soon of the head. I am closed to finishing roughing out the form.
Btw did you make that character in your avatar in zbrush? He is in the highlights gallery in zbrush. If you did your a far better zbrusher than I am.
Yes it needs a lot of work. I just want to show my progress in zbrush so far. I’m going on vacation this weekend so I won’t be working on it until monday.
Womball, great job so far. I understand that you don’t want to shape you topology if you already UV mapped and zbrushed. There’sd time later on to refine or continue a 2nd version.
Just keep in mind that if finishing up, that you get rid of perfect mirroring things.
Will do WIM. A lot can be done in zbrush. I have not had much time to work on this, and this is the best part so far. Keep in mind I do not know how to set smooth in zbrush, when you get to high resolutions in zbrush it does not really matter either. I am still doint a lot of research on muscle structures, so its going to take me awhile to rought them all out. The seratus, abs oblique, mentalis and gluteus medius are driving me nuts. They seem to vary radically from source to source. I don’t know know if there are 5-7 serratus muscles, and how many obliques there are. The gluteuse medius seems to be in different locations in different sources, and mentalisis is very hard to get decent references for.
