I had a few unfinished car and truck models which I decided to finish. This is my only model based on an actual car. I found no blueprints and the original which inspired me no more comes where I can see it, so only drawings traced from photos found online were used.
Ambient occlussion wass not used, it is faked by using baked textures and shadow only buffer lamps. Even if the results are not perfect, I learnt good lighting tricks thanks to the advice in the WIP thread.
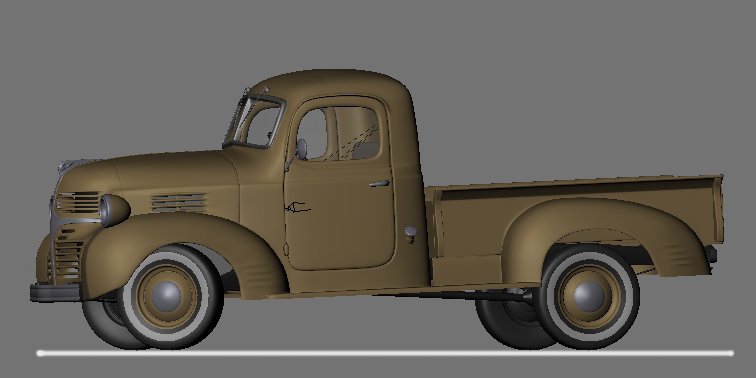
(dun dun dun, critique) There’s something about the door (at the topmost and bottom parts) that could be tweaked to make it fit the outer part better. It might just be the camera angle or the lighting, though.
As for the rest of the scene…I think making the pavement material just a tiny bit darker would make it contrast better with the building in the back, to make things look less grey.
Tiny crit is the shadow under the left headlight as well as the windshield wipers being crispy, like there is no over-sampling there. Very nice other than that.
Oh, and what’s the car doing in the middle of the road?
I like it. The background could use some dust and oil stains if you’re going for realism, but if you’re going for the “pixar cars” type thing, you nailed it. Love the reflections and textures. Good work.
Nice model, very clean. Really good for doing it from scratch practicaly. And a nice scene you put it in. 4*
like the little detail of the figure in the window
Thanks for your comments. What sharp eyes you have.
Yes, it is more of a subsurf thing. Since I separated the door and the body so the door can open, it has been difficult to make tham match. Fixing it means more polygons, but I will have to do it.
Dark pavement under the sun is tricky. If I make the pavement darker, there is no contrast in the shadows. That reminds me of my old book on perception about how we perceive lit black and white in the shadow. An interesting problem for CG images.
Cuby: thanks
Right, the ugly shadow under the headlight is there because there is a strong shadow only lamp from the top, otherwise there was too much light under the truck so I had to compromise. Good eye
BumpyMonkey: thanks
Yes I know it looks strange, that is because of the suspension, the model is not perfectly horizontal. I had problems matching my images because of that.
General tip for compositing/photographing things in general: don’t take a picture of the dark side of the car. Move the light or something, so it’s more illuminated and isn’t mostly in shadow.
Wow. When I look at what’s been getting 3 and 4 stars around here lately, I wish I could give this 6 stars. That’s not to say it’s perfect but it’s far superior to some.
Now, where’s this lighting WIP thread that you used? I’m a buffer lamp fan but gee they can test the patience a bit.
Modron, no retopo here (retopo is great though). Just started from a grid and just went selecting faces and extruding. It was fast and a lot of fun. I ended up with this topology (with very minor loop rerouting), on which it is very easy to remove edgeloops and add cuts to control edge sharpness:
Thanks AndyD, I don’t think I deserve 6 stars, but thanks. I posted the original WIP in spanish, so there might be a language barrier, but the discussion basically centered on this video, from which I learnt and I applied a lot: http://video.google.com/videoplay?docid=-5167385886400683169
My trick to get the same shadows I get from buffer spots but with no visible cone borders projected on the street was to duplicate the spot lamps and turn one copy into a simple lamp and make the other copy a “shadow only” lamp. The results are pretty much the same, although this doesn’t work well if a light is facing the camera or if the lamp is too far and the cone is too narrow.
In my opinion the shadows of a few classic-halfway lamps give a good effect of ambient occlussion, without the graininess and added rendering time.