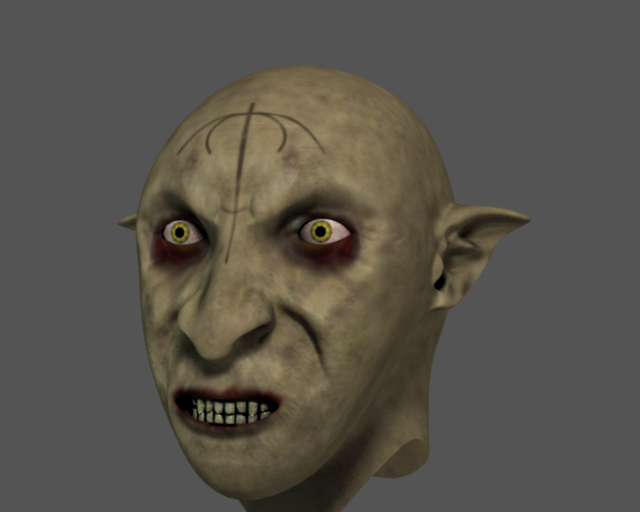
I started this thing as a sculpt starting at a cube. I then completely redid all the topology and UV mapped it. I used the new baking options to baked a normal map from the sculpt. Finally i textured it, this is pretty much the first organic thing i’ve textured so i’m sure how i went.
not bad for a test.
What did you have in mind for this? as you have put it in the FC forum.
A couple issues with the textured render: The lighting is very dark, I cannot really see the model very well. And it looks like your UV’d normal map is really making your UV seams stand out on the top of the head. You might need to edit the normal map to remove the deformed seam area.
Nice start though!
I put it here to just get some constuctive critism and such, should i have put it somewhere else?. I don’t really have any plans to take it much further, other than whatever suggestions are made in this topic.
While i was fixing up the normal map i noticed that it was incorrect on the neck. It must have been from when i generated it because the sculpt didn’t have a neck. I also made it a bit brighter.
It’s probably just fine in this forum, just know that you’re going to get a higher level of scrutiny in the Focused Critique forum than in say, WiP.
The lighting in your second render reveals your model much better.
Nice modeling, overall. However, it looks like your UV texture map is too low of a resolution. The texture looks fine in the small image, but looks blurry in the larger image. Also, the lips are fairly undefined. The topology of the face is kind of flat right to the opening of the mouth. In other words the lips look like they are pretty sharp and have no volume. This might be intentional But if not, it’s something that should be looked into.
The eyes look like they have the same material settings as the rest of the model and look like they are simply textured, with no volume for the cornea. Here is a link that has some great tutorials for modeling the eye, just scroll down a bit and you’ll see a section with eye modeling tutorial links.
The texture isn’t too low of a resulution, that comes down to my texture painting abilities. I guess the only way to improve is practise. When you talk about the lips, should i be fixing up the texture or the model, or both? Meanwhile i’ll make some proper eyes. Thanks for the crit.
well, I was commenting on the modeling of the lips. but it’s really an aesthetic thing, you modeled it that way on purpose, no problem.
On the texture: what you have there is pretty close to look good, just need to make it look more crisp, like the thumbnail in this thread.
I’ve done some decent eyes and made a few little touch ups on the texure. I’ll probably leave it where it is unless someone spots something thats needs fixing.
this is nice,but i have some critics,the mouth looks kinda weird,i dont know if its just me,but i cant really see an upper lip,and i would like to see a side view,so i can tell you if the jaw(i think its called jaw,english is not m native language) looks nice,the greatest thing here are the ears,nice job on them,keep working,and make him a body,and some nice looking axes.