Sorry I have no images, as I was just trying this, got fed up and did not save it . But I’ll do my best to explain. I have searched and tried a few techniques.
I f you can point me in the right direction that would be great.
The Tissue modifier/tool will do something similar to what I want but I need to do it with a predefined pattern, after using that I can then fuse the two objects to create one object.
It’s like the opposite of engraving, over a dome or terrain, so it follows the surface.
I have complex shapes, think terrain for one, a dome and an elliptical dome.
I’m trying to apply and join a pre-defined complex pattern like a lattice or basket weaving to the surfaces but bet needs to be slightly raised. I’ve tried some different techniques and no of them give the desired result. Think icing a cake with a pattern or applying a metal pattern applied over a domed ornate box and wanting to stand pound by a few mm.
eventually this will be 3D printed.
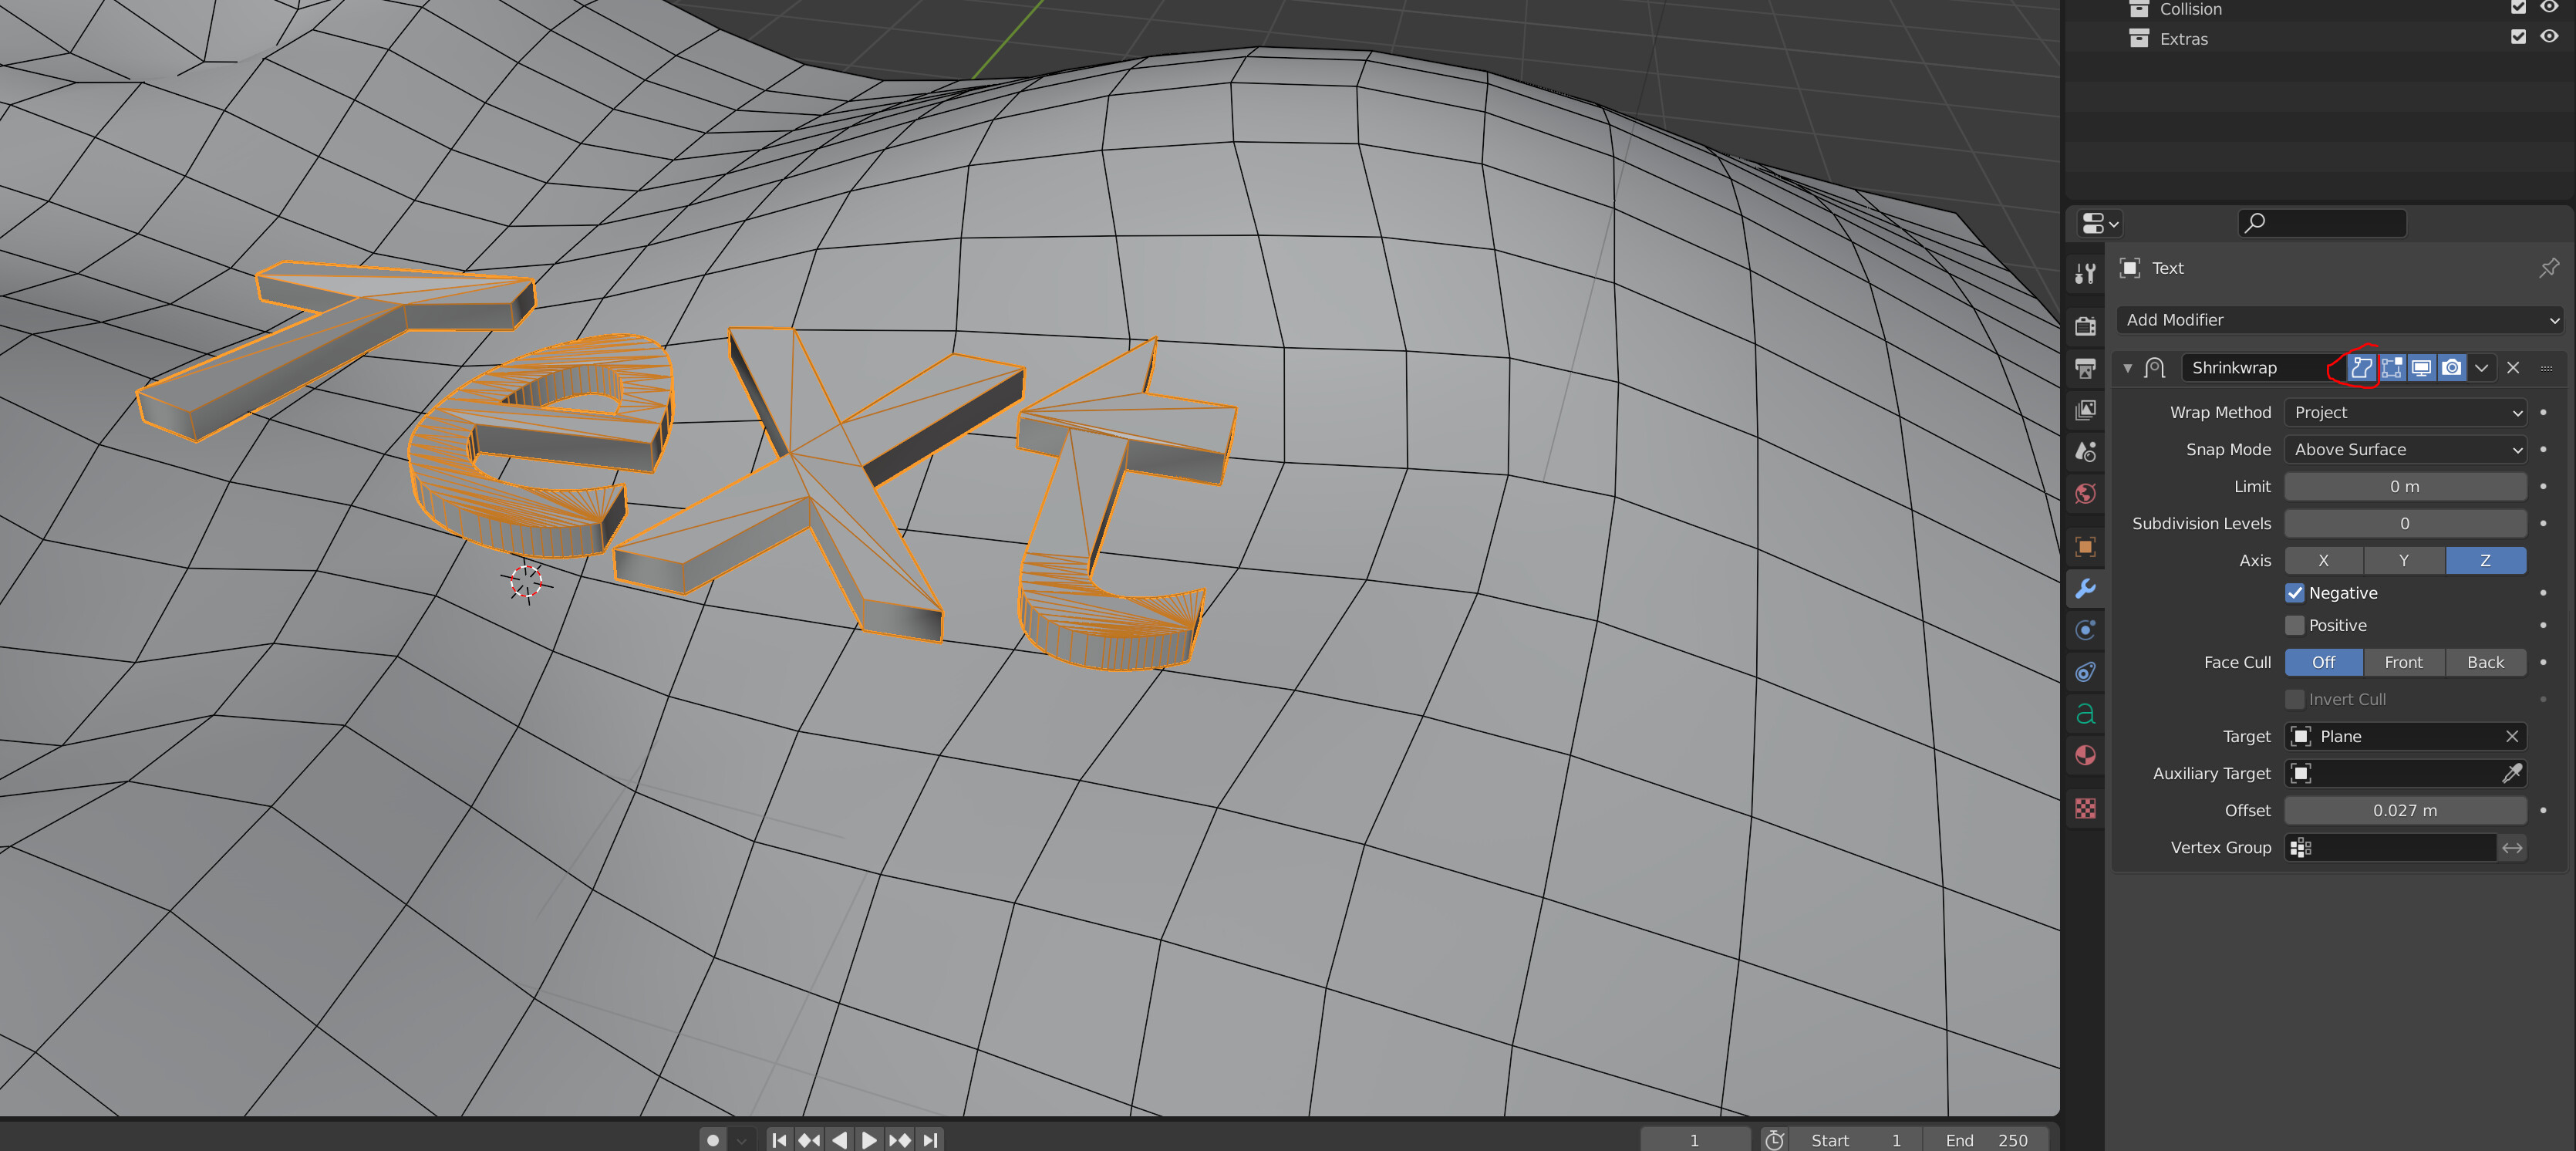
The shrink wrap, shrinks it, and it does not cover it fully or neatly, and is quite uneven; adding lots of subdivisions to the pattern it does not help either.
Maybe you could try a displacement modifier using your pattern as the texture. Then apply it to get real geometry for printing. You will need to use loads of geometry/subdivisions for it to look good though.
Not sure that I totally understand the problem, but I’ll offer a technique in case it’s useful:
Download and install Textools addon.
UV map the “complex preformed objects”. No seams, or seam in invisible places. This will create a 2D mapping that tries to minimize distortion.
Using the textools addon, make flatten copies of those meshes. Textools will make a mesh ripped on seams (which you don’t have), that echoes your UV-- a flattened, 2D mesh-- with a shapekey to change it back to its original position.
Using a surface deform modifier, bind your overlay mesh to your flattened Textools mesh. Then, set the shapekey back to its original form.
Thanks for the tips, it all helps, I’ll have a go at those when I sit down to look at it later.
I’ll try to explain it differently, Imagine you have a 3D terrain with hills and valleys then imagine wanting overlay a grid, text or any other pre drawn wire frame pattern that will stand proud but follow the exact contours of the terrain, neatly.
That is what the shrink wrap modifer is for.
For spline based objects like cuvers you can activate “apply on spline” marked red in the image. This means that the spline is shrink wrapped to the object and the splnes extrusion is applied later on.