Work on Brush management was announced as delayed because of work on Dyntopo improvements. But it should happen in first trimester of next year.
Something for work on assets.
So, there is no reason to work on an intermediate feature for a very short period of time, when work on definitive feature should happen soon.
I don’t know the addon used in the video. But it looks like screws are inserted in Blender in object mode.
You can find a large variety of useful addons for that based on Boolean modifier.
For example, Carver addon is bundled with an official release.
Official Add Object tool did not reach expectations of community and was postponed to 2.92.
In his Zbrush session, he just creates holes where he will add screws.
You don’t need Zbrush for that.
Basically, his Zbrush session can be done the same way in Blender’s Sculpt mode.
You just need to switch a brush to Substract mode, switch Stroke Method to Drag Dot or Line, increase Hardness or tweak Falloff and in rare cases, use a gradient texture with a View Plane mapping.
For the rest, his use of mask is similar as in a Blender’s workflow.
Where Zbrush and Blender’s workflow are diverging is that :
in Zbrush, he is using Zremesher. Where in Blender, you have to use Quadriflow. That may be not as satisfying.
in Zbrush, he is editing polygroups. Where in Blender, you have to edit Face Sets. That may imply switch to Edit mode.
Pablo did not create an Insert Mesh Brush and clearly explained that was not one of its priorities.
But that kind of tool and support of Vector Displacement Maps as brush textures are real differences between Zbrush and Blender.
But that is not is shown in this video. Except, maybe, for support of an high polycount, exact same sculpting session could have been done entirely in Blender.
So I tried doing something simple with the cloth brushes, dropping a rag on the ground. I activated the collisions, but it just keeps self-intersecting and unnaturally flattening against the ground as though it had no stiffness whatsoever. There doesn’t seem to be any settings for stiffness, surprisingly. Any ideas?
Ok, sculpting in Blender gets better and better and in my humble opinion cloth brush realization is better than in zbrush. And I am almost ready to switch to Blender for sculpting except… Baking.
Baking in Blender is not good. And zbrush has the feature of exporting subd level maps without intersections. Is there something like that in plans for Blender? Or baking rework in general?
There is no relation between those things.
Counterpart of fast cloth in sculpt mode is that is not as accurate as the modifier.
Self collisions are ignored. Only collisions with other objects handling a collision modifier are taken into account.
Although Pablo introduced global/dynamic simulation area to reduce problems with simulation limits, he never guaranteed that the use of node will not produce self intersection.
The goal of the brush is to create believable cloth wrinkles where it is used, not to be a simulation in sculpt mode.
So, you have to switch between brush deformations to fix undesired consequences of excessive strength of a cloth brush stroke.
Nice, although this will become really useful once Dyntopo has been upgraded. Without Dyntopo, Snake Hook just acts like the Grab / Elastic Deform brush on steroids.
I’m also really looking forward to the new brush management system, allowing Blender users to create and share custom brushes with all kinds of settings. Right now, you have to think too much about which checkboxes in which sections you need to activate to get a certain effect, then uncheck everything again.
I’m really looking forward to try that. I’ve been using Pablo’s scrape brush a lot because it was such a drastic improvement on the previous iteration, so I can’t imagine how much even better this is gonna be.
Is there a hotkey to change active brush to previously used one? For example when I am using claybrush and grab (just using 2 of them for long time) is there a way to fastly change brush only back and forth?
lots of programs have the last 3-5 previously used brushes in a small row at the top left of the screen that you can flick between. It would make the sculpting process easier and i dont think it would need to be part of the upcoming asset manager but a separate feature
Is not exactly a switch between 2 brushes, but you can assign any brush to the Quick Favorites menu (right-click on the brush/ Add to Quick Favorites), then with the Q key you can choose whatever brush you added as a favorite.
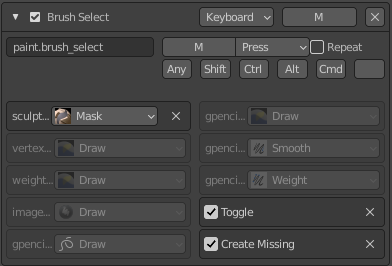
The mask brush has the “Toggle” option active by default that makes it so when you press the shortcut again you go back to the brush you previously had selected. You can activate it for any other brush shortcut.